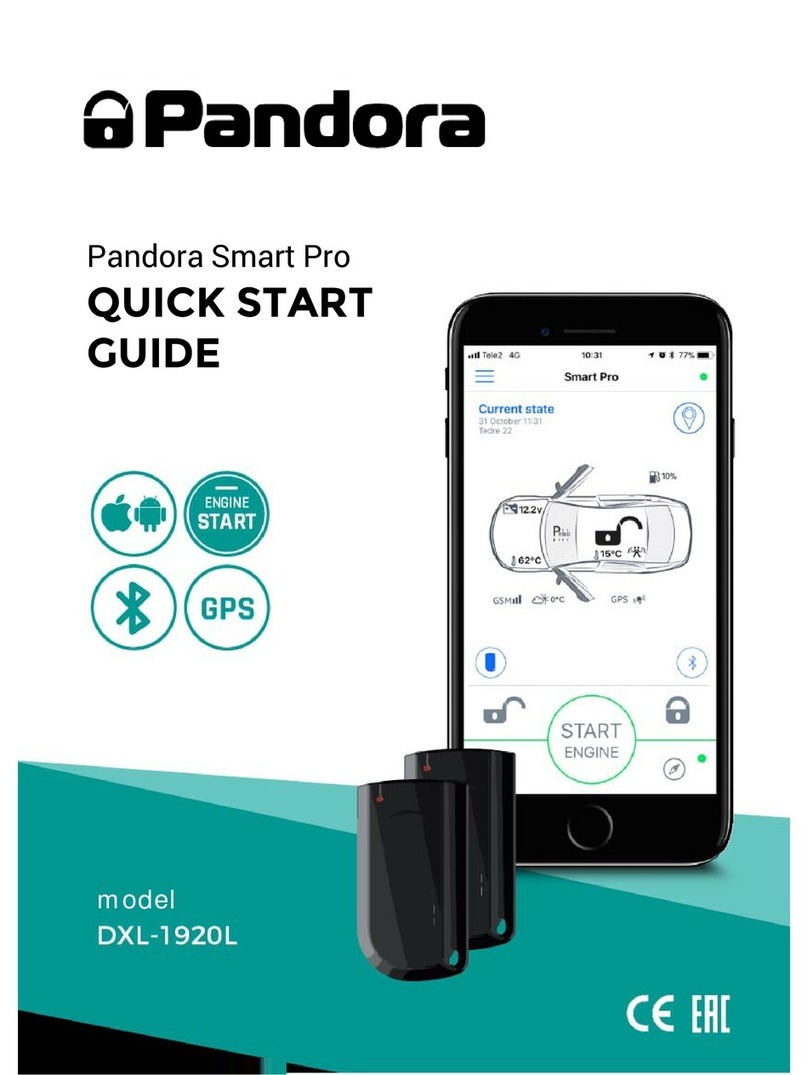
Pandora 397O User manual


3
2User manualCar service and security system Pandora DXL 39
7O
Alarmtrade thanks you for choosing Pandora service and security system Pandora 397O - is a
premium-class telemetric service and security system, designed for B, C, M, S or J class cars (European
classification). It was developed and produced in Europe, in a cozy industrial city of Kaluga in the west
of Russia, on a privately owned“Experimental Engineering Factory”.
With Pandora 397O your car will have numerous new features for both security and service.
Elegant and advanced technical design and unique ergonomic interaction algorithms that are used
in Pandora 5OOO, allows enhancing your car with fantastic set of intuitive and useful functions. Your
car’s control and monitoring options at your fingertips.
Exclusive features of Pandora 397O:
• Online service p-on.ru allows monitoring, controlling, and adjusting paramters of your car using
any computer or smartphone with internet connection.
• SOS emergency button on the remote, and automatic notification system will be of help in any
sitaution that threatens your personal security. It is not just the car we aim to protect.
• Interior microphone that can be accessed from your phone.
• Infinite event history with coordinates, precice times and full information about car’s condition.
• Mobile app Pandora info to control your security system via smartphoneand access online
service p-on.ru is avaliable for iOS (iTunes store) and Android (Google play).
• Wide range of automatic engine start options: by weekdays, by engine or inerior temperature, by
battery voltage to keep it charged, etc.
Our website: www.alarmtrade.ru
Table of contents
General information 5
System features 6
Car security zones 7
System set 8
Control remotes 9
Quick access functions 11
Light indicator functions 12
LCD 12
Arming procedure 14
Disarming procedure 15
Unlocking the trunk 15
Locking/unlocking doors when the engine running 16
Car search function 16
Delayed arming (hands-free mode) 17
PANIC mode 17
CHECK mode, monitoring car parameters 18
Event history 18
Remote and automatic engine start 18
Programmable neutral procedure 19
Remote engine start 19
System settings 21
Main settings menu 21
Automatic engine start settings 22
Time settings for automatic engine start 22
Maintenance/valet mode 30
Settings of the remote 31
Checking the number of recorded remotes 32
Replacing a battery in the remote 33

5
4User manualCar service and security system Pandora DXL 39
7O
General information
1
Owner’s personal security, immobilizer and SOS button 34
Immobilizer mode 35
AntiHiJack mode 35
Emergency immobilizer shutdown 36
Replacing immobilizer tag battery 36
Immobilizer code using original car controls 36
Panic (sos)button 37
Automatic emergency notifications 37
Pandora and a cell phone 38
Setting up emergency notification phone numbers 39
Cell phone notifications 39
Security zones triggered notifications 39
Receiving voice information via phone 39
Control over system via phone 40
Changing settings via phone 42
Online information service p-on.ru and mobile apps 45
System login 46
Event history 46
System status information 47
Security and warning zones 47
Important information 48
Smartphone apps 49
Control over system in case of emergency, entering individual PIN code 50
Any problem can be solved 51
Useful websites 53
Buzzer sounds and winkers light signals 54
Meaning of the 3-colored status indicator lights 54
System’s modules layout 55
Installation certificate 56
Warranty obligations 57
Acceptance certificate 60
Warranty card 60

7
6User manualCar service and security system Pandora DXL 39
7O
System features
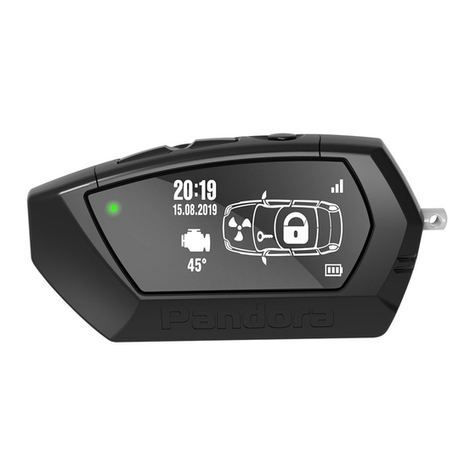
Main LCD remote
• Dialog encryption of commands.
• Arming and disarming security system using separate buttons.
• Controls status of 15 independent security zones.
• Vibrating alert.
• 16 sound notifications.
• Automatic LED lighting of the LCD.
• Vibration confirmation of the button press.
• AAA battery (1,5 ), up to 6 month of continuous operation.
• Battery level indicator.
• Current time indication, alarm clock.
• Time synchronizes with the base unit for exact time stamp in the event history.
• Engine and interior temperature, voltage indication.
• Prompt remote access to the settings of shock, motion, tilt and supplementary sensors.
• 1800 meters range within sight.
• View last 48 hours of the event history with time stamps.
• Automatic control of covering zone and notifications.
Base unit
• Dialog encryption of commands.
• Individual 128-bit encryption key that can be changed by the user.
• Voice interface for controlling the system using a phone.
• Individual disarming PIN code.
• Event history stored in the base unit with date, time and coordinates.
• RC blockage relay (2,4 GHz, frequency, up to 3 units can be connected).
• Built-in integral accelerometer for determining motion and shocks with adaptive processing
algorithm and sensitivity controls via the remote.
• External dualband GSM 900/1800 MHz aerial.
• Built-in 2.4 GHz aerial.
• Monitoring of on-board voltage.
• Distinct sensors for the front hood and the trunk.
• Advanced process of sensor data reading, eliminating false alarm possibilities.
• Precision measurement of interior and engine temperature, displayed on the remote.
• Sequential unlocking of the doors.
• Arming when the engine is running.
• Automatic arming.
• Registers delay for interior lighting when arming.
• Hands-free mode for arming/disarming without using a remote.
• Software updates via built-in mini-USB socket.
RF module
• «CALL» button for calling the driver.
Immobilizer tag
• Dialog encryption of commands.
• Arm/disarm button.
• Individual 128-bit encryption key that can be changed by the user.
• Built-in LED indicator.
• CR 2032 battery.
Car security zones
• Car doors perimeter (separately for every door)
• front hood limit switches
• trunk limit switches
• ignition trigger
• brake pedal button
• triggering of the shock sensor (warning level)
• triggering of the shock sensor (alarm level)
• triggering of the motion sensor
• triggering of the two-level supplementary sensor (warning level)*
• triggering of the two-level supplementary sensor (alarm level)*
• critically low on-board voltage
• marker lights left on notification when arming**.
* - Volume sensor is not a part of Pandora DXL 397O service-security system set configuration
** - Availability of this function depends on car model
9
8User manualCar service and security system Pandora DXL 39
7O
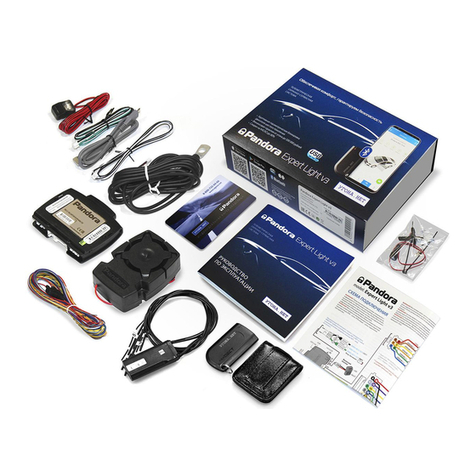
System set
1. Base unit........................................................................................................................................................1
2. RF module and cable................................................................................................................................1
3. Main control remote with LCD............................................................................................................1
4. Additional remote (three-button).......................................................................................................1
5. Immobilizer tags........................................................................................................................................2
6. Leather case for immobilizer tags.......................................................................................................1
7. RR-100 blockage radio relay..................................................................................................................1
8. Main cable....................................................................................................................................................1
9. Supplementary cable...............................................................................................................................1
10. Cable with VALET button and three-colored light indicator.....................................................1
11. Relay automatic launch module..........................................................................................................1
12. Mini-USB cable............................................................................................................................................1
13. Microphone.................................................................................................................................................1
14. Limit switch..................................................................................................................................................2
15. Limit switch wire........................................................................................................................................2
16. Tapping screw Ø4,213...........................................................................................................................5
17. Plastic tie 120 - 150 mm...........................................................................................................................2
18. Grounding contact....................................................................................................................................3
19. User manual.................................................................................................................................................1
20. Installation manual (connection scheme).........................................................................................1
21. Plastic card with individual secret code.............................................................................................1
22. Packaging..................................................................................................................................................1
Manufacturer reserves the right to change conguration and construction of the product to improve its
technological and operational parameters without notication.
Control remotes
2

11
10 User manualCar service and security system Pandora DXL 39
7O
Two-way remote is the main mean of control over the system.
For easily distinguishable notifications the remote uses 16 ringtones. Each ringtone matches
particular event.
Remote has flashing LED indicators for additional information. Occasional green flashes mean
that there is a connection and there were no alarm events, red flashes mean that either an alarm even
happened, there is no connection to the base unit, or the system is not armed.
The remote is fully operational when shipped. To switch the remote on press and hold button
for 3 seconds. «REMOTE ON» ringtone will play. Pressing and holding this button again for 3
seconds will cause the remote to switch off.
CAUTION! ALL CONTROL COMMANDS ARE TRANSMITTED VIA RADIO CHANNEL,
FOR MAXIMUM EFFECTIVENESS AND RANGE IT IS RECOMMENDED NOT TO SHIELD
AERIAL AREA SEE PICTURE WITH FINGERS WHEN USING A REMOTE.
System disarmed
System armed
Engine is running Engine is stopped
(short press) Lock doors without arming Arming
with sound conrmation
Search mode - car will ash
winkers and sound horn for 5
seconds
(1 sec.) Arming without sound
conrmation
Search mode - car will ash
winkers without any sounds for
5 seconds
(2 sec) Switch on ignition support
(short press) Open door locks Open door locks Disarming with sound
conrmation
(1 sec.) Open door locks Disarming without sound
conrmation
(short press) Switch on LCD lighting
(1 sec.) Switch on/o timer channel (CH1)
Unlock trunk (CH1)
(2 sec.) Switch on/o timer channel
(3 sec.) Switch the remote on/o
button 4 ( 1 sec.) Emergency call
+
(short press)
PANIC mode
+
(short press)
Arming when the engine is
running with sound conrmation
Arming in 30 seconds (hands-free
mode) with sound notication
+
(1 sec.)
Arming when the engine
is running without sound
conrmation
Arming in 30 seconds (hands-free
mode) without sound notication
button 6 (1 sec.) Request current car status (CHECK command)
button 6 (2 sec.) Enter event history
button 6 (3 sec.) Force connection to the online service
button 5 (1 sec.) Enter setting menu
button 5 (3 sec.) Switch engine preheater on
button 5 (2 sec.) Switch engine preheater o
Quick access functions of the main control remote
Button 4
Beeper
Send indicator
Alarm indicator
Lighting sensor
Lock/arm indicator
Unlock/disarm
button
Button 1
Button 2
Button 3
Send
indicator
Button 1 Button 3 Button 2
Button 5
Button 6

13
12 User manualCar service and security system Pandora DXL 39
7O
Light indicator functions
Red Alarm indicator.
• Flashes occasionally and sounds short signal once a minute untill any button is pressed, after the
end of any alarm notification.
Green Lock indicator.
• Flashes occasonally if there is a connection and the system is armed.
Red Unlock indicator.
• Flashes occasonally when the system is armed.
Red Send indicator.
• Flashes occasionally when there is no connection.
LCD
17:13 CHECK
o
eng
U
-27 15,7
85%
o
in
15
1. Flashes if there is no connection to the base unit.
2. Flashes when transmitts or recieves commands.
3.
GSM modem. The icon lits if the GSM modem is switched on and the car is in
the coverage area of the cellular network. The icon fashes if there is no GSM
connection.
4. GSM signal level.
5.
GPS receiver. The icon lits if the GPS receiver is switched on and recieveing
coordinates of the car. The icon fashes if it is not possible to recieve the
coordinates of the car.
6. Security mode status (Armed/disarmed).
7.
Shock sensor security zone.
- Warning level of the sensor.
- Alarm level of the sensor.
- Warning level zone monitoring disabled.
- Shock sensor monitoring disabled.
8. Trunk security zone.
9. Engine operation icon.
10. Light signaliztion (using marker lights, winkers).
11. Front hood security zone.
12. Motion sensor security zone

15
14 User manualCar service and security system Pandora DXL 39
7O
13.
Silent mode of the system.
- warning signals of the system disabled.
- all sound signals disabled.
14. Ignition, ignition security zone.
15. Door security zone. Separate for each door.
16.
Supplementary sensor security zone.
- Warning level of the sensor.
- Alarm level of the sensor.
- Warning level zone monitoring disabled.
- Supplementary sensor monitoring disabled.
Arming procedure
~~
short
press doors locking
system arming 1 flash
1 flash
1x
hold
1 sec.
Arming the system allows monitoring of all security zones, locks the doors and blocks the engine.
To arm the system when the engine is stopped shortly press button on the remote. The
buzzer will sound and the winkers will flash once. The remote will play“Arming”ringtone and security
mode status icon (the lock) will change to:
For arming without sound confirmation press for more than 1 second. If when arming
doors, hood or trunk were open, the buzzer will sound four short signals instead of one,winkers will
flash four times, remote will play "Warning!" ringtone and will show troubled zone. This zone sensor
will be disabled at that moment. Sensor will be armed again in 15 seconds after the zone was set right.
1
1
*
*
- Arming using a phone. 10* - arming without sound confirmation.
Disarming procedure
~~
short
press
hold
1 sec.
doors unlocking
system disarming 2 flashes
2 flashes
2x
2flashes
2
flashes
To disarm the system shortly press button on the remote. You will hear two short buzzer
sounds and will see two flashes of the winkers. The remote will paly "Disarming" ringtone and security
mode status icon will change to:
For disarming without sound confirmation press button for more than 1 second.
If there were new alarming events during the time system was armed, buzzer will sound four
times, and winkers will flash four times, the remote will sound «WARNING» ringtone and will indicate
zones triggered. Detalied event history can be accessed by using CHECK button.
When disarming, two-step mode of unlocking the doors can be programmed. First press
will disarm the system and unlock driver's door while second press will unlock all the other doors
1.
0
0
*
*
- Disarming using a phone. 00* - disarming without sound confirmation
Unlocking the trunk
To independently unlock the trunk, no mater if the system is armed or not, press button
and hold it for 1 second.
If the system is armed when this action is performed, the trunk will be disarmed, shock and
supplementary sensors of the trunk will be disabled. All the other security zones will remin armed.
1- In some cars additional connection may be needed
~~
hold
1 sec.
If in 15 seconds after using "unlock trunk" command, the trunk was not opened, the system will
lock it back, enable sensors and arm trunk security zone. This will be indicated with one flash of the
winkers.

17
16 User manualCar service and security system Pandora DXL 39
7O
If you have opened the trunk when the system is armed and have not armed it in 3 minutes, the
system will give warning message on the remote without triggering the car’s buzzer.
Locking/unlocking doors when the engine is running
A mode of locking doors at the start of the movement and unlocking when the igniton is switching
off is avaliable. In 5 seconds after ignition was switched on, the doors will be locked, and ublock whe
nthe ignition will be switched off (programmable).
OFF
ON
ACC
locking doors
short
press
unlocking doors
Locking and unlocking doors when the engine is running can be forced using a remote. To do
this shortly press - when the engine is running. Pressing button will unlock the doors in
the same way.
Moreover, it is possible to control central lock using button on the immobilizer tag or by phone
with 1* and 0* commands.
Car search function
~~
short
press
5 flashes
5 flashes
1x
hold
1 sec.
To easily find your car on a massive parking, shortly press when the car is armed. The system
will sound the buzzer and flash winkers five times in a row.
To search for car withour sound confirmation, hold button for more than 1 second.
Delayed arming (Hands-free mode)
~~
short press
doors locking
system arming
1 flash
1x
press 1 sec.1 flash
1 flash
1x
+
30 sec.
If when leaving the car you cannot arm it using a remote (you have your hands full), you can use
«DELAYED ARMING».
To activate this mode, shortly press and simultaneously. Buzzer will sound and
winkers will flash once, indicating that the mode is triggered. Remote LCD will display , icon,
and red indicator will lit red. In 30 seconds the door will lock and the system will arm. This will be
indicated with one buzzer sound and one flash of the winkers.
To activate this mode without sound confirmation press and hold both and for more
than one second. To cancel delayed arming when it is triggered, simply press
PANIC mode
+ light for 30 sec
~~
short press
ight
for
30
sec
+
If you or your car are in dange and you want to draw attention to your car, you could use «PANIC
MODE». In this mode the buzzer will sound and winkers will flash repeatedly. To trigger «PANIC MODE»,
press and simultaneously. To switch it off press either or .

19
18 User manualCar service and security system Pandora DXL 39
7O
CHECK mode, monitoring car parameters
Button 6
(1 sec.)
6
17:13 CHECK
o
eng U
-27 15,7
85%
o
in 15
To recieve information about engine and interior temperature and on-board voltage, press button 6
and hold it for 1 second. To exit this mode shortly press F otherwise it will be exited automatically in
10 seconds.
Event history
HISTORY
00:00 ALARM
21:46 ARM
21:33 ENG STOP
21:15 ENG START
20:55 SETUP
To access event history in the system's memory, press and hold button 6 for 2 second
. Nagivate last
48 events using button 6 (forward) and button 4 (back). Events are displayed by showing time of the
evend and flashing corresponding indicators. To exit this mode, press button F, otherwise the mode will
be exited in 60 seconds.
9
9
0
0
*
*
- Listen to the extended event history using a phone.
Remote and automatic engine start
The system allows for remote engine start usinf remote «REMOTE ENGINE START»command or
automatic engine start using preconfigured «AUTOMATIC ENGINE START» function. Remote launch can
be used to heat engine and interior, charge battery or to cool the inerior with air conditioning.
Remote and automatic start can only be used when the system is armed.
If the car has manual transmission, automatic launch will only occur if «PROGRAMMED NEUTRAL»
function was enabled when the car was arming.
Remote and automatic engine start on automatic transmission cars will only occur, if transmission
selector lever was left in a "P" position.
When using remote and automatic engine start functions, make sure that the car is secured with
handbreak or some other means of fixating the car on a parking position.
While system is in remote and automatic start mode, it keeps performing all security functions save
for shock sensor, which will be disabled. To compensate, motion sensor sensitivity, responsiveness
and range will be increased. If any security zone will be triggered, the engine will be immediately
stoped and alarm mode will be entered. Herewith all engine blockages will be activated.
Programmable neutral procedure
Fixate the car using
a handbreak Leave the car, close the door
OFF
ON
ACC
short
press
The engine will be stopped,
the system is ready
to perform remote start
“Engine stop”
ringtone
~~
If you are planning to use remote and automatic engine start on a car with manual transmission,
than before arming you will need to perform following actions:
1. When the engine is running, fixate the car with the handbreak.
2. Turn the key in the ignition lock to the OFF position (while you are doing it the engine should
be running) and take it out of the lock.
3. Leave the car, close the door.
4. Press button to arm the car and lock the doors. On LCD remote the engine operation icon
will be spinning and security mode status icon will lit.
5. The engine will be stopped. Now the system is ready to perform remote and automatic engine
start.
Remote engine start
If the system is prepared to remote system start, to execute it press and hold for 3 seconds.
Sound signal will confirm the command, LCD will show crossed out shock sensor icon and flashing

21
20 User manualCar service and security system Pandora DXL 39
7O
engine operation icon - signifiying preparation to the engine start. In a few seconds the engine
will be started, the remote will play «ENGINE START»and show spinning engine operation icon .
Engine operation duration depends on heating time or temperature for engine stop.
+ 4 flashes
"Engine start"
ringtone
4
flashes
hold
3 sec. Preparing to
launch
Engine start
1
12
23
3
*
*
- Remote engine start using a phone.
If the engine was started using remote or automatic start (via timer of clock) 123*
phone menu command will extend its operation period by 10 minutes.
To remotely stop the engine while it performs heating, press and hold for 2 or more seconds.
The engine will be immediately stopped and it will be confirmed by remote playing «ENGINE STOP»
ringtone and engine operation icon fading .
"Engine stop"
ringtone
hold
2 sec.Engine
stopped
~~
"Engine start" ringtone
The remote will give notification 1 minute before designated engine stop: icon will flash and
«ENGINE STOP IN 1 MINUTE» rington will play every 10 seconds.
If the engine was started using remote or automatic start, remote engine start command will
extend its operation period by 10 minutes. This procedure can be repeated multiple times.
3
32
21
1
*
*
- Remote engine stop using a phone.
System settings
Main system settings and parameters can be adjusted via LCD remote.
To enter settings menu, press and hold for 1 second button 5. LCD will display Main Menu and a
list of available functions.
To navigate the list use short presses of buttons 4 and 6, to enter submenu shortly press button 5.
To go back to the higher level menu, select the top line of the list and shortly press button 5.
To exit any level of the menu without saving parameters shortly press F button.
To save current settings, use buttons 4 and 6 to select SAVE line in the list and press button 5
shortly to confirm.
Main settings menu
After holding button 5 for 1 second, the LCD remote’s display will show the list of available func-
tions:
Button 5 (1 sec.) >>>>>>
1. AUTOSTART
2. HEATER
3. SENSORS
4. TRACKING
1. AUTOSTART - automatic engine start settings
2. HEATER - engine preheater controls
3. SENSORS - settings of the sensors
4. TRACKING - switching tracking on/o (available for Pandora 5000)
5. SIREN - siren (buzzer) signal options
6. HANDS FREE - Hands Free mode settings
7. CHANNELS - setting of the time channels
8. GPS RECEIVER - switching on/o GPS/GLONASS receiver
9. GSM MODEM - switching on/o GSM modem
10. VALET MODE - switching on/o maintenance/valet mode
11. SETTINGS - settings of the remote

23
22 User manualCar service and security system Pandora DXL 39
7O
Automatic engine start settings
The system allows setting mods of automatic engine starts and stops. Synchronized real-time
clock in the remote and the base unit and other autonomous systems allow using many mods of
automatic engine start regardless of whether the remote is in range.
To enter automatic engine start settings menu select AUTOSTART option in the main menu using
buttons 4 and 6, and select it with button 5 short press. Following functions will be displayed:
1. AUTOSTART
2. HEATER
3. SENSORS
4. TRACKING
1. AUTOSTART
2. HEATER
3. SENSORS
4. TRACKING
1. ENABLE
2. TIMER
3. START TEMP
4. WORK TIME
Кнопка 6
(коротко)
6
Кнопка 5
(коротко)
5
1. ENABLE - switching on/off automatic engine start
2. TIMER - time settings for automatic engine start
3. START TEMP - temperature settings for automatic engine start
4. WORK TIME - max engine work time settings for automatic engine start
5. PERIODICALLY - settings of periodical engine starts
6. STOP TEMP - engine stop temperature settings
Time settings for automatic engine start
To set time for automatic engine start, select TIMER menu using navigation buttons (4 and 6) and
confirm it with button 5 short press:
TIMER
ON OFF
SAVE
21:45
BACK
switching on/off engine
start by time
set automatic engine start time
save settings
Full path to this settings menu: Main Menu >>AUTOSTART>>TIMER
Temperature settings for automatic engine start
To set temperature for automatic engine start, select START TEMP menu using navigation
buttons (4 and 6) and conrm it with button 5 short press:
START TEMP
ON OFF
SAVE
BACK
–22 CO
switching on/off engine
start by temperature
set automatic engine start temperature
save settings
Full path to this settings menu: Main Menu >>AUTOSTART>>START TEMP
Max engine work time settings for automatic engine start
To set max engine work time for automatic engine start, select WORK TIME menu using
navigation buttons (4 and 6) and conrm it with button 5 short press:
WORK TIME
SAVE
BACK
60MIN
set engine work time
in minutes
save settings
Full path to this settings menu: MainMenu>>1.Autostart>> WORK TIME
Settings of periodical engine starts
To congure periodical engine starts, select PERIODICALLY menu using navigation buttons (4
and 6) and conrm it with button 5 short press:
PERIODICALLY
ON OFF
SAVE
BACK
switching on/off periodical
engine starts
save settings

25
24 User manualCar service and security system Pandora DXL 39
7O
1. AUTOSTART
2. HEATER
3. SENSORS
4. TRACKING
1. AUTOSTART
2. HEATER
3. SENSORS
4. TRACKING
SENSORS
1. SHOCK
2. MOTION
3. SLOPE
4. EXTENSION
Button 6
(short press)
6
Button 5
(short press)
5
1.SHOCK- shock sensor settings
2. MOTION - motion sensor settings
3. TILT - tilt sensor settings
4. EXTENSION - supplementary sensor settings
Shock sensor settings
The system allows full control over built-in shock sensor. To configure shock sensor settings, select
SHOCK menu using navigation buttons (4 and 6) and confirm it with button 5 short press:
SENSORS > SHOCK
1. CONTROL
2. SENSITIVITY
control over shock sensor
adjusting sensitivity of the shock
sensor
Full path to this settings menu: MainMenu>>1.SENSORS>> SHOCK
Shock sensor settings. Operation mode controls
To disable warning zone or disable shock sensor completely select CONTROL option in the
SHOCK menu using navigation buttons (4 and 6) and confirm it with button 5 short press.
enable shock sensor
disable warning level of the shock sensor
disable shock sensor
save settings
SHOCK > CONTROL
ON
OFF
NO WARNING
SAVE
Full path to this settings menu: MainMenu>>1.AUTOSTART>> PERIODICALLY
Engine stop temperature settings
To set engine stop temperature, select STOP TEMP menu using navigation buttons (4 and 6) and
conrm it with button 5 short press:
STOP TEMP
ON OFF
SAVE
BACK
+80CO
switching on/off engine stop
by temperature
Set engine stop
temperature
save settings
Full path to this settings menu: MainMenu>>1.AUTOSTART>> STOP TEMP
Engine preheater controls
To congure engine preheater, select HEATER menu using navigation buttons (4 and 6) and
conrm it with button 5 short press:
HEATER
ON OFF
SAVE
BACK
switching on/off engine
preheater
save settings
Full path to this settings menu: MainMenu>>2. HEATER
Settings of the sensors
The system allows setting sensor sensitivity via the remote.
To enter sensor settings menu select SENSORS option in the main menu using buttons 4 and 6,
and select it with button 5 short press. Following functions will be displayed:

27
26 User manualCar service and security system Pandora DXL 39
7O
Full path to this settings menu: MainMenu>>1.SENSORS>>1.SHOCK>> 1.CONTROL
Shock sensor settings. Sensitivity settings
To adjust shock sensor sensitivity select SENSITIVITY option in the SHOCK menu using navigation
buttons (4 and 6) and conrm it with button 5 short press.
To enter and exit adjustment bar use button 5, adjust parameters on the bars using buttons 4
(lower sensitivity) and 6 (raise sensitivity). Sensitivity can be adjusted between 0 (lowest sensitivity)
and 50 (highest sensitivity).
adjustment bar for warning level
of the shock sensor
adjustment bar for alarm level
of the shock sensor
save settings
SHOCK > SENSITIVITY
WARNING
ALARM
15
34
SAVE
Full path to this settings menu: MainMenu>>1.SENSORS>>1.SHOCK>> 2.SENSITIVITY
Motion sensor settings
To adjust built-in motion sensor sensitivity select MOTION option in the SENSORS menu using
navigation buttons (4 and 6) and conrm it with button 5 short press.
To enter and exit adjustment bar use button 5, adjust parameters on the bars using buttons 4
(lower sensitivity) and 6 (raise sensitivity). Sensitivity can be adjusted between 0 (disable motion
sensor) and 50 (highest sensitivity).
29 adjustment bar for motion
sensor
save settings
SENSORS > MOTION
ALARM
SAVE
Full path to this settings menu: MainMenu>>1.SENSORS>>2.MOTION
Tilt sensor settings
To adjust built-in tilt sensor sensitivity select TILT option in the SENSORS menu using navigation
buttons (4 and 6) and conrm it with button 5 short press.
To enter and exit adjustment bar use button 5, adjust parameters on the bars using buttons 4
(lower sensitivity) and 6 (raise sensitivity). Sensitivity can be adjusted between 0 (disable tilt sensor)
and 50 (highest sensitivity).
38
SENSORS > TILT
ALARM
SAVE
adjustment bar for tilt
sensor
save settings
Full path to this settings menu: MainMenu>>1.SENSORS>>3.TILT
Supplementary sensor settings
The system allows full control over supplementary sensor. To configure shock sensor settings,
select EXTENSION menu using navigation buttons (4 and 6) and confirm it with button 5 short press:
SENSORS > EXTENSION
1. CONTROL
2. SENSITIVITY
control over supplementary sensor
adjusting sensitivity
of the supplementary sensor
Full path to this settings menu: MainMenu>>1.SENSORS>> 4.EXTENSION
Supplementary sensor settings. Operation mode controls
To disable warning zone or disable supplementary sensor completely select CONTROL option in
the EXTENTION menu using navigation buttons (4 and 6) and conrm it with button 5 short press:

29
28 User manualCar service and security system Pandora DXL 39
7O
SENSORS > EXTENSION
ON
OFF
NO WARNING
SAVE
enable supplementary sensor
disable warning level of the supplementary sensor
disable supplementary sensor
save settings
Full path to this settings menu: MainMenu>>1.SENSORS>>4. EXTENSION.>> 1.CONTROL
Supplementary sensor settings. Sensitivity settings
To adjust supplementary sensor sensitivity select SENSITIVITY option in the EXTENSION menu
using navigation buttons (4 and 6) and confirm it with button 5 short press.
To enter and exit adjustment bar use button 5, adjust parameters on the bars using buttons 4
(lower sensitivity) and 6 (raise sensitivity). Sensitivity can be adjusted between 0 (lowest sensitivity)
and 50 (highest sensitivity).
adjustment bar for warning level
of the supplementary sensor
adjustment bar for alarm level
of the supplementary sensor
save settings
EXTENSION > SENSITIVITY
WARNING
ALARM
15
34
SAVE
Full path to this settings menu: MainMenu>>1.SENSORS>>4.EXTENSION>> 2.SENSITIVITY
ATTENTION! ADJUSTING SUPPLEMETARY SENSOR SENSITIVITY IS AVALIABLE
WHEN USING PANDORA VS VOLUME SENSORS
Siren (buzzer) signal options
To congure buzzer sounds, select SIREN menu using navigation buttons (4 and 6) and conrm
it with button 5 short press:
SIREN
ON
OFF
NO WARNING
SAVE
enable all siren signals
disable warning and service siren signals
disable siren signals
save settings
Full path to this settings menu: MainMenu>>5.SIREN
Hands Free mode settings
The system allows for Hands Free arming and disarming. When the owner with 2.4Hz radio tag
is in range, the system will disarm, and arm again when the owner moves further away from the car.
To select one of Hands Free mods, select HANDS FREE menu using navigation buttons (4 and 6)
and confirm it with button 5 short press:
HANDS FREE
OFF
UNLOCK
LOCK/UNLOCK
LOCK
disable Hands Free
enable Hands Free arming
enable Hands Free disarming
enable full Hands Free (arming/disarming)
Full path to this settings menu: MainMenu>>6. HANDS FREE
Setting of the time channels
The system allows switching on timer channels via remote.Timer channels should be programmed
separately using timer channel table in DXL Loader or Pandora Alarm Studio specialist software.
To remotely switch on one of the timer channels, select corresponding line (channel number) in
the CHANNELS list menu using navigation buttons (4 and 6) and confirm it with button 5 short press:
CHANNELS > CH6
ON
OFF
SAVE
switch on selected channel
switch off selected channel
save settings

31
30 User manualCar service and security system Pandora DXL 39
7O
Full path to this settings menu: MainMenu>>7.CHANNELS>>CH1CH10
Switching on/off GPS/GLONASS receiver
To control GPS/GLONASS receiver, select GPS RECEIVER menu using navigation buttons (4 and 6)
and conrm it with button 5 short press:
GPS RECEIVER
ON
OFF
SAVE
switch on GPS/GLONASS receiver
switch off GPS/GLONASS receiver
save settings
Full path to this settings menu: MainMenu>>8.GPS RECEIVER
Switching on/off GSM modem
To control GSM modem, select GSM MODEM menu using navigation buttons (4 and 6) and
conrm it with button 5 short press:
GSM MODEM
ON
OFF
SAVE
switch on GSM modem
switch off GSM modem
save settings
Full path to this settings menu: MainMenu>>9. GSM MODEM
Maintenance/valet mode
It is recommended to put system into maintenance mode (valet mode) before handing it to the
car service or valet parking. When this mode is switched on, security system stops interfering with
built-in electronics and disables all functions to ease maintenance or parking. Moreover, you will not
have to leave the remote to the valet or the mechanic. Disabling valet mode is not possible without
using the remote. This feature is implemented to prevent recording additional remotes during
maintenance without the owner knowing.
To enable Valet mode when the engine is stopped and immobilizer tag is within range, select
VALET MODE menu using navigation buttons (4 and 6) and confirm it with button 5 short press:
VALET MODE
ON
OFF
SAVE
switch on Valet mode
switch off Valet mode
save settings
Lit green status indicator on the remote when the engine is stopped will signify active valet mode.
Valet mode can only be disabled when the engine is stopped.
Full path to this settings menu: MainMenu>>10.VALET MODE.
Settings of the remote
To enter remote’s settings, select SETTINGS menu using navigation buttons (4 and 6) and confirm
it with button 5 short press. Available functions will be displayed:
1. SOUND - sound signal settings
2. VIBRO - vibration settings
3. BACKLIGHT - LCD backlight brightness settings
Full path to this settings menu: MainMenu>>11.SETTINGS
Sound signal settings of the remote
To enter remote’s sound signal settings, select SOUND option in the SETTINGS menu using
navigation buttons (4 and 6) and conrm it with button 5 short press:
SETTINGS > SOUND
ON
OFF
SAVE
switch on sound signals
switch off sound signals
save settings
Full path to this settings menu: MainMenu>>11.SETTINGS>>1.SOUND

33
32 User manualCar service and security system Pandora DXL 39
7O
Vibration settings of the remote
To enter remote’s vibration settings, select VIBRO option in the SETTINGS menu using navigation
buttons (4 and 6) and conrm it with button 5 short press:
SETTINGS > VIBRO
ON
OFF
SAVE
switch on vibration
switch off vibration
save settings
Full path to this settings menu: MainMenu>>11.SETTINGS>>2.VIBRO
LCD backlight brightness settings of the remote
To enter remote’s LCD backlight brightness settings, select BACKLIGHT option in the SETTINGS
menu using navigation buttons (4 and 6) and conrm it with button 5 short press:
25 adjustment bar for the brightness of the LCD
save settings
enable automatic brightness adjustment
SE
TTINGS > BACKLIGHT
MAX BRIGHTNESS
SAVE
AUTOCONTROL
To enter and exit adjustment bar use button 5, adjust parameters on the bars using buttons 4 (lower
brightness) and 6 (raise brightness). Brightness can be adjusted between 0 (disable backlight) and 50
(highest brightness).
Full path to this settings menu: MainMenu>>11.SETTINGS>>3.BACKLIGHT
Checking the number of recorded remotes
Number of recorded remotes and radio tags can be checked every time the ignition is switched
on when disarmed. Number of orange and green LED flashes will indicate number of remotes and
tags recorded correspondingly.
Number of recorded remotes and radio tags can also be checked by taking off and putting back
on battery terminal. The system will sound a set of signals, corresponding to the number of recorded
remotes.
Replacing a battery in the remote
If high quality batteries are used, service-security system remote can function up to 6 month without
needing a replacement. Battery needs to be replaced, if the remote is not turning on or the icon
has only one bar left and starts flashing. To replace the battery:
• move battery cover in the direction shown;
• take the battery out and place a new AAA
battery on its place taking notice of the polarity;
• the remote is ready for use (switch it on by
pressing and holding for 3 seconds).
It is recommended to have a spare AAA battery in the car.

35
34 User manualCar service and security system Pandora DXL 39
7O
Pandora DXL 3970 security system is an efficient measure of antitheft security and is able to pre-
vent hijacking. The system is supplied with 2 immobilizer radio tags. To increase security 1 to 3 radio
relays can be installed on the car. Immobilizer functions can be switched on and off via a phone or us-
ing Pandora DXL Loader on a computer. Pandora DXL loader can be downloaded from www.manuals.
alarmtrade.ru or www.alarmtrade.com
This system uses hardware + program algorithm of determining whether the owner is moving
towards or from the car, increasing precision of the HandsFree function. Immobilizer mods can be
set via the remote.
Immobilizer mode
The system has functions that can contribute towards owner's personal safety. The remote has
SOS button to call for help in an emergency. In case of car accident, the system will automatically
send notifications to owner's close ones. All personal security notifications are supplemented with
car current coordinates and web links to online map services. The system uses flexible Anti HiJack
algorithms.
When ignition is being switched on, Pandora's base unit performs a search for immobilizer tags in
radio zone. If no tags were detected, LCD remote will play "no tag found" ringtone. If when the ignition
is switched on no radio tags were detected, the system will lock the engine with all radio relays that
were programmed into the system. Engine lock will only occur when radio relay motion sensor
detects movement of the car. If additional blockages were installed, they will lock doors immediately,
before the car starts moving.
Anti-Hi-Jack mode
AntiHiJack mode helps to prevent aggressive seizure of the car using delayed engine blockage
on door opening. Every time when the engine is running on opening/closing a door, immobilizer
requests response from a remote using unique algorithm. After a door was opened while the engine
is running and the car is moving, and if the system cannot detect a radio tag, the engine will be
stopped after 60 seconds (general safety requirement). 30 seconds after detecting movement, engine
blockage warning’ ringtone will play for the remaining 30 seconds.
If engine blockage is done via radio relay, when warning signals will end, or new attempts to start
the engine will commence, immobilizer will only allow it to start when the car is not moving, and will
block it again if will start movement. Immobilizer will be activated in 2 seconds after the ignition is
switched on. If the car starts moving, the immobilizer will block the engine for 15 seconds.
Owner’s personal security,
immobilizer
and SOS button
3

37
36 User manualCar service and security system Pandora DXL 39
7O
Panic (sos) button
Button 4
In case your life or health are threatened,
press button 4 for 1 second and the system
will automatically make voice call and send
text notification with car's coordinates
to all programmed emergency numbers.
Pandora DXL 3970 will send messages with
car’s coordinates (GPS/GLONASS receiver
required)
During emergency voice call, person
called can access car's interior microphone.
Thus the car establishes an owner’s
personal security zone around itself in the
range of 433MHz radio channel.
Automatic emergency notications
If a car with Pandora DXL 3970 telemetric system gets into car accident, automatic notifications
will be sent in form of text messages and voice calls with the car’s coordinates.
All emergency events are recorded on a personal page in www.p-on.ru online service, displaying
date, time and coordinates (NAV-03 GPS/GLONASS module required).
Emergency immobilizer shutdown
To disable immobilizer in case of emergency, enter programming level 15 (look at "Emergency
control over system, entering PIN code") LED indicator will be lit green. Enter first digit of the secret
code using VALET button (press the button a number of times equal to the desired digit, pauses
between presses should not exceed 1 second). The system will confirm with red flash of the indicator.
Similarly enter second, third and fourth digits. After entering correct PIN the system will confirm with
two sound signals and red LED will become lit.
To activate immobilizer functions and AntiHiJack, enter programming level 15. Led indicator
should be lit red. Press VALET button once, the indicator will lit green and the system will sound one
signal.
Replacing immobilizer tag battery
After receiving a text message on the main owner’s phone number, saying that immobilizer tag
battery is low, battery should be replaced soon. Battery type is CR2032.
Carefully open the cover of the tag's battery compartment. Extract discharged battery and insert
a new one keeping in mind the correct polarity. Replacing a battery will not cause a loss of tag code
information, as authorization data is stored in the nonvolatile memory of the MCU.
Carefully close the cover of the tag's battery compartment. All elements of construction should be
rigidly locked in places. If it is so, the tag can be operated as usually.
Immobilizer code using original car controls
Code immobilizer – a function that allows disarming and controlling timer channels using original
car controls (button, lever or pedal). To enter immobilizer code, programmed button (lever, pedal)
should be pressed a number of times equal the digit of the code. Pauses between presses should not
exceed 1 second. Pauses more than 1 second will be interpreted as the start of next digit input (can
be a max of 4 digits 1 to 9).
After entering a correct immobilizer code, depending on the settings, either will lift the engine
blockage, or activate a programmed timer channel.

39
38 User manualCar service and security system Pandora DXL 39
7O
Setting up emergency notication phone numbers
Emergency phone numbers can be set in the system settings using Pandora DLX Loader. If you
will not program emergency phone numbers, voice call and text messages will be sent to the owner’s
additional numbers.
Cell phone notications
If any of security zones were triggered the system will immediately notify the owner by all
available means: it will send alarm notification to the remote, will call and text owner's mobile phone,
and will save information about the event in online service www.p- on.ru.
Security zones triggered notications
- Left/right, front/rear door security zone triggered;
- Trunk security zone triggered;
- Front hood security zone triggered;
- Brake pedal security zone triggered;
- Ignition security zone triggered;
- Warning level of the shock sensor security zone triggered;
- Shock sensor security zone triggered;
- Warning level of the supplementary sensor security zone triggered;
- Supplementary sensor security zone triggered;
- Motion sensor security zone triggered;
- Tilt sensor security zone triggered;
- Voltage outage security zone triggered.
Receiving voice information via phone
Call the system and listen to the status report.
1. System security status: armed/disarmed
2. If the alarm was triggered, the system will communicate the cause, number of events, time and
date (in case events occurred more than 24 hours away).
3. Temperature sensors readings.
4. On-board voltage (to the nearest tenth of a volt).
5. GSM connection signal level.
Pandora and a cell phone
4
Table of contents
Other Pandora Security System manuals

Pandora
Pandora SMART PRO V3 User manual

Pandora
Pandora Camper Pro v2 User manual

Pandora
Pandora Camper Pro User manual

Pandora
Pandora Camper Mini User manual

Pandora
Pandora Pandect X1100 User manual

Pandora
Pandora Mini v3 User manual

Pandora
Pandora dlx5000 User manual

Pandora
Pandora DXL-0090L User manual

Pandora
Pandora Smart Pro DXL-1920L User manual

Pandora
Pandora Smart Moto User manual
Popular Security System manuals by other brands

NTI
NTI ENVIROMUX-SRN-MTR-xxxV Series Installation instruction

Radionics
Radionics Security System user guide

Ryobi
Ryobi TEK4 RP4290 user manual

AJAX Systems
AJAX Systems HomeSiren user manual

Honeywell
Honeywell Lyric SIXSIREN Quick installation guide

Thermon
Thermon Terminator ZE-B Beacon Installation procedures