Phonocar VM197 User manual

MONITOR
17” - TFT/LCD
ISTRUZIONI DI MONTAGGIO
MOUNTING INSTRUCTIONS
INSTRUCTIONS DE MONTAGE
MONTAGE-ANLEITUNGEN
INSTRUCCIONES PARA EL MONTAJE
VM 197
ITALIANO
ENGLISH
FRANÇAIS
DEUTSCH
ESPAÑOL

3
TELECOMANDO • REMOTE CONTROL • TÉLÉCOMMANDE • FERNBEDIENUNG • MANDO DISTANCIA
1) .....ON/OFF Encendido/Apagado
2).....Selecciona fuentes AV
3).....Teclado numérico
4-17) Volumen - / Volumen +
5).....Teclas para el desplazamiento del cursor
6).....NO DISPONIBLE
7) .....Vuelve al menú de reproducción
8-12) Canción siguiente / precedente
1) ......... ON/OFF
2) ......... Quelle wählen (AV)
3) ......... Nummern-Tasten
4-17).... Lautstärke - / Lautstärke +
5) ......... Läufer-Bewegungstasten
6) ......... NICHT VERFÜGBAR
7) ......... Zurück zum Wiedergabe-Menü
8-12).... Titel nachher / vorher
1) ......... ON/OFF
2) ......... Sélectionne Sources AV
3) ......... Clavier numérique
4-17).... Volume - / Volume +
5) ......... Touches pour déplacement curseur
6) ......... PAS DISPONIBLE
7) ......... Retour au menu de reproduction
8-12).... Trace successive / précédente
1) ..... ON/OFF
2) ..... Select Sources AV
3) ..... Number-keys
4-17) Volume - / Volume +
5) ..... Cursor-moving keys
6) ..... NOT AVAILABLE
7) ..... Back to Reproduction-Menu
8-12) Track after / before
1) ......... ON/OFF
2) ......... Selezione sorgenti AV
3) ......... Tastiera numerica
4-17).... Volume - / Volume +
5) ......... Tasti per spostamento cursore
6) ......... NON ABILITATO
7) ......... Ritorno al menù di riproduzione
8-12).... Traccia successiva / precedente
9-11).... Avanti - Indietro
10) ....... Ferma riproduzione
13) ....... Riproduzione / Pausa
14) ....... Regolazione schermo
15) ....... Conferma selezione
16) ....... NON ABILITATO
18) ....... Menù configurazione
19) ....... NON ABILITATO
FUNZIONI / FUNCTIONS / FONCTIONS / FUNKTIONEN / FUNCIÓNES
1) .. + Regolazione Setting Einstellung Ajuste Réglage
2).. Menù principale Main Menu Menu principal Hauptmenü Menú principal
3).. - Regolazione Setting Réglage Einstellung Ajuste
4) .. Regolazione schermo Screen Setting Bildschirm-Einstellung Ajuste pantalla
5).. Seleziona sorgenti (AV) Select Source (AV) Sélectionne sources (AV) Quelle wählen (AV) Selecciona fuentes (AV)
6).. ON/OFF
7) .. ON/OFF-Luci di cortesia Courtesy-lights Lumière de courtoisie Stand-Licht Luces de cortesía
8).. Porta USB USB-port Porte USB USB-Öffnung Puerta USB
9).. Slot SD Card SD-Card-slot Slot Carte SD SD-Card-Öffnung Ranura SD Card
ATTENZIONE • ATTENTION • VORSICHT • ATENCIÓN
• I tasti 3-5-7-8-9-10-11-12-13-14-15 funzionano solo nella funzione USB/SD CARD.
• The keys 3-5-7-8-9-10-11-12-13-14-15 react only when using USB/SD-card.
• Les touches 3-5-7-8-9-10-11-12-13-14-15 fonctionnent uniquement dans la fonction USB/Carte SD.
• Die Tasten 3-5-7-8-9-10-11-12-13-14-15 reagieren nur bei USB/SD-Betrieb.
• Las teclas 3-5-7-8-9-10-11-12-13-14-15 funcionan solo con la función USB/SD CARD
COLLEGAMENTI • CONNECTIONS • CONNEXIONS • ANSCHLÜSSE • CONEXIONS
12
3
4
6
8
9
10
11
13
16
17
12
14
15
18
19
7
5
I
E
D
FR
GB
9-11) Adelante - Atrás
10) ...Parar reproducción
13) ...Reproducción / Pausa
14) ...Ajustar pantalla
15) ...Confirma selección
16) ...NO DISPONIBLE
18) ...Menú de configuración
19) ...NO DISPONIBLE
9-11).... Vorwärts / Rückwärts
10) ....... Wiedergabe stoppen
13) ....... Wiedergabe / Pause
14) ....... Bildschirm-Einstellungen
15) ....... Wahl bestätigen
16) ....... NICHT VERFÜGBAR
18) ....... Konfigurations-Menü
19) ....... NICHT VERFÜGBAR
9-11).... Avance - Revient
10) ....... Arrête reproduction
13) ....... Reproduction / Pause
14) ....... Réglage écran
15) ....... Valide sélection
16) ....... PAS DISPONIBLE
18) ....... Menu configuration
19) ....... PAS DISPONIBLE
9-11) Forward / Backward
10) ... Stop Reproduction
13) ... Reproduction / Pause
14) ... Screen-Setting
15) ... Confirm Selection
16) ... NOT AVAILABLE
18) ... Configuration-Menu
19) ... NOT AVAILABLE
1 2 3 4 5 6
89
7
G N D
NERO/BLACK
USCITA / OUTPUT AUDIO
ROSSO/RED
+12V DC
ROSSO/RED
USCITA / OUTPUT AUDIO
BIANCO/WHITE
USCITA / OUTPUT VIDEO
GIALLO/YELLOW
INGRESSO / INPUT AUDIO
BIANCO/WHITE
INGRESSO / INPUT AUDIO
ROSSO/RED
INGRESSO / INPUT VIDEO
GIALLO/YELLOW
3
EXIT
I
Per scorrere le icone premere i tasti sul telecomando o “+/-” sul monitor, per entrare premere il tasto ENTER sul
telecomando o il tasto MENÚ sul monitor. Per tornare nella HOME premere i tasti RETURN sul telecomando o POWER sul
monitor.
GB
To scroll the icons, press remote-control-keys or “+/-” on the Monitor. To enter the requested function, press
ENTER on the remote-control or the MENU-key on the Monitor. To return to the HOME-menu, press RETURN on the remote-
control or POWER on the Monitor.
FR
Pour parcourir les icônes, appuyer les touches sur la télécommande ou “+/-” sur l’écran; pour entrer, appuyer la touche ENTER sur la télécommande
ou la touche MENU sur l’écran. Pour retourner dans la HOME appuyer les touches RETURN sur la télécommande ou POWER sur l’écran.
D
Um die Ikonen zu scrollen Fernbedienung verwenden oder die Tasten “+/-”auf dem Monitor. Um die gewünschte Funktion zu erlangen, ENTER auf der
Fernbedienung drücken, oder MENÜ-Taste auf dem Monitor. Will man zurück zum HOME-Menü, RETURN auf der Fernbedienung oder POWER auf dem Monitor,
drücken.
E
Para pasar los iconos presionar las teclas en el mando a distancia o “+/-”en el monitor, para entrar presionar la tecla ENTER en el mando a distancia
o la tecla MENÚ en el monitor. Para volver en la HOME presionar las teclas RETURN en el mando a distancia o POWER en el monitor.
I
Premere il tasto AV sul monitor o sul telecomando per passare alla sorgente USB/SD CARD. Nella HOME appariranno
l’icona SETTINGS (sempre) e le icone USB e SD/MMC MS solo se inserite. Scorrere le icone con i tasti sul telecomando
o “+/-” sul monitor e premere ENTER sul telecomando o MENÚ sul monitor per entrare nei SELECT MEDIA USB/SD CARD
oppure nel SETTING.
GB
To change to USB-SD-mode, press AV-key on the Monitor or on the remote-control-unit. On the HOME-Menu, you will
always find the SETTINGS-icon, whereas the USB and/or SD/MMC MS-icons will appear only when inserted. Scroll the icons
with the remote-control-keys or with “+/-” keys on the Monitor. Then press ENTER on the remote-control or MENU on
the Monitor, to obtain the functions SELECT MEDIA USB/SD CARD or the SETTINGS.
FR
Appuyer la touche AV sur l’écran ou sur la télécommande pour passer à la source USB/SD CARD. Dans HOME apparaîtront: l’icône SETTINGS (toujours) et
les icônes USB et SD/MMC MS sauf si insérées. Parcourir les icônes avec les touches sur la télécommande ou “+/-” sur l’écran; et appuyer ENTER sur la
télécommande ou MENU sur l’écran pour entrer dans les SELECT MEDIA USB/SD CARD ou dans le SETTING.
D
Um den USB-SD-Modus einzustellen, AV-Taste auf dem Monitor oder auf der Fernbedienung, drücken.
Auf dem HOME-Menü, erscheint immer die Ikone EINSTELLUNGEN. Die USB- und/oder SD/MMC MS-Ikonen dagegen, erscheinen nur wenn diese eingesteckt
sind. Die Ikonen mittels Fernbedienung oder mittels “+/-” Tasten des Monitors scrollen. Dann ENTER auf der Fernbedienung drücken, oder MENÜ auf dem
Monitor, um zu den Funktionen SELECT MEDIA USB/SD CARD und EINSTELLUNGEN zu gelangen.
E
Presionar la tecla AV en el monitor o bien en el mando a distancia para pasar a la fuente USB/SD CARD. En la HOME aparecerá el icono SETTINGS
(siempre) y los iconos USB y SD/MMC MS solo si están introducidas. Pasar los iconos con las teclas en el mando a distancia o bien “+/-” en el monitor y
presionar ENTER en el mando a distancia o MENÚ en el monitor para entrar e los SELECT MEDIA USB/SD CARD o bien en el SETTING.
I
Premere il tasto MENÚ sul monitor o sul telecomando e appariranno i sottomenù; scorrere la lista con i tasti “+/-”.
Per modificare premere il tasto MENÚ seguito dai tasti “+/-”. Premere il tasto MENÚ per uscire oppure attendere 10 sec. senza operare.
GB
Press MENU-key on the monitor, or on the remote-control unit, so that the sub-menus will appear. Now scroll list, by using the keys “+/-”. To modify, press
MENU-key and then keys “+/-”. To quit function, press MENU-key again, or just wait for 10seconds without moving.
FR
Appuyer la touche Menu sur l’écran ou sur la télécommande, les sous-menus apparaîtront; parcourir la liste avec les touches “+/-”. Pour modifier, appuyer
la touche Menu suivie des touches “+/-”. Appuyer la touche Menu pour sortir ou attendre 10 sec. Sans rien toucher.
D
MENÜ-Taste auf dem Monitor, oder auf der Fernbedienungseinheit, drücken: somit erscheinen alle Unter-Menüs. Nun die Liste mit den Tasten “+/-”
scrollen. Um Änderungen vorzunehmen, MENÜ-Taste, dann die Tasten “+/-”drücken. Um die Funktion zu verlassen, wieder MENÜ-Taste drücken, oder einfach
nur 10 Sek. bewegungslos warten.
E
Presionar la tecla MENÚ en el monitor o en el mando a distancia y a continuación aparecerán los submenú; desplazarse con las teclas “+/-”..
Para modificar presionar la tecla MENÚ y a continuación las teclas “+/-”. Presionar la tecla MENÚ para salir o bien esperar 10 seg. sin operar.
IMPOSTAZIONI DI SISTEMA • SYSTEM SET-UP • REGLAGE SYSTEME • SYSTEM-EINSTELLUNGEN
CONFIGURACIÒN DEL SISTEMA - USB/MMC/SD CARD
MENU SETUP AUDIO/VIDEO
HOME MP5 MULTIMEDIA PLAYER USB/SD CARD
SELECT MEDIA USB/SD CARD
52%
BRIGHTNESS
50%
CONTRAST
50%
HUE
50%
SATURATION LANGUAGE
ITALIANO
MODE
16:9 4:3
SOURCE
AV MP5
IR
2.3-2.8MHZ 3.2-3.8MHZ
OK
RESET

S.p.A. - Via F.lli Cervi, 167/C • 42124 Reggio Emilia (Italy) • Tel. ++39 0522 941621 • Fax ++39 0522 942452
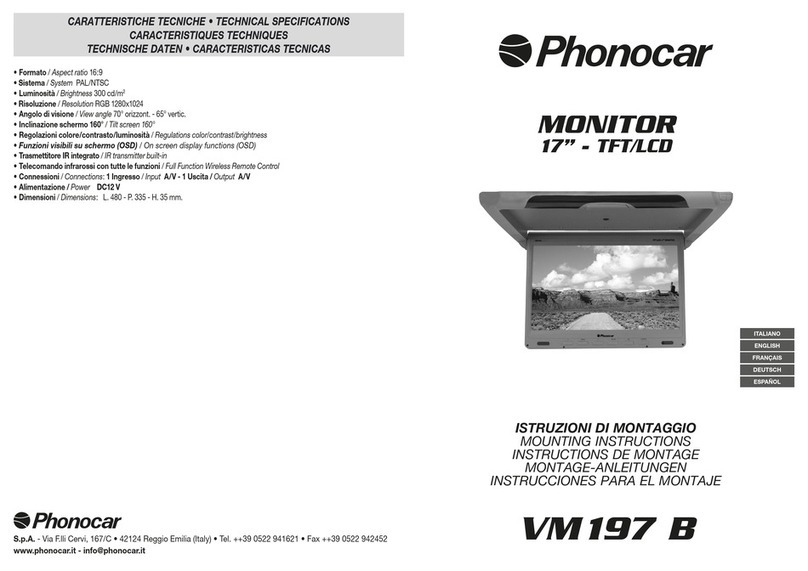
CARATTERISTICHE TECNICHE • TECHNICAL SPECIFICATIONS • CARACTERISTIQUES TECHNIQUES
TECHNISCHE DATEN • CARACTERISTICAS TECNICAS
• Formato / Aspect ratio 16:9
• Sistema / System PAL/NTSC
• Luminosità / Brightness 300 cd/m2
• Risoluzione / Resolution RGB 1280x1024
• 1 Porta / Port USB 16 GB
• 1 Slot SD Card 16 GB
• Angolo di visione / View angle 70° orizzont. - 65° vertic.
• Inclinazione schermo 160° / Tilt screen 160°
• Regolazioni colore/contrasto/luminosità / Regulations color/contrast/brightness
•
Funzioni visibili su schermo (OSD) / On screen display functions (OSD)
• Trasmettitore IR integrato / IR transmitter built-in
• Telecomando infrarossi con tutte le funzioni / Full Function Wireless Remote Control
• Connessioni / Connections: 1 Ingresso / Input A/V - 1 Uscita / Output A/V
• Alimentazione / Power DC12-24 V
• Dimensioni / Dimensions: L. 480 - P. 335 - H. 35 mm.
I
Selezionando l’icona SETTINGS dalla HOME si accede ai settaggi del “MP5 MULTIMEDIA PLAYER” scorrere l’elenco
delle funzioni sul telecomando e selezionare la funzione desiderata tramite i tasti sul telecomando o “+/-” sul
monitor.
GB
To carry out the settings of the ìMP5 MULTIMEDIA PLAYERî, select SETTINGS-icon from the HOME-menu. Then
scroll functions-list with the remote-control and select the requested function with the remote-control-keys or with the
“+/-”keys on the Monitor.
FR
En sélectionnant l’icône SETTINGS dans la HOME, on accède aux réglages du “MP5 MULTIMEDIA PLAYER” parcourir la liste des fonctions sur la
télécommande et sélectionner la fonction désirée à travers les touches sur la télécommande ou “+/-” sur l’écran.
D
Aus dem HOME-Menü, die Ikone EINSTELLUNGEN wählen, um die Einstellungen auf dem “MP5 MULTIMEDIA PLAYER“ durchzuführen. Mittels
Fernbedienung, die Liste der Funktionen scrollen. Dann, mittels Fernbedienung, oder mit den Tasten “+/-” des Monitors, die gewünschte Funktion
wählen.
E
Seleccionando el icono SETTINGS desde la HOME se accede a las configuraciones del “MP5 MULTIMEDIA PLAYER” pasar la listas de las funciones con
el mando a distancia y seleccionar la función deseada mediante las teclas del mando a distancia o “+/-” en el monitor.
SETTINGS MP5 MULTIMEDIA PLAYER USB/SD CARD
Other Phonocar Media Player manuals

Phonocar
Phonocar VM197B User manual

Phonocar
Phonocar VM199 User manual

Phonocar
Phonocar VM181 Installation guide

Phonocar
Phonocar VM154 User manual

Phonocar
Phonocar VM547 User manual

Phonocar
Phonocar VM183 User manual

Phonocar
Phonocar VM541 User manual

Phonocar
Phonocar VM 031 User manual

Phonocar
Phonocar VM194 User manual

Phonocar
Phonocar VM196 User manual