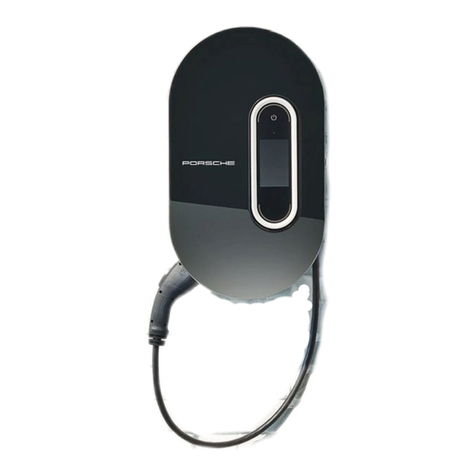
Porsche Mobile Charger Connect User manual

9Y0012702
Porsche Mobile Charger Connect
9Y0.012.702 - ROW
Porsche Mobile Charger Connect

9Y0.012.702 - ROW 09/2021
Porsche, the Porsche Crest, Panamera, Cayenne and
Taycan are registered trademarks of Dr. Ing. h.c. F.
Porsche AG.
Printed in Germany.
Reprinting – even of excerpts – or duplication of any
kind are only permissible with the written authorisa-
tion of Dr. Ing. h.c. F. Porsche AG.
© Dr. Ing. h.c. F. Porsche AG
Porscheplatz 1
70435 Stuttgart
Germany
Operating Manual
Always keep this operating manual and hand it over
to the new owner if you sell your charger.
Due to dierent requirements in various countries,
the information in the thumb index tabs of this ma-
nual will be dierent. To ensure that you are reading
the thumb index tab that applies to your country,
compare the article number of the charger shown in
the “Technical Data” section with the article number
on the identication plate on the charger.
Suggestions
Do you have any questions, suggestions or ideas re-
garding your vehicle or this manual?
Please write to us:
Dr. Ing. h.c. F. Porsche AG
Vertrieb Customer Relations
Porscheplatz 1
70435 Stuttgart
Germany
Equipment
Because our vehicles undergo continuous develop-
ment, equipment and specications may not be as
illustrated or described by Porsche in this manual.
Items of equipment are not always according to the
standard scope of delivery or country-specic vehicle
equipment
For more information on retrot equipment, please
contact a qualied specialist workshop. Porsche re-
commends a Porsche partner as they have trained
workshop personnel and the necessary parts and
tools.
Because of dierent legal requirements in individual
countries, the equipment in your vehicle may vary
from what is described in this manual. If your Porsche
is tted with any equipment not described in this ma-
nual, your qualied specialist workshop will be glad to
provide information on the correct operation and care
of the items concerned.

EN Porsche Mobile Charger Connect
Good to know – Owner’s Manual . . . . . . . . . . . 3
FR Porsche Mobile Charger Connect
Bon à savoir – Manuel du propriétaire . . . . . 45
ES
Porsche Mobile Charger Connect
Información importante: Manual del propie-
tario . . . . . . . . . . . . . . . . . . . . . . . . . . . . . . . . . . . . . 91
PT Porsche Mobile Charger Connect
É bom saber – Manual do proprietário . . . 137
TR Porsche Mobile Charger Connect
Bilmeniz gerekenler – Sürücü El Kitabı . . 183
RU Porsche Mobile Charger Connect
Полезно знать — руководство . . . . . . . . 225
UK Пристрій Porsche Mobile Charger Connect
Корисна інформація — посібник . . . . . . 273
VI
Thiết bịkết nối bộsạc di động cao cấp của
Porsche
Điều cần biết – Hướng dẫn sửdụng dành
cho người lái . . . . . . . . . . . . . . . . . . . . . . . . . . . 319
HE רוביחןעטמהדיינהלשהשרופ
בוטתעדל–תוארוההלעפהגהנל . . . . 364
AR Porsche Mobile Charger Connect
- . . . . . . . . . . . . 406
JA ポルシェ モバイル チャージャー コネクト
Good to know - 取扱説明書 . . . . . . . . . . . . . . 449
KO Porsche Mobile Charger Connect
Good to know – 사용 설명서 . . . . . . . . . . . . . 491
ZH Porsche Mobile Charger Connect
保时捷– 车主指南 – 驾驶手册 . . . . . . . . . . . 529
ZH 保時捷行動充電互聯裝置
Good to know – 車主手冊 . . . . . . . . . . . . . . . . 565
TH Porsche Mobile Charger Connect
– . . . . . . . . . . . . . . . . . . . . 603


3
DANGER
WARNING
CAUTION
NOTICE
About this Owner’s Manual
Warnings and symbols
Dierent types of warnings and symbols are used in
this manual.
Serious injury or death
Failure to observe warnings in the "Danger" category
will result in serious injury or death.
Possible serious injury or
death
Failure to observe warnings in the "Warning" cate-
gory can result in serious injury or death.
Possible moderate or mi-
nor injury
Failure to observe warnings in the "Caution" category
can result in moderate or minor injuries.
Vehicle damage possible
Failure to observe warnings in the "Notice" category
can result in damage to the vehicle.
Information
Additional information is indicated using the word
"Information".
bPrerequisites that must be met in order to use a
function.
eInstructions that must be followed.
1. Instructions are numbered in cases where a se-
quence of steps must be followed.
2. Instructions that must be followed on the cen-
tral display.
g Indicates where you can nd more information on a
topic.

Contents
4
English
To the Operating instructions
Key to pictograms. . . . . . . . . . . . . . . . . . . . . . . . . . . . . . . 5
Data protection notice. . . . . . . . . . . . . . . . . . . . . . . . . . . 5
Further information. . . . . . . . . . . . . . . . . . . . . . . . . . . . . . 5
Safety
Safety instructions. . . . . . . . . . . . . . . . . . . . . . . . . . . . . . . 6
Intended use. . . . . . . . . . . . . . . . . . . . . . . . . . . . . . . . . . . . 8
Scope of supply
Access Data. . . . . . . . . . . . . . . . . . . . . . . . . . . . . . . . . . . . . 9
Overview
Connections on the control unit. . . . . . . . . . . . . . . . . . 10
Charger control unit. . . . . . . . . . . . . . . . . . . . . . . . . . . . 11
Displays and controls on the display. . . . . . . . . . . . . . 11
Selecting the installation location. . . . . . . . . . . . . . . . 13
Tools required. . . . . . . . . . . . . . . . . . . . . . . . . . . . . . . . . . . 14
Installing
Installing the wall mount. . . . . . . . . . . . . . . . . . . . . . . . 14
Charging dock installation. . . . . . . . . . . . . . . . . . . . . . . 15
Setup
Vehicle charging and supply cables. . . . . . . . . . . . . . 17
Commissioning and conguration. . . . . . . . . . . . . . . . 21
First use of the web application. . . . . . . . . . . . . . . . . . 22
Logging into the Charger. . . . . . . . . . . . . . . . . . . . . . . . 23
Starting Setup on the Charger. . . . . . . . . . . . . . . . . . . 23
Overview. . . . . . . . . . . . . . . . . . . . . . . . . . . . . . . . . . . . . . 23
Operation
Operating instructions. . . . . . . . . . . . . . . . . . . . . . . . . . 24
Charging. . . . . . . . . . . . . . . . . . . . . . . . . . . . . . . . . . . . . . . 24
Logging into the web application. . . . . . . . . . . . . . . . 26
Using the web application. . . . . . . . . . . . . . . . . . . . . . . 27
Charging dock. . . . . . . . . . . . . . . . . . . . . . . . . . . . . . . . . . 33
Malfunctions. . . . . . . . . . . . . . . . . . . . . . . . . . . . . . . . . . . . 35
Transport. . . . . . . . . . . . . . . . . . . . . . . . . . . . . . . . . . . . . . . . 37
Cleaning and maintenance. . . . . . . . . . . . . . . . . . . . . . . 38
Disposal. . . . . . . . . . . . . . . . . . . . . . . . . . . . . . . . . . . . . . . . . 39
Technical Data
Identication plate. . . . . . . . . . . . . . . . . . . . . . . . . . . . . . 42
Manufacturing information. . . . . . . . . . . . . . . . . . . . . . 42
Importers. . . . . . . . . . . . . . . . . . . . . . . . . . . . . . . . . . . . . . 42
Index. . . . . . . . . . . . . . . . . . . . . . . . . . . . . . . . . . . . . . . . . . . . 43

To the Operating instructions
5
To the Operating instructions
Key to pictograms
Depending on the country, various pictograms may
be attached to the charger.
Operate the charger within a temper-
ature range from –22 °F (–30 °C)
to+122 °F (+50 °C).
The charger should not be operated
at altitudes of more than 16,404 .
(5,000 m) above sea level.
The charger is equipped with a non-
switched ground wire.
The charger is equipped with a
switched ground wire.
Dispose of the charger in compliance with
all applicable disposal regulations.
Do not use extension cables or cable
reels.
Do not use (travel) adapters.
Do not use multi-outlet power strips.
Do not use chargers with damaged
electronics or connection cables.
Risk of electric shock
due to improper use.
Observe the operating
instructions provided,
particularly the warn-
ings and safety instructions.
The
sur-
face of
the charger can become very hot.
Do not operate the charger in non-
grounded power grids (e.g. IT net-
works). Only operate the charger in
grounded power grids.
Only operate the charger in single-
phase networks.
The charger requires an AC power
supply
Indicates the type 1 plug with a voltage
range of ≤ 250 V AC.
Indicates the type 2 plug with a voltage
range of ≤ 480 V AC.
Data protection notice
To ensure that your Porsche charging equipment can
communicate properly and is always up-to-date, the
charging equipment will send the following equip-
ment-specic data to Porsche in encrypted form at
regular intervals and process this data there: device
ID, brand, generation, device type and soware ver-
sion.
If you would also like to have the option of using
other Porsche Connect Services for the charging
equipment, you must pair your charging equipment
to your Porsche ID account, which is available from
the Porsche Connect distributor in selected markets.
While using Porsche Connect services, the following
personal data and other device-specic data required
for the provision of the services is sent to Porsche
and processed there: customer ID, statistics, charg-
ing history information, status, connection status and
time stamp for when communication was last estab-
lished. You will nd more detailed information on the
general terms and conditions and the privacy policy
at www.porsche.com/connect-store.
The regular transmission of data for your charging
equipment can incur additional costs with your Inter-
net supplier. The data you have saved at Porsche can
be irrevocably deleted using My Porsche. Some of the
Porsche Connect Services for the Porsche charging
equipment are not available in all countries due to
technical or legal restrictions.
Further information
Further information on the charger and the web ap-
plication is available in the "E-Performance" area at
https://www.porsche.com.

Safety
6
DANGER
DANGER
DANGER
WARNING
Safety
Safety instructions
Electric shock, short cir-
cuit, re, explosion
Use of a damaged or incorrect charger and a dam-
aged or incorrect electrical socket, improper use of
the charger or failure to observe the safety instruc-
tions can cause short circuits, electric shocks, explo-
sions, res or burns.
eOnly use accessories, e.g. supply and vehicle ca-
bles, that have been approved and supplied by
Porsche.
eDo not use a damaged and/or soiled charger.
Check the cable and plug connection for damage
and soiling before use.
eOnly connect the charger to properly installed
and undamaged electrical sockets and fault-free
electrical installations.
eDo not use extension cables, cable reels, multiple
sockets or (travel) adapters.
eDisconnect the charger from the power grid dur-
ing thunderstorms.
eDo not modify or repair any of the electrical com-
ponents.
eOnly get experts to correct faults and carry out
repairs on the charger.
Electric shock, re
Incorrectly installed electrical sockets can cause
electric shock or re when the high-voltage battery
is charged using the vehicle charge port.
ePower supply testing and installation and initial
operation of the electrical socket for the charger
may only be carried out by a qualied electrician.
The qualied electrician is fully responsible for
compliance with the relevant standards and reg-
ulations. Porsche recommends that you use a
certied Porsche service partner.
eOnly operate the charger in grounded power
grids. Do not operate the charger in non-
grounded power grids (e.g. IT networks).
eThe cross-section of the power cable for the
electrical socket is dened in accordance with
the wire length and the locally applicable regula-
tions and standards.
eTo ensure uninterrupted charging, we recom-
mend that you only use electrical sockets that
are connected via a separately fused electric cir-
cuit for charging.
eThe charger is designed for use in the private
and semi-public sector, e.g. on private property
or in company parking lots. In some countries,
e.g. in Italy and New Zealand, mode 2 charging is
prohibited in public areas.
Further information is available from your au-
thorized Porsche dealer or your local electricity
supplier.
eUnauthorized persons (e.g. playing children) or
animals must not have access to the charger or
the vehicle during unsupervised charging.
e
g Please read the safety instructions in the in-
stallation instructions and the Owner’s Manual.
Electric shock, re
Incorrect handling of the plug contacts can lead to
electric shock or re.
eDo not touch the contacts on the vehicle charge
port and charger.
eDo not insert any objects into the vehicle charge
port or charger.
eProtect electrical sockets and plug connections
against moisture, water and other liquids.
Flammable or explosive
vapors
Components of the charger can cause sparks and
ignite ammable or explosive vapors.
eTo reduce the risk of explosion, –particularly in
garages–, make sure that the control unit is lo-
cated at least 19.7 in. (50 cm) above the oor
during charging.
eDo not install the charger in potentially explosive
areas.
NOTE: This equipment has been tested and found to
comply with the limits for a Class B digital device,
pursuant to Part 15 of the FCC Rules.
These limits are designed to provide reasonable pro-
tection against harmful interference in a residential
installation. This equipment generates, uses, and can
radiate radio frequency energy and, if not installed

Safety
7
WARNING
and used in accordance with the instructions, may
cause harmful interference to radio communications.
However, there is no guarantee that interference
will not occur in a particular installation. If the Wall
Charger Connect does cause harmful interference
to radio or television reception, which can be deter-
mined by turning the equipment o and on, the user
is encouraged to try to correct the interference by
one or more of the following measures:
–Reorient or relocate the receiving radio or televi-
sion antenna.
–Increase the separation between the equipment
and receiver.
–Connect the equipment into an outlet on a circuit
dierent from that to which the receiver is con-
nected.
–Consult the dealer or an experienced radio/TV
technician for help.
Changes or modications not expressly approved by
the manufacturer could void the user's authority to
operate the equipment under FCC rules. To comply
with FCC RF exposure compliance requirements, the
device must be installed to provide a separation dis-
tance of at least 8 inches (20 cm) from all persons.
Observe the following instructions and recommenda-
tions in order to ensure uninterrupted charging with
the charger:
–When installing the new electrical socket, select
an industrial electrical outlet with the highest
possible power available (adapted to the domes-
tic electrical installation) and have it commis-
sioned by a qualied electrician. Porsche recom-
mends that you use a certied Porsche service
partner.
–Where technically possible and legally permis-
sible, the electrical installation must be dimen-
sioned in such a way that the maximum nominal
power of the electrical socket used is available
continuously for charging the vehicle.
–Before installation, check that the additional
power required to charge a vehicle can be con-
tinuously provided by the currently available do-
mestic installation. Protect the domestic instal-
lation with an energy management system, if
necessary.
–If you are unsure about the electrical domestic
installation, have it checked by a qualied elec-
trician. Porsche recommends that you use a cer-
tied Porsche service partner.
–If you intend to use the charger with a photo-
voltaic system, contact an authorized Porsche
dealer.
–In order to fully exploit the performance of the
charger and to ensure fast vehicle charging, use
either NEMA electrical sockets with the highest
possible current rating appropriate for the power
plug or industrial electrical outlets according to
IEC 60309.
–When charging the high-voltage battery via the
domestic/industrial electrical outlet, the electri-
cal installation may be loaded to its maximum
capacity. Porsche recommends that you have the
electrical installations used for charging checked
regularly by a qualied electrician. Ask a qualied
electrician which inspection intervals are appro-
priate for your installation. Porsche recommends
that you use a certied Porsche service partner.
–On delivery, the charging current is automatically
limited to prevent overheating of the electrical
installation. Get a qualied electrician to com-
mission the charger and set the charging current
limit as required for the domestic installation.
g Refer to chapter "Charging current limiting" on
page 25.
Grounding Instructions
Charger must be grounded.
If it should malfunction or break down, grounding
provides a path of least resistance for electric current
to reduce the risk of electric shock.
The charger is equipped with a cord having an equip-
ment grounding conductor and a grounding plug. The
plug must be plugged into an appropriate outlet that
is properly installed and grounded in accordance with
all local codes and ordinances.
Electric shock, short cir-
cuit
Improper connection of the equipment-grounding
conductor is able to result in a risk of electric shock.
eCheck with a qualied electrician or serviceman
if you are in doubt as to whether the product is
properly grounded.
eDo not modify the plug provided with the prod-
uct - if it will not t the outlet, have a proper
outlet installed by a qualied electrician.

Safety
8
Intended use
Charger with integrated control and protection for
mode 2 charging for vehicles with high-voltage bat-
tery that meet the generally applicable standards and
directives for electric vehicles.
eAlways use the appropriate device version for the
regional power grid.
g Refer to chapter "Technical Data" on page 40.
The charger may only be used as a combined unit
consisting of supply cable, control unit and vehicle
cable.

Scope of supply
9
Scope of supply
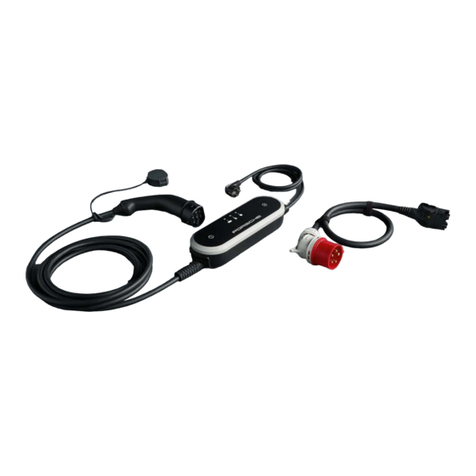
Fig. 1 Scope of supply
ASupply cable (pluggable to control unit)
BPower plug for connecting to the power grid
CControl unit
DVehicle plug (connector plug for the vehicle)
EVehicle cable (country-specic: either removable
or secured to the control unit)
FLetter containing access data
Information
Optional components: Various wall mounts are availa-
ble for the charger in the dierent countries, e.g. the
basic wall mount or the charging dock.
Access Data
A letter containing access data, which includes all the
data you need for the charger and the web applica-
tion, is supplied with your device.
eKeep the letter containing access data in a safe
place.
Information
If you lose the access data that is valid upon delivery
of your device, e.g. the preset PIN and the initial
password, please contact your authorized Porsche
dealer.
−Have the serial number of the charger ready.
g Refer to chapter "Serial number of the charger"
on page 10.
The letter containing access data contains the fol-
lowing data:
Designation Meaning
Serial Number Serial number of the
charger
Wi-Fi MAC MAC address, WiFi in-
terface
GRID MAC MAC address of do-
mestic PLC interface
Vehicle MAC MAC address of vehicle
PLC interface
Wi-Fi SSID –SSID WiFi access
point
–Host name
Designation Meaning
Wi-Fi PSK Network key
Password for Home
user
Initial password for
Home user Web Appli-
cation
Password for Customer
service
Initial password for
Customer service Web
Application
PIN Personal ID number
PUK Personal unlocking key
Information
The Hostname consists of the following components:
WallChargerConnect + serial number (example: Wall-
ChargerConnect-1234567)
Information
The security eld contains the necessary access co-
des (PIN and PUK). This eld has special ink covering
these codes. The codes are only visible when this
eld is dampened in running water.
Do not rub or scratch the eld while dampening it, as
the codes could also be damaged.

Overview
10
PIN and PUK
The PIN and PUK are used for unlocking the charger.
eIf you lose or forget a PIN you set yourself, un-
lock the charger by entering the PUK and set a
new PIN.
eIf you lose or forget the PUK, contact your au-
thorized Porsche dealer.
Password for the web application
The password is used for logging into the web appli-
cation.
When using the initial password:
eIf you lose or forget the initial password, contact
an authorized Porsche dealer.
When using a password you set yourself:
eIf you lose or forget a password you set yourself,
reset the charger to factory settings and thereby
re-activate the initial password (Settings e
Factory settings).
Serial number of the charger
The serial number of the charger can be found in the
following places:
–In the letter containing access data aer the
designation "Serial NumberSerial Number"
–On the identication plate (on the back of the
control unit) aer the abbreviation "SNSN"
–On the charger: Settings eService eDevice
information
–In the web application: Settings eService eIn-
formation
Serial number of the charger
The serial number of the charger can be found in the
following places:
–In the letter containing access data aer the
designation "Serial Number"
–On the identication plate (on the back of the
control unit) aer the abbreviation "SN"
–On the charger: Settings eInformation
–In the web application: Settings eService eIn-
formation
Porsche ID
When the charger is paired to your Porsche ID, infor-
mation about the charger and the charging processes
can be displayed in My Porsche or in the Porsche
Connect App.
If you will no longer be using the charger, e.g. if you
sell it:
1. Unpair the charger from your Porsche ID (Set-
tings eUser proles).
2. Reset the charger to factory settings (Set-
tings eFactory settings).
Overview
Connections on the control unit
Fig. 2 Connections on the control unit
ASupply cable
BVehicle cable
The supply cable Ais removed and plugged in at the
top of the control unit.
The vehicle cable Bis removed and plugged in at the
bottom of the control unit.

Overview
11
Charger control unit
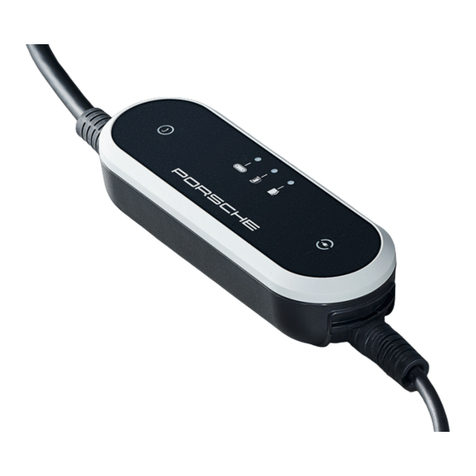
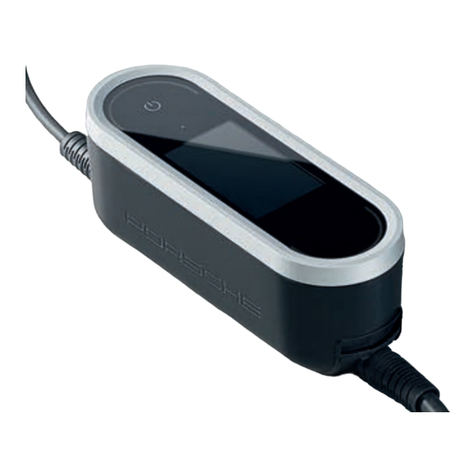
Fig. 3 Control unit
APower button
BStatus LEDs
CDisplay
The charger can be switched on and o using the
Power button A(Fig. 3).
The status LEDs B(Fig. 3) show the status of the
charger.
Communication with the charger takes place via the
display C(Fig. 3). It shows information and error mes-
sages.
Displays and controls on the dis-
play
Fig. 4 Charger display
AStatus bar
BInformation area
CMenu bar
A brightness sensor controls the brightness of the
display. The brightness adjusts automatically to the
ambient lighting conditions.
Status bar
Various symbols can be displayed in the status bar.
The following overview shows the meaning of the
status bar symbols.
Symbol Meaning
WiFi connection availa-
ble
Symbol Meaning
Server connection
available
Soware update down-
loading
Connection to PLC net-
work available
Hotspot activated
A charging prole is ac-
tivated in the vehicle.
This prole is loaded
in accordance with the
settings.
Photovoltaic system
connected
Status bar
Various symbols can be displayed in the status bar.
The following overview shows the meaning of the
status bar symbols.
Symbol Meaning
WiFi connection availa-
ble
Server connection
available
Soware update down-
loading

Overview
12
Symbol Meaning
Connection to PLC net-
work available
Hotspot activated
Ground monitoring
deactivated (Canada,
Mexico)
Charger is connected to
an energy manager
A charging prole is ac-
tivated in the vehicle.
This prole is loaded
in accordance with the
settings.
Photovoltaic system
connected
Information
Depending on the importance, certain symbols are
superimposed on one another and are therefore not
visible (symbols with increasing priority include e.g.
PLC network < WiFi connection < Energy manager).
Menu bar
Various symbols can be displayed in the menu bar.
The following overview shows the meaning of the
symbols in the menu bar.
Symbol Meaning
Display information
about the current
charging process
Display charging history
Making settings
A soware update is
available.
Operating options
Fig. 5 Operating options
ABack
BUp/Down
CActivity
DDetails
ESkip

Selecting the installation location
13
DANGER
Selecting the installation lo-
cation
Electric shock, re
Improper use of the charger or non-compliance with
the safety instructions can cause short circuits, elec-
tric shocks, explosions, res or burns.
eDo not install the basic wall mount or the charg-
ing dock in potentially explosive areas.
eBefore installing the basic wall mount or charg-
ing dock, make sure that there are no electric
wires in the area in which the mounting holes are
to be drilled.
eTo reduce the risk of explosion, particularly in
garages, make sure that the control unit is lo-
cated at least 19.7 in. (50 cm) above the oor
during charging.
eObserve the locally applicable electrical installa-
tion regulations, re protection measures, acci-
dent prevention regulations and escape routes.
The basic wall mount and the charging dock are
designed for installation indoors and outdoors. The
following criteria must be considered when selecting
a suitable installation location:
–Install the electrical socket/supply cable, basic
wall mount or charging dock in a covered area
away from direct sunlight and rain (e.g. in a ga-
rage) if possible.
–Make sure the distance of the electrical socket
from the oor and ceiling conforms to national
standards and regulations, to ensure comfortable
use.
–Do not install the basic wall mount or charging
dock under hanging objects.
–Do not install the basic wall mount or charging
dock in stables, livestock buildings or locations
where ammonia gases occur.
–Install the basic wall mount or charging dock on
a smooth surface.
–In order to ensure secure fastening, check the
condition of the wall before installation.
–Install the basic wall mount or charging dock as
close as possible to the preferred parking posi-
tion for the vehicle. Take the orientation of the
vehicle into account.
–Install the basic wall mount or charging dock so
that it is not near to pathways and the supply
cable does not cross any pathways.
–Install the basic wall mount or charging dock so
that the distance from the power plug to the
power socket does not exceed the available sup-
ply cable length.

Tools required
14
Tools required
–Spirit level
–Power or hammer drill
–Screwdriver
Installing
Installing the wall mount
Installing the Basic Wall Mount
Fig. 6 Drilling dimensions
1. Mark the drill holes on the wall.
2. Drill the mounting holes and insert wall plugs.
3. Press the basic wall mount 2(Fig. 6) into the
cable guide 1(Fig. 6) from the front.
4. Screw the basic wall mount to the wall.
Installing the plug holder
Fig. 7 Distance from wall mount to plug holder
When installing the plug holder, ensure a distance of
7.9 in. (200 mm) from the basic wall mount.

Installing
15
Fig. 8 Drilling dimensions
1. Remove plug holder 1from the cover (Fig. 8) 2
(Fig. 8).
2. Mark the drill holes on the wall.
3. Drill the mounting holes and insert wall plugs.
4. Screw the plug holder 1(Fig. 8) to the wall.
5. Fit the cover 2(Fig. 8) onto the plug holder 1
(Fig. 8) from below and press it upwards.
Inserting the control unit in the wall
mount
Fig. 9 Inserting control unit
1. Guide the vehicle cable through the lower open-
ing in the basic wall mount, t the bottom of the
control unit on the locking lug and engage it by
pushing it to the rear.
2. Guide the supply cable through the upper open-
ing in the basic wall mount and lock the snap
ring by pushing it to the le.
3. Insert the vehicle plug into the plug holder.
Charging dock installation
There are two options for securing the charging dock.
The installation variant depends on the type of power
cable (exposed or concealed).
–Installation without spacer (concealed power
cable): The mounting plate is tted directly to
the wall.
–Installation with spacer (exposed power cable):
The mounting plate is tted on the wall using a
spacer for the power cable.
Installation without spacer
Fig. 10 Drilling dimensions
1. Mark the drill holes on the wall.
2. Drill the mounting holes and insert wall plugs.
3. Screw the mounting plate to the wall.

Installing
16
Fig. 11 Screwing charging dock to mounting
plate
4. Screw the charging dock to the mounting plate.
Installation with spacer
Fig. 12 Drilling dimensions
1. Mark the drill holes on the wall.
2. Drill the mounting holes and insert wall plugs.
3. Screw the mounting plate together with the
spacer to the wall.
Fig. 13 Screwing charging dock to mounting
plate
4. Screw the charging dock to the mounting plate.

Setup
17
1. Time of printing. Further information is available from your authorized Porsche dealer or your local electricity supplier.
NOTICE
Setup
Vehicle charging and supply cables
Information on vehicle charging cables
and plugs
Dierent vehicle charge ports Aand vehicle plugs B
are available depending on country-specic vehicle
equipment.
IEC 62196-2/
SAE-J1772-2009
Type 1 UL/IEC
Selecting a Supply Cable
For regular charging with optimum charging speed,
use only the supply cables listed below. The maxi-
mum achievable charging power is up to 22 kW (de-
pending on device variant, power grid/domestic con-
nection and on-board charger). When driving abroad,
always carry the appropriate supply cable for the
country you are visiting with you.
In some countries, only approved supply cables may
be used. When driving abroad, always carry the ap-
propriate supply cable for the country you are visiting
with you.
Country Supply ca-
bles for in-
dustrial
electrical
outlets
Supply ca-
bles for do-
mestic elec-
trical outlets
Argentina 5, 6, 7, 8 C
Bolivia, Paraguay,
Uruguay, Saint
Marteen, Saint
Martin
5, 6, 7, 8 B
Chile 5, 6, 7, 8 D
Peru 5, 6, 7, 8 A
Country-specic approval of supply cables (exam-
ples)
The vehicle cable can be 8.2 or 24.6 . (2.5 or
7.5 meters) long, depending on the situation. The
total length of the supply cable, control unit and vehi-
cle cable is limited in some countries, e.g. to 16.4 .
(5 m) in Switzerland and to 24.6 . (7.5 m) in Israel
and the USA1.

Setup
18
1. Time of printing. Further information is available from your authorized Porsche dealer or your local electricity supplier.
Supply cables for industrial electrical out-
lets
1
NEMA 14-30
2
NEMA 14-50
3
NEMA 6-30
4
NEMA 6-50
5
IEC 60309-2
CEE 230 V/16 A
6 h
6
IEC 60309-2
CEE 230 V/32 A
6 h
7
IEC 60309-2
CEE 400 V/16 A
6 h
8
IEC 60309-2
CEE 400 V/32 A
6 h
Supply cables for domestic electrical out-
lets
If there is no industrial electrical outlet available,
the supply cables listed below can also be used for
charging at a reduced charging power.
eIn some countries, e.g. in Abu Dhabi, Israel, Sin-
gapore and India1, charging using domestic elec-
trical outlets is prohibited.
eIn Canada, any outlet for charging electric vehi-
cles must be rated for at least 20 A.
A
NEMA 5-15
Type B
B
CEE 7/5; CEE 7/7
Type E/Type F
(shockproof)
C
AS 3112
Type I
D
CEI 23-16-VII
Type L 16 A (0.2 in.
(5 mm))
NEMA 6-50/NEMA 14-50 (additional infor-
mation)
Information
Scope
This recommendation for use applies only to regions
with the NEMA 6-50/NEMA 14-50 standard.
Charging your vehicle may result in high electric cur-
rents. For safety reasons, it is mandatory to use only
components exclusively approved for this purpose
and to have the charging equipment installed profes-
sionally.
Other manuals for Mobile Charger Connect
10
Table of contents
Languages:
Other Porsche Batteries Charger manuals

Porsche
Porsche 971044033 User manual

Porsche
Porsche Charge-o-mat Pro User manual

Porsche
Porsche Mobile Charger Plus Specification sheet

Porsche
Porsche Home Energy Manager User manual

Porsche
Porsche Mobile Charger Plus User manual

Porsche
Porsche Charge-o-mat Pro User manual

Porsche
Porsche Charge-o-mat Pro User manual

Porsche
Porsche E-Performance User manual

Porsche
Porsche Mobile Charger Connect User manual

Porsche
Porsche Mobile Charger Connect User manual