5
3. INSTALLATION
●PLACEAUNITONAFLATSURFACE
Before placing a unit on a flat surface, loosen the small knob with the support and make the angle between the arm and the support
60degrees. Tightenthe small knob. Loosen he bigknob and adjust the angle between thearm and unit as desired and then tighten it.(if
theversionis withwirelesscontrol,the antennashould faceup ifthe fixtureisplacedonflatsurface)
●TRANSPORTATION
Before transportation,tighten both knobs after the arm and supportareoverlapped.
WARNING:
●The projectorMUSTbeliftedorcarriedbytheHANDLESinsteadofclamps.
●.Forsafetythesafetycordshouldafford10times the Projector’s weight.
●POWERCONNECTION
Connectthepowercordasfollows:
L(live)=brown
E(earth) =yellow/green
N(neutral)=blue
Before power connection, please ensure the power supplied must match what the nameplate says. It is recommended that each
projector be connected withpower separatelyso that theymaybeindividuallyswitchedonand off.
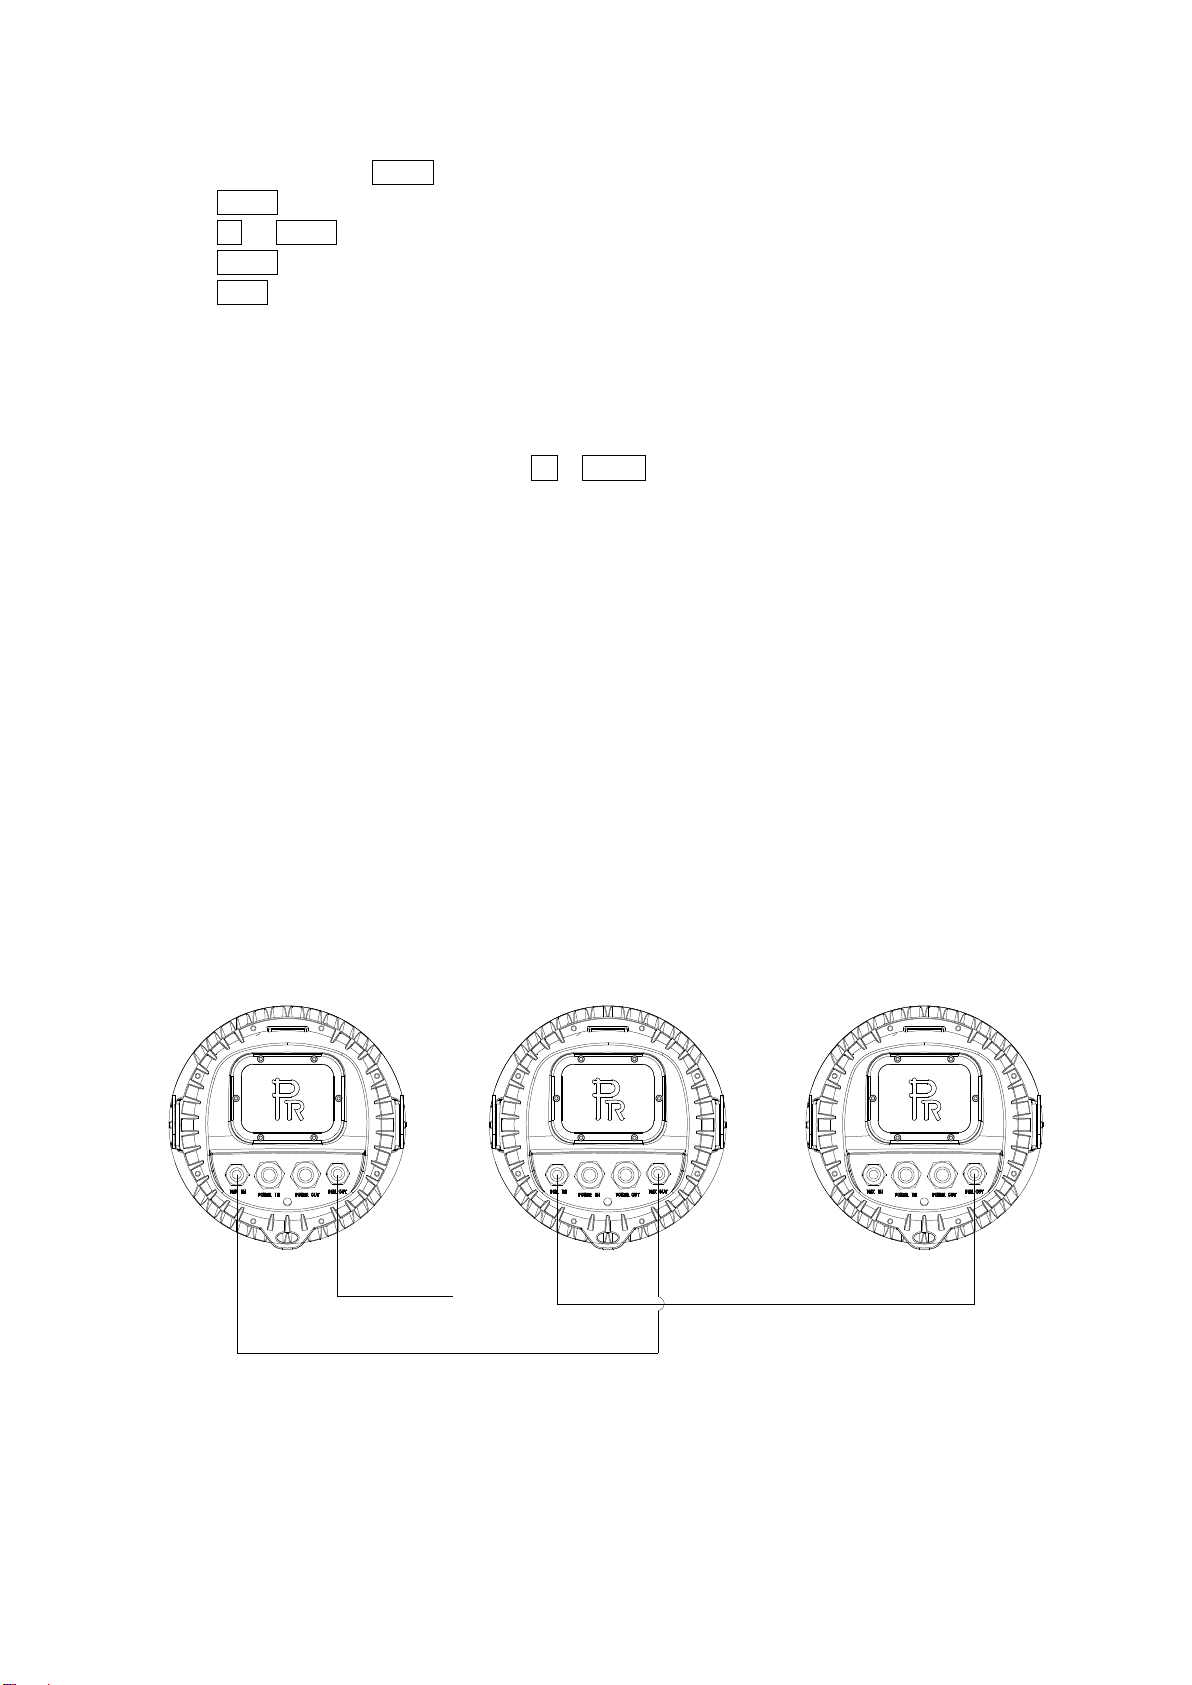
Note: If projectors are connected in series, please connect POWER IN port of the 1st projector with the Power Mains, then
connectitsPOWEROUTwithPOWERINof the2nd projector,andsoontillallfixturesareconnected.Ifthe voltagesupplied
is 200V-240V, the maximum projectors connected is 8pcs, if it is 100V-120V, the maximum is 4pcs. The diameter of the cores
ofthewiresforthe Powerin/outcablesmustbeequalorbiggerthan2.5mm2.
●Theearthwire(yellow/green) must be connectedto theground.Andelectricalconnectionmust be in
accordancewiththe standardsconcerned.
●Ifanyquestionsabouttheelectricalinstallation, donot continue but consult aqualifiedelectrician.
●DMXCONTROLCONNECTION
Connection between controller and projector and between one projector and another must be made with a twin-screened cable, with
each wire having at least a 0.5mm in diameter. Connection to and from the projector is via cannon 5 pin (which are included with the
projector)or5pinXLRplugsand sockets.The XLR'sareconnectedasshown inthe figureabove.
Note: care should be taken to ensure that none of the pins touch the metallic body of the plug or each other. XLR plugs and sockets
mustn’t be connected in any way other than mentioned in the above figure. The unit accepts digital control signals in protocol
DMX512(1990).
Connect the controller’s DMX output to the first fixture’s DMX input, and connect the first fixture’s DMX output to the second
fixture’s DMX input and connect the rest fixtures in the same way. Eventually connect the last fixture’s DMX output to a DMX
terminatorasshown inthe figurebelow.