manuals.online logo
Brands
  1. Home
  2. •
  3. Brands
  4. •
  5. RAB
  6. •
  7. Lighting Equipment
  8. •
  9. RAB GUS- 2FT User manual

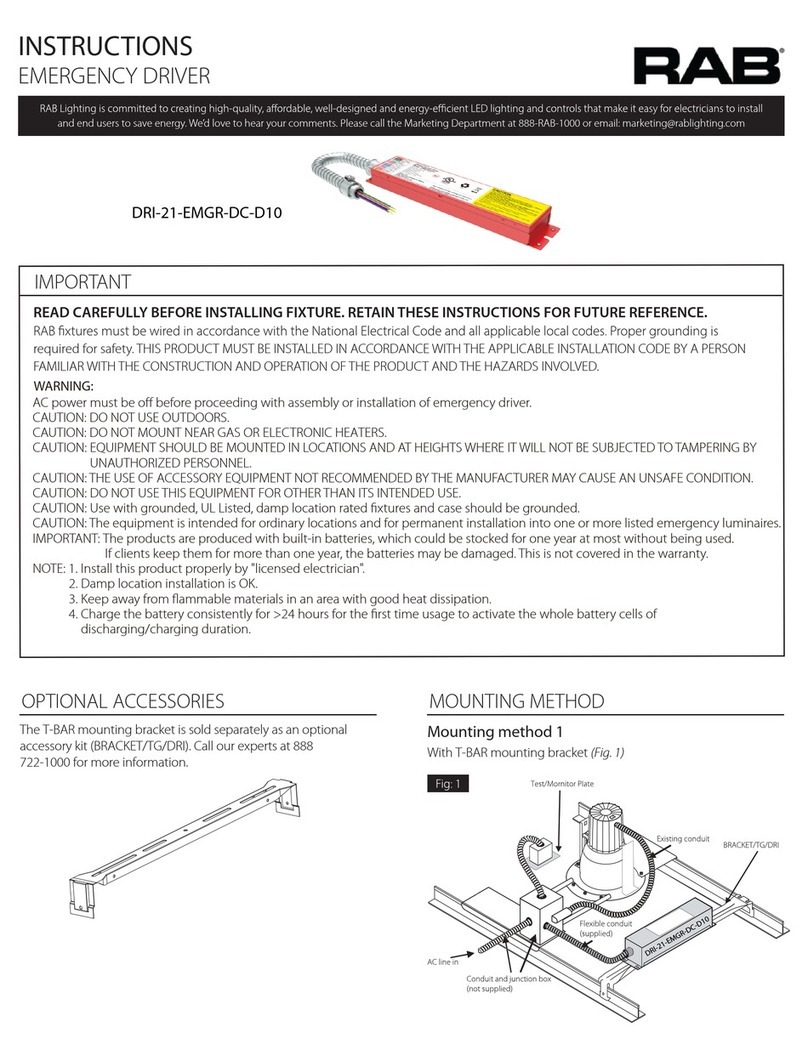
RAB GUS- 2FT User manual

This manual suits for next models

1

Other RAB Lighting Equipment manuals

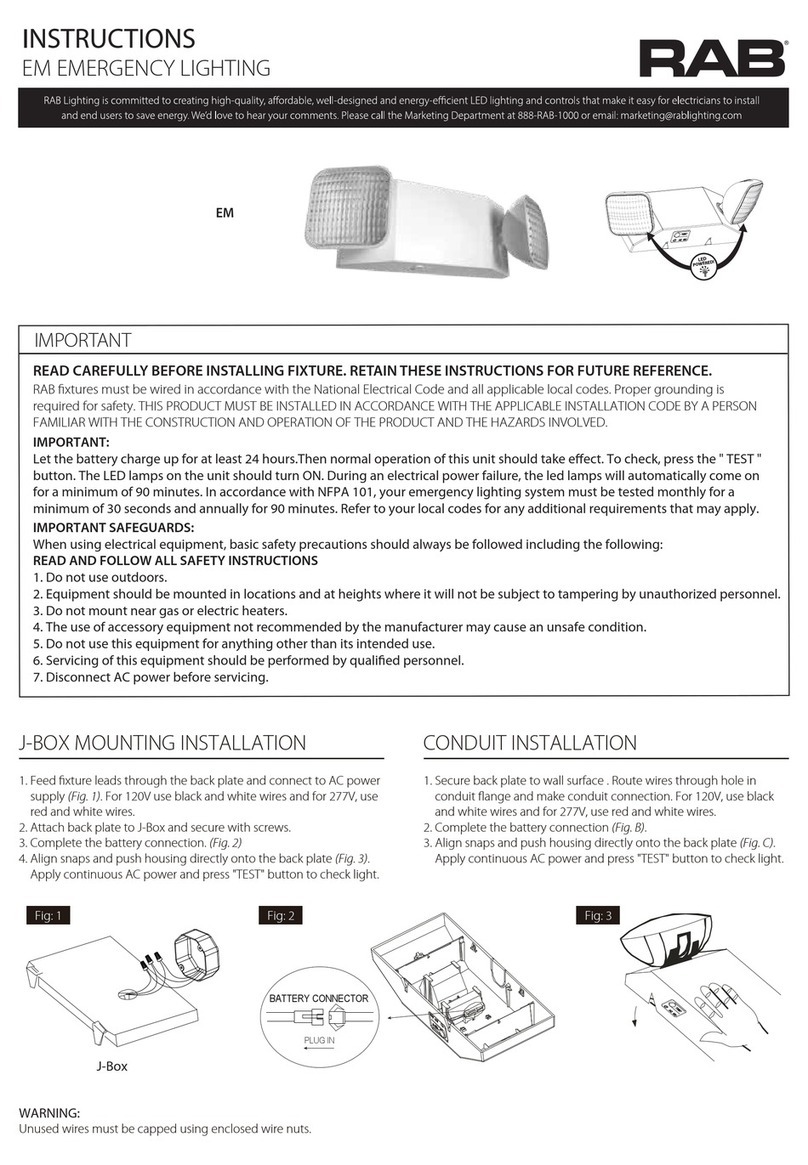
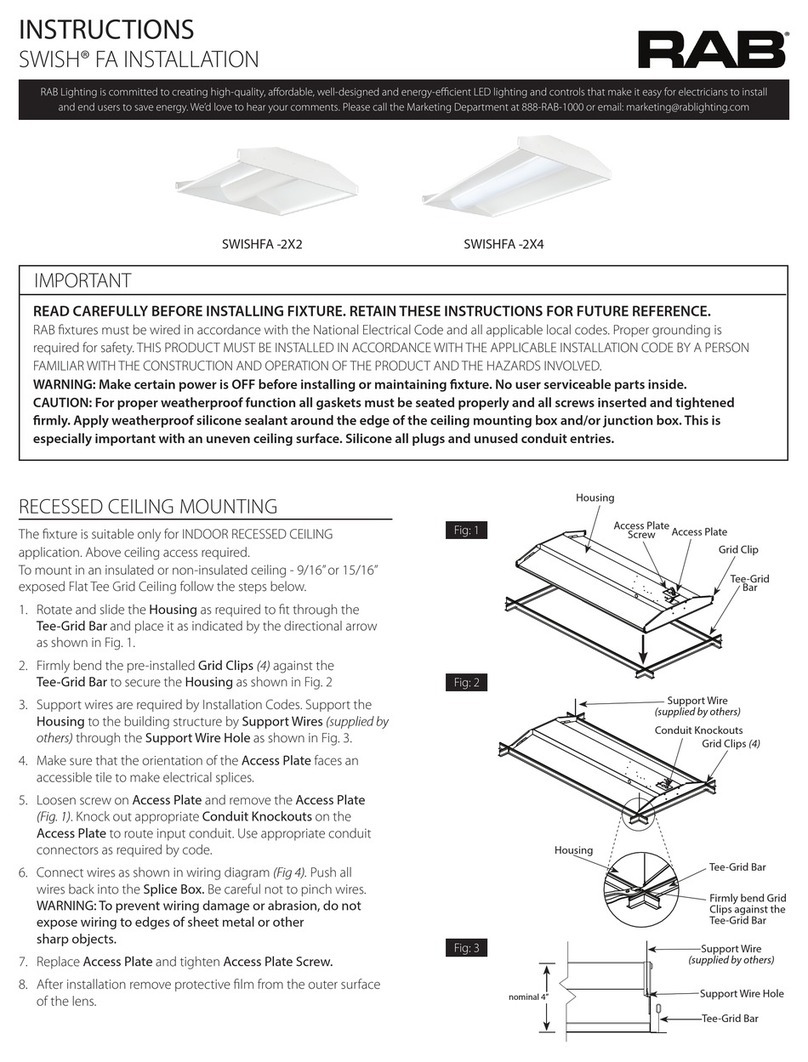
RAB SWISHFA -2X2 User manual

RAB

RAB SWISHFA -2X2 User manual

RAB PLL-14-8 DIR Series User manual

RAB

RAB PLL-14-8 DIR Series User manual

RAB Lightcloud Controller Mini User manual

RAB

RAB Lightcloud Controller Mini User manual

RAB EM-2H2RNY User manual

RAB

RAB EM-2H2RNY User manual

RAB SHARK - 8FT User manual

RAB

RAB SHARK - 8FT User manual

RAB STRINGER34 User manual

RAB

RAB STRINGER34 User manual

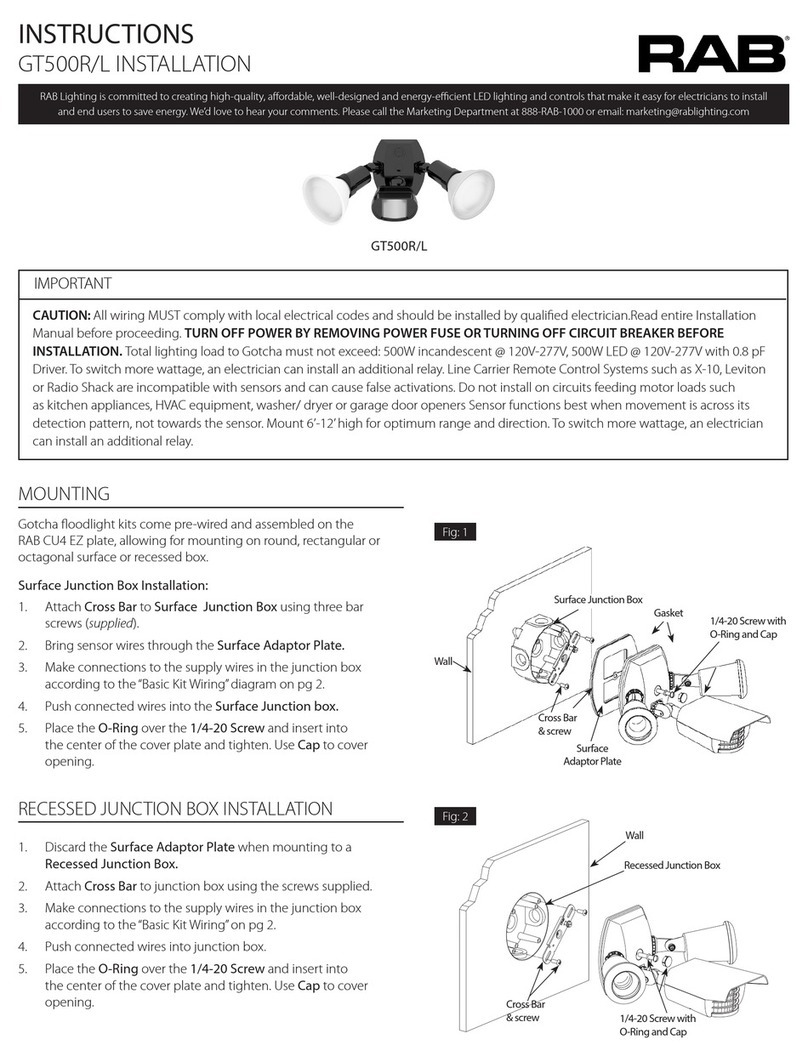
RAB GT500R/L User manual

RAB

RAB GT500R/L User manual

RAB TOMO- 2FT User manual

RAB

RAB TOMO- 2FT User manual

RAB T5HE-10-24P-8-EXT Series User manual

RAB

RAB T5HE-10-24P-8-EXT Series User manual

RAB STRING-50 User manual

RAB

RAB STRING-50 User manual

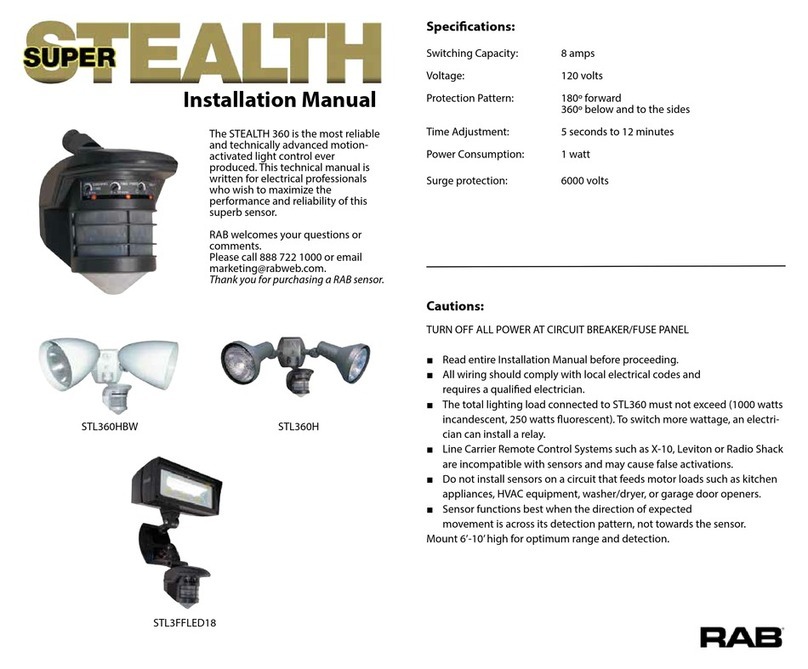
RAB STEALTH 360 User manual

RAB

RAB STEALTH 360 User manual

RAB EZPAN HE 1X4 User manual

RAB

RAB EZPAN HE 1X4 User manual

RAB STL360HB/L User manual

RAB

RAB STL360HB/L User manual

RAB STL200H/L User manual

RAB

RAB STL200H/L User manual

RAB HAZL34-40 User manual

RAB

RAB HAZL34-40 User manual

RAB T8 User manual

RAB

RAB T8 User manual

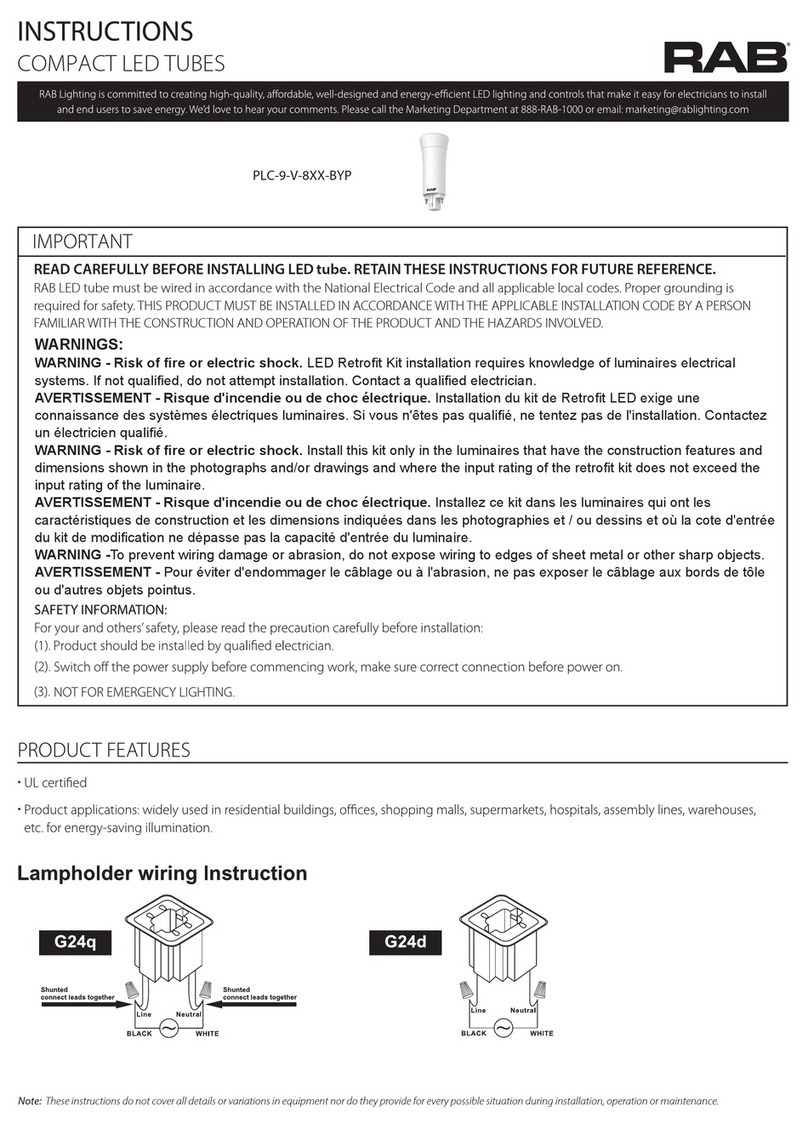
RAB PLC-9-V-8XX-BYP User manual

RAB

RAB PLC-9-V-8XX-BYP User manual

RAB LESLIE User manual

RAB

RAB LESLIE User manual

RAB X34 User manual

RAB

RAB X34 User manual

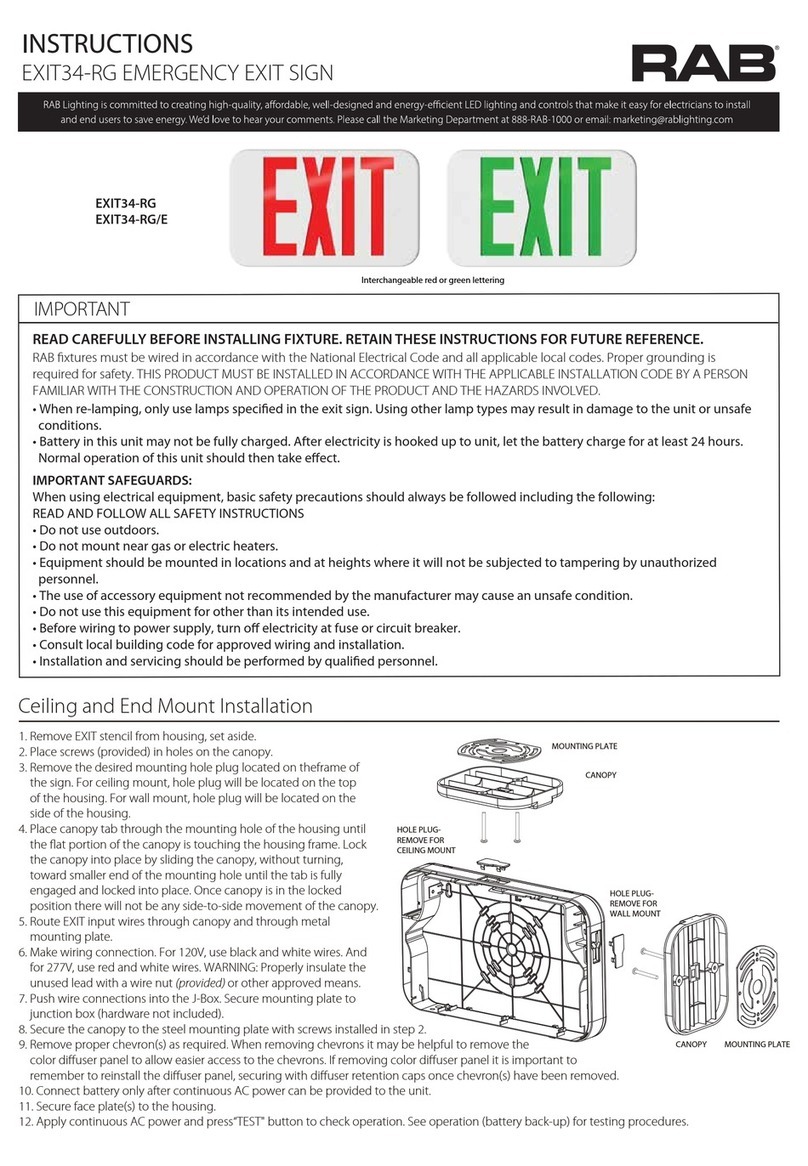
RAB EXIT34-RG User manual

RAB

RAB EXIT34-RG User manual

RAB EM User manual

RAB

RAB EM User manual

RAB FFLEDXS User manual

RAB

RAB FFLEDXS User manual

RAB STL110H/L User manual

RAB

RAB STL110H/L User manual

RAB FXLED User manual

RAB

RAB FXLED User manual

Popular Lighting Equipment manuals by other brands

Life 39.9F70020C quick start guide

Life

Life 39.9F70020C quick start guide

EuroLite LED ML-20 user manual

EuroLite

EuroLite LED ML-20 user manual

LIGMAN OD-50141 installation manual

LIGMAN

LIGMAN OD-50141 installation manual

Home Accents Holiday 1002461144 instructions

Home Accents Holiday

Home Accents Holiday 1002461144 instructions

Experia IRiS Ripple Light instruction manual

Experia

Experia IRiS Ripple Light instruction manual

Erco Gecko Mounting instructions

Erco

Erco Gecko Mounting instructions

Inter-lux ZTA.100.Surface Installation and maintenance instructions

Inter-lux

Inter-lux ZTA.100.Surface Installation and maintenance instructions

Whelen Engineering Company TN Series installation guide

Whelen Engineering Company

Whelen Engineering Company TN Series installation guide

IKEA BJÖRKSPIREA manual

IKEA

IKEA BJÖRKSPIREA manual

Toolland PM 6640 instruction manual

Toolland

Toolland PM 6640 instruction manual

GTD GTD-LP200 user manual

GTD

GTD GTD-LP200 user manual

LIVARNO home 1105-W-UK manual

LIVARNO home

LIVARNO home 1105-W-UK manual

ProLights EclPar IPMFC user manual

ProLights

ProLights EclPar IPMFC user manual

Velvet EVO Series user manual

Velvet

Velvet EVO Series user manual

IDTOLIGHT GENT installation instructions

IDTOLIGHT

IDTOLIGHT GENT installation instructions

MAYTONI S35 installation manual

MAYTONI

MAYTONI S35 installation manual

MaxLite MLFP14DP4535 user manual

MaxLite

MaxLite MLFP14DP4535 user manual

SLV Elektronik 550621 instruction manual

SLV Elektronik

SLV Elektronik 550621 instruction manual

manuals.online logo
manuals.online logoBrands
  • About & Mission
  • Contact us
  • Privacy Policy
  • Terms and Conditions

Copyright 2025 Manuals.Online. All Rights Reserved.

INSTRUCTIONS
GUS INSTALLATION



 LensHousing.
2. Remove Screws (2) Reector .
 ReectorNotches.
3. not supplied) through
Center Access HoleHousing


4. 
code.
5. 
Reector.
6. ReectorScrews (2).
 LensHousing
Lens
7. 
WARNING: To prevent wiring damage or abrasion, do not
expose wiring to edges of sharp objects.
GUS- 2FT
End Cap (2)
Housing
Lens
Reector
GUS - 4FT
Screw (2)
Snap
Squeeze
Lens
Housing
Notches (4)
Center Access Hole
Knock out for 1/2”
conduit
IMPORTANT
READ CAREFULLY BEFORE INSTALLING FIXTURE. RETAIN THESE INSTRUCTIONS FOR FUTURE REFERENCE.



WARNING: Make certain power is OFF before installing or maintaining xture. No user serviceable parts inside.




INSTRUCTIONS
GUS INSTALLATION




 Secure HousingHousing
Drill Locations
6 holes for 4ft fixture, 4 holes for 2ft fixture Use


2. 
End Cap (2)
Locknut
Center Access Hole
VHOOKGUSJR
Drill Locations


 Pendant (not
provided)

2. Pendant
electrical connections according to code.
3. Secure Housing to Pendant

Pendan

ordered separately as VHOOKGUSJR)
 Mount VHOOKGUSJR
2. Lens and Reector as

3. Center Access Hole.


1/2” Pendant

 
Lens.
2. (not supplied) through
Knock out HoleHousing
3. Remove Lens and Reector
4. 








INSTRUCTIONS
GUS INSTALLATION


 Remove End Caps2Housings
GUS JCAP (ordered separately).
2. Secure GUS JCAPScrews (3) and Nuts (3)
Fig. 6Housings.
3. Housings to


GUS JCAP
Screws (3)
Nuts (3)



  LINE s
 COMMON
lead.
3. Connect the GROUND 
 
 
 
PINK
LIGHT
FIXTURE
Vaux 12V
YELLOW
GROUND
GROUND
( - ) DIM V
( + ) DIM V
COMMON
LINE BLACK
WHITE
PURPLE
End Cap





CAUTION: Be sure xture temperature is cool enough to touch.
Do not clean or maintain while xture is energized.
 
2. 





Note: These instructions do not cover all details or variations in equipment nor do they provide for every possible situation during installation, operation
or maintenance.
INSTRUCTIONS
GUS INSTALLATION


WIRING 


Note: These instructions do not cover all details or variations in
equipment nor do they provide for every possible situation during
installation, operation or maintenance.
LIGHT
FIXTURE
INSIDE FIXTURE
BATTERY
Pink/DIM–
Black/Switched Line
Green/Ground
White/Neutral
Black/Unswitched Line
Purple/DIM+
BACKUP
DRIVER
BATTERY
CONNECTOR:
CONNECT
ONLY AFTER
AC SUPPLY
POWER IS
CONNECTED

GUS-IN-1122 RAB WARRANTY: RAB’s warranty is subject to all terms and conditions found at rablighting.com/warranty.
Easy Answers
rablighting.com
Visit our website for product info
Tech Help Line
Call our experts: 888 722-1000
e-mail
Answered promptly - sales@rablighting.com
Free Lighting Layouts
Answered online or by request
© 2022 RAB LIGHTING Inc.

CAUTION: FOR BATTERY BACKUP FIXTURE.
BATTERY. 

BATTERY
(Fig. 8).
NOTE: Make sure that the necessary branch circuit wiring is available.
An UNSWITCHED AC source of power is required. The emergency driver
must be fed from the same branch circuit as the LED driver.
CAUTION: Do not use any supply voltage other than 120-277V
50/60 HZ.
 Connect UNSWITCHED HOT HOT AC
line.
2. UNSWITCHED circuit, connect UNSWITCHED and
SWITCHED lines together.
3. SWITCHED circuit, connect SWITCHED HOT AC
4. DIMDIM
leads to dimming connections.
5. 
6. AC power
and connect the BATTERY.
7. Charging
Indicator Light
charging.
 Once the BATTERY

9. 

 
is illuminated, indicating that the BATTERY
charged.
Note: The charging indicator light and test switch are
located on the LED tray below the lens.
2. 
(internal battery)


3. 
automatically returns to charging mode.
 
2. 






 

2. 

3. 


73372-RAB