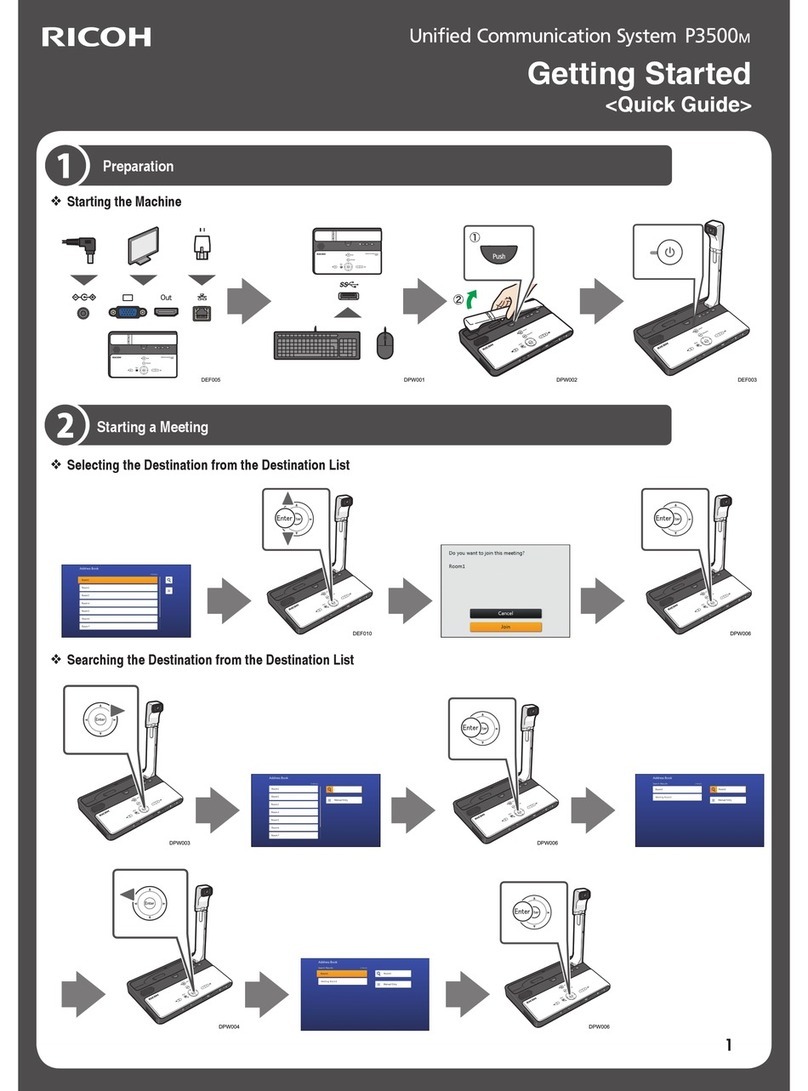
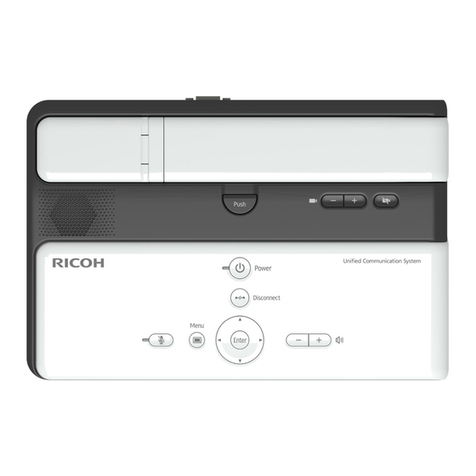
Ricoh P3500 User manual

P3500
Quick Start Guide

Contents
1. Connecvity............................................................................................................................................... 3
A. Front View ........................................................................................................................................... 3
B. Rear View............................................................................................................................................. 3
2. Funcons and Controls.............................................................................................................................. 4
3. Seng up the P3500 ................................................................................................................................. 5
4. P3500 Displays........................................................................................................................................... 6
A. Main Screen layout............................................................................................................................. 6
B. Meeng Screen.................................................................................................................................... 7
5. Configuring the P3500............................................................................................................................... 8
A. Connecng to the Web Portal ............................................................................................................. 8
B. Device Sengs..................................................................................................................................... 8
C. Address Book ......................................................................................................................................... 9
A. Registering a new Contact................................................................................................................... 10
B. Accepng a Registraon Request........................................................................................................ 11
1. From Web .................................................................................................................................... 11
2. From P3500.................................................................................................................................. 12
D. Firmware Updates ............................................................................................................................... 12
6. Using the P3500 ........................................................................................................................................ 13
A. Starng a Meeng ............................................................................................................................... 13
B. Changing Screen layout ....................................................................................................................... 14
C. Screen Share ....................................................................................................................................... 14
1. Installing PC Driver...................................................................................................................... 14
2. Screen Share from PC .................................................................................................................. 15
3.Screen Share from MAC ............................................................................................................... 16
4. Starng Screen Share PC and MAC.............................................................................................. 17
9/2015 V. Jacksier

1.Connecvity
3
HDMI in
Camera
HDMI out
Display
Power in
VGA Display
Out
Network in
B.RearView
A.FrontView
1 4
2 3
1. 3.5mm Audio out for headphones
2. 3.5mm Audio in for microphone
3. Two USB 3.0 outputs for Speaker, Microphone or USB camera
4. USB 3.0 input for Computer screen share
Externaldevices
If required you can connect external speakers, microphones and cameras to expand the funconality of the P3500.

2.FunconsandControls
4
There are two ways to control the P3500. First is by using the buons on the P3500, and secondly, using the remote control.
1. Controls on the P3500
1. PushKey‐Press to release the camera arm from the locked posion.
2. ZoomKeys‐Press the "+" or "‐" keys to increase or decrease the displayed image size
3. Cameraoffkey‐Turns offthe camera during a video conference. A black screen is displayed
4. PowerKey‐Turns power to the unit ON and OFF.
5. DisconnectKey‐Press this key to end a video conference.
6. MuteKey‐Press once to temporarily disable audio input at the device. Press again to re‐enable audio capabilies. Mute status
displayed on screen
7. MenuKey‐Switches between the default Contact list screen and the Main Menu screen
8. ArrowKeys‐This circle of four keys is used to move the cursor up, down, le, and right when entering data. The leand right
arrow keys are also used to switch between screen layouts during a meeng.
9. EnterKey‐Press to enter a menu, or confirm a seng or value that is highlighted on the screen. Press to connect with an incom‐
ing video conference.
10. SpeakerVolume‐Use the "–" and "+" keys to adjust speaker volume.
1 2 3
4
5
6 7
8
9
10
7
5 4
9 8
2 3
10
6

3.SengUptheP3500
A.Setup
Connect the AC Adapter and power cable to the unit and an AC outlet.
Press the Push key to release the camera arm and raise it to the desired height.
The arm has a 135° swing radius. Users will feel stops at 45°, 90°, and 135°.
2. The camera head itself can swivel 270° horizontally (from ‐
90° clockwise to +180° counterclockwise) so users can orient and fine‐tune the view direcon without moving the enre unit.
It also can be lted forwards or backwards 45°. This versality allows users to point the camera at the tabletop to display
documents and small objects, or even skyward.
3. Connect the UCS P3500 to the network and press the Power key to start the unit.
5

4.P3500Displays
A.P3500MainScreen
The P3500 screen displays your contact list and status as well as your Name and CID.
If there is an available firmware update, contact request or service noce, it will be displayed at the boom of the screen.
6
Your CID and Name
A green checkbox denotes that a contact is on‐line and ready for a call
A Blue “plus” sign denotes that a contact is on‐line and in a call
A Grey “X” denotes that a contact id off‐line

4.P3500Displays
B.TheP3500MeengScreen
When you are in a meeng the following informaon will be displayed.
7
Your CID # Number in meeng Time of meeng Bandwidth being used
Download / Upload
While in a meeng you can use the arrow keys to change the display to seven different views.
1. Other party full screen
2. Full screen of local device
3. Picture in Picture mode (Full screen of other locaon, small local window)
4. Picture and Picture ‐Up to nine locaons on a screen
5. Mulview ‐Large window surrounded by smaller windows. Large window is speaker’s locaon
6. Screen share full screen
7. Screen share surrounded by parcipants

5.ConfiguringtheP3500
A.ConnecngtotheWebPortal
Before using the P3500 it is important to connect to the web portal and configure the device and create your address book.
1. Connecng to the Web Portal
Using a computer browser, log on to HTTPS://UCS.Ricoh.com/ul/login
B.DeviceSengs
2. Naming Your Device and Changing your Password
Click on Device Sengs
In the Name box, enter the name you wish to
have your device idenfied in other address books.
To change your default password (recommended)
enter the current password and then your new password
Click Save when complete
8
Your password is case sensive.
The Login is your CID (Contact ID)
Your inial Password is the P3500’s Serial
Number
Click the Login buon to access your
Unified Communicaon System portal.

5.ConfiguringtheP3500
C.AddressBook
The Address Book is where your contact list for the P3500 is managed. From the “Address Book”, you can add new P3500 devices/
locaons, edit exing lisngs, send registraon requests, and accept or decline parcipaon invitaons from other P3500 contacts.
9

5.ConfiguringtheP3500
1.RegisteringaNewContactintheAddressBook
To Register a new contact:
1. Click the “Address Book” buon, and click the “Register Contact” buon.
2. Enter the Contact ID and name of the P3500
contact you want to add to your Address
Book. Note: The Contact ID and Name will be
provided to you by that user.
3. Click the “Send Request” buon.
When the “Send Request” buon is clicked, a
registraon request is sent to the contact for
acceptance. Your status is “Waing for
Acceptance.”
Note: When the contact accepts the request, your Address Book will be updated and add the contact to the list.
10

5.ConfiguringtheP3500
1.AccepngaRegistraonRequestfromOtherContacts
ToAcceptaRequestfromtheWeb
1) Go to “Address Book”.
2) Click the “Accept” buon from the Registraon Request area.
3) You can either accept the other’s default name or type in the name of contact.
4) click the “Accept” buon.
1.
11

5.ConfiguringtheP3500
2. To Accept a Request from the Device
ToAcceptaRequestfromtheP3500
You can also accept the registraon request from the ‘Menu’ on the P3500 device by clicking on the Registraon Request List and
then selecng Accept.
D. Firmware Update
If there is an updated version of firmware, the message will show up in “Firmware Update”.
1. Select Menu
2. Select Configuraons
3. Scroll down and select Firmware Update
4. Select Update.
12

6.UsingtheP3500
A. Start a Meeting
Once your P3500 is setup and configured, it’s easy to use it. To start a meeng:
1. Power the P3500 on.
2. Click the “Push” buon on the P3500 to release the camera, and posion it for opmal viewing.
3. Select your contact using the navigaon arrow buons, and select “Enter”. You will be connected as soon as the other
parcipant accepts your meeng invitaon.
Start connecon screen will be displayed and you can either select an open Meeng (Connect) or a private meeng
• If someone else iniates a call, accept the meeng invitaon by pressing “Enter” buon. 13
StarngaPrivateMeeng
1. Select “Connect as Private Meeng”
2. Enter a meeng code that you shared
with aendees prior to meeng.
3. Select connect

6.UsingtheP3500
B. Changing Screen Layout
You can use the arrow buons to move the images around the monitor for preferred viewing.
In addion, when the PC Screen Share is used and displayed on the monitor, it can also be changed along with camera images. The
size of the PC Screen Share or each displayed image can also be enlarged or reduced.
C. PC Screen Share (Windows 7 and Windows 8.x)
The PC Screen Share feature allows you to display and share your computer screen with connected users. It also displays the
camera image, so users can see your screen and parcipants. The PC Screen Share needs to setup prior to using it.
1. install the PC Screen Share driver:
1. Aach your computer to the P3500 using the USB 3 cable included with your package.
2. Open a window to display you’re My computer components.
3. Right click on the PC Screen Share opon.
4. Select the 32 or 64 bit driver. (The driver is based on your PC and
operang system).
Follow the steps to complete the installaon
14

6.UsingtheP3500
2. Using the Screen Share Application
The P3500 comes with a USB 3 cable to connect your computer to the P3500 to share out your computer screen.
1. The first me you use the Screen share, you need to install the screen share driver
To install the PC Screen Share driver:
a. Aach your computer to the P3500 using the USB 3 cable included with your package.
b. Open a window to display you’re My computer components.
c. Right click on the PC Screen Share opon.
d. Select the 32 or 64 bit driver. (The driver is based on your PC and operang system).
Follow the steps to complete the installaon
1. Starting the Screen Share Application (Windows)
There are two ways to launch the Screen Share applicaon
Aer starng a video call, Click the Start Sharing buon that appears on your screen.
Your screen will display on the monitor and can be viewed by contacts.
15
1. Connect the P3500 to your computer
with the provided USB cable and select
“Start PC Screen Share.
1. Open a window to display you’re My computer
components.
2. Navigate to the app directory
3. Launch ScreenSender.exe
Start a Share End a Share

6.UsingtheP3500
2. Starting the Screen Share Application (MAC)
There are two ways to launch the Screen Share applicaon
D. Screen Share (Mac)
1. Connect the USB 3 cable to the Mac.
2. Open the drive and select the MAC directory
16
A. Launch Screen Share App
B. Starng the Screen Share Applicaon in
Macintosh
C. To end a meeng, press
the disconnect buon.

6.UsingtheP3500
3. Starting a PC Screen Share
When in a call, click the Start Sharing buon that appears on your screen.
Your screen will display on the monitor and can be viewed by contacts.
Click the Stop Sharing once completed
17

Other manuals for P3500
2
Table of contents
Other Ricoh Conference System manuals

Ricoh
Ricoh P3000 User manual

Ricoh
Ricoh Meeting 360 V2 User manual

Ricoh
Ricoh P3500M User manual

Ricoh
Ricoh P3500 User manual

Ricoh
Ricoh P3000 User manual

Ricoh
Ricoh G5000H User manual

Ricoh
Ricoh P3500M User manual

Ricoh
Ricoh P3000 User manual

Ricoh
Ricoh Meeting 360 V1 User manual

Ricoh
Ricoh P3500 Quick start guide