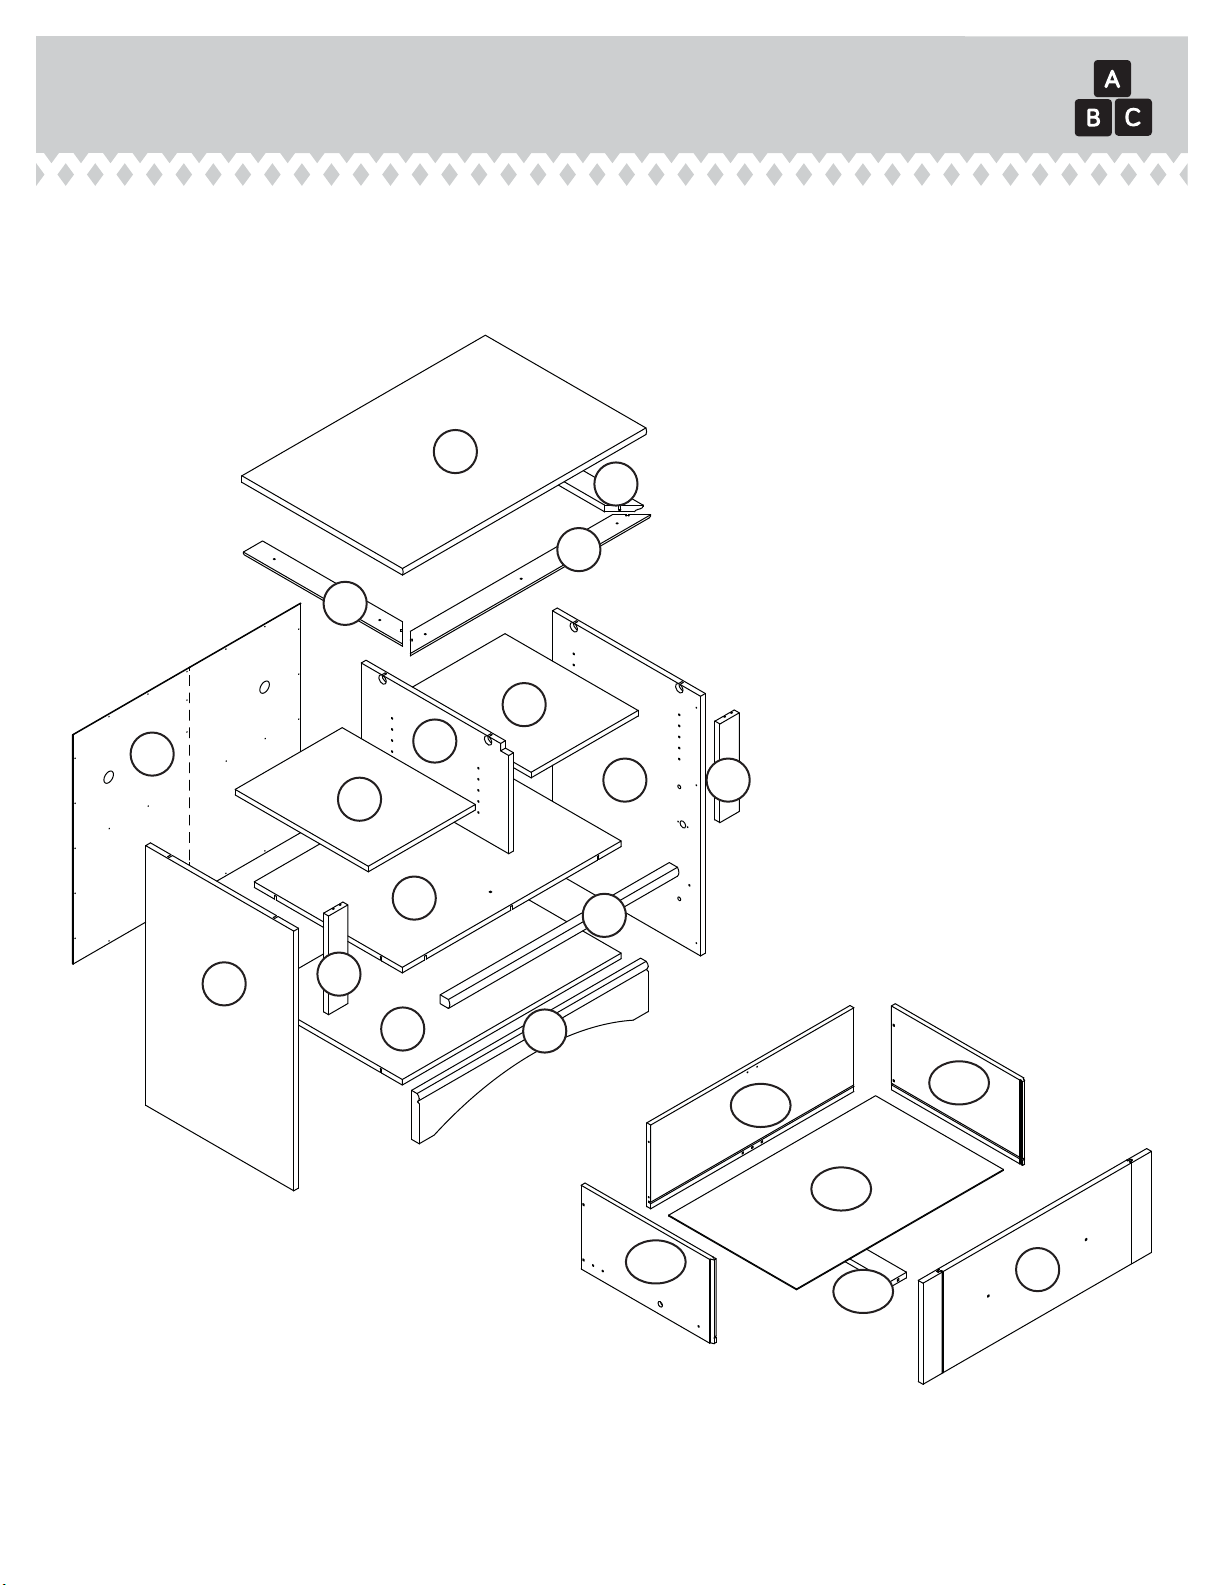
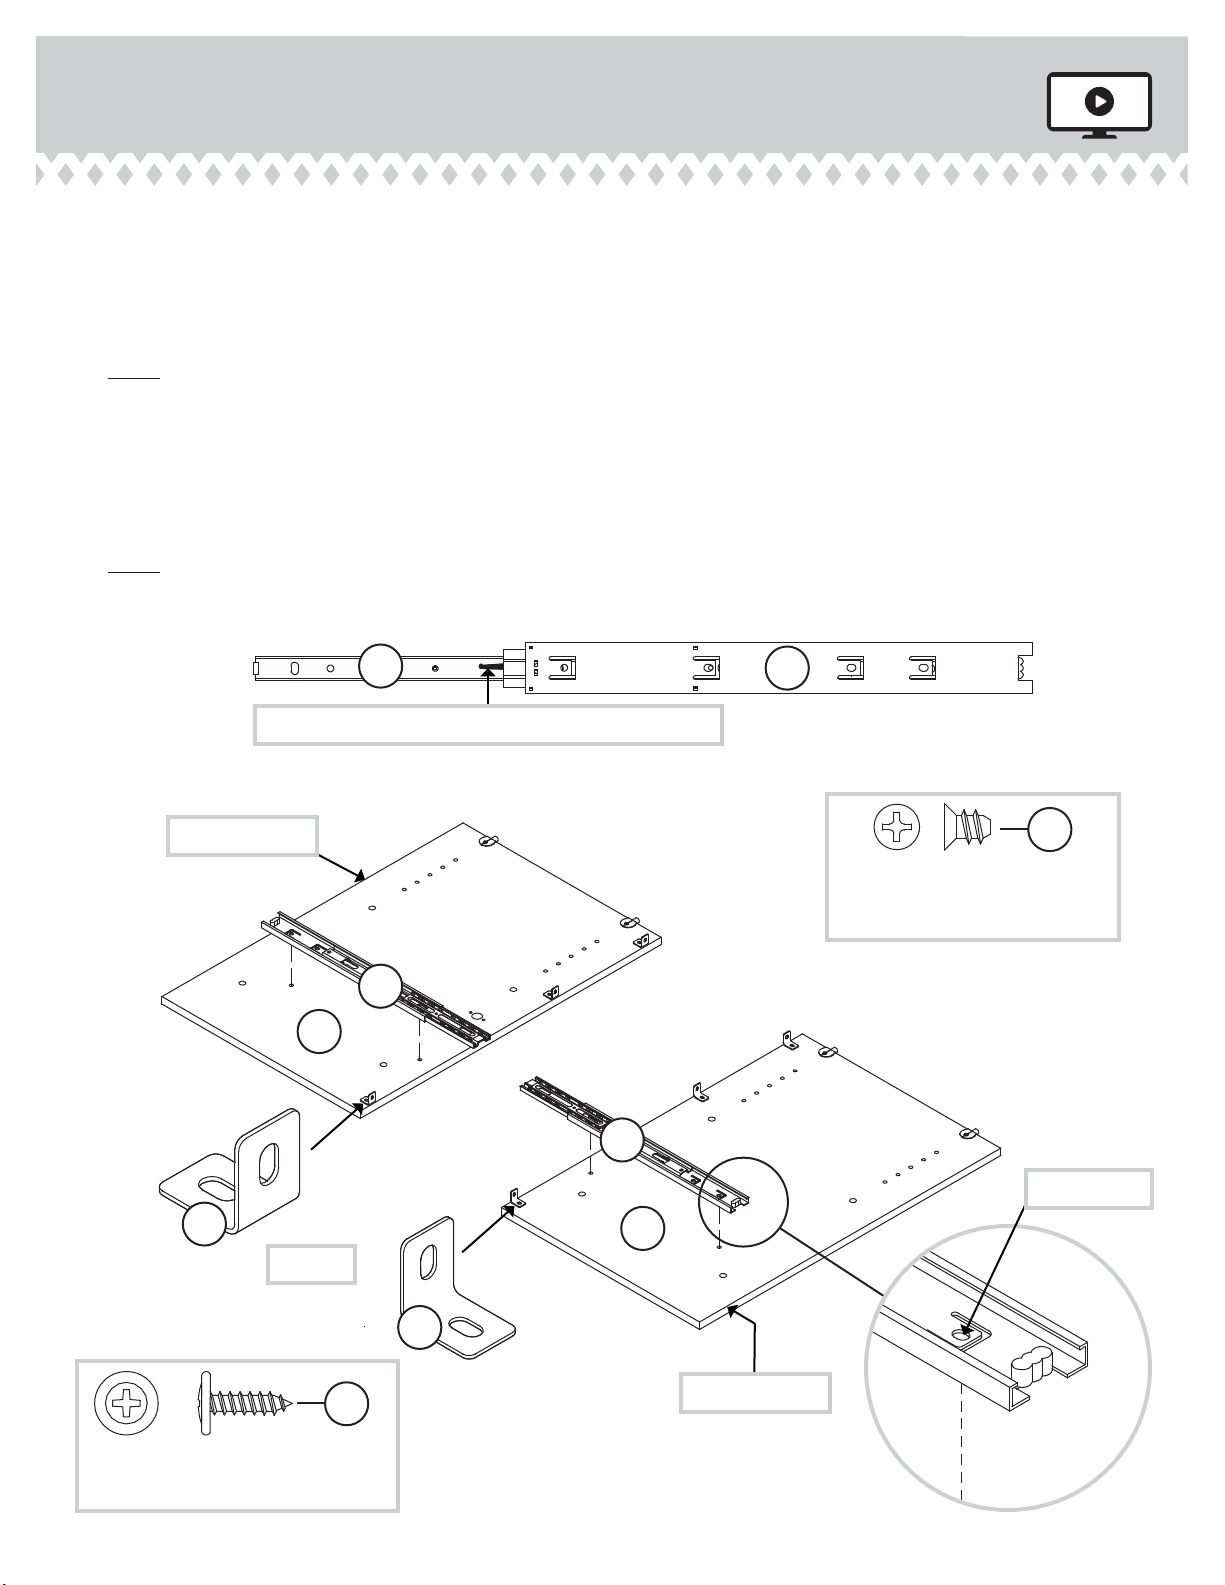
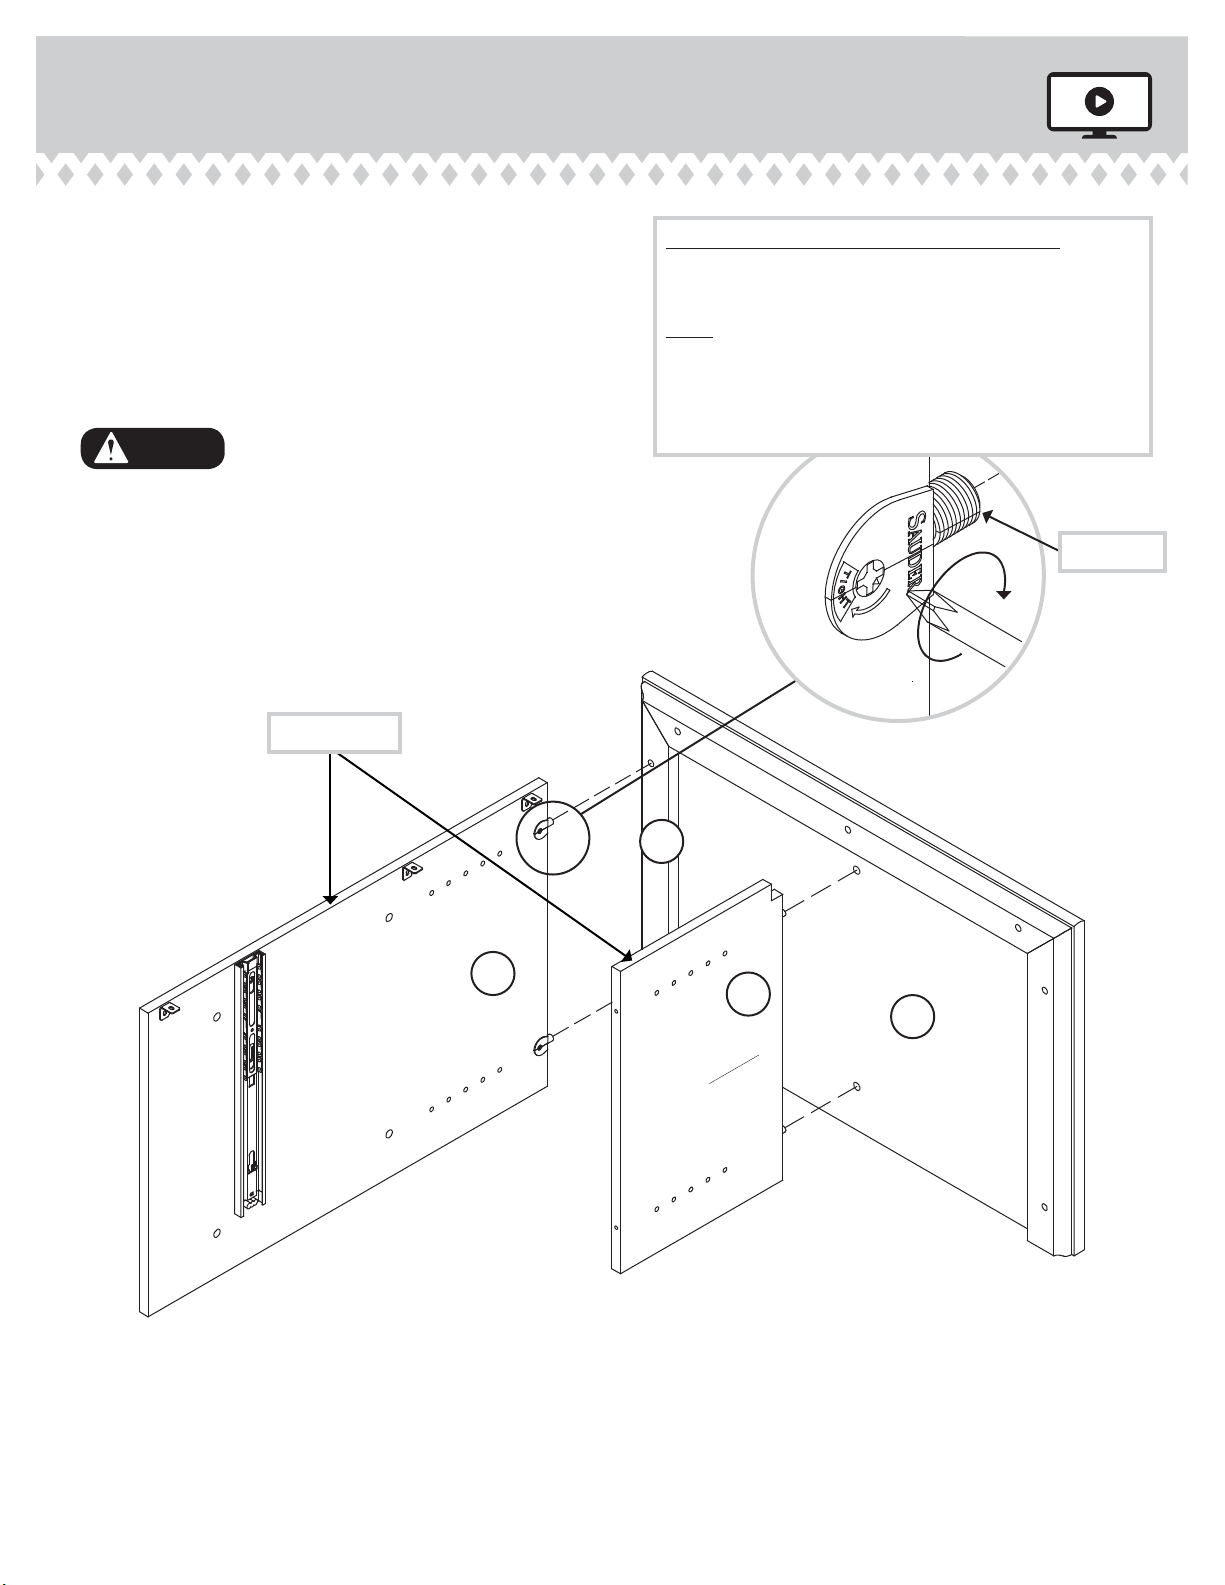
Sauder Harbor View 158002 User manual
Other Sauder Indoor Furnishing manuals

Sauder
Sauder Clifford Place 429501 User manual

Sauder
Sauder Aspen Post 427015 User manual

Sauder
Sauder Carson Forge 419575 User manual

Sauder
Sauder Worksense BERGEN CIRCLE 426288 User manual

Sauder
Sauder 414129 User manual

Sauder
Sauder 409937 User manual

Sauder
Sauder Via 419613 User manual

Sauder
Sauder 420612 User manual

Sauder
Sauder 401323 User manual

Sauder
Sauder 414817 User manual

Sauder
Sauder 402375 User manual

Sauder
Sauder 403785 User manual

Sauder
Sauder Harbor View 414942 User manual

Sauder
Sauder 408726 User manual

Sauder
Sauder Primary Street 418388 User manual

Sauder
Sauder worksense PALO ALTO 427795 User manual

Sauder
Sauder Hutch 404975 User manual

Sauder
Sauder Carson Forge Armoire User manual

Sauder
Sauder Costa 428193 User manual

Sauder
Sauder 423392 User manual


Popular Indoor Furnishing manuals by other brands

Regency
Regency LWMS3015 Assembly instructions

Furniture of America
Furniture of America CM7751C Assembly instructions

Safavieh Furniture
Safavieh Furniture Estella CNS5731 manual

PLACES OF STYLE
PLACES OF STYLE Ovalfuss Assembly instruction

Trasman
Trasman 1138 Bo1 Assembly manual

Costway
Costway JV10856 manual