manuals.online logo
Brands
  1. Home
  2. •
  3. Brands
  4. •
  5. Sauder
  6. •
  7. Indoor Furnishing
  8. •
  9. Sauder 402375 User manual

Sauder 402375 User manual

PLEASE CONTACT US
BEFORE RETURNING
YOUR UNIT TO THE STORE
1-800-523-3987
www.sauder.com
Made in the USA
Archbold, OH
NOTE: THIS INSTRUCTION BOOKLET CONTAINS
IMPORTANT SAFETY INFORMATION.
PLEASE READ AND KEEP FOR FUTURE REFERENCE.
Lot #: 345251 05 / 02 / 12
Date Purchased: ____________________
English.................... Page 1-22
Français...............Pages 23-25
Espanol.............Páginas 26-28
402375
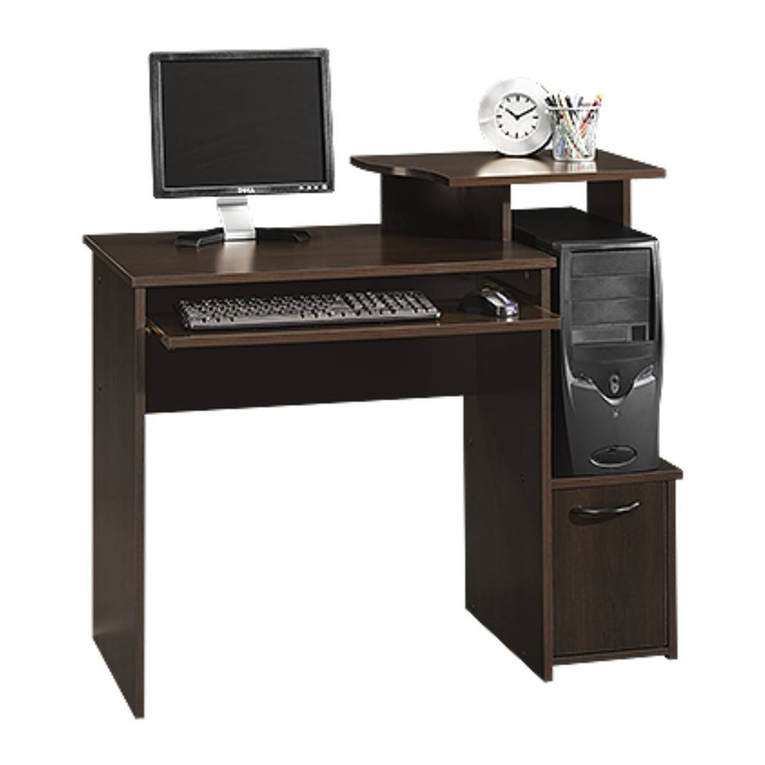
Computer Desk
ASSEMBLY TOOLS REQUIRED
Hammer
No. 2 Phillips Screwdriver
Tip Shown Actual Size
TABLE OF CONTENTS
Part Identification...................2-3
Hardware Identification .........4-5
Assembly Steps....................6-22
Français..............................23-25
Espanol...............................26-28
Safety .................................29-30
Warranty...................................31
A2 RIGHT END 1
B LEFT END 1
C2 RIGHT UPRIGHT 1
D LEFT UPRIGHT 1
E TOP 1
F MODESTY PANEL 1
G2 RIGHT BOTTOM 1
H LEFT BOTTOM 1
I RIGHT BACK 1
J LEFT BACK 1
K ADJUSTABLE SHELF 1
L KEYBOARD SHELF 1
M DOOR 1
N LARGE DRAWER FRONT 1
D227 LARGE DRAWER BACK 1
D232 LARGE DRAWER SIDE 2
D793 LARGE DRAWER BOTTOM 1
R SMALL DRAWER FRONT 1
D230 SMALL DRAWER BACK 1
D231 SMALL DRAWER SIDE 2
D792 SMALL DRAWER BOTTOM 1
V2 RIGHT BASE 1
W LEFT BASE 1
PART IDENTIFICATION: While not all parts are labeled, some of the parts will have a label or an inked
letter on the edge to help distinguish similar parts from each other. Use this PART IDENTIFICATION to help
identify similar parts.
Page 2 www.sauder.com/services 402375
PART IDENTIFICATION
A2
B
C2
D
E
F
G2
H
I
J
K
L
M
N
R
V2
W
14-1/8"
13-1/2"
Page 3
www.sauder.com/services402375
D232
D230
D793
D792
D227
D231
D231
D232
HARDWARE IDENTIFICATION
35DA CABINET RIGHT - 1 35DD DRAWER LEFT - 1
35DC DRAWER RIGHT - 1
35DB CABINET LEFT - 1
35AW CABINET RIGHT - 1 35AZ DRAWER LEFT - 1
35AY DRAWER RIGHT - 1
35AX CABINET LEFT - 1
45BA CABINET RIGHT - 1 45BD DRAWER LEFT - 1
45BC DRAWER RIGHT - 1
45BB CABINET LEFT - 1
Page 4 www.sauder.com/services 402375
FILE GLIDE - 2
JJ FILE ROD - 2
KK ANGLE BRACKET - 8
LL
HIDDEN CAM - 16
MM2
CAM DOWEL - 16
NN2 CORD CLIP - 1
OO
HARDWARE IDENTIFICATION
Screws are shown actual size. You may receive extra hardware with your unit.
Page 5
www.sauder.com/services402375
HINGE BRACKET - 2
PP HINGE - 2
QQ BACKPLATE - 3
RR PULL - 3
SS
LARGE DRAWER
FRONT BRACKET - 2
TT SMALL DRAWER
FRONT BRACKET - 1
UU GROMMET - 1
VV GROMMET CAP - 1
WW
FELT DISC CARD - 1
XX METAL PIN - 4
YY RUBBER SLEEVE - 4
ZZ
BLACK 1-7/8" FLAT HEAD SCREW - 4
AAA BROWN 1" FLAT HEAD SCREW - 4
BBB
BLACK 9/16" LARGE HEAD SCREW - 20
DDD
BLACK 1/2" FLAT HEAD SCREW - 4
EEE BROWN 7/16" LARGE HEAD SCREW - 4
FFF
GOLD 5/16" FLAT HEAD SCREW - 20
GGG NAIL - 29
HHH
GOLD 1" MACHINE SCREW - 3
III
1
1
S
t
e
p
Look for this icon. It means a video
assembly tip is available at:
www.sauder.com/services/tips
Assemble your unit on a carpeted floor or on the empty carton to avoid scratching your unit or the floor.
Push sixteen HIDDEN CAMS (MM2) into the ENDS (A2 and B), UPRIGHTS (C2 and D), and BOTTOMS (G2 and H). Then, insert
the metal end of a CAM DOWEL (NN2) into each HIDDEN CAM.
Page 6 www.sauder.com/services 402375
Do not tighten the HIDDEN CAMS in this step.
(16 used)
Insert the metal end of the CAM
DOWEL into the HIDDEN CAM.
Arrow
A2
B
C2
D
G2
H
Arrow
MM2
NN2
Fasten the CABINET RIGHTS (35AW, 35DA, and 45BA) and CABINET LEFTS (35AX, 35DB and 45BB) to the RIGHT
END (A2) and UPRIGHTS (C2 and D). Use twelve GOLD 5/16” FLAT HEAD SCREWS (GGG).
2
2
S
t
e
p
Page 7
www.sauder.com/services402375
GOLD 5/16" FLAT HEAD SCREW
(12 used in this step)
GGG
Roller end
Roller end
Roller end
Roller end
A2
D
C2
Fasten the ENDS (A2 and B) and UPRIGHTS (C2 and D) to the BOTTOMS (G2 and H). Tighten eight HIDDEN CAMS.
3
3
S
t
e
p
Page 8 www.sauder.com/services 402375
A2
D
C2
BH
G2
Roller end
Roller end
This hole must be here.
Do not stand the unit upright without the
BACK fastened. The unit may collapse.
Caution
Caution
Risk of damage or
injury. Hidden Cams
must be completely
tightened. Hidden
Cams that are not
completely tightened
may loosen, and parts
may separate.
To completely tighten:
Start Tighten
Arrow
Arrow
Maximum
210 degrees
Minimum
190 degrees
Fasten six ANGLE BRACKETS (LL) to the ENDS (A2 and B), UPRIGHTS (C2 and D), and BOTTOMS (G2 and H). Use six
BLACK 9/16” LARGE HEAD SCREWS (DDD).
NOTE: Be sure the edges of the ANGLE BRACKETS are even with the edges of the ENDS, UPRIGHTS, and BOTTOMS.
Fasten the BASES (V2 and W) to the ENDS (A2 and B), UPRIGHTS (C2 and D), and BOTTOMS (G2 and H). Use six BLACK
9/16” LARGE HEAD SCREWS (DDD).
4
4
S
t
e
p
Page 9
www.sauder.com/services402375
BLACK 9/16" LARGE HEAD SCREW
(12 used for the ANGLE BRACKETS)
DDD
A2
C2 G2
D
BH
W
V2
LL
LL
LL
Make equal margins along all four edges of the BACKS (I and J). Push on opposite corners of your unit if needed to make it “square”.
Fasten the BACKS (I and J) to your unit using the NAILS (HHH).
NOTE: Be sure to tap NAILS into the holes that line up over the BOTTOMS (G2 and H).
5
5
S
t
e
p
Page 10 www.sauder.com/services 402375
Do not stand the unit upright without the
BACK fastened. The unit may collapse.
Caution
These holes must line up
over the BOTTOM (G2).
NAIL
(29 used in this step)
HHH
Finished
surface
Finished
surface
G2
H
J
I
These edges
should be even.
These holes must line up
over the BOTTOM (H).
Fasten the ENDS (A2 and B) and UPRIGHTS (C2 and D) to the TOP (E). Tighten eight HIDDEN CAMS.
Fasten the MODESTY PANEL (F) to the UPRIGHTS (C2 and D). Use four BLACK 1- 7/8” FLAT HEAD SCREWS (AAA).
Now, fasten two ANGLE BRACKETS (LL) to the TOP (E) and MODESTY PANEL (F). Use four BROWN 7/16” LARGE HEAD
SCREWS (FFF).
6
6
S
t
e
p
Page 11
www.sauder.com/services402375
A2
C2 F
DB
E
LL
This hole must
be here.
BLACK 1-7/8" FLAT HEAD SCREW
(4 used for the MODESTY PANEL)
AAA
BROWN 7/16" LARGE HEAD SCREW
(4 used for the ANGLE BRACKETS)
FFF
Maximum
210 degrees
Minimum
190 degrees
Arrow
Fasten the DRAWER RIGHT (35AY) and DRAWER LEFT (35AZ) to the KEYBOARD SHELF (L). Use four BROWN 1” FLAT
HEAD SCREWS (BBB).
Turn the CORD CLIP (OO) into the KEYBOARD SHELF (L).
NOTE: The CORD CLIP is used to hold your keyboard cord against the KEYBOARD SHELF.
7
7
S
t
e
p
Page 12 www.sauder.com/services 402375
L
Finished surface
Roller end
Roller end
OO
Finished edge
BROWN 1" FLAT HEAD SCREW
(4 used in this step)
BBB
Carefully stand your unit upright.
To insert the KEYBOARD SHELF (L) into your unit, tip the front of the KEYBOARD SHELF down and drop the rollers on the
KEYBOARD SHELF behind the rollers on the unit. Lift the front of the KEYBOARD SHELF up and slide it into the unit.
8
8
S
t
e
p
Page 13
www.sauder.com/services402375
L
To separate the HINGES (QQ) from the HINGE BRACKETS (PP), turn the mounting screw counter- clockwise and the adjusting
screw clockwise. Follow the diagram closely.
Fasten two HINGES (QQ) to the DOOR (M). Use four BLACK 1/2” FLAT HEAD SCREWS (EEE).
9
9
S
t
e
p
Page 14 www.sauder.com/services 402375
M
QQ
Mounting
screw
Adjusting
screw
(vertical adjustment)
BLACK 1/2" FLAT HEAD SCREW
(4 used in this step)
EEE
QQ
10
10
S
t
e
p
Page 15
www.sauder.com/services402375
Fasten two HINGE BRACKETS (PP) to the LEFT END (B). Use the screws in the HINGE BRACKETS.
PP
B
Fasten the DOOR (M) to the LEFT END (B). Slide the HINGES (QQ) onto the HINGE BRACKETS on the LEFT END. Secure the
DOOR with the mounting screw on the HINGE BRACKET. See the next step for adjustments.
Peel the FELT DISC from the FELT DISC CARD (XX). Stick a FELT DISC on the DOOR where it comes in contact with the
UPRIGHT (D).
Fasten a BACKPLATE (RR) and PULL (SS) to the DOOR (M). Use a GOLD 1” MACHINE SCREW (III).
11
11
S
t
e
p
Page 16 www.sauder.com/services 402375
B
M
XX
XX
RR +SS
GOLD 1" MACHINE SCREW
(1 used for the BACKPLATE and PULL)
III
Refer to the enlarged diagram to identify the parts on the HINGES and HINGE BRACKETS.
The DOOR may need some adjustments. Follow the text below to make needed adjustments.
DOOR ADJUSTMENTS:
To adjust the DOOR from side to side (horizontal), loosen the mounting screw several turns, then turn the adjusting screw in or out.
Tighten the mounting screw after making adjustments.
To adjust the DOOR up and down (vertical), loosen both screws that fasten the HINGE BRACKETS to the END. Move the DOOR
up or down to the desired location. Tighten the screws after making adjustments.
To adjust the DOOR in or out (depth), loosen the mounting screw one turn and move the DOOR in or out, as needed. Tighten the
mounting screw after making adjustments.
12
12
S
t
e
p
Page 17
www.sauder.com/services402375
Mounting screw
(depth))
Adjusting screw
(horizontal)
(vertical adjustment)
Slide the DRAWER SIDES (D232) onto the DRAWER BACK (D227).
Slide the DRAWER BOTTOM (D793) into the grooves in the DRAWER SIDES and DRAWER BACK.
Pull the DRAWER FRONT BRACKETS (TT) apart and slide them into the grooves in the DRAWER SIDES (D232).
Fasten the DRAWER FRONT (N) to the DRAWER FRONT BRACKETS. Use eight BLACK 9/16” LARGE HEAD
SCREWS (DDD).
Repeat this step for the small drawer using the SMALL DRAWER FRONT (R), SMALL DRAWER BACK (D230),
SMALL DRAWER SIDES (D231), SMALL DRAWER BOTTOM (D792), and SMALL DRAWER FRONT BRACKETS (UU).
13
13
S
t
e
p
Page 18 www.sauder.com/services 402375
BLACK 9/16" LARGE HEAD SCREW
(8 used for the DRAWER FRONTS)
DDD
14-1/8"
N
TT
Finished surface
Slide the SIDES down.
Groove
Tap down with your screwdriver and hammer.
D232
D793
D227
D232
D232
D227
D232
D793 D232
D232
D232
Fasten the DRAWER RIGHT (45BC) and DRAWER LEFT (45BD) to the DRAWER SIDES (D232). Use four GOLD 5/16” FLAT
HEAD SCREWS (GGG) through holes #2 and #4.
Repeat this step for the small drawer using holes #1 and #3 on the DRAWER RIGHT (35DC) and DRAWER LEFT (35DD).
14
14
S
t
e
p
Page 19
www.sauder.com/services402375
GOLD 5/16" FLAT HEAD SCREW
(8 used in this step)
GGG
Roller end
Roller end
3
4
1
2
3
4
1
2
D232
D232
Push a FILE GLIDE (JJ) onto the DRAWER SIDE (D232).
Slide the FILE RODS (KK) into the FILE GLIDE (JJ) on the DRAWER SIDE.
Slide another FILE GLIDE (JJ) onto the other end of the FILE RODS (KK), then press this FILE GLIDE over the other
DRAWER SIDE (D232).
15
15
S
t
e
p
Page 20 www.sauder.com/services 402375
Insert the FILE RODS into the holes of your choice
in the FILE GLIDES, depending on your file sizes.
KK
JJ
JJ
D232
D232

Other manuals for 402375

1

Other Sauder Indoor Furnishing manuals
Sauder North Avenue 422313 User manual

Sauder

Sauder North Avenue 422313 User manual

Sauder Office Works Affirm 431916 User manual

Sauder

Sauder Office Works Affirm 431916 User manual

Sauder Boulevard Cafe 422355 User manual

Sauder

Sauder Boulevard Cafe 422355 User manual

Sauder 410367 User manual

Sauder

Sauder 410367 User manual

Sauder Costa 428728 User manual

Sauder

Sauder Costa 428728 User manual

Sauder Palladia 411861 User manual

Sauder

Sauder Palladia 411861 User manual

Sauder The Edge Water 409045 User manual

Sauder

Sauder The Edge Water 409045 User manual

Sauder Barrister Lane Storage Credenza 414721 User manual

Sauder

Sauder Barrister Lane Storage Credenza 414721 User manual

Sauder Radial 426023 User manual

Sauder

Sauder Radial 426023 User manual

Sauder Shoal Creek 420272 User manual

Sauder

Sauder Shoal Creek 420272 User manual

Sauder Harvest Mill 404961 User manual

Sauder

Sauder Harvest Mill 404961 User manual

Sauder 2-Door Wardrobe/Armoire Clothes Storage Cabinet With Hanger Rod & Shelves... User manual

Sauder

Sauder 2-Door Wardrobe/Armoire Clothes Storage Cabinet With Hanger Rod & Shelves... User manual

Sauder 411985 User manual

Sauder

Sauder 411985 User manual

Sauder Carson Forge 416967 User manual

Sauder

Sauder Carson Forge 416967 User manual

Sauder Whitaker Point 429366 User manual

Sauder

Sauder Whitaker Point 429366 User manual

Sauder Hammond 428247 User manual

Sauder

Sauder Hammond 428247 User manual

Sauder HomePlus 422428 User manual

Sauder

Sauder HomePlus 422428 User manual

Sauder Harbor View Library with Doors User manual

Sauder

Sauder Harbor View Library with Doors User manual

Sauder Heritage Hill 109872 User manual

Sauder

Sauder Heritage Hill 109872 User manual

Sauder Harbor View 417586 User manual

Sauder

Sauder Harbor View 417586 User manual

Sauder Costa Credenza 422984 User manual

Sauder

Sauder Costa Credenza 422984 User manual

Sauder Credenza 425765 User manual

Sauder

Sauder Credenza 425765 User manual

Sauder Caraway Etagere 414111 User manual

Sauder

Sauder Caraway Etagere 414111 User manual

Sauder Dakota Pass 419119 User manual

Sauder

Sauder Dakota Pass 419119 User manual

Popular Indoor Furnishing manuals by other brands

Jysk KETTINGE quick start guide

Jysk

Jysk KETTINGE quick start guide

Better Homes and Gardens BH16-022-099-18 Assembly instructions

Better Homes and Gardens

Better Homes and Gardens BH16-022-099-18 Assembly instructions

Big Lots Palermo 810325120 Assembly instructions

Big Lots

Big Lots Palermo 810325120 Assembly instructions

Westwood Design TRIBECA Assembly instruction

Westwood Design

Westwood Design TRIBECA Assembly instruction

Riverside Furniture Madison Panel King Bed Assembly instructions

Riverside Furniture

Riverside Furniture Madison Panel King Bed Assembly instructions

Kvik SU920,060-050-040 Assembly manual

Kvik

Kvik SU920,060-050-040 Assembly manual

Kitchensource 88 3 6000 1 Assembly instructions

Kitchensource

Kitchensource 88 3 6000 1 Assembly instructions

Intex 15IO owner's manual

Intex

Intex 15IO owner's manual

Seconique MONACO Assembly instructions

Seconique

Seconique MONACO Assembly instructions

Riverside Furniture Zoey Assembly instructions

Riverside Furniture

Riverside Furniture Zoey Assembly instructions

Furniture of America YNJ-19602C24-M Assembly instructions

Furniture of America

Furniture of America YNJ-19602C24-M Assembly instructions

Dorel TG6898-C instruction manual

Dorel

Dorel TG6898-C instruction manual

ESD-PROTECT ERGO QUADRA owner's manual

ESD-PROTECT

ESD-PROTECT ERGO QUADRA owner's manual

B-Famous CANNES 180 Assembly instructions

B-Famous

B-Famous CANNES 180 Assembly instructions

HENN Amaro D177-10 Assembly instructions

HENN

HENN Amaro D177-10 Assembly instructions

DURAVIT Ketho.2 K2 7074 Mounting instructions

DURAVIT

DURAVIT Ketho.2 K2 7074 Mounting instructions

Koolr red rack DISPLAY TOP Assembly Installation Guide

Koolr

Koolr red rack DISPLAY TOP Assembly Installation Guide

Little Folks Furniture HSP003 manual

Little Folks Furniture

Little Folks Furniture HSP003 manual

manuals.online logo
manuals.online logoBrands
  • About & Mission
  • Contact us
  • Privacy Policy
  • Terms and Conditions

Copyright 2025 Manuals.Online. All Rights Reserved.