manuals.online logo
Brands
  1. Home
  2. •
  3. Brands
  4. •
  5. Sauder
  6. •
  7. Indoor Furnishing
  8. •
  9. Sauder OFFICE WORKS AFFIRM 427438 User manual

Sauder OFFICE WORKS AFFIRM 427438 User manual

sauder.com
NOTE: THIS INSTRUCTION
BOOKLET CONTAINS IMPORTANT
SAFETY INFORMATION.
PLEASE READ AND KEEP FOR
FUTURE REFERENCE.
sauder.com
CONTACT US FIRST
BEFORE MAKING ANY RETURNS TO THE STORE.
sauder.com
CONTACT US FIRST
BEFORE MAKING ANY RETURNS TO THE RETAILER.
Sauder.com
Share your journey!
AFFIRM COLLECTION
Lot # 566962 10/08/21
Purchased: __________________
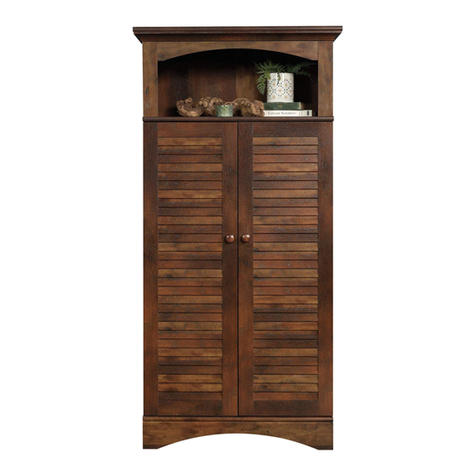
Storage Cabinet
Noble Elm finish | Model 427438
English pg 1-17
Français pg 18-20
Español pg 21-23
How can we help you? To reach our customer service, visit sauder.com/commercial-oce/service
to chat with a live rep or email us.
Prefer the phone? Give us a ring at
877-996-7539
.
Our award-winning team is available Monday-Friday - 8:30 a.m. to 5 p.m. EST (except holidays).
Table of Contents Assembly Tools Required
Hammer
Not actual size
No. 2 Phillips Screwdriver
Tip Shown Actual Size
Hardware Identification
Part Identification
Hardware Usage Guide
Assembly Steps
Français
Español
Safety
Warranty
2
3
5
4-17
18-20
21-23
24-26
27
42S SILVER 7/8" MACHINE SCREW - 4
10M TOUCH-UP PEN - 1 1R METAL PIN - 4
11S BLACK 1/2" FLAT HEAD SCREW - 8
4I DOOR
STOP - 2
2R RUBBER
SLEEVE - 4
13H HINGE - 4WOOD DOWEL - 16
42F PULL - 2
195K
Hardware Identification
åScrews are shown actual size. You may receive extra hardware with your unit.
LEVELER - 4
46E
TWIST-LOCK®
FASTENER COVER - 12
124P
427438 www.sauder.com/commercial-oce/servicePage 2
Part Identification
åWhile not all parts are labeled, some of the parts will have a label or an inked letter on the edge
to help distinguish similar parts from each other. Use this part identification to help identify similar parts.
Now you know
our ABCs.
A RIGHT END (1)
B LEFT END (1)
C TOP (1)
D BOTTOM (1)
E BASE (1)
F ADJUSTABLE SHELF (1)
G BACK (2)
H DOOR (2)
A
B
C
D
E
F
G
G
H
H
427438www.sauder.com/commercial-oce/service Page 3
Step 1 Look for this icon. It means a video assembly tip is
available at www.sauder.com/service/tips
Find the numbered video or scan the QR code. 0
å Assemble your unit on a carpeted floor or on the empty
carton to avoid scratching your unit or the floor.
å Insert six WOOD DOWELS (42F) into the exact holes
shown in the LEFT END (B).
å NOTE: You may need to gently tap the WOOD DOWEL in
with your hammer.
B
42F
42F
427438 www.sauder.com/commercial-oce/servicePage 4
å Fasten the BACKS (G) to the LEFT END (B). Tighten four
TWIST-LOCK® FASTENERS.
å NOTE: Be sure the WOOD DOWELS in the LEFT END
insert into the BACKS.
Hardware Usage Guide
1. Insert the dowel end of the FASTENER into the
hole of the adjoining part.
NOTE: The dowel end of the FASTENER must
remain fully inserted in the hole of the adjoining
part while locking the FASTENER.
2. Tighten the FASTENER with a Phillips
screwdriver as tight as possible.
Dowel end
2.
Push a TWIST-LOCK® FASTENER
into the large hole in the part.
1.
HOW TO USE A TWIST-LOCK®FASTENER
Step 2
B
G
G
2
Surface with
TWIST-LOCK®
FASTENERS
Surface with
TWIST-LOCK®
FASTENERS
Surface with
TWIST-LOCK®
FASTENERS
427438www.sauder.com/commercial-oce/service Page 5
Step 3
å Fasten the BOTTOM (D) to the LEFT END (B). Tighten two
TWIST-LOCK® FASTENERS.
å NOTE: Be sure the WOOD DOWELS in the LEFT END
insert into the BOTTOM.
B
D
Surface with
TWIST-LOCK®
FASTENERS
Edge with TWIST-LOCK® FASTENERS
2
Just think. The sooner
you do this, the sooner
you do something else.
427438 www.sauder.com/commercial-oce/servicePage 6
å Insert six WOOD DOWELS (42F) into the exact holes
shown in the RIGHT END (A).
å NOTE: You may need to gently tap the WOOD DOWEL in
with your hammer.
Step 4
A
42F
42F
427438www.sauder.com/commercial-oce/service Page 7
Step 5
å Fasten the RIGHT END (A) to the BOTTOM (D) and
BACKS (G). Tighten six TWIST-LOCK® FASTENERS.
å NOTE: Be sure the WOOD DOWELS in the RIGHT END
insert into the BACKS and BOTTOM.
A
D
G
G
2
427438 www.sauder.com/commercial-oce/servicePage 8
å Using your hammer, gently tap four LEVELERS (46E)
completely into the holes in the ENDS (A and B).
å NOTE: Adjustments to the LEVELERS will be made later in
assembly once your unit is standing upright.
Step 6
A
B
46E
427438www.sauder.com/commercial-oce/service Page 9
Step 7
å Fasten the BASE (E) to the ENDS (A and B) and the
BOTTOM (D). Tighten four TWIST-LOCK® FASTENERS.
A
B
D
E
2
427438 www.sauder.com/commercial-oce/servicePage 10
å Insert four WOOD DOWELS (42F) into the exact holes
shown in the TOP (C).
å Insert the DOOR STOP (4I) into the exact holes shown in
the TOP (C).
Step 8
C
42F
42F
4I
Now might be a
good time to refresh
your drink.
427438www.sauder.com/commercial-oce/service Page 11
Step 9
å Carefully stand your unit upright.
å Fasten the TOP (C) to the ENDS (A and B). Tighten four
TWIST-LOCK® FASTENERS.
å Using your hammer, gently tap a TWIST-LOCK® FASTENER
COVER (124P) onto each visible TWIST-LOCK® FASTENER.
C
The DOOR STOPS
must be here.
A
B
2
124P
427438 www.sauder.com/commercial-oce/servicePage 12
å Fasten four HINGES (13H) to the DOORS (H). Use eight
BLACK 1/2" FLAT HEAD SCREWS (11S).
Step 10
H
H
17
BLACK 1/2" FLAT HEAD SCREW
(8 used in this step)
11S
13H
13H
427438www.sauder.com/commercial-oce/service Page 13
Step 11
H
A
B
195K
17
å Your unit may need leveling. To raise a corner of your unit, rotate the LEVELER
downward. To lower a corner of your unit, rotate the LEVELER upward.
å Before fastening the DOOR to your unit, be sure the mounting screw is against
the stops as shown in the right diagram. If it isn't, loosen the adjusting screw and
mounting screw to slide it against the stops. Then tighten the mounting screw.
å Fasten one of the DOORS (H) to the RIGHT END (A) as shown in the lower
diagram. Use the screws in the HINGES. You should start each SCREW a few
turns before completely tightening any of them.
å Fasten one PULL (195K) to the DOOR (H). Use two SILVER 7/8"
MACHINE SCREWS (42S).
å Repeat this step for the other DOOR (H).
å See the next step for DOOR adjustments.
Mounting
screw
Stop
Hinge
Adjusting
screw
SILVER 7/8" MACHINE SCREW
(4 used in this step)
42S
To raise a corner of your
unit, rotate the LEVELER
downward. To lower a
corner of your unit, rotate
the LEVELER upward.
427438 www.sauder.com/commercial-oce/servicePage 14
Step 12 17
å Refer to the enlarged diagram to identify the parts on
the HINGE.
å The DOOR may need some adjustments. Follow the text
below to make needed adjustments.
å DOOR ADJUSTMENTS:
To adjust the DOOR from side to side (horizontal), turn the
adjusting screw in or out.
å To adjust the DOOR up and down (vertical), loosen both
vertical adjustment screws. Move the DOOR up or down to the
desired location. Tighten the screws after making adjustments.
å To adjust the DOOR in or out (depth), loosen the mounting
screw one turn and move the DOOR in or out, as needed.
Tighten the mounting screw after making adjustments.
(vertical adjustment)
Adjusting screw (horizontal)
Mounting screw (depth)
427438www.sauder.com/commercial-oce/service Page 15
Step 13
å Push the RUBBER SLEEVES (2R) over one end of the
METAL PINS (1R). Insert the METAL PINS into the hole
locations of your choice in the ENDS (A and B). Set the
ADJUSTABLE SHELF (F) onto the METAL PINS.
å For long-term care and maintenance of your unit, you may
touch up the edges with the TOUCH-UP PEN (10M).
(4 used)
2R
1R
F
A
B
10M
427438 www.sauder.com/commercial-oce/servicePage 16
Step 14
å NOTE: Please read the back pages of the instruction booklet for important safety information.
å This completes assembly. Clean with a damp cloth. Wipe dry.
And to celebrate, why not share your success story at sauder.com or
50 lbs.
35 lbs.
35 lbs.
The DOOR STOP
is adjustable. If
needed, turn the
DOOR STOP until
it allows the DOOR
to evenly close.
427438www.sauder.com/commercial-oce/service Page 17
Noter la date d’achat
de cet élément et
conserver le livret pour
future référence. Pour
contacter Sauder en
ce qui concerne cet
élément, faire référence
au numéro de lot et
numéro de modèle en
appelant notre numéro
sans frais.
Lot nº : ____________
Date de
l'achet : ____________
LISTE DE PIÈCES
REFERENCE DESCRIPTION QUANTITÉ
LISTE DE PIÈCES
REFERENCE DESCRIPTION QUANTITÉ
Utilisez les instructions d’assemblage en français avec les
schémas étape par étape du manuel d’instruction en anglais.
Chaque étape en français correspond à la même étape en
anglais. Comparer la “Liste de pièces” ci-dessous avec la “PART
IDENTIFICATION” du manuel en anglais pour vous familiariser
avec les pièces avant l’assemblage.
REMARQUE : CE MANUEL D’INSTRUCTIONS CONTIENT
D’IMPORTANTES INFORMATIONS RELATIVES À LA SÉCURITÉ.
À LIRE ET CONSERVER POUR TOUTE RÉFÉRENCE FUTURE.
NOUS CONTACTER EN PREMIER
AVANT D'EFFECTUER TOUT RETOUR AU MAGASIN.
Nous faisons de notre mieux pour nous assurer que votre meuble
arrive dans d’excellentes conditions. Nos représentants du service
Clientèle sont aimables et prêts à vous aider au cas où une pièce
aurait été endommagée ou manquerait (ou si vous aviez besoin
d’aide pour l’assemblage). Composez ce numéro d’appel gratuit:
877-996-7539
Du lundi au vendredi, de 8:30 heures du matin à
5 heures du soir (horaire Côte Est)
(sauf jours fériés)
Si une pièce a besoin d’être remplacée, la pièce de remplacement
sera envoyée dans les 48 heures. (Sauf week-ends et jours fériés)
46E VÉRIN....................................................................................4
42F CHEVILLE EN BOIS................................................16
13H CHARNIÈRE.....................................................................4
4I ARRÊT DE PORTE......................................................2
195K
POIGNÉE............................................................................2
10M FEUTRE DE RETOUCHE.........................................1
124P COUVERCLE DE FIXATION
TWIST-LOCK®...............................................................12
1R SUPPORT DE TABLETTE......................................4
2R MANCHON EN CAOUTCHOUC.....................4
11S VIS TÊTE PLATE 13 mm NOIRE......................8
42S VIS À MÉTAUX 22 mm ARGENTÉE.............4
A EXTRÉMITÉ DROITE..................................................1
B EXTRÉMITÉ GAUCHE...............................................1
C DESSUS...............................................................................1
D DESSOUS...........................................................................1
E BASE ......................................................................................1
F TABLETTE RÉGLABLE.............................................1
G ARRIÈRE .............................................................................2
H PORTE..................................................................................2
Meuble de rangementModèle 427438
427438 www.sauder.com/commercial-oce/servicePage 18
ÉTAPE 1
Assembler l'élément sur un sol à moquette ou sur le carton vide
pour éviter d'endommager l'élément ou le sol.
Insérer six CHEVILLES EN BOIS (42F) dans les trous exacts
illustrés dans l'EXTRÉMITÉ GAUCHE (B).
REMARQUE: Il est peut-être nécessaire d'enfoncer les CHEVILLES
EN BOIS délicatement à l'aide d'un marteau.
ÉTAPE 2
Fixer les ARRIÈRES (G) à l'EXTRÉMITÉ GAUCHE (B). Serrer quatre
FIXATIONS TWIST-LOCK®.
REMARQUE: S’assurer d’insérer les CHEVILLES EN BOIS de
l'EXTRÉMITÉ GAUCHE dans les ARRIÈRES.
ÉTAPE 3
Fixer le DESSOUS (D) à l'EXTRÉMITÉ GAUCHE (B). Serrer deux
FIXATIONS TWIST-LOCK®.
REMARQUE: S’assurer d’insérer les CHEVILLES EN BOIS de
l'EXTRÉMITÉ GAUCHE dans le DESSOUS.
ÉTAPE 4
Insérer six CHEVILLES EN BOIS (42F) dans les trous exacts
illustrés dans l'EXTRÉMITÉ DROITE (A).
REMARQUE: Il est peut-être nécessaire d'enfoncer les CHEVILLES
EN BOIS délicatement à l'aide d'un marteau.
ÉTAPE 5
Fixer l’EXTRÉMITÉ DROITE (A) au DESSOUS (D) et aux
ARRIÈRES (G). Serrer six FIXATIONS TWIST-LOCK®.
REMARQUE: S’assurer de bien insérer les CHEVILLES EN BOIS de
l'EXTRÉMITÉ DROITE dans les ARRIÈRES et le DESSOUS.
ÉTAPE 6
À l'aide d'un marteau, enfoncer légèrement quatre VÉRINS (46E)
complètement dans les trous dans les EXTRÉMITÉS (A et B).
REMARQUE: Les réglages des VÉRINS se feront ultérieurement
dans l’assemblage une fois l’unité en position verticale.
ÉTAPE 7
Fixer la BASE (E) aux EXTRÉMITÉS (A et B) et au DESSOUS (D).
Serrer quatre FIXATIONS TWIST-LOCK®.
Guide d'utilisation de la visserie
UTILISATION DE LA FIXATION TWIST-LOCK®
1. Enfoncer une FIXATION TWIST-LOCK® dans le gros trou
de la pièce.
2. 1. Insérer l'extrémité filetée de la FIXATION dans le trou de la
pièce attenante.
REMARQUE : L'extrémité filetée de la FIXATION doit rester
complètement insérée dans le trou de la pièce attenante lorsque
l'on bloque la FIXATION.
2. Bien serrer la FIXATION à l'aide d'un tournevis Phillips.
ÉTAPE 8
Insérer quatre CHEVILLES EN BOIS (42F) dans les trous exacts
illustrés dans le DESSUS (C).
Enfoncer l'ARRÊT DE PORTE (4I) dans les trous exacts illustrés
dans le DESSUS (C).
427438www.sauder.com/commercial-oce/service Page 19
ÉTAPE 12
Consulter le schéma agrandi pour identifier les pièces
de CHARNIÈRE.
Il faut peut-être ajuster la PORTE. Suivre les indications
ci-dessous pour ajuster.
RÉGLAGES DES PORTES :
Pour ajuster la PORTE latéralement (horizontalement), tourner la
vis de réglage vers l'intérieur ou vers l'extérieur.
Pour ajuster la PORTE de haut en bas (verticalement), desserrer
les deux vis de réglage. Déplacer la PORTE verticalement à
l'emplacement désiré. Serrer les vis après avoir ajusté.
Pour ajuster la PORTE vers l'intérieur où vers l'extérieur
(profondeur), desserrer la vis de montage un tour et déplacer la
PORTE vers l'intérieur ou vers l'extérieur. Serrer la vis de montage
après avoir ajusté.
ÉTAPE 13
Enfoncer les MANCHONS EN CAOUTCHOUC (2R) sur
l’une extrémité des GOUPILLES EN MÉTAL (1R). Insérer
les GOUPILLES EN MÉTAL dans les trous choisis dans les
EXTRÉMITÉS (A et B). Poser la TABLETTE RÉGLABLE (F) sur les
GOUPILLES EN MÉTAL.
Pour un entretien à long terme de l'élément, il est possible de
retoucher les chants à l'aide du FEUTRE DE RETOUCHE (10M).
ÉTAPE 14
REMARQUE: Prière de lire les informations importantes sur la
sécurité figurant sur les pages arrière du manuel d’instructions.
Ceci complète l'assemblage. Nettoyer avec un tissu
humide. Essuyer.
ÉTAPE 10
Fixer quatre CHARNIÈRES (13H) sur les PORTES (H). Utiliser huit
VIS TÊTE PLATE 13 mm NOIRES (11S).
ÉTAPE 11
Vous devrez peut-être niveler votre unité. Pour soulever un coin de
l'élément, faire tourner le VÉRIN vers le bas. Pour baisser un coin
de l'élément, faire tourner le VÉRIN vers le haut.
Avant de fixer la PORTE à l’unité, s’assurer que la vis de montage
se trouve contre les butées comme l’indique le schéma de droite.
Si ce n’est pas le cas, desserrer la vis de réglage et la vis de
montage pour la faire glisser contre les butées. Serrer ensuite la
vis de montage.
Fixer l'une des PORTES (H) à l’EXTRÉMITÉ DROITE (A) comme
l'indique le schéma du bas. Utiliser les vis fournies avec les
CHARNIÈRES. Il est préférable de donner quelques tours de
tournevis à chaque VIS avant de les serrer toutes à bloc.
Fixer une POIGNÉE (195K) à la PORTE (H). Utiliser deux VIS À
MÉTAUX 22 mm ARGENT (42S).
Répéter cette étape pour l'autre PORTE (H).
Voir l'étape suivante pour réglages des PORTES.
ÉTAPE 9
Relever, avec précaution, l'élément dans sa position verticale.
Fixer le DESSUS (C) aux EXTRÉMITÉS (A et B). Serrer quatre
FIXATIONS TWIST-LOCK®.
À l'aide d'un marteau, taper légèrement un COUVERCLE
DE FIXATION TWIST-LOCK® (124P) sur chaque FIXATION
TWIST-LOCK® visible.
427438 www.sauder.com/commercial-oce/servicePage 20

Other Sauder Indoor Furnishing manuals
Sauder Jaclyn Smith 416404 User manual

Sauder

Sauder Jaclyn Smith 416404 User manual

Sauder worksense PALO ALTO 427795 User manual

Sauder

Sauder worksense PALO ALTO 427795 User manual

Sauder Boulevard Cafe 422420 User manual

Sauder

Sauder Boulevard Cafe 422420 User manual

Sauder OfficeWorks AFFIRM 427058 User manual

Sauder

Sauder OfficeWorks AFFIRM 427058 User manual

Sauder 417886 User manual

Sauder

Sauder 417886 User manual

Sauder 158085 User manual

Sauder

Sauder 158085 User manual

Sauder Shoal Creek 411201 User manual

Sauder

Sauder Shoal Creek 411201 User manual

Sauder Tremont Row 427971 User manual

Sauder

Sauder Tremont Row 427971 User manual

Sauder 420850 User manual

Sauder

Sauder 420850 User manual

Sauder Via 419641 User manual

Sauder

Sauder Via 419641 User manual

Sauder OFFICE WORKS AFFIRM 427431 User manual

Sauder

Sauder OFFICE WORKS AFFIRM 427431 User manual

Sauder 407468 User manual

Sauder

Sauder 407468 User manual

Sauder Hudson Court 425833 User manual

Sauder

Sauder Hudson Court 425833 User manual

Sauder Coral Cape 423808 User manual

Sauder

Sauder Coral Cape 423808 User manual

Sauder 413074 User manual

Sauder

Sauder 413074 User manual

Sauder Shoal Creek 420166 User manual

Sauder

Sauder Shoal Creek 420166 User manual

Sauder Hythe 5426439 User manual

Sauder

Sauder Hythe 5426439 User manual

Sauder Cornerstone 404972 User manual

Sauder

Sauder Cornerstone 404972 User manual

Sauder 422294 User manual

Sauder

Sauder 422294 User manual

Sauder Shoal Creek 409937 User manual

Sauder

Sauder Shoal Creek 409937 User manual

Sauder Via 419610 User manual

Sauder

Sauder Via 419610 User manual

Sauder Dakota Pass 420410 User manual

Sauder

Sauder Dakota Pass 420410 User manual

Sauder 429430 User manual

Sauder

Sauder 429430 User manual

Sauder Worksense MASON PEAK 427827 User manual

Sauder

Sauder Worksense MASON PEAK 427827 User manual

Popular Indoor Furnishing manuals by other brands

Instant Desks IDA-2024 instruction manual

Instant Desks

Instant Desks IDA-2024 instruction manual

Walker Edison SIGL7J Assembly instructions

Walker Edison

Walker Edison SIGL7J Assembly instructions

LIVIQUE Hedy 6716237 Assembly instructions

LIVIQUE

LIVIQUE Hedy 6716237 Assembly instructions

Teamson Home VERSANORA VNF-00026 Assembly instructions

Teamson Home

Teamson Home VERSANORA VNF-00026 Assembly instructions

Bertolini R-618 BE Assembly instructions

Bertolini

Bertolini R-618 BE Assembly instructions

Essentials ESS-6015M Control Instructions

Essentials

Essentials ESS-6015M Control Instructions

Freistil 181 manual

Freistil

Freistil 181 manual

realspace Chase manual

realspace

realspace Chase manual

HULALA HOME RCXA0346 manual

HULALA HOME

HULALA HOME RCXA0346 manual

Graco Benton manual

Graco

Graco Benton manual

Triarch Indoor Lighting 60165 Assembly instructions

Triarch

Triarch Indoor Lighting 60165 Assembly instructions

Emco asis prestige Mounting instruction

Emco

Emco asis prestige Mounting instruction

Trasman 1140 BO12 Assembly manual

Trasman

Trasman 1140 BO12 Assembly manual

Cooper Lighting SURE-LITES PHL Series installation instructions

Cooper Lighting

Cooper Lighting SURE-LITES PHL Series installation instructions

Extremis Tiki High manual

Extremis

Extremis Tiki High manual

OVE 1902418 Assembly instructions

OVE

OVE 1902418 Assembly instructions

Badger Basket 13641 Assembly instructions

Badger Basket

Badger Basket 13641 Assembly instructions

Draper LightBloc ZIP 92 Installation & operation instructions

Draper

Draper LightBloc ZIP 92 Installation & operation instructions

manuals.online logo
manuals.online logoBrands
  • About & Mission
  • Contact us
  • Privacy Policy
  • Terms and Conditions

Copyright 2025 Manuals.Online. All Rights Reserved.