manuals.online logo
Brands
  1. Home
  2. •
  3. Brands
  4. •
  5. Sunjoy
  6. •
  7. Outdoor Furnishing
  8. •
  9. Sunjoy G-GZ107PST User manual

Sunjoy G-GZ107PST User manual

Owner’s manual
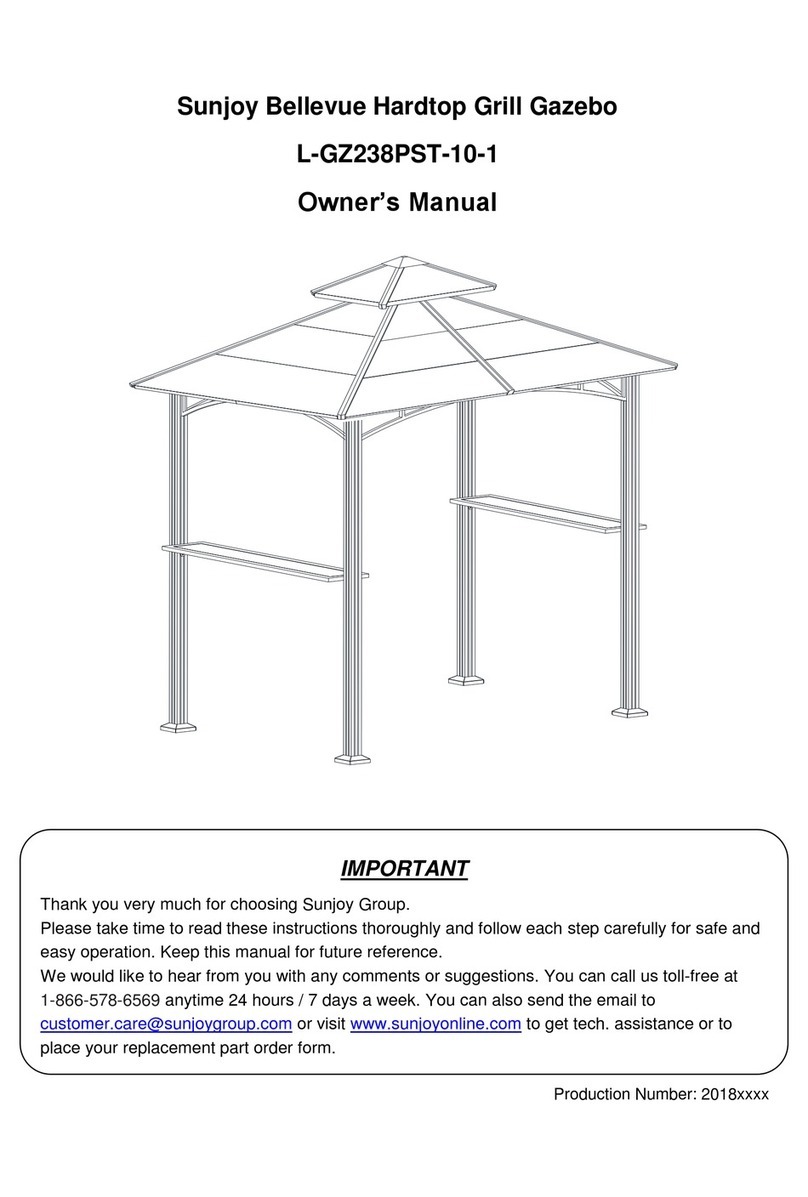
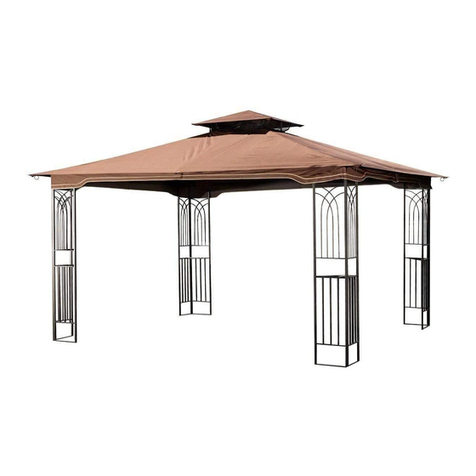
Sean Conway Gazebo II # G-GZ107PST
1. WARNING
1. When assembling and using this product, basic safety precautions should always be followed to
reduce the risk of personal injury and damage to equipment. Please read all instructions before
assembly and use.
2. Some parts may contain sharp edges, wear protective gloves if necessary. At least two or more
people are recommended for safe assembly.
3. Keep all children and pets away from assembly area.
4. Begin assembly not less than 6 feet from any obstruction such as fence, garage, house,
overhanging branches, laundry line or electrical wires.
5. Install on level ground. This gazebo cannot be permanently staked or attached to concrete floor or
platform. This gazebo is intended for decorative and sunshade purposes only and is not meant to
withstand inclement weather including high winds, rain and snow. Gazebo fabric is water resistant,
not water proof and may leak during exposure toprecipitation.
6. Check all nuts and bolts for tightness before and during usage.
7. Keep all flame and heat sources away from this gazebo fabric. This gazebo is made with fabric that
meets cpai-84 specifications for flame resistance. It is not fire proof. The fabric will burn if left in
continuous contact with any heat source. The application of any foreign substance to the gazebo
fabric may render the flame-resistant properties ineffective.
2. Assembly Instruction
2.1. Part list
A.column(4pcs)
B1.left long frame (2pcs)
B2.right long frames (2 pcs)
C1.short frame (2pcs)
C2.short frame (2pcs)
D1. left short top upper panel (2pcs)
D2.left short top lower panel(2 pcs)
E1.right short top upper panel(2pcs)
E2.right short too lower panel(2pcs)
F1. 90° top connector slip (4pcs)
F2. 90° lower connector slip (4 pcs)
G1. B1,E1 connector (2pcs)
G2.C1,D1 connector (2pcs)
H. column roof cover (4pcs)
I.U shape connector (4pcs)
J. straight connector (4pcs)
K. 90 °beam connector (4pcs)
L.90°short beam (2pcs)
M. 90°long beam (2pcs)
N. long curtain pole (4pcs)
O. top connector (1pc)
P. finial (1 pcs)
R. M6*15 screw TBZ0030615HQ (48 PCS)
S. peg (16pcs)
T. mosquito net hook (32 pcs)
U1. big canopy (1pc)
U2. small canopy (1pc)
V. mosquito net (1 pc)
w. washer(TBZ10806HQ) (24pcs)
x. M6×10 screws(TBZ0120610HQ) (32 pcs)
Y. interior wrench (1pc)
2.2Assembly: (Tools required for assembly: a screwdriver)
A
A
R
S
B1
B2
B1
B2
C1
C2
D1
D2
C1
C2
E1
E2
E1
E2 D1
D2
A
A
F1
G1
K
H
I
J
L
M
N
O
P
G2
Fig.1
Fig.2
Fig.3
Fig.4
Fig.5
Fig.6
Fig.7
Fig.8
Fig.9
T
F2
U1
V
U2
X
W
Y
step1.Check all parts and hardware listed in the parts list. Lay them on a clear and level surface prior to
assembly. Ideally, the gazebo frame should be set up in its desired location to avoid moving it after
assembly.
step2. Have B1 connected with B2, C1 connected with C2, D1 connected with D2, E1 connect ed with E2 to
form the side panel as shownin fig 1.
Fig.1
B1
B2
setp3 .Attach the connected part B1&B2 with part C1& C2 by inserting the connector I,J . Make sure the
screw holes on frames & connectors are lined up, then fix them by inserting the screw X, washer W,
BUT DON’T FIX THE TWO HOLES NEXT TO THE JOINT IN THIS MOMENT, tighten them by
screwdriver. (fig 2)
B1(E1)
C1(D1) J
I
J
I
B2(E2)
C2(D2)
K
B1
B2
T
T
T
T
Fig.2
B1(E1)
C1(D1)
B2(E2)
C2(D2)
B1(E1)
C1(D1)
B2(E2)
C2(D2)
X
X
X
X
X
X
XX
W
W
WWW
W
step4. Make sure the screw holes on the beam connector K and the unfixed screw holes on the frames are
lined up, attach the K with connected frames by inserting the screws X, tighten them tightly by
screwdriver.(fig2)
step5. Repeat steps 3, 4 to connect the other 2 frames D1& D2, E1&E2.
step 6.Hang the mosquito nethook T to the slot of the frames after step 5.
F2
R
Fig.3
G1(G2)
R
R
B1(C1)
B2(C2)
F1
F2
R
F1
B1(C1)
B2(C2)
B1(C1)
B2(C2)
E2(D2)
E1(D1) E1(D1)
E2(D2)
R
R
step7. Connect the connected frames in 45°angles, attach the connected B1/B2 toE1/E2 by inserting the
90°connector F1,F2 into adjacent side of the frame, make sure the screw are lined up before fixing
them by screw R,BUTDON’T FIX THE TWO HOLES NEXTTO JOINT ON F1 IN THIS MOMENT( fig
3).
step8. Make sure the holes on the G1 and unfixed holes on frames are lined up, attached G1 to the
connected frames by inserting screw R, fix them tightly byscrewdriver.(fig 3)
step 9. Repeat above steps toconnect the C1/C2 and D1/D2 for assembling them to a rectangleframe.
step 10.Connect the G1 to N,the two parts will be attached together by night lock.(fig4)
Fig.4
N
G1
E1 B1
step 11. Repeat the step10 to connect the short beam L to the K on the attached part B1&C1 by the night
lock, connect the long beamM to K on attached part D1&E1.(fig5)
Fig.5
K
L
B1
C1
step 12.Join the top connectors with beam and bar by inserting the connected set P&L,M,N into the top
connector O, fix them tightly by night lock. Do make sure the 45°bars are inserted into the higher
connectors while 90°beams are inserted into the lower connectors during this process. after this
step , your top assembly should as shown in the fig.6. Then put the big canopy over the
assembled top frame, and small canopy over the big canopy. Connect the finial P with O by
inserting screw R through O, canopyS, securing them tightly with screwdriver. Insert the slip
hooks around the canopy to the slot on frame B1,C1,D1,E1.The top frame as shown in second
picture of fig 6 now.
Fig.6
P
O
LN
M
L
M
N
N
N
B
B
C
C
D
D
E
E
O
N
L
L
M
M
Top Frame
N
N
N
step 12. Attach whole top frame to the assembled rectangle frame. lifting top frame , connecting the four
corners to the four columns. make sure two sides of the columns with the patterns are outside
facing. and the screw holes in the upper column A and lower frame B1&E1 are lined up, and
tighten them tightly with R screws.(fig 7)
Fig.7
A
B1 E1
RRRR
step 13.Attach the back column roof cover H with the sliding part on B2,C2,D2.E2 , making sure the screw
holes are lined up before attaching them with screw R.(fig8)
Fig.8
A
H
RR
step 14.Hang the mosquito net to curtain pole byslip hooks T.
step 15.Secure the gazebo to the ground with pegs S.(fig 9)
A
S
S
S
Fig.9
step 16.Tighten all the hardware.
Now your gazebo is ready for use!
Warning
This gazebo is not meant to withstand extreme weather, such as: moderate to high winds, continued exposure to
ice, or freezing conditions. We recommend removing your canopy if heavy rain, snow, or big wind. Do not leave
the gazebo out in the winter unprotected. Water gets in the metalwork and will freeze and expand causing
ruptures.
This unit is heavy. Do not assemble this item alone.
Care & Maintenance
Our iron components for garden accessories and furniture are coated with rust inhibiting paint that protects it from
rusting. However, due to the nature of iron, surface oxidation (rusting) will occur once these protective coatings are
scratched.
This is a natural process and is not a defect! To minimize this condition, we recommend care when
assembling & handling the product to prevent scratching the paint. Should any scratching or damage occur, we
recommend immediate touch-up with rust inhibiting paint, which is included in the package. Surface rust can also
be easily removed with a very light application of common cooking oil. If surface oxidation (rusting) occurs and if
no measure is taken to prevent this, the oxidation may start dripping on to deck or patio and cause damaging
stains, which may be difficult to remove. This can be prevented if measure is taken to keep the product from
oxidizing.
Limited Warranty
This limited warranty is extended to the original purchaser and applies to defects in materials and workmanship of
your item provided the item is maintained with care and used only for personal, residential purposes.
The item is warranted to be free from defects in material or workmanship for a period of 6months. We
don't reimburse for transportation or delivery costs, or compensate the individual or any outside party for
assembling or disassembling the product.
Exclusions: Items used for commercial, contract, or other non-residential purposes, or items damaged due to acts
of nature, vandalism, misuse, or improper assembly are not covered. Corrosion or rusting of hardware is not
covered. Proof of purchase (dated register receipt) is required for warranty claims. Warranty is to the original
purchaser and is non-transferable. Any replacement of warranted items will be in the original style and color, or a
similar style and color if the original is unavailable or has been discontinued. As some states do not allow
exclusions or limitations on an implied warranty, the above exclusions and limitations may not apply. This warranty
gives you specific rights, and you may also have other rights, which vary from state to state.
For technical assistance on assembly or replacement parts Please do not return this product to the store,
call Sunjoy Industries at 1(866) 578-6569 from 8:30 AM to 5:30 EST Monday to Friday or fax the
replacement part form which put into the package to (740)-283-3549 or Email target05@sunjoygroup.com
for assistance.

Other Sunjoy Outdoor Furnishing manuals
Sunjoy L-GZ340PST-3N-6 User manual

Sunjoy

Sunjoy L-GZ340PST-3N-6 User manual

Sunjoy L-GZ098PST-1B User manual

Sunjoy

Sunjoy L-GZ098PST-1B User manual

Sunjoy 10'X10' OPP Gazebo L-GZ322PST User manual

Sunjoy

Sunjoy 10'X10' OPP Gazebo L-GZ322PST User manual

Sunjoy A102008700 User manual

Sunjoy

Sunjoy A102008700 User manual

Sunjoy South Bay L-GZ793PST-A-PK User manual

Sunjoy

Sunjoy South Bay L-GZ793PST-A-PK User manual

Sunjoy Ethan L-GG069PST-D User manual

Sunjoy

Sunjoy Ethan L-GG069PST-D User manual

Sunjoy A102016300 User manual

Sunjoy

Sunjoy A102016300 User manual

Sunjoy Manhattan A101001100 User manual

Sunjoy

Sunjoy Manhattan A101001100 User manual

Sunjoy 810213850 User manual

Sunjoy

Sunjoy 810213850 User manual

Sunjoy A102008001 User manual

Sunjoy

Sunjoy A102008001 User manual

Sunjoy A101012900 User manual

Sunjoy

Sunjoy A101012900 User manual

Sunjoy D-DN1377SAL-A User manual

Sunjoy

Sunjoy D-DN1377SAL-A User manual

Sunjoy A102012800 User manual

Sunjoy

Sunjoy A102012800 User manual

Sunjoy A103002203 User manual

Sunjoy

Sunjoy A103002203 User manual

Sunjoy A102009600 User manual

Sunjoy

Sunjoy A102009600 User manual

Sunjoy A101000700 User manual

Sunjoy

Sunjoy A101000700 User manual

Sunjoy Hampshire L-GZ029PST User manual

Sunjoy

Sunjoy Hampshire L-GZ029PST User manual

Sunjoy L-CM057PST User manual

Sunjoy

Sunjoy L-CM057PST User manual

Sunjoy L-GZ472PST-C-A User manual

Sunjoy

Sunjoy L-GZ472PST-C-A User manual

Sunjoy South Hampton L-GZ215PST-A-MN User manual
Sunjoy

Sunjoy South Hampton L-GZ215PST-A-MN User manual

Sunjoy LDN916SAL Operating instructions

Sunjoy

Sunjoy LDN916SAL Operating instructions

Sunjoy A101011800 User manual

Sunjoy

Sunjoy A101011800 User manual

Sunjoy A702004200 User manual

Sunjoy

Sunjoy A702004200 User manual

Sunjoy A111005500 User manual

Sunjoy

Sunjoy A111005500 User manual

Popular Outdoor Furnishing manuals by other brands

Songmics GMB20 manual

Songmics

Songmics GMB20 manual

Ashley Signature DESIGN P539 -665 user guide

Ashley

Ashley Signature DESIGN P539 -665 user guide

siena GARDEN L19582 Assembly instruction

siena GARDEN

siena GARDEN L19582 Assembly instruction

MAISONS DU MONDE TILLANDSIA manual

MAISONS DU MONDE

MAISONS DU MONDE TILLANDSIA manual

Yardistry YM11895 Installation and operating instructions

Yardistry

Yardistry YM11895 Installation and operating instructions

hanit MIRA Assembly instructions

hanit

hanit MIRA Assembly instructions

Deuba 101553 instructions

Deuba

Deuba 101553 instructions

Forever Redwood PENNY WOODEN SUN LOUNGER Assembly instructions

Forever Redwood

Forever Redwood PENNY WOODEN SUN LOUNGER Assembly instructions

Gutta 7500803 Assembly instructions

Gutta

Gutta 7500803 Assembly instructions

forma KRONOS Assembly instructions

forma

forma KRONOS Assembly instructions

Marquee HAVANA Assembly instructions

Marquee

Marquee HAVANA Assembly instructions

Safavieh Outdoor PAT7050 manual

Safavieh Outdoor

Safavieh Outdoor PAT7050 manual

BENITO Urban Leman UM397E Anchoring instructions

BENITO

BENITO Urban Leman UM397E Anchoring instructions

Mirpol LUXE Assembly instructions

Mirpol

Mirpol LUXE Assembly instructions

YitaHome Pure & Easy FTPLPB-K07-TZC-02 Assembly instructions

YitaHome

YitaHome Pure & Easy FTPLPB-K07-TZC-02 Assembly instructions

Ballard Designs Ceylon Loveseat SO625 manual

Ballard Designs

Ballard Designs Ceylon Loveseat SO625 manual

urbidermis SANTA & COLE VIA LACTEA instructions

urbidermis

urbidermis SANTA & COLE VIA LACTEA instructions

jardipolys KANGOUROU 332 manual

jardipolys

jardipolys KANGOUROU 332 manual

manuals.online logo
manuals.online logoBrands
  • About & Mission
  • Contact us
  • Privacy Policy
  • Terms and Conditions

Copyright 2025 Manuals.Online. All Rights Reserved.