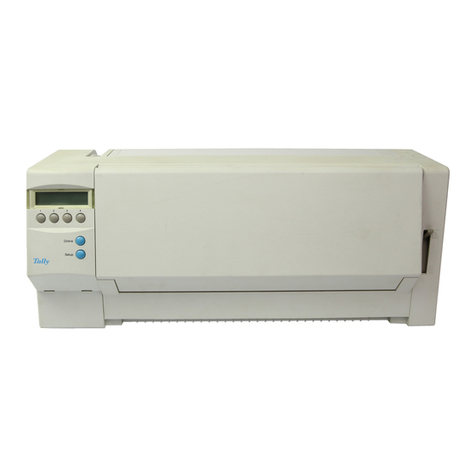
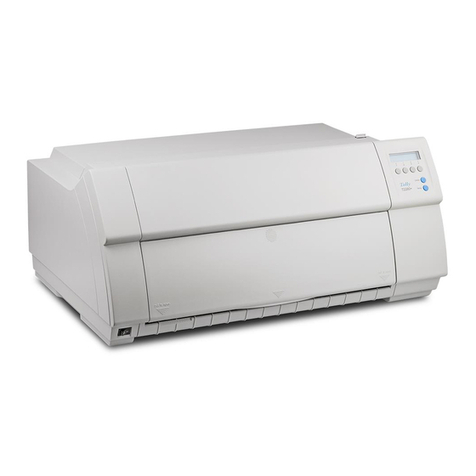
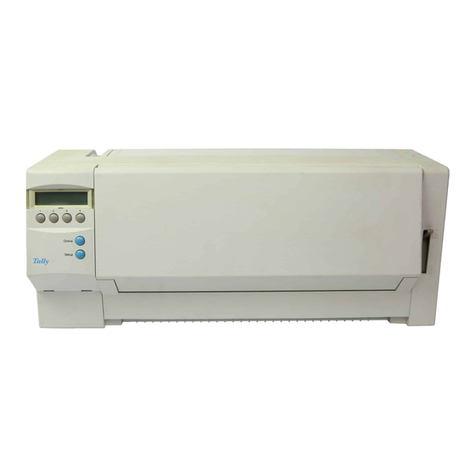
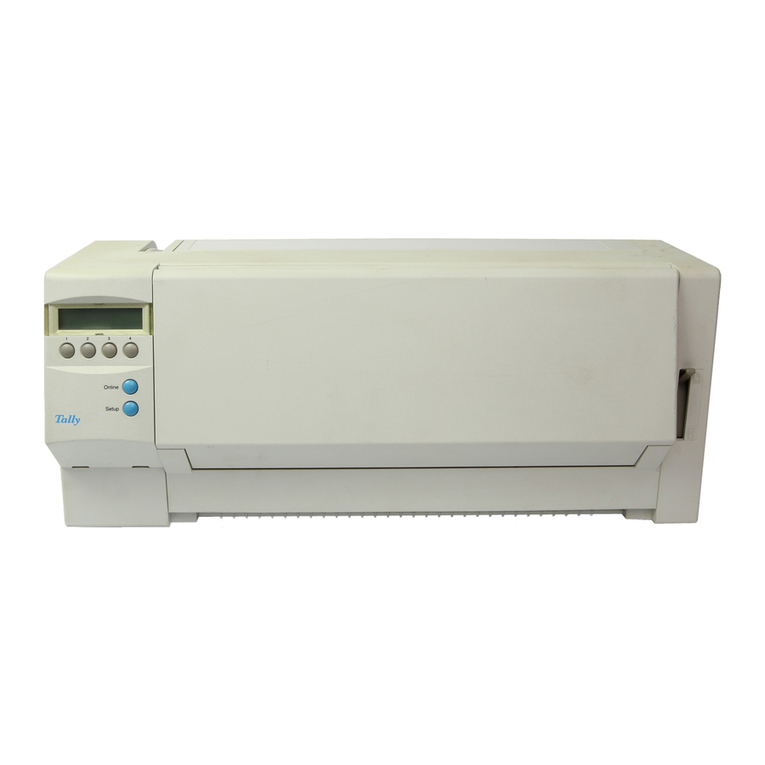
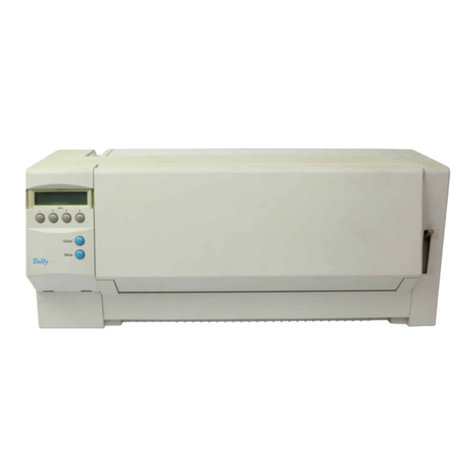
Tally T2024/24 User manual

Operator’s manual Matrix printer
Bedienungsanleitung Matrixdrucker
Manuel d’utilisation Imprimante matricielle
Istruzioni per l’uso Stampante a matrice
Instrucciones de servicio Impesora matricial
®
T2024T2024
/24/24

Important Information
This equipment generates and uses radio frequency energy
and if not installed and used properly, that is, in accordance
with the manufacturer’s instructions, may cause interference
in radio and television reception. It has been type tested and
found to comply with the limits for class B computing devices
in accordance with the specification in subpart J of part 15 of
FCC rules, which are designed to provide reasonable pro-
tection against such interference in a residential installation.
However, there is no guarantee that interference will not
occur in a partial installation. If this equipment does cause
interference to radio or television reception, which can be
determined by turning the equipment off and on, the user is
encouraged to try to correct the interference by one or more
of the following measures:
Reorient the receiving antenna,
Relocate the peripheral away from the receiver,
Move the peripheral away from the receiver
Plug the peripheral into a different outlet, so that the
peripheral and receiver are on different branch circuits
If necessary, the user should consult the dealer or an expe-
rienced radio/television technician for additional sugge-
stions. The user may find the following booklet, prepared by
the Federal Communications Commission, helpful: “How to
Identify and Resolve Radio-TV Interference Problems”.
This booklet is available from the U.S. Government Printing
Office, Washington DC 20402 Stock No. 004.000.00345.4.
WARNING: To comply with FCC regulations on electroma-
gneticinterferenceforaclassBcomputingdevice,theprinter
cable must be shielded. To assure compliance with FCC
regulations for a computing device, use a shielded interface
cable with a metal shell connector. The use of cables not
properly shielded may result in violating FCC regulations.
This digital apparatus does not exceed the class B limits for
radio noise emissions from digital apparatus as set out in the
radio interference regulations of the Canadiandepartment of
communications.
This unit complies with DOC standard C108.8-M 1983
ATTENTION: Le présent appareil numérique n’ement pas
de bruits radioélectriques déspassant les limites
applicables aux appareils numériques de la classe B
prescrites dans le règlement sur le brouillage radio-
électrique édicté par le minstère des communications du
Canada.
The paper used is made of raw materials treated with a
chlorine-free bleaching process.
Das verwendete Papier ist aus chlorfrei gebleichten Roh-
stoffen hergestellt.
Le papier utilisé est fabriqué àpartir de matières premières
blanchis sans chlore.
La carta utilizzata è prodotta con materiali sbiancati senza
cloro.
El papel utilizado ha sido fabricado con un proceso de
blanqueo libre de cloro.
WARNING Only trained and qualified personnel may open covers or remove parts that are not explicitly shown and
described in the User Guide as being accessible to the operator.
WARNUNG Das Entfernen oder Öffnen von Abdeckungen und Teilen darf nur durch geschultes Fachpersonal vor-
genommen werden. Ausgenommen hiervon sind nur solche Abdeckungen und Teile, deren Entfernen bzw.
Öffnen in der Bedienungsanleitung ausdrücklich gekennzeichnet und beschrieben sind.
ATTENTION Seul un personnel qualifié et formé est habilité à démonter les sous-ensembles de la machine qui ne sont
pas formellement indiqués dans le Manuel d’utilisation meme s’ils sont accessibles par l’opérateur.
ATTENZIONE Solo personale qualificato puo’accedere a parti che non siano esplicitamente descritte nelle Istruzioni per
l’operatore come accessibill all’operatore.
ADVERTENCIA Las cubiertas y piezas sólo deberán ser quitadas o abiertas por personal especializado. Se exceptúan de
esta regla sólo las cubiertas y piezas cuya retirada y apertura estén indicadas y descritas expresamente en
las Instrucciones de uso.
This device fulfils the European standards requirements by complying with the
Directive of the Commission dated May 3, 1989 (89/336/EEC) relating to elec-
tromagneticcompatibilityandtheDirectivedatedFebruary19,1973(73/23/EEC)
relating to low-voltage electrical equipment. Conformity with the above mentioned Direc-
tives is indicated by the CE symbol attached to the device.
Note: Conformity may be affected by:
using interface cables not complying with the specifications
non-observance of important instructions in the operator’s manual
installing components not approved for this device by the manufacturer
unauthorized manipulation
Dieses Gerät erfüllt die Anforderungen der Europäischen Normen durch Einhal-
tung der Richtlinie des Rates vom 3. Mai 1989 (89/336/EWG) bezüglich der
Elektromagnetischen Verträglichkeit sowie die Richtlinie vom 19. Februar 1973
(73/23/EWG) bezüglich Elektrischer Betriebsmittel mit Niederspannungen. Die Konformi-
tät zu den oben angeführten Richtlinien ist durch das am Gerät angebrachte CE-Zeichen
gekennzeichnet.
Hinweis: Die Konformität kann beeinflußt werden durch:
Benutzung von nicht spezifizierten Schnittstellenkabeln
Nichtbeachtung wichtiger Hinweise der Bedienungsanleitung
Ersetzen von Bauteilen, die nicht vom Hersteller für dieses Gerät freigegeben wurden
Eingriffe durch Unbefugte
Cet appareil remplit aux exigences des normes européennes en respectant la
directive du Conseil du 3 mai 1989 (89/336/CE) relative à la compatibilité
électromagnétique et la directive du 19février 1973 (73/23/CE) en matière du
matériel à basse tension. La conformité aux directives mentionnées ci-dessus est repérée
par la marque de conformité de la Communauté Européenne (CE).
Remarque: La conformité peut être influencée par:
l’utilisation de câbles d’interface non spécifiés
le non-respect de consignes importantes du manuel d’utilisation
le remplacement de composants qui n’ont pas été homologués pour cet appareilpar le
constructeur
l’intervention de personnes non autorisées
Questo apparecchio soddisfa le richieste delle norme europee rispettando la
direttiva del consiglio del 3 Maggio 1989 (89/336/CEE) relativa alla compatibilità
elettromagnetica nonché la direttiva del 19 Febbraio 1973 (73/23/CEE) relativa
a mezzi di produzione elettrici a bassa tensione. La conformità alle direttivesopra citate è
contrassegnata con il simbolo CE applicato sull’apparecchio.
Nota: La conformità può essere influenzata tramite:
Utilizzo di cavi interfaccia non specificati
Inosservanza di importanti indicazioni delle istruzioni per l’uso
Sostituzione di componenti per i quali non è stato dato il benestare dal produttore per
questo apparecchio
Interventi tramite persone non autorizzate
Este equipo corresponde a lo exigido en las normas europeas a base del
cumplimiento de la directriz del Consejo del 3 de mayo de 1989 (89/336/CEE)
en lo que se refiere a la compatibilidad electromagnética así como de la directriz
del 19 de febrero de 1973 (73/23/CEE) en lo que se refiere a los materiales eléctricos con
bajas tensiones. Para señalizar la conformidad con las directrices antes mencionadas, el
equipo está dotado de la marca CE.
Indicación: La conformidad puede estar influida por:
la utilización de cables de interface no especificados
la inobservancia de indicaciones importantes contenidas en el manual de servicio
la sustitución por componentes, que no han sido homologados por el fabricante para
el equipo en cuestión
intervenciones de personas no autorizadas

Quick Start
Guide
KX-P3200
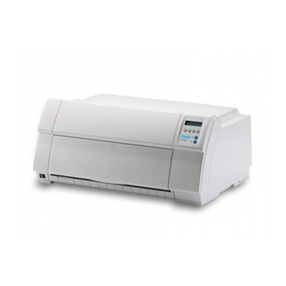
Congratulations on purchasing a T2024/24 printer.
This Quick Start Guide provides step-by-step
instructions on your printer’s setup procedures.
This printer has been factory set to operate with most
of the popular software packages.
Your software should control the printer functions. In
most cases, there will be no need to change the front
panel settings. However, if your application requires
changes to be made to the factory settings, you may
do so by using the enclosed Setup CD-ROM or the
Control Panel ( P. 24-26, 32-33 of the Reference
Manual).
Printer Driver Program for Windows 3.1x*1:
All Rights Reserved. © COPYRIGHT 1990 – 1992 Microsoft Corporation.
Printer Driver Program for Windows 95*2:
All Rights Reserved. © COPYRIGHT 1991 – 1995 Microsoft Corporation.
Printer Driver Program for Windows 98*3:
All Rights Reserved. © COPYRIGHT 1990 – 1995 Microsoft Corporation.
Printer Driver Program for Windows NT 4.0*4:
All Rights Reserved. © COPYRIGHT 1981 – 1997 Microsoft Corporation.
Printer Driver Program for Windows 2000*5:
All Rights Reserved. © COPYRIGHT 1985 – 1999 Microsoft Corporation.
*1Microsoft®Windows®operating system Version 3.1 (hereafter Windows 3.1)
*2Microsoft®Windows®95 operating system (hereafter Windows 95)
*3Microsoft®Windows®98 operating system (hereafter Windows 98)
*4Microsoft®Windows NT®Workstation operating system and Microsoft®Windows NT®Server network
operating system Version 4.0 (hereafter Windows NT 4.0)
*5Microsoft®Windows 2000®operating system (hereafter Windows 2000)
•IBM and Proprinter are trademarks of International Business Machines Corporation.
•Microsoft, Windows and Windows NT are registered trademarks of Microsoft Corporation in the United States
and/or other countries.
•Epson is a trademark of Seiko Epson Corporation.
Permission is granted from Microsoft Corporation to use Microsoft®Windows®Screen Shots.
®
Contents
Step 1 Preparation . . . . . . . . . . . . 2
Step 2 Connecting to a Computer . . . . 2
Step 3 Installing Ribbon Cassette . . . . 3
Step 4 Installing Paper . . . . . . . . . . 4
Fanfold Paper
(Push Tractor Mode) . . . . . . . 4
Single Sheets and Envelopes
(Friction Mode) . . . . . . . . . . 5
Step 5 Software-Printer Driver
Selection . . . . . . . . . . . . 6
Step 6 Installing Printer Driver . . . . . . 6
Windows 3.1x . . . . . . . . . . . 6
Windows 95 / Windows 98 . . . . . 7
Windows NT 4.0 . . . . . . . . . . 8
Windows 2000 . . . . . . . . . . . 8
☞
Quick Start
Guide T2024/24
-1-

Insert the platen knob and push it onto shaft as shown below.
1Turn power off on both printer and
computer.
2Attach other end of the interface cable
from your computer.
3Connect AC power cord to a grounded
AC socket.
Note:
•Use a shielded cable 1.95 m (6′5″) or less in
length for both parallel and serial. If you do not
already have a interface cable, you will need to
purchase one from your local computer or printer
dealer. For details, refer to “Interfacing”
( P. 40 of Reference Manual).
•If the cable has a frame ground wire, connect it to
the frame ground terminal.
☞
Step 2 Connecting to a Computer
Step 1 Preparation
Frame ground wire
Frame ground
terminal
➊
Serial interface
➋
Serial interface connector
Serial interface cable
➊
➋
➊
Parallel interface
Parallel interface connector
Parallel interface cable
AC power cord
AC
socket
-2-

Step 4 Installing Ribbon Cassette
■Supply
Description
Ribbon Cassette (black)
1➊Turn power on.
➋Open smoked plastic cover.
2Move head gap lever to position “6”.
3Install ribbon cassette and push down
4 arrows until they click into place.
4➊Lift blue ribbon guide from ribbon
cassette.
➋Slide blue ribbon guide between
printhead nose and ribbon mask,
and push it down.
5Make sure ribbon is not twisted and
rotate knob to remove any slack.
6Close smoked plastic cover.
7Adjust head gap lever for the
thickness of paper you are using.
Position Used for
1 or 2 Thinner sheets
3, 4, 5 or 6 Thick sheets or
multi-part forms
Note:
•If the ribbon does not insert easily between
the printhead nose and the ribbon mask,
rotate the knob on the ribbon cassette to
reduce the slack.
Step 3 Installing Ribbon Cassette
Note:
•Do not take off the blue ribbon guide from
the ribbon.
Ribbon cassette
Arrows
➊
➋
Smoked plastic
cover
Power switch
1
2
3
4
5
6
HEAD GAP
Head gap lever
Knob
Ribbon cassette
1
2
3
4
5
6
HEAD GAP
CAUTION
HOT SURFACE,
AVOID CONTACT.
Printhead nose
Blue ribbon guide
Ribbon Ribbon mask
Printhead nose
Blue ribbon guide
➋
➊
-3-

Step 5 Handling Paper
Fanfold Paper (Push Tractor Mode)
1Set paper feed selecter to “ ”
position.
2Lift off top cover.
3➊ Unlock tractors by pulling tractor
clamping levers forward.
➋Slide tractors to accomodate
approximate width of paper being
used.
4Raise tractor covers.
5Align paper sprocket holes with
tractor pins, then close tractor cover.
6➊Adjust tractors to remove any slack.
➋Lock tractor clamping levers.
7Press LOAD/PARK .
8Raise top cover.
9Raise paper support.
Step 4 Installing Paper
Top cover
Paper
feed
selector
➊
➊
➋
➋
Tractor clamping
levers
Tractors
Tractor
covers
Face down
Paper sprocket hole
Tractor pin
Tractor
clamping
levers
Top cover
Paper
support
-4-

1
0
Insert paper support into slot of
extension plate until it stops. 1
1
If ON LINE indicator is not lit, press
ON LINE to get ready to print.
Single Sheets and Envelopes (Friction Mode)
1Set paper feed selector to “ ”
position.
2Raise top cover.
This is done by inserting the side pins of the top
cover into the slots in the upper cabinet.
3Raise paper support.
4➊Separate paper guides to
approximate width of your paper or
envelope.
➋Insert a sheet of paper through
paper guides.
The paper will be automatically loaded to the
first print line.
5If ON LINE indicator is not lit, press
ON LINE to get ready to print.
Note:
•If the extension plate is already installed, it
does not need to be removed.
Paper
feed
selector
Top cover
➋
➊
Paper
support
Extension plate
-5-

This procedure is the final step before printing and is performed in your application software program.
The steps will vary, depending on the software program. Consult your software package for proper procedures.
The Tally T2024/24 will be your first choice. However, if the Tally T2024/24printer is not listed in your software, you
must select an alternative from the following table.
Note:
If using Microsoft Windows 3.1, Windows 95, Windows 98, Windows NT 4.0 or Windows 2000 you will need to
install a Windows printer driver. Proceed to Step 6 ( below) for the installation procedure.
Printer Selections (in order of priority)
*If selecting the IBM Proprinter X24E or X24 in your software, printer emulation must also be changed through
the Control Panel Software program or using the Control Panel. Consult your Reference Manual
( P. 24-26, 32-33) for details.
Windows 3.1x
Follow the steps below for installation.
1Insert the CD into the CD drive.
2Click Control panel , Printer ,
Add new model in the Main window.
3Select “unlisted or updated printer” In the
printer list.
4Select Your CD drive and go to the directory
T2024_24\English\Drivers\Win3x.
5Click OK .
6In the printer list select “Tally T2024/24” and
click OK .
Tally T2024/24
Epson LQ-300
Epson LQ series
IBM Proprinter X24E *
IBM Proprinter X24 *
☞
Step 5 Software — Printer Driver Selection
Step 6 Installing Printer Driver
☞
-6-

Windows 95 / Windows 98
Follow the steps below for installation.
1Insert the CD into the CD drive.
2Click Start , point to “Settings” and
“Printers”, then click.
3Double click Add Printer , and click Next> .
4When the option “Local printer” or
“Network printer” appears, select
Local printer then Next> .
5Click Have Disk , Browse .
Select the CD drive and go to the directory
T2024_24\English\Drivers\Win9x. Click OK ,
OK .
6Select your Tally printer model.
7Click Next> .
8Click Next> to set up.
9Select “Yes” and click Next> .
1
0
Click Finish .
1
1
Follow the instructions on your computer
screen.
-7-

Windows NT 4.0
Follow the steps below for installation.
1Click Start , point to “Settings” and click
“Printers”.
2Double click the Add Printer icon.
3Click Next> .
4Select “LPT1:” by clicking on the check box.
5Click Next> .
6Click Have Disk... .
7Insert the CD into the CD drive. Click
Browse .
Go to the directory T2024_24\English\
Drivers\WinNT4x. Click Open .
8Click OK .
9Click Next> three times.
10Click Finish .
Windows 2000
Follow the steps below for installation.
1Click Start , point to “Settings” and click
“Printers”.
2Double click the Add Printer icon.
3Click Next> .
4Select “Local printer” by clicking on the check
box.
5Click Next> .
6Select the appropriate port “Use the following
port”: normally LPT1.
7Click Next> .
8Click Have Disk .
9Insert the CD into the CD drive. Click
Browse .
Go to the directory T2024_24\English\
Drivers\Win2000.
10Select T2024W2K.
11Select OK .
12Click Next> three times.
13Click Finish .
14Awarningaboutdigitalsignature isdisplayed.
“Do you want to continue installation?”
Click Yes .

Quick Start
Guide
KX-P3200
Wir beglückwünschen Sie zum Kauf eines T2024/24-
Druckers.
Diese Kurzbedienungsanleitung erläutert Schritt für
Schrittdiefür IhrenDruckernotwendigenSetup-Proze-
duren.
Der Drucker wurde werkseitig so eingerichtet, daß er
mit den meisten bekannten Software-Paketen arbeiten
kann.
Ihre Anwendungs-Software sollte die Drucker-Funktio-
nen steuern. In den meisten Fällen wird es nicht nötig
sein, die Einstellungen des Bedienfelds zu ändern.
Sollte es dennoch nötig sein, die Werkseinstellungen
zuändern, können Sie das mitHilfe der Setup-CD oder
über das Bedienfeld tun ( S. 24-26, 32-33 des
Referenzhandbuchs).
Druckertreiber-Programm für Windows 3.1x*1:
Alle Rechte vorbehalten. © COPYRIGHT 1990 – 1992 Microsoft Corporation.
Druckertreiber-Programm für Windows 95*2:
Alle Rechte vorbehalten. © COPYRIGHT 1991 – 1995 Microsoft Corporation.
Druckertreiber-Programm für Windows 98*3:
Alle Rechte vorbehalten. © COPYRIGHT 1990 – 1995 Microsoft Corporation.
Druckertreiber-Programm für Windows NT 4.0*4:
Alle Rechte vorbehalten. © COPYRIGHT 1981 – 1997 Microsoft Corporation.
Druckertreiber-Programm für Windows 2000*5:
Alle Rechte vorbehalten. © COPYRIGHT 1985 – 1999 Microsoft Corporation.
*1Microsoft®Windows®Betriebssystem Version 3.1 (im Folgenden Windows 3.1)
*2Microsoft®Windows®95 Betriebssystem (im Folgenden Windows 95)
*3Microsoft®Windows®98 Betriebssystem (im Folgenden Windows 98)
*4Microsoft®Windows NT®Workstation Betriebssystem und Microsoft®Windows NT®Server network
Betriebssystem Version 4.0 (im Folgenden Windows NT 4.0)
*5Microsoft®Windows 2000®Betriebssystem (im folgenden Windows 2000)
•IBM und Proprinter sind Warenzeichen der International Business Machines Corporation.
•Microsoft, Windows und Windows NT sind eingetragene Warenzeichen der Microsoft Corporation in den United
States und/oder anderen Ländern.
•Epson ist ein Warenzeichen der Seiko Epson Corporation.
Die Verwendung von Microsoft®Windows®-Screen Shots geschieht mit Genehmigung der Microsoft Corporation.
Inhalt
1 Vorbereitung . . . . . . . . . . . 2
2 Mit einem Computer verbinden . 2
3 Farbbandkassette installieren . . 3
4 Papier einlegen . . . . . . . . . . 4
Endlospapier
(Schubtraktor-Modus) . . . . . . 4
Einzelblätter und Briefumschläge
(Friktionsmodus) . . . . . . . . . 5
5 Software – Druckertreiber
Auswahl . . . . . . . . . . . . . 6
6 Druckertreiber installieren . . . . 6
Windows 3.1x . . . . . . . . . . . 6
Windows 95 / Windows 98 . . . . . 7
Windows NT 4.0 . . . . . . . . . . 8
Windows 2000 . . . . . . . . . . . 8
☞
®
Der schnelle
Einstieg
T2024/24
-1-

Stecken Sie das Walzenrad auf die Achse wie unten dargestellt.
1Schalten Sie sowohl den Drucker als
auch den Computer aus.
2Stecken Sie das freie Ende des Schnitt-
stellenkabels Ihres Computers ein.
3Stecken Sie das Netzkabel in eine ge-
erdete Steckdose.
Hinweis:
•VerwendenSiesowohlfürdieparallelewiefürdie
serielle Schnittstelle ein geschirmtes Kabel mit
einer Länge von 1,95 m (6′5″) oder weniger.
Wenn Sie kein Kabel besitzen, können Sie eines
bei Ihrem lokalen Computer- oder
Druckerhändler erwerben. Weitere Einzelheiten
siehe unter ,,Schnittstellen“ (Referenzhandbuch
S. 40).
•Wenn das Kabel eine Erdungsleitung hat,
verbinden Sie diese mit dem Masseanschluß.
☞
Schritt 2 Mit einem Computer verbinden
Schritt 1 Vorbereitung
Erdungsleitung
Masseanschluß
➊
Serielle Schnittstelle
➋
Serieller Schnittstellen-
anschluß
Serielles Schnittstellenkabel
➊
➋
➊
Parallele Schnittstelle
Paralleler Schnittstellen-
anschluß
Paralleles Schnittstellenkabel
Netzkabel
Steckdose
-2-

4 Installing Ribbon Cassette
■Zubehör
Beschreibung
Farbbandkassette (schwarz)
1➊Drucker einschalten.
➋Rauchfarbene Plastikabdeckung
öffnen
2Kopfabstandshebel auf Position “6”
stellen.
3DieFarbbandkassetteeinsetzen unddie
4 Pfeile nach unten drücken, bis sie hör-
bar einrasten.
4➊Blaue Farbbandführung anheben.
➋Blaue Farbbandführung zwischen
Druckkopfnase und Farbbandmaske
schieben und nach unten drücken.
5Sicherstellen, daß das Farbband nicht
verdreht ist; Knopf drehen, um das
Farbband zu straffen.
6Rauchfarbene Plastikabdeckung
schließen
7Kopfabstandshebel entsprechend der
Dicke des verwendeten Papiers ein-
stellen.
Stellung verwendet für
1 oder 2 Dünnere Blätter
3, 4, 5 oder 6 Dicke Blätter oder
mehrlagige Formulare
Hinweis:
•Sollte das Farbband nicht leicht zwischen
Druckkopfnase und Farbbandmaske glei-
ten, den Knopf auf der Farbbandkassette
drehen um die Spannung des Farbbands
zu erhöhen.
Schritt 3 Farbbandkassette installieren
Hinweis:
•Die blaue Farbbandführung nicht von der
Farbbandkassette entfernen.
Farbbandkassette
Pfeile
➊
➋
Rauchfarbene
Plastikabdeckung
Netzschalter
1
2
3
4
5
6
HEAD GAP
Kopfabstands-
hebel
Knopf
Farbband
1
2
3
4
5
6
HEAD GAP
Kopfabstand
CAUTION
HOT SURFACE,
AVOID CONTACT.
Druckkopfnase
Blaue Farbbandführung
Farbband Farbbandmaske
Druckkopfnase
Blaue Farbbandführung
➋
➊
-3-

5 Handling Paper
Endlospapier (Schubtraktormodus)
1Papierwahlhebel auf “ ” stellen.
2Obere Abdeckung abnehmen.
3➊Verriegelungshebel der Traktoren
nach vorne ziehen um Traktoren zu
entriegeln.
➋Die Traktoren auf eine dem verwen-
deten Papier angepaßte Breite
schieben.
4Traktorabdeckungen aufklappen.
5Transportlöcher des Papiers über Trak-
torstacheln legen.
6➊Die Traktoren so ausrichten, daß das
Papier nicht lose ist.
➋Traktoren mit den Verriegelungs-
hebeln fixieren.
7LOAD/PARK drücken.
8Obere Abdeckung einsetzen.
9Papierstütze nach oben klappen.
Schritt 4 Papier einlegen
Obere Abdeckung
Papier-
wahl-
hebel
➊
➊
➋
➋
Verriegelungs-
hebel
Traktoren
Traktor-
abdeckungen
Face down
Perforationsloch
Traktorstachel
Traktorver-
riegelungs-
hebel
Obere Abdeckung
Papier-
stütze
-4-

1
0
Die Erweiterungsstütze mit dem Schlitz
auf die Papierstütze stecken und bis
zum Anschlag nach unten schieben.
1
1
Wenn die ON LINE-Anzeige nicht leuch-
tet, Taste ON LINE drücken, um
Druckbereitschaft herzustellen.
Einzelblätter und Briefumschläge (Friktionsmodus)
1Papierwahlhebel auf “ ” stellen.
2Obere Abdeckung nach oben
schwenken.
Dazu die seitlich an der oberen Abdeckung ange-
brachtenStiftein die dafürvorgesehenenSchlitze
am Druckergehäuse einführen.
3Papierstütze nach oben klappen.
4➊Die Papierführungen auf eine dem
Papier oder dem Briefumschlag an-
gepaßte Breite schieben.
➋Ein Blatt Papier zwischen die
Papierführungen einlegen.
Das Papier wird automatisch bis zur ersten
Druckzeile eingezogen.
5Wenn die ON LINE-Anzeige nicht leuch-
tet, Taste ON LINE drücken, um
Druckbereitschaft herzustellen.
Hinweis:
•Sollte die Erweiterungsstütze schon
installiert sein, muß sie nicht entfernt
werden.
Paper
feed
selector
Obere Abdeckung
➋
➊
Papier
stütze
Erweiterungsstütze
-5-

Nach Abschluß dieser Prozedur ist das Gerät druckbereit; die Prozedur wird in Ihrer Anwendungssoftware
ausgeführt.
Die notwendigen Schritte weichen – abhängig von der verwendeten Software – voneinander ab.
Ihreerste Wahl sollte der TallyT2024/24-Treiber sein. Wird dieser jedochnicht in Ihrer Software angezeigt, müssen
Sie einen der in der folgenden Tabelle aufgeführen anderen Drucker wählen.
Hinweis:
Wenn Sie Microsoft Windows 3.1, Windows 95, Windows 98, Windows NT 4.0 oder Windows 2000 verwenden,
müssen Sie einen Windows-Druckertreiber installieren. Lesen Sie dazu bei Schritt 6 ( unten) weiter.
Druckerauswahl (in der empfohlenen Reihenfolge)
*Wenn Sie in Ihrer Software einen IBM Proprinter X24E- oder X24-Druckertreiber wählen, muß die Drucker-
emulation mit Hilfe der Control Panel-Software oder über das Bedienfeld ebenfalls geändert werden. Einzel-
heiten dazu finden Sie im Referenzhandbuch ( S. 24-26, 32-33).
Windows 3.1x
Führen Sie zur Installation die folgenden Schritte aus.
1Legen Sie die CD in das CD-Laufwerk ein.
2Klicken Sie im Fenster der Hauptgruppe
auf “Systemsteuerung”, “Drucker” und
“Drucker hinzufügen”.
3In der Druckerliste wählen Sie aus: “Nicht auf-
geführter oder aktualisierter Drucker”.
4Wählen Sie Ihr CD-Laufwerk aus und gehen
Sie in das Verzeichnis:
T2024_24\Deutsch\Drivers\Win3x.
5Klicken Sie auf OK .
6Wählen Sie in der Druckerliste den Tally
T2024/24 aus und klicken Sie dann auf OK .
Tally T2024/24
Epson LQ-300
Epson LQ series
IBM Proprinter X24E *
IBM Proprinter X24 *
☞
Schritt 5 Software — Auswahl des Druckertreibers
Schritt 6 Druckertreiber installieren
☞
-6-

Windows 95 / Windows 98
Führen Sie zur Installation die folgenden Schritte aus.
1Legen Sie die CD in das CD-Laufwerk ein.
2Klicken Sie auf Start , zeigen Sie mit dem
Mauszeiger auf “Einstellungen”, “Drucker”
und klicken Sie.
3Doppelklicken Sie auf Neuer Drucker und
klicken sie auf Weiter .
4Wenn die Option “Lokaler Drucker” oder
“Netzwerk Drucker” erscheint, wählen Sie
Lokaler Drucker und anschließend
Weiter .
5Klicken Sie auf Diskette…, Durchsuchen .
Wählen Sie das CD-Laufwerk aus und gehen
Sie in das Verzeichnis T2024_24\Deutsch\Driv-
ers\Win9x. Klicken Sie auf OK , OK .
6Wählen Sie das gewünschte Tally-Drucker-
modell aus.
7Klicken Sie auf Weiter .
8Klicken Sie auf Weiter , um den Drucker
einzurichten.
9Wählen Sie “Ja” und klicken Sie auf Weiter .
1
0
Klicken Sie auf Fertig stellen .
1
1
Folgen Sie den Anweisungen auf dem Bild-
schirm.
-7-

Windows NT 4.0
Führen Sie zur Installation die folgenden Schritte aus.
1Klicken Sie auf Start , zeigen Sie mit dem
Mauszeiger auf “Einstellungen”, “Drucker”
und klicken Sie.
2Doppelklicken Sie auf Neuer Drucker .
3Klicken Sie auf Weiter .
4Wählen Sie durch Klicken auf das dazuge-
hörige Kontrollkästchen “LPT1:”.
5Klicken Sie auf Weiter .
6Klicken Sie auf Diskette….
7Legen Sie die CD in das CD-Laufwerk ein.
Klicken Sie auf Durchsuchen .
Gehen Sie in das Verzeichnis
T2024_24\Deutsch\Drivers\WinNT4x.
Klicken Sie auf Öffnen .
8Klicken Sie auf OK .
9Klicken Sie dreimal auf Weiter .
10Klicken Sie auf Fertig stellen .
Windows 2000
Führen Sie zur Installation die folgenden Schritte aus.
1Klicken Sie auf Start , zeigen Sie mit dem
Mauszeiger auf “Einstellungen”, “Drucker”
und klicken Sie.
2Doppelklicken Sie auf Neuer Drucker .
3Klicken Sie auf Weiter .
4Wählen Sie durch Klicken auf das dazuge-
hörige Kontrollkästchen “Lokaler Drucker”.
5Klicken Sie auf Weiter .
6Wählen Sie durch Klicken auf das dazuge-
hörige Kontrollkästchen “Vorhandenen
Anschluß verwenden”, normalerweise LPT1.
7Klicken Sie auf Weiter .
8Klicken Sie auf Datenträger .
9Legen Sie die CD in das CD-Laufwerk ein.
Klicken Sie auf Durchsuchen .
Gehen Sie in das Verzeichnis
T2024-24\Deutsch\Drivers\Win2000.
10Wählen Sie T2024W2K und klicken Sie auf
Öffnen .
11Klicken Sie OK .
12Klicken Sie dreimal auf Weiter .
13Klicken Sie auf Fertig stellen .
14Eine Warnung über die digitale Signatur wird
angezeigt. “Soll die Installation fortgesetzt
werden?”
Klicken Sie auf Ja .
-8-

Guide de démarrage
rapide
KX-P3200
Félications d’avoir acheté une imprimante T2024/24.
Ce guide de démarrage rapide vous fournit des
instructions de point en point pour le réglage (Setup)
de votre imprimante.
L’imprimante a été réglée à l’usine de telle sorte qu’elle
puisse être utilisée avec la plupart des logiciels usuels.
Votre logiciel devra commander les fonctions d’impri-
mante. Dans la plupart des cas, il ne sera pas néces-
saire de modifier les réglages du panneau de
commande. Si des modifications des réglages usine
serontnéanmoinsnécessaires,utiliseràceteffetleCD
d’installation ou le panneau de commande
( P. 24-26, 32-33 du Manuel de Référence).
Programme de pilote d’imprimante pour Windows 3.1x*1:
Tous les droits réservés. © COPYRIGHT 1990 – 1992 Microsoft Corporation.
Programme de pilote d’imprimante pour Windows 95*2:
Tous les droits réservés. © COPYRIGHT 1991 – 1995 Microsoft Corporation.
Programme de pilote d’imprimante pour Windows 98*3:
Tous les droits réservés. © COPYRIGHT 1990 – 1995 Microsoft Corporation.
Programme de pilote d’imprimante pour Windows NT 4.0*4:
Tous les droits réservés. © COPYRIGHT 1981 – 1997 Microsoft Corporation.
Programme de pilote d’imprimante pour Windows 2000*5:
Tous les droits réservés. © COPYRIGHT 1985 – 1999 Microsoft Corporation.
*1système d’exploitation Microsoft®Windows®version 3.1 (ci-après Windows 3.1)
*2système d’exploitation Microsoft®Windows®95 (ci-après Windows 95)
*3système d’exploitation Microsoft®Windows®98 (ci-après Windows 98)
*4système d’exploitation de poste de travail Microsoft®Windows NT®et système d’exploitation de réseau de
serveur Microsoft®Windows NT®version 4.0 (ci-après Windows NT 4.0)
*5système d’exploitation Microsoft®Windows 2000®(ci-après Windows 2000)
•IBM et Proprinter sont des marques de la International Business Machines Corporation.
•Microsoft, Windows et Windows NT sont des marques déposées de la Microsoft Corporation aux Etats-Unis
et/ou d’autres pays.
•Epson est la marque de la Seiko Epson Corporation.
Microsoft Corporation accorde la permission d’utiliser des Microsoft®Windows®Screen Shots.
Table des matières
Etape 1 Préparation . . . . . . . . . . . . 2
Etape 2 Raccordement à un ordinateur . . 2
Etape 3 Mise en place du ruban-cassette 3
Etape 4 Mise en place du papier . . . . . 4
Papier à pliage accordéon
(mode de tracteur pousseur) . . . 4
Feuilles séparées et enveloppes
(mode de friction) . . . . . . . . 5
Etape 5 Logiciel - sélection de pilote
d’imprimante . . . . . . . . . . 6
Etape 6 Installation du pilote d’imprimante 6
Windows 3.1x . . . . . . . . . . . 6
Windows 95 / Windows 98 . . . . . 7
Windows NT 4.0 . . . . . . . . . . 8
Windows 2000 . . . . . . . . . . . 8
☞
®
Guide de
démarrage rapide
T2024/24
-1-

Insérer le bouton de cylindre et le pousser sur l’arbre comme représenté ci-après.
1Mettre l’imprimante et de l’ordinateur
hors circuit.
2Insérer l’autre extrémité du câble d’in-
terface de votre ordinateur.
3Raccorder le cordon d’alimentation
c.a. à une prise c.a. mise à la terre.
Nota:
•Utiliser un câble blindé de 1.95 m (6′5″) ou plus
court pour l’interface parallèle et sérielle. Si vous
n’avez pas de câble, vous pouvez vous en
procurer un auprès de votre revendeur
d’informatique ou d’imprimantes. Vous trouverez
des informations détaillées dans “Connexion
d’interface”( P. 40 du Manuel de Référence).
•Si le câble est doté d’un câble de mise à la terre,
le raccorder à la borne de terre.
☞
Etape 2 Raccordement à un ordinateur
Etape 1 Préparation
Câble de mise
à la terre
Borne de terre
➊
Interface sérielle
➋
Connecteur d’interface
sérielle
Câble d’interface sérielle
➊
➋
➊
Interface parallèle
Connecteur d’interface parallèle
Câble d’interface parallèle
Cordon d’alimentation c.a.
prise
c.a.
-2-
Other manuals for T2024/24
1
Table of contents
Languages:
Other Tally Printer manuals

Tally
Tally T 2045 User manual

Tally
Tally T2265 SprintPro User manual

Tally
Tally T2150 SprintPro User manual

Tally
Tally T9114 Installation guide

Tally
Tally Dascom 1125 User manual

Tally
Tally T2265 SprintPro User manual

Tally
Tally T2030/24 User manual

Tally
Tally XPRESS T9412i Installation instructions

Tally
Tally T2040 User manual

Tally
Tally T8106 User manual