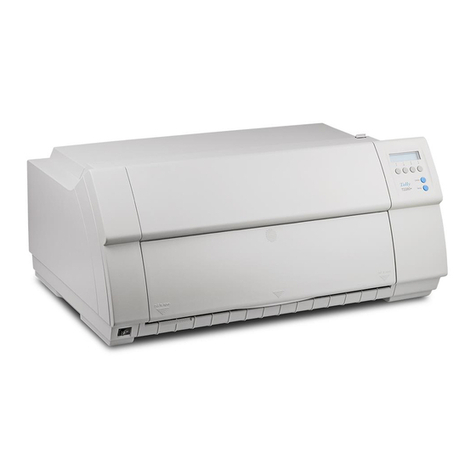
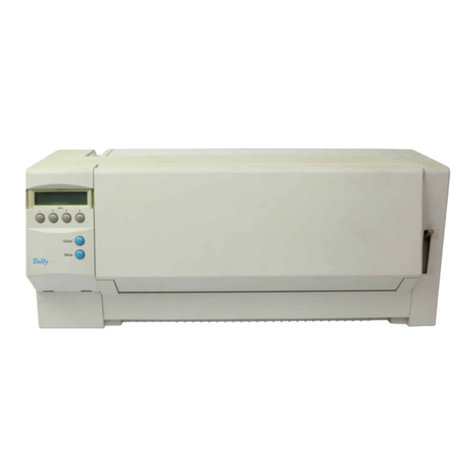
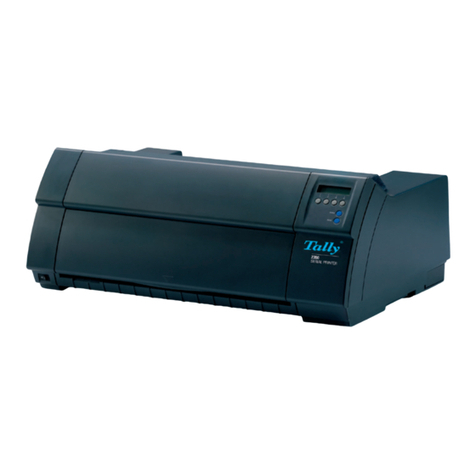
Tally T9114 Installation guide

Seite -1-
-PostScriptModule
-Barcode Module
-Memory Module
T9114 / T9216
T9120 / T9220
Installation,
Barcode Programming

Seite -2-
PRECAUTIONS
Disconnect The Power Cord
Never remove the printer control board while the printer is plugged in. To avoid the
possibility of electrical shock, always disconnect the power cord when installing or
removing ANY internal or external printer option.
Discharge Static Electricity
The control board and internal printer options (SIMM, Network interface) are sensitive to
static electricity. Before installing or removing an internal option, discharge static electricity
from your body by touching something metal, such as the metal back plate on any device
plugged into a grounded power source.
If you walk round before finishing the installation, discharge any static electricity again.
Copyrights
This manual is provided for information purposes only. All information included herein is
subject to change without notice. Tally is not responsible for any damages, direct or
indirect, arising from or related to use of this manual.
© 2002 Tally Computerdrucker GmbH. All rights reserved.
© 2003 Tally Computerdrucker GmbH. All rights reserved.
-T9114, T9120, T9216, T9412, T9220 and Tally logo are trademarks of
TallyComputerdruckerGmbH
-Centronics is a trademark of Centronics Data Computer Corporation.
-PCL and PCL6 are trademarks of Hewlett-Packard Company.
-IBM and IBM PC are trademarks of International Business Machines Corporation.
-TrueType, Laser Writer and Macintosh are trademarks of Apple Computer Inc.
-Microsoft, Windows, Windows 9x, Windows Me, Windows 2000, Windows NT, Windows
XP and MS-DOS are registered trademarks of Microsoft Corporation.
-PostScript 3 is a trademark of Adobe Systems Inc.
-All other brand or product names are trademarks of their respective companies or
organizations.

Seite -3-
Table of Contents
InstallingtheBarcodemodule 4
InstallingonT9412,T9114,T9216 4
InstallingonT9120 6
InstallingonT9220 10
UsingthemoduleoptionswithinMicrosoftWord 12
SAP Support 13
OCR-B 13
How Barcode module works 14
How to use Barcode module 16
Parameter description 17
Tparameter Esc(s#T (Bar Code System) 17
Pparameter Esc(s#P (Human readable text) 18
Hparameter Esc(s#H(HRTFont) 18
Vparameter Esc(s#H(VerticalSIze) 19
Bparameter Esc(s#1,#2[,#3,#]4B (Black Bars widths) 19
Sparameter Esc(s#1,#2[,#3,#]4B (White Bars widths) 19
PrintExtendedCharactersandleadingspaces 20
Code 128 Control Codes 20
PCL Escape Sequences Examples 21
Default parameters 22
Bar Code Formats Characteristics: Size 23
„Barcode & More“ Fonts 24
Trouble shooting 27
Barcode Testpage sample 29
Trademarks 31

Seite -4-
Additional memory, Barcode and the PostScript option are provided on SIMMs.
Notes: Since PostScript setting requires 12 MB of printer memory and the T9114 / T9412 comes with 4 MB
standard, installation of the PS SIMM requires installation of a 8 MB SIMM memory as well.
1Turn the power off and unplug all cables from the printer
2Remove the two screws on the rear of the printer,
then remove the control board cover.
3Locate the Barcode/PostScript SIMM slot (lower slot on
the left as shown) and the memory SIMM slot (upper
slot) on the control board. They are not interchangeable.
- To install the Memory SIMM, continue with Step 4.
- To install the Barcode / PostScript SIMM, go to Step 6.
4Hold the memory SIMM so that the notch Œand the
connection point •are aligned with the slot as shown.
T9412/T9114: Insert the SIMM all the way into the upper
slot labeled DRAM MODULE at a 45 degrees angle
.T9216:Insert the SIMM all the way into the lower slot
labeled DRAM MODULE at a 90 degrees angle.
Next step 6)
T9412 / T9216 / T9114
Memory, PostScript and Barcode Installation.
T9412/T9114

Seite -5-
5Rotate it up until it snaps into place.
6Hold the memory SIMM so that the notch Œand the
connection point •are aligned with the slot as shown.
T9412/T9114: Insert the SIMM all the way into the lower
slot labeled FLASH-ROM MODULE at a 45 degrees
angle.
T9216: Insert the SIMM all the way into the upper
slot labeled FLASH-ROM MODULE at a 90 degrees
angle. Next step 8)
7Rotate it up until it snaps into place.
8Make sure that the SIMMs are secured in place by
the metal clips and pins on both sides of the connectors.
9Reconnect the power cord and turn the printer on.
Note: For PostScript driver installation and usage information on a Macintosh system, refer to Appendix
C, “Using Your Printer with a Macintosh.” For PS printing on a Windows system, refer to Appendix
E, “Using Windows PostScript Driver.” of the printers reference manual.

Seite -6-
1Unplug the printer power cord.
2Disconnect all cables from the back of the printer.Prep
arations
3Remove the printer cover .
aOpen the rear cover.
bRemove the two screws from the back of the printer.
Save the screws.
cGrasp the cover (as illustrated) and pull it firmly
toward the rear of the printer until it stops.
dRemove the cover from the printer.
eRemove the five screws from the metal plate
covering the control board.
fRemove the plate.
Closing The Printer Cover
T9120 Memory, Barcode and PostScript Installation.

Seite -7-
If the printer cover is opened,
you can see the printer control board as below.
ROM SIMM Network Card
Connector Connector
Understanding the Printer Control Board Printer Memory Serial/LocalTalk
Connector Connector
The printer memory option increases the printer´s dynamic random access memory (DRAM). Your printer
was shipped with 16MB of standard printer memory. You can install two printer memory options in your
printer. Printer memory upgrade options available are 4, 8, 16, 32, 64 and 128MB.
Notes: Your machine recognizes only half of 8MB, 32MB and 128MB SIMMs if installed in the slot CN4.
DRAM SIMM Features for Upgrade
- Speed(Access Time): 60nS
- Refresh Time: 1K(1024 cycles/16 ms) / 2K(2048 cycles/32 ms)
- The Method of refresh is CAS-befor-RAS refresh
- Mode: EDO Type
- Single +5V +/-10% power supply
- The SDRAM does not support
Notes: The printer memory option is easily damaged by static electricity. Touch something metal before
you touch the memory option.
Memory
Connector
CN 3
CN 4
CN 5Printer Memory
CN 4: This slot recognizes only half of 8MB, 32MB
and 128MB SIMMs if they are installed.

Seite -8-
4Unpack the SIMM module.
Notes: Avoid touching the connection points along
the edge.
Save the packaging.6
5Hold the SIMM module with the connection points
pointing toward the connector and position the notch
as shown. Insert the memory option all the way into
the connector at a 30Oangle, and rotate it left until
it snaps into place.
6
6Make sure both metal clips on the connector are
fastened, and the two pins on each of the connectors
are pushed through the holes on the SIMM module.
7Close the metal plate and tighten all the screws.
8Set the bottom of the cover onto the printer. Make
sure the bottom tabs on the cover fit into the
corresponding slots in the printer. Rotate the cover
up towards the printer. Slide the cover toward the
front of the printer until it clicks into place.
PostScript module
Memory module

Seite -9-
9Gently tighten all the screws
10 Reconnect any interface cables and the power cord.
11 Memory module:
Set the printer memory item on the printer tab of
the properties dialogue box to the value of the added
printer memory.
Barcode / PostScript module:
Install the PostScript driver from the printers CD
to use the PostScript emulation.
Removing a SIMM module
1Push the metal clips at each end of the connector
away from memory option.
2Rotate the memory option right to a 30Oangle and
gently pull it out of the connector as shown.
3Place the printer memory option in its original
packaging.
Notes: Store the SIMM module in the original packaging
due to a damage by static electricity

Seite -10-
T9220
Memory, PostScript (PS) and Barcode Installation.
Additional memory, Barcode and the PS option are provided on DIMMs.
1Turn the power off and unplug all cables from the printer
2Remove the two screws on the rear of the printer,
then remove the control board cover.
3Locate the Barcode/PS DIMM slot (upper slot)
and the memory SIMM slot (lower slot) on the control board.
They are not interchangeable.
- To install theMemory DIMM, continue with Step 5.
- To install the Barcode / PS DIMM, go to Step 4.

Seite -11-
4Hold the Barcode / PS DIMM so that the notch and the
connection point are aligned with the slot as shown.
Insert the DIMM all the way into the upper slot
labelledROMDIMMata90degreesangle.
Nextstep6)
5Hold the memory DIMM so that the notch and the
connection point are aligned with the slot as shown.
Insert the DIMM all the way into the lower
slotlabelled RAM DIMM at a 90 degrees
angle.
6Replace the control board cover and tighten the two screws.
7Reconnect the power cord and turn the printer on.

Seite -12-
Using the module options within Microsoft Word
MS Word has the possibility to send printer commands direct to the printer.
Select <Insert> <Fields> and then proceed in the right window to the field <print>
(<druck>) and click at it once. Press the Tab and cursor right keys and enter any valid
ESC-Sequence like this: 27"(s.....T“
If you would like to display the field, mark the field functions option in <Tools>
(<Extras>) <Options>....
Note: Unfortunately there is a bug in MS Word 97. If you are using a Microsoft printer
driver, the print field may not be sent to the printer. There are two ways to solve this
problem:
1. Install the Windows (Word) Service Pack 1, or
2. Install another PCL5e driver.
If you need always the identical barcode information, then we suggest to add the
code information into the print field. The best is you use a small Letter Gothic font.

Seite -13-
SAP Support
The Barcode module functionality is supported standard by the SAP R/3 software.
-OSS note #5196 lists standard R/3 barcode names and supported device types for
printing barcode
-PCL-5 commands for Tally Barcode module are built into the HP compatible device
types by SAP
-Modifications are only required for special Barcode types and sizes
-OSS note #45643 lists PCL-5 command details for barcode attribute selection
-PCL-5 commands are maintained as « Print Controls » in SPAD
-SE73 transaction lists barcode names and print-controls for every device type
-Barcode on: Print-control SBPxx
-Barcode off (regular font): SBSxx
-A test text is built into R/3: SO10, SAPSCRIPT-BARCODETEST (client 000)
Note: In the early release of the device type, there were a few errors in the escape
sequences. It is then recommended to verify the escape sequence syntax in R/3.
We recommend to copy the control into the user „Z“-environment and maintain it to your
own needs.
OCR-B
ESC-Sequence: <27>(1O<27>(sp10h12vsb110T OCR-B of „Bar Codes & More“
OCR-B of the „Bar Codes & More“ does print the same characters, except
<CHR 95>, <CHR 96> and <CHR 126> look according the ASCII symbol set.
The SAP print control for OCR-B is SF500.

Seite -14-
How the Barcode module works
The Barcode module is not only made of scalable fonts. It is hooked to font calls within the
PCL5 interpreter. Typeface numbers from 24600 to 24800 (those number are in a
guaranteed exclusive range) activate the intelligence. All data mapped to one of those
special fonts is analysed and converted into bar code directly by the firmware.
If you want to print special characters (ASCII code < 32) with those bar codes, a
„Transparent Print Data“ PCL sequence (Esc&p#X) must follow immediately the font
selection sequence. This is the only way to know how many characters have to be printed.
The firmware gets from the I/O port the data corresponding to the font. The end of bar
code data is determined according to the bar code type:
* Barcode data is numeric only: ended by space/CR/LF/FF/Escape code.
* Barcode data is alphanumeric: ended by CR/LF/FF/Escape code.
If you want to print binary informations in the barcode, please use the Esc&p#X length
definition sequence, explained right before.
1) Once the data is received, it is analysed to verify it fits in the bar code specs:
Correct data size, for example Code 2of5 interleaved must have an even size, EAN
and UPC have fixed lengths...)
Valid data: some systems, like UPC-E, accept only specially structured data.
If data can only be numeric or alphanumeric, it accepts only allowed characters.
2) Some code systems, like Code 128C print compressed data. The compressed value is
not always available to the user. For such codes, the Barcode module verify if data is
compressed. If not, it performs automatically the compression.
3) Some formats require what is called a checksum. A checksum is a value, result of a
complex calculation on the code data. That value is added to the end of the data and
used by the code reader to proof the reading. The Barcode module calculates
automatically the checksum(s) of bar codes which need it. Bar codes can have up to 2
checksums (MSI Plessey, UCC128). If the checksum was provided with fixed length
data (EAN 8/13, UPC) it is ignored.
The Barcode module then generates the shape of the bar code, according to
parameters in the font-like PCL sequence. For Barcode module bar codes, PCL font
parameters don’t have the standard meaning (besides the V and T parameter):
The parameter definition for Barcodes:
Pparameter: Controls if/how text is printed with bars
Hparameter: Controls what font to use for that text

Seite -15-
V parameter: Bar code vertical size, in points (like fonts).
1 point size = 1/72 inch.
Sparameter: White bars widths (has up to 4 values separated by commas)
Bparameter: Black bars widths (has up to 4 values separated by commas)
Tparameter: Bar code format number
As Barcode is algorithms-only, the user can apply the scaling independently in the X and Y
axis. In the past with standard scalable fonts, bigger size meant larger bars, resulting in a
too-wide and unreadable code, and small size meant thinner bars resulting also in
unreadable codes. Some barcodes are standardized and can not be resized.
5) The Barcode can be of any height, in the 3 to 960 pointsize range. The current cursor
position is the location of the bottom left corner of the leftmost black bar, whatever bar
code text parameter is provided. If text is to be printed by Barcode module together
with bars (P and H parameters), bars heights will be automatically adapted in order not
to overlap possibly embedded characters.
Every bar code system has default options, activated when parameters are not
provided. The user does not need to provide all parameters. As an example, if the
height is omitted, the default size is used. Every code has its specific default values,
based on international standards.
6) If required, the Barcode module prints the code value as text with the bars, either
under, half-embedded in, full-embedded in, or above the bars. Checksum and flag
characters are automatically placed in the right place for some systems (EAN 8/13 and
UPC), according to the international standards.
The Barcode module centres automatically the text and support 6 typefaces: Courier,
Letter Gothic, Univers, Univers Condensed, CG-Times and OCR-B. By default, the
Barcode module scales automatically the font proportionally to the code width and
bars height and the type of textembedding selected.
Automatic sizing limits the pointsize to 15 (no limit for text above or under bar code).
Automatic centring is done for both fixed pitch and proportional fonts.
7) After bar code printing completion, cursor is set after the bottom right corner of the
rightmost black bar.
8) If another bar code then needs to be printed, just locate the cursor to a new position
and send the barcode data. The Barcode font-like PCL sequence does not need to be
sent again.

Seite -16-
How to use the Barcode module
The Barcode module can be used:
·From specific developments.
Developers write PCL code based on Barcode module functionality.
·From standard software. Barcodes should be driven by bitmap-font-like drivers, with
one entry per size and type of bar code. A scalable font driver can not be used as
the horizontal width is not a factor of the height.
·For MS Windows and SAP support go to the corresponding chapters.
Please note that the <27> notation represents the ‘ESC’ Sign, ASCII 27 or Hex 1B.
If you want to make a quick test, then just use the DOS Editor to enter any valid sequence.
To enter the ESC sign there simply type Crtl+p and Esc. This will result in a arrow left.

Seite -17-
Parameter description
T parameter Esc(s#T (Typeface): Select Bar Code System
24600, UPC-A
24601, UPC-A +2
24602, UPC-A +5
24610, UPC-E
24611, UPC-E +2
24612, UPC-E +5
24620, EAN/JAN-8
24621, EAN/JAN-8 +2
24622, EAN/JAN-8 +5
24630, EAN/JAN-13
24631, EAN/JAN-13 +2
24632, EAN/JAN-13 +5
24640, Code 25 interleaved
24641, Code 25 interl + CHK
24660, Code 25 matrix
24661, Code 25 matrix + CHK
24670, Code 39 (3of9)
24671, Code 39 + CHK
24672, Code 39 encode space before/after data
24690, Code 93
24691, Code 93 extended
24700, Code 128 autoswitch
24701, Code 128 A
24702, Code 128 B
24703, Code 128 C
24704, Code 128 C
24710, UCC-128
24720, EAN 128
24750, CODABAR
24751, CODABAR +CHKmod16
24760, MSI
24761, MSI +CHK10
24762, MSI +CHK10+CHK10
24763, MSI +CHK11+CHK10
24770, ZIP+4 POSTNET 5
24771, ZIP+4 POSTNET 9
24772, ZIP+4 POSTNET 11

Seite -18-
P parameter Esc(s#P
Control if how human-readable (caption) text is printed with bar code
0Use default value
1Don’t print human readable text
2Print human readable text embedded
3 Print human readable text half embedded
4Print human readable text under code
5Print human readable text above code
Specials: Add 10 to print UPC/EAN/JAN checksum middle left rather than bottom left
of bar code.
Add 10 to print start&end * characters with 39 barcode text
Add 100 to print checksum character with text.
H parameter Esc(s#H
Controls what font is used for the human-readable (caption) text
Format: CBA, numeric value, where
C: Style0 Use Default (Bold)
1Use Regular
2Use Italics
3Use Bold
4Use Bold Italic
B: Size0Use automatic font size
A: Typeface
0 Use Courier to print text (default)
1Use Letter Gothic to print text
2Use Univers to print text
3Use Univers Condensed to print text
4Use CG-Times to print text
5Use OCR-B to print text
Example: text in Univers Bold Italic, automatic size: Esc(s402H

Seite -19-
V parameter Esc(s#V
Short bar height in points (1/72 inch). Same unit as fonts. Minimum sizes apply.
Example: Bar code in pointsize 87: Esc(s87V
B parameter Esc(s#1,#2[,#3,#4]B
Bar Widths
#1 bar width, first (thin) width in dots (1/600 inch)
#2 bar width, second width in dots (1/600 inch)
Only for EAN, UPC and Code 128 Barcodes please extend:
#3 bar width, third width in dots (1/600 inch)
#4 bar width, fourth width in dots (1/600 inch)
Example: Thin bars 4 dots, thick bars 8dots : Esc(s4,8B
S parameter Esc(s#1,#2[,#3,#4]S
Space Widths
#1 space width, first (thin) width in dots (1/600 inch)
#2 space width, second width in dots (1/600 inch)
Only for EAN, UPC and Code 128 Barcodes please extend:
#3 space width, third width in dots (1/600 inch)
#4 space width, fourth width in dots (1/600 inch)
Example: Thin spaces 4 dots, thick spaces expand 4 dots : Esc(s4,8,12,16S
Note: The s and b parameters should be specified together.
If this is not possible then please specify only the s parameter
Barcode parameters must be combined in a unique PCL font escape sequence.
e.g.: <ESC>(s4p305h24v7,21s7,21b24670T

Seite -20-
Print Extended Characters and leading spaces
Some of the barcodes can print the full ASCII table from 1 to 127. In regular mode,
some of the characters below 33 may cause the Barcode module to print the code
up to this character and maybe even start after the character with a new barcode
definition. In order to avoid this, you can add after the full Esc Sequence for the
code <27>&p####X. The numeric value ### does define the length of the message
information in Bytes.
Code 128 Control Codes
Code 128 has five non-data special control codes, called FUNCTION CODES, and 2
control codes to switch from one 128 set (A, B or C) to another one. The switching control
codes are used by the Barcode module to force one 128 set. As an example, the string
„123456“ can be printed with both sets A, B and C. Inserting a character with ASCII value
=134 at the beginning of the string will force the Barcode module to use the set B of code
128.
Note that both Code 128 Autoswitch and EAN 128 analyse the data and optimise the
barcode length by switching automatically between sets A, B and C. EAN128 and UCC-
128 already include the FNC1 code as the first character: you should not send it with the
data.
Special control codes are inserted by passing the following special decimal characters in
the bar code:
133 = CODE A129 = FNC 1 134 = CODE B 130 = FNC 2
135 = CODE C 131 = FNC 3 128 = SHIFT
Other manuals for T9114
1
This manual suits for next models
3
Table of contents
Other Tally Printer manuals

Tally
Tally T8106 User manual

Tally
Tally T2040 User manual

Tally
Tally T9006 User manual

Tally
Tally DT-230 User manual

Tally
Tally T6218 Configuration guide

Tally
Tally T8024 User manual

Tally
Tally T2265plus User manual

Tally
Tally T2280 SprintPro User manual

Tally
Tally T9408 User manual

Tally
Tally T2030/24 User manual