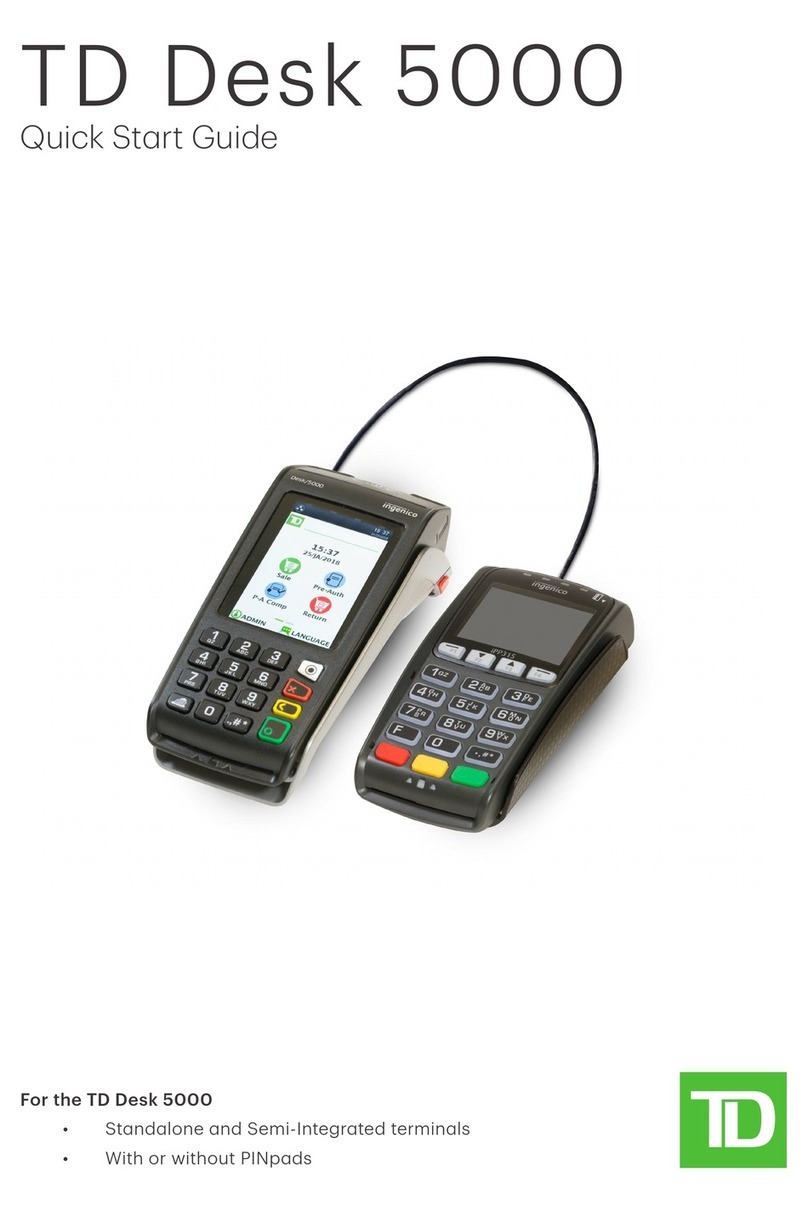
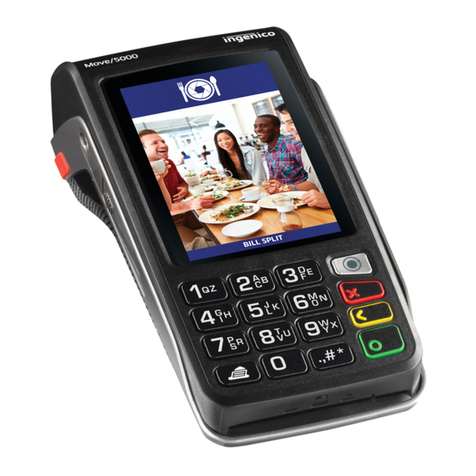
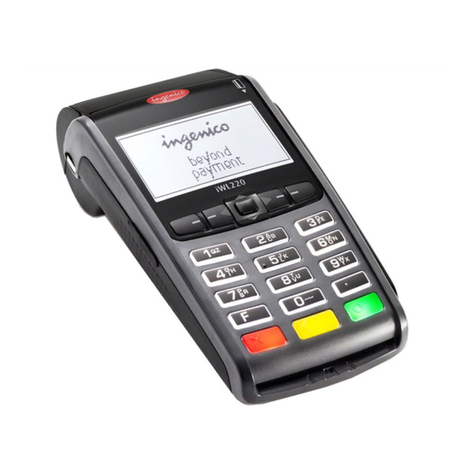
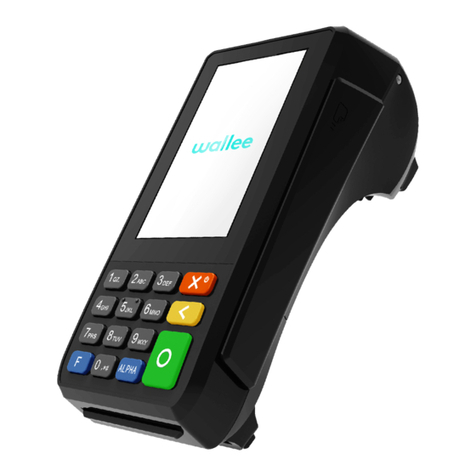
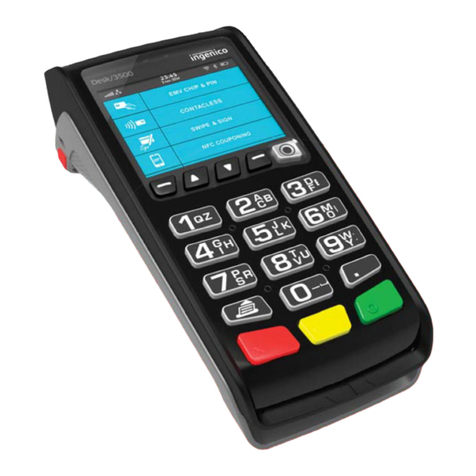
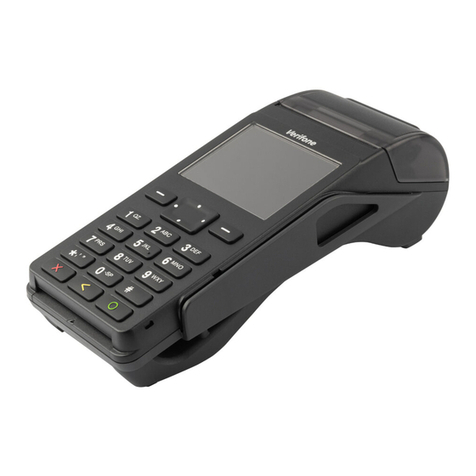
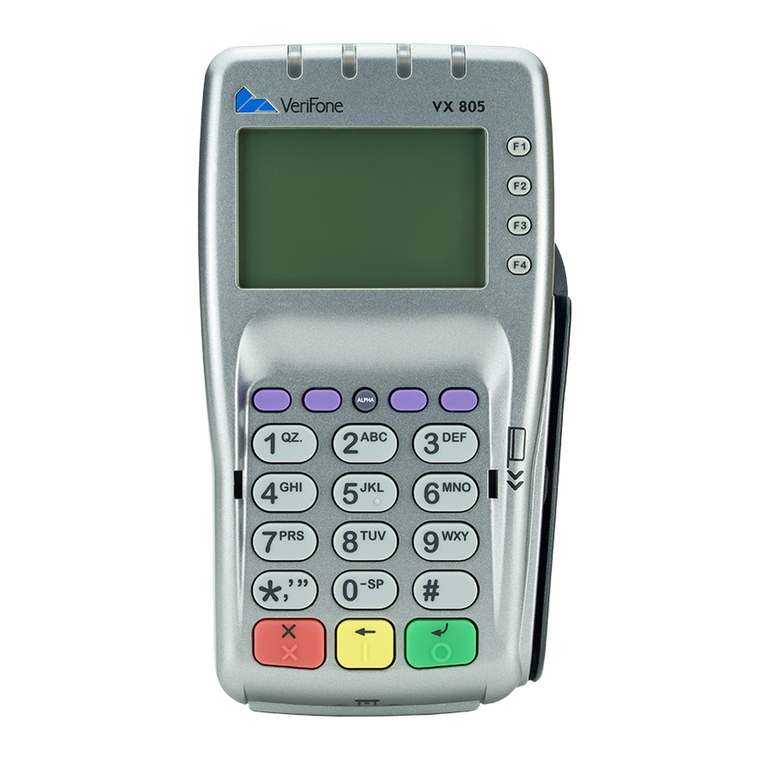
TD Desk 5000 User manual

For the TD Desk 5000
• Standalone and Semi-Integrated terminals
• With or without PINpad
For the TD Move 5000
• Standalone and Semi-Integrated terminals
• iPay@Table solution
TD Move 5000 and TD Desk 5000
Coniguration and Troubleshooting Guide

COPYRIGHT ©2020 by The Toronto-Dominion Bank
This publication is conidential and proprietary to The Toronto-Dominion Bank and is intended solely for the use of Merchant customers of TD Merchant
Solutions. This publication may not be reproduced or distributed, in whole or in part, for any other purpose without the written permission of an authorized
representative of The Toronto-Dominion Bank.
The Bluetooth® word mark and logos are registered trademarks owned by Bluetooth SIG, Inc. and any use of such marks by TD is under
license. Other trademarks and trade names are those of their respective owners.
NOTICE
The Toronto-Dominion Bank reserves the right to make changes to speciications at any time and without notice. The Toronto-Dominion Bank
assumes no responsibility for the use by the Merchant customers of the information furnished in this publication, including without limitation
for infringements of intellectual property rights or other rights of third parties resulting from its use.

i
Table of Contents
Welcome to TD Merchant Solutions........................................1
Who should use this guide?.................................................................... 1
Reporting ..................................................................................1
Business day reports............................................................................... 1
Batch reports...........................................................................................2
Coniguration ..........................................................................3
Administering the terminal.....................................................................3
User management ..................................................................................4
Administrators..................................................................................................4
Managers/supervisors ....................................................................................6
Clerks .................................................................................................................7
General customization ......................................................................... 10
Security.................................................................................................. 13
Menu security ................................................................................................. 13
Transaction security...................................................................................... 14
Report security ............................................................................................... 16
Cashback settings .................................................................................17
Debit surcharge......................................................................................17
Tip settings .............................................................................................17
Receipt settings......................................................................................17
Communication settings (TD Desk 5000) ........................................... 18
Communication settings (TD Move 5000) ......................................... 20
Download settings ................................................................................23
Semi-integrated settings ......................................................................24
Troubleshooting ....................................................................25
Error codes ............................................................................................25
Hardware troubleshooting ...................................................................34
Why isn’t my terminal connecting to the network? ............................35
TD Move 5000 .............................................................................................. 35
Signal Strength .................................................................................... 36
What do I do if there’s a power outage?..............................................37
Reference...............................................................................38
Admin Menu Structure..........................................................................38
Lost or stolen equipment......................................................................42
Police information......................................................................................... 43

ii

1
Welcome to TD Merchant Solutions
The following materials will provide helpful information about the equipment, its features and TD Merchant
Solutions. Please ensure you read this guide so that you become familiar with the capabilities of the TD Desk
5000 and TD Move 5000 and how it can support your business needs.
By now your terminal is installed and now it’s time for you to learn more about its features and capabilities.
Who should use this guide?
You would use this guide if you use the TD Desk 5000 or the TD Move 5000 at your business.
Reporting
The following reporting options are split into two dierent groups, business day, and batch. You have access to
all of the business day and batch reports, and these will be covered in this guide.
Business day reports
1. Press the OK key, then Reports and then select one of the following:
Report Instructions Provides...
Detail • PRINT or DISPLAY your report.
• Sort transactions by Reference #,
Invoice # or Card Type.
... all transactions for the current business
day. This report will not show Pre-Auth
transactions.
Summary • PRINT or DISPLAY your report. ...all transactions by card type showing the
grand total transaction amount and the
number of transactions of that card type.
Clerk • Select whether the report is a Summary
Report or a Tip Report.
• Select whether Is it for All Clerks or Single
Clerk. If it is a single clerk enter the ID.
• PRINT or DISPLAY your report.
...all transactions by card type showing the
grand total transaction amount and the
number of transactions of that card type by
Clerk ID.
OR
...tip total for all or single clerk.
Open-Pre-Auth • PRINT or DISPLAY your report.
• Sort the information by Date/Time,
Invoice # or Card Type.
...transactions by card type, operator ID for
the current business day sorted by date/time,
invoice # or card type.
Recent Error • Select whether the report is a System
Error Messages, Application Error
Messages or Host Response Messages.
• PRINT your report.
...any system, application, and host errors
that have occurred on this terminal over the
last 10 days.

2
Batch reports
These reports are for all transactions performed within a particular batch. It then prints a report showing
transactions performed on the terminal since the last Settlement / Day Close.
1. Tap the Admin icon Batch menu View History.
2. Select one of the following options (Batch Totals, View History or Host Batch Inquiry).
Batch Totals
This option allows you to view the current batch on the terminal.
3. The batch totals are shown relecting sale and return amounts separately.
View history
This option allows you to view the previous 30 closed batches on the terminal.
3. Indicate what information you wish to see (Batch #, All and Last Batch).
Batch # - Enter the Batch # and press OK and the batch total is displayed.
All - The last 30 batches will be displayed.
Last Batch - Select how you want much detail you want (Detail or Summary).
Detail
a) Indicate how you want the information sorted and displayed (Reference #, Invoice # or Card Type).
b) Scroll through the information with the arrow icons.
c) Tap the Print icon to print a copy of this information.
Summary
a) The information is automatically printed.
Host batch inquiry
This option allows you to view the current batch at the host.
3. Select preferred viewing option (Print or Summary).

3
Coniguration
The TD Desk 5000 and TD Move 5000 oers you a variety of options to personalize the terminal while helping
you to administer your business. Some standard administration features are:
• User Management (creating, editing, deleting and unlocking locked user IDs)
• Parameter Updates (updating your settings on the terminal to relect new information such as new
accepted payment types)
• Communications (changes to your terminal’s communication method)
• Training Mode (enable/disable this setting to train new employees on how to use the terminal)
• Receipts (changes to how and when they are printed)
Administering the terminal
By utilizing the user types, you can help secure your terminal by setting what terminal functionality that each of
your employees can access. Listed below are the user types and their functionality.
Note: There is a user hierarchy that determines who can access certain functionality:
• Administrator (highest),
• Manager,
• Supervisor, and
• Clerk (lowest).
TD Merchant Solutions strongly suggests that you create and use a manager ID for your day-to-day business
needs and only use the administrator ID when absolutely necessary. Some functions that require an
administrator ID are.
• Adding, editing, deleting or unlocking manager IDs
• Any functionality that you have protected with an administrator login
User Type Capabilities Special Notes
Administrator • Can access all features and functions,
including transaction processing, reports
and menus
• Can set up manager, supervisor and
clerk IDs
• Only administrators have access to the
Activity Log
• A maximum of 9 administrators IDs are
allowed per terminal
• IDs are 1 to 10 digits in length (#)
• Passwords are case sensitive, 7 to 12
characters in length using at least one
number AND one letter (######A)
Any changes that you make on the terminal will be overwritten the next time that you perform a Host
1 or Host 2 download after a settlement request. Please contact the TD Merchant Solutions Help Desk
to make any permanent changes to your terminal.
TD Merchant Solutions strongly suggests that when you create your administrator and manager IDs
that you record and store them in a safe place for future reference.

4
User Type Capabilities Special Notes
Manager • Can access features and functions,
including transaction processing, all
reports and all menus
• Can set up supervisor and clerk IDs
• A maximum of 10 manager IDs are
allowed per terminal
• Be aware of who you grant Manager
access to
• IDs are 1 to 7 digits in length (#)
• Passwords are case sensitive, 4 to 7
characters (alpha-numeric) in length
(####)
Supervisor • Can perform normal transactions
• Can set up clerk IDs
• A maximum of 10 supervisor IDs are
allowed per terminal
• IDs are 1 to 7 digits in length (#)
• Passwords are case sensitive, 4 to 7
characters (alpha or numeric) in length
(####)
Clerk • Can perform normal everyday inancial
transactions
• A maximum of 200 clerk IDs are allowed
per terminal
• Clerks (default) can be renamed to
Server or Cashier by a manager
• IDs are 1 to 6 digits in length (#)
• Passwords are 4 to 7 digits in length (####)
• An optional name can be added (up to 20
alpha or numeric characters in length)
User management
Administrators
Create a new administrator ID
Use this option to add a new administrator ID to the terminal. You log in as an administrator to initiate this process.
1. Tap the Admin icon Security Admin Setup Add Admin.
2. Enter the new Admin ID.
3. Enter the new password.
4. Re-enter the new password and press OK.
5. The administrator has been added and you are prompted if you want to add another on (Yes or No).
If you select Yes, go to step 2.
IDs are 1 to 10 digits in length (#).
Passwords are 7 to 12 characters in length using at least one number and one letter (######A).

5
Set administrator password expiry
Use this option to set the number of days before administrator passwords expire on the terminal. You must log
in as an administrator to initiate this process.
1. Tap the Admin icon Security Admin Setup PWExpire.
2. Enter the number of days before administrator passwords expire and press OK. The maximum setting
999 days.
Set administrator password lock
Use this option to set the number of minutes that an user is locked out for after incorrectly entering their password
three times (four times for administrators). You must log in as an administrator to initiate this process.
1. Tap the Admin icon Security Admin Setup PWLock.
2. Enter the number of minutes that a user is locked out and press OK. The minimum setting is 30 and
the maximum is 999.
Edit an administrator ID
Use this option to edit an existing administrator ID from the terminal. You log in as an administrator to initiate
this process.
1. Tap the Admin icon Security Admin Setup Delete Admin.
2. Select the Admin ID you want to edit.
3. Edit the Admin ID. (optional)
4. Edit the password. (optional)
5. Conirm the edited password and press OK.
Delete an administrator ID
Use this option to delete one or all existing clerk IDs from a terminal. Repeat these steps on each terminal where
the administrator ID resides. You must log in as an administrator to initiate this process.
1. Tap the Admin icon Security Admin Setup Delete Admin.
2. Conirm how many administrator IDs you wish to delete (All or One).
All
a) Conirm this action (Yes or No). Select Yes if you wish to delete all clerks from this terminal.
All administrator IDs are now deleted from the terminal except the original administrator ID
that came with the terminal. This can never be deleted by you.
One
a) Enter the Admin ID to be deleted.
b) Conirm your decision (Yes or No).
c) You will be oered the option to delete another ID if one exists.

6
Managers/supervisors
Login requirements
Login as...to Add user Delete user Unlock user Change password Pull user list
Admin M, S M, S M, S N/A M, S
Manager (M) S S S M M, S
Supervisor (S) N/A N/A N/A S S
Add supervisor or manager ID
Use this option to add a new supervisor ID to the terminal. Depending which ID is used to log in will determine
which functionality you will have access to. For example, you must log in as a manager to add a supervisor, or
as an administrator to add a manager.
1. Tap the Admin icon Security Supervisor/Manager Add User.
2. Log in as an administrator or manager.
3. Select which type of user you wish to create (Supervisor or Manager).
4. Enter the new Supervisor or Manager ID.
5. Enter the new Supervisor or Manager name.
6. Enter the password. Passwords are 4 to 7 digits in length (####).
7. Re-enter the password and press OK.
8. You will be given the option to add another ID of the same type (Yes or No). If you select Yes, go to step 2.
Delete supervisor or manager ID
Use this option to delete an existing ID from the terminal. You must log in with an ID that is one level higher than
the one you wish to delete. For example, you must log in as a manager to delete a supervisor, or as an
administrator to delete a manager.
1. Tap the Admin icon Security Supervisor/Manager.
2. Tap Delete User.
3. Select the ID you want to delete.
4. Conirm your selection (Yes or No).
5. If there are any remaining IDs you will be given the option to delete another.
Change a supervisor or manager password
Use this option to change an existing supervisor or manager ID’s password on the terminal. You must log in with
an ID that is equal to or one level higher than the one you wish to change the password for. For example, you
IDs are 1 to 7 alpha-numeric characters in length (#).

7
must log in as a manager to change a supervisor or manager password.
1. Tap the Admin icon Security Supervisor/Manager.
2. Log in with ID that you want to change the password for.
3. Tap Change Password.
4. Enter the existing password.
5. Enter the new password.
6. Re-enter the new password and press OK.
Unlock an ID
Use this option to unlock an ID on the terminal. You must log in with an ID that is one level higher than the one
you wish to unlock. For example, you must log in as a administrator or manager to unlock a supervisor ID, or as
an administrator to unlock a manager ID. IDs are locked when an incorrect password is entered too many times.
The number of times is controlled by the application.
1. Tap the Admin icon Security Supervisor/Manager.
2. Log in with ID that you want to unlock.
3. Tap Unlock User.
4. Tap the locked ID.
5. Conirm that you want to unlock it (Yes or No).
6. You will be given the option to delete another.
Display existing IDs
Use this option to display a list of existing IDs on the terminal. You must log in with an ID that is equal to or
greater than the level of the user list you wish to view. Log in as a manager to see all manager and supervisor
IDs on the terminal.
1. Tap the Admin icon Security Supervisor/Manager.
2. Log in with a manager or supervisor ID.
3. Tap User List and the list will display.
4. Tap Print if you want to print a copy.
Clerks
User management is your irst line of defense in helping you protect your terminal from unauthorized use. The
most common users on your terminal will be the clerk. You can:
• Create and manage clerks users
• Require clerks use an ID and passwords to limit access to the terminal
The following are some scenarios to help you administer clerk users on your terminal(s) to suit your business needs.
Scenario: I want clerks IDs to be automatically created when they use the terminal for the irst time…
This will automatically create a clerk ID on the terminal for a new user or if a manager/supervisor enters their ID
for a clerk ID. This will not protect your terminal as it is only helps you monitor terminal activity.
1. Ensure ClkPrompt is set to ID Only (page 8)
2. Ensure ClkLogOnOff is off (page 8)

8
3. Ensure AutoAddClk is on (page 9)
4. Once the ID has been created, we suggest that you add a name to it as well. This is very useful when
you have to administer multiple clerks.
Scenario: I want my clerks to log on to the terminal for their shift…
This will help protect your terminal and its functionality as it requires clerks to sign in for standalone mode only.
1. Ensure Enable clerk login is on (page 8)
2. Ensure Select clerk login requirements is set to ID Only or ID & Password (page 8)
3. Ensure Enable auto clerk IDs is off (page 9)
4. When creating the clerk ID ensure you add a name to it as well. This is very useful when you have to
administer multiple clerks.
Enable clerk log in
Use this option to enable clerk login and logo functionality on the terminal. Once logged in, the terminal will
not require another log in until the current clerk logs out. This option in conjunction with clerk login requirements
will enhance the terminal’s security.
1. Tap the Admin icon Clerk Menu ClkLogOnO.
2. Enable or disable this feature (On or Off). By enabling this option clerks must log on to the terminal
before they can perform any inancial transactions.
Select clerk login requirements
Use this option to set what information, if any, is required for a clerk user on the terminal. This must be set to ID
Only if you want to enable the Auto Add Clerk feature (page 9).
1. Tap the Admin icon Clerk Menu ClkPrompt.
2. Select which of the following options you would like to assign to all Clerks on this terminal (Off, ID
Only or ID & Password):
a) Off
Clerk users cannot be created and existing clerks will be deleted on this terminal. Once deleted these
clerks cannot be recovered and will have to be manually recreated if they were deleted in error.
b) ID Only
Clerks can be created but they will not have a password attached to them.
c) ID & Password
• The default login/logoff key is 9on the keypad when this is enabled.
• All terminal transactions and activities will relect the currently logged in clerk so they must log
out when they are inished using it.
• ClkLogOnO negates AutoAddClk as you will need an existing clerk ID to log onto the terminal from
the home page. You will be unable to automatically make clerk IDs until ClkLogOnO is disabled.
• If you switch from ID Only to ID & Password the clerk ile on this terminal will be deleted.
• If you switch from ID & Password to ID Only the clerk ile will not be deleted on this terminal, but
the passwords will be removed.
• If you then switch back to ID & Password, the clerk ile will be cleared as the passwords are not
saved and you will have to manually recreate your all clerk IDs and create new passwords.

9
Clerks can be created with passwords for added security.
3. Press OK. Depending upon your current settings and which option you select, you may be prompted
to clear the existing clerk ile (Yes or No).
a) If you select Yes, the clerk ile will be deleted.
b) If you select No, you will be returned to the Clerk Prompt selection screen.
Enable auto clerk IDs
Use this option to auto create a new clerk when performing a transaction on the terminal. This does not
enhance security to your terminal.
1. Tap the Admin icon Clerk Menu AutoAddClk.
2. Select whether you wish to oer the user to automatically create clerk users when certain
transactions are activated (On or Off):
Add a clerk
Use this option to create a unique user ID for them with the appropriate level of access to terminal features. You
will be required to log in as an administrator to create a clerk user.
1. Tap the Admin icon Clerk Menu Add ID.
2. Enter Clerk ID.
3. Enter Clerk Name (optional). This is useful to track IDs and their owners.
4. Enter the Password (optional). This will only appear if the clerk prompt is set to ID & Password.
5. Reenter Password (optional).
6. Press OK.
7. An option to create another clerk appears. Select Yes No. If you select Yes, go to step 2.
Edit a clerk name
Use this option to add or change an existing clerk name. It requires a higher level user to change it. For
example, it would take a manager tor supervisor to aect a clerk’s name. You must enable ClkPrompt to use
this feature (page 8).
1. Tap the Admin icon Clerk Menu ClkWording.
2. Select which name you wish to apply to your general user group (Clerk, Server, or Cashier) and press OK.
Delete a clerk ID
Use this option to delete one or all existing clerk IDs from a terminal. Repeat these steps on each terminal where
the clerk ID resides. This option cannot delete one or more clerks if the terminal has an open batch.
1. Tap the Admin icon Clerk Menu Delete ID.
2. Conirm how many clerks you wish to delete (All or One).
This is only used when Clerk Prompt is set to ID Only. This cannot be used when Clerk Prompt is set to
ID & Password (see page 8).
• If you have multiple terminals, you must add the clerk ID to each one separately.
• The clerk ID is one to six digits in length.
• The clerk name is always optional and has a 20 alpha-numeric character limit.
• The password may be optional and must be a minimum of four to seven digits in length.

10
All
a) Conirm this action (Yes or No).
Select Yes if you wish to delete all clerks from this terminal. All clerk IDs are now deleted from
the terminal.
One
a) Enter the Clerk ID to be deleted.
b) Press OK. The individual clerk ID is now deleted from the terminal.
Create a clerk ID report
Use this option to print a report that contains the user ID details.
1. Tap the Admin icon Clerk Menu Print ID List.
2. The report prints showing all clerk IDs and associated clerk names (if entered) for the terminal that
this was performed on. Passwords are not shown on this report.
Create a clerk parameter report
Use this option to display all clerk parameter settings on the terminal. This feature is useful to review the
settings on terminal or to compare settings between terminals.
1. Press Admin icon Clerk Menu Display Params.
2. Tap Server Menu. The following parameters and their settings will be displayed: AutoAddClk,
ClkLogOnOff, ClkPrompt and ClkWording.
3. Tap PRINT if you wish to print a copy of what is shown on screen.
General customization
Training mode
This option allows a Manager or Supervisor to sign in and train a new user on the functions of the terminal
without impacting any live transactions or totals. While in Training Mode the user can perform all transactions
except for any coniguration changes or chip card transactions. You cannot enter demo mode if the terminal
has an open batch, but you can exit training mode.
1. Tap the Admin icon Setup Menu Demo.
2. Enable or disable demo mode (On or Off) and press OK.
Limit transaction amounts in training mode
This option allows you to limit the transaction amount when in training mode.
1. Tap the Admin icon Setup Menu Demo Demo Amt Max.
2. Enter the maximum amount that you want to be entered when in training mode and press OK.
• All screen names will have a (D) at the end to indicate that you are in demo/training mode – Sale
(D), Main Menu (D), etc.
• You can create, edit and delete users that will be active after you exit training mode.
…the CALL FOR AUTH
message is seen.
(No comm error seen)
1. Don’t attempt the transaction again.
2. Call for a voice authorization immediately.

11
Terminal backlight
Use this option to adjust the brightness setting on this terminal.
1. Tap the Admin icon Setup Menu Term Settings Term HW Brightness Setting.
2. Use the scroll bar to set the touchscreen brightness (0% - 100%) and press OK. The default setting is 100%.
Keystroke sounds
Use this option to adjust the keystroke sound settings on this terminal.
1. Tap the Admin icon Setup Menu Term Settings Term HW Keybeep.
2. Select the desired option (All Off, All On or Invalid Only).
• All Off – The terminal will beep on every key press. This is the default.
• All On – The terminal won’t beep when keys are pressed.
• Invalid Only – The terminal will only beep when an invalid action is performed.
Keypad lighting
Use this option to adjust the keypad backlight settings on this terminal which illuminates the numbers on the keypad.
1. Tap the Admin icon Setup Menu Term Settings Term HW Backlight.
2. Set the backlight levels for the keypad (Always Off, Always On or On/Key Press) and press OK.
• Always Off disables keypad backlighting.
• Always On enables keypad backlighting. This is the default setting.
• On/Key Press enables keypad backlighting only when a key is pressed.
Set the clock
Use this option to adjust the time and date on this terminal. You cannot change this if there is an open batch or
there are open pre-authorizations.
1. Tap the Admin icon Setup Menu Term Settings Set Date And Time.
2. Enter the current date (MMDDYY).
3. Enter the current time (HHMM) and press OK. This can be set to a 24 hour time format.
Terminal font size
Use this option to adjust the font size on this terminal.
1. Tap the Admin icon Setup Menu Term Settings Font Size.
2. Determine the font size you wish to use for the touchscreen (Normal or Large) and press OK. The
default setting is Large.
If KeyBeep is set to All Off, this does not include sounds related to the activity log is full, PIN
entry and postal code entry error.

12
Enable clock
Use this option to adjust the clock settings on this terminal.
1. Tap the Admin icon Setup Menu Term Settings Clock Display.
2. Determine when you want the clock to be displayed on the terminal (All Pages, First Page Only or
Hide) and press OK. The default setting is All Pages.
Set daily terminal reboot
Use this option to set a time that this terminal will automatically reboot. This functionality is required to erase the
working memory of the terminal. This will not erase data iles on the terminal such as completed transactions.
You must call the TD Merchant Solutions Help Desk to have this time changed.
Reset terminal
This option resets your terminal to factory settings. Do not use this option unless instructed to by the TD
Merchant Solutions Help Desk as it resets the terminal to the factory default settings.
1. Tap the Admin icon Setup Menu Term Settings Reset New.
2. Enter your admin password and press OK.
3. Conirm that you wish to continue (Yes or No).
Enable screen saver image
Use this option to adjust the screen saver settings on this terminal.
1. Tap the Admin icon Setup Menu Term Settings Screen Saver.
2. Set the Screen Saver Move. This is the speed at which the image moves on the screen and the default
is 10.
3. Set the Screen Saver Timer and press OK. This is the time in which the terminal must be idle before the
screen saver turns on and the default is 001.
Press any key to disable the screen saver. If the pressed key is associated with any function, terminal
will exit screen saver mode and perform the corresponding function.
• Enabling this clock display reduces the number of screen icons from six to four.
• The small clock in the upper-right corner of the screen is not affected by this setting.
• This function can be executed if there are open batches in the device.
• All password iles and transactions are erased.
• This is not reversible.

13
Security
Menu security
The TD Move 5000 has dierent ways to help protect your terminal by password including using passwords and
the user level functionality (clerk, supervisor, manager or administrator). These settings are useful to block speciic
transactions from general users such as force post, day end settlement and administrative functions on the terminal.
Note: You must call the TD Merchant Solutions Help Desk to enable these settings.
Main menu passwords
Use this to password protect one, some or all of the inancial transactions on the terminal.
1. Tap the Admin icon Security Main Menu PWs and select one of the following:
• PWSale – Sale transactions
• PWReturn – Return transactions
• PWVoid – Void transactions
• PWForce – Force post transactions
• PWPreAuth – Pre-authorization transactions
• PWCompletion – Pre-authorization completion transactions
• PWSettle – Settlement / day close
• PWReprint – Reprint receipts
• PWReports – Print reports
• PWManual – Manually key transactions
• PWStandalone – Change mode to standalone
2. Indicate the minimum user type that must enter their password to access the protected menu
(Supervisor, Manager or Admin) and press OK.
Admin menu passwords
Use this to password protect one, some or all of the administrator functionality on the terminal.
1. Tap the Admin icon Security Admin Menu PWs and select one of the following:
• PWClerkMenu – Clerk Menu
• PWBatch – Batch Menu
• PWSetup – Setup Menu
• PWMaintenance – Maintenance Menu
• PWDiagnostics – Diagnostics Menu
• PWSecurity – Security Menu
• PWTermInfo – TermInfo Menu
• PWHostMgmt – Host Mgmt Menu
• PWMisc – Misc. Options Menu
• PWDetail – Detail Report Menu
• PWSummary – Summary Report Menu

14
2. Indicate the minimum user type that must enter their password to access the protected menu
(Supervisor, Manager or Admin) and press OK.
Activity log
The activity log provides the ability to display, print or delete a report log showing all restricted access activity
on the terminal.
1. Tap the Admin icon Security Activity Log.
2. Select your report option (Display, Print, or Delete).
3. Select Display if there aren’t many transactions to go through. Otherwise the Print option is better for
reviewing a large number of entries.
Transaction security
Merchants have the option to protect speciic transactions by password as well as setting a dollar limit on sale /
return transactions, lag duplicate transactions and mask card information.
Enable maximum sale passwords
Use this option to designate the minimum level of authorization required to proceed with a sale that exceeds
the transaction limit on this terminal.
1. Tap the Admin icon Setup Menu Trans Options High Amt Tran PWHighAmt.
2. Select the required user level to authorize sale transactions that exceed your established limit (Off,
Supervisor, Manager or Admin) and press OK. The default setting is Off.
3. Go to Enable a maximum sale amount and set it to Password.
Enable maximum sale amount
Use this option if you would like to limit sale amounts on your terminal. This option is useful for Merchants who
want an upper limit on transaction amounts for their business. This option can help reduce fraudulent high
value transactions.
1. Tap the Admin icon Setup Menu Trans Options High Amt Tran HighAmtTran.
2. Select how you want to protect high transaction amounts (Off, Limit or Password) and press OK.
• Off means there are no limitations on transaction amounts and is the default setting.
• Limit means there is a hard maximum limit to transaction amounts. This cannot be bypassed.
• Password means that a password must be entered by a supervisor or manager if a
transaction amount is higher than the HighAmtLmt setting.
3. Go to Set a maximum sale amount to complete this option.
• If you delete the log it cannot be retrieved.
• If a user ID is used, the activity captures the user ID against the restricted function that was
performed.
• If a software download is performed the activity log will be deleted.
Whenever you perform a Host 1 Download, you will overwrite these options with what is on the server. To ensure
that these settings aren’t overwritten you must call TD Merchant Solutions Help Desk to permanently change them.

15
Set a maximum sale amount
Use this option to set a sales transaction limit on this terminal. You must enable HighAmtTran on this terminal to
use this function at Enable a maximum sale amount.
1. Tap the Admin icon Setup Menu Trans Options High Amt Tran HighAmtLmt.
2. Enter the transaction limit amount and press OK. Once set, any transaction above this amount will
be veriied against whatever setting was chosen in Enable a maximum sale amount.
The amount entered is always assumed to have cents. This means that for $78.50, you must enter
7850 or for $80.00, you must enter 8000.
Enable maximum return passwords
Use this option to designate the minimum level of authorization to proceed with a return that exceeds the
transaction limit on this terminal.
1. Tap the Admin icon Setup Menu Trans Options High Amt Tran PWHighAmtRet.
2. Select the required user level to authorize return transactions that exceed your established limit (Off,
Supervisor, Manager or Admin) and press OK. The default setting is Off.
3. Go to Enable a maximum return amount and set it to Password.
Enable maximum return amount
Use this option if you would like to limit return amounts on your terminal. This option is useful for merchants who
want an upper limit on transaction amounts for their business. This option can help reduce fraudulent high
value transactions.
1. Tap the Admin icon Setup Menu Trans Options High Amt Tran HighAmtTranRet.
2. Select how you want to protect high transaction amounts (Off, Limit or Password) and press OK.
• Off means there are no limitations on transaction amounts and is the default setting.
• Limit means there is a hard maximum limit to transaction amounts. This cannot be bypassed.
• Password means that a password must be entered by a supervisor or manager if a
transaction amount is higher than the HighAmtLmt setting.
3. Go to Set a maximum return amount to complete this option.
Set a maximum return amount
Use this option to set a return transaction limit on this terminal. You must enable HighAmtTran on this terminal
to use this function at Enable a maximum return amount.
1. Tap the Admin icon Setup Menu Trans Options High Amt Tran HighAmtLmtRet.
2. Enter the transaction limit amount and press OK. Once set, any transaction above this amount will
be veriied against whatever setting was chosen in Enable a maximum return amount.
The amount entered is always assumed to have cents. This means that for $78.50, you must enter
7850 or for $80.00, you must enter 8000.
Duplicate transaction warnings
Use this option to enable duplicate transaction warning messages on this terminal for credit (DupTran) or debit
(DbDupTran). This option will only work with Automatic Invoice Number enabled.
1. Tap the Admin icon Setup Menu Trans Options Prompts DupTran or DbDupTran.
2. Select your duplicate transaction option (Off, All Transactions or Last Transaction) and press OK.
• Off does not check for duplicate transactions. This is the default setting.

16
• All Transactions lags for any duplicate transactions performed on the terminal. The terminal
will compare against all transactions contained within the current open batch.
• Last Transaction will only check if your transaction is a duplicate of the prior transactions
performed on the terminal.
Card information masking
Use this option to determine how much card information is included on the settlement report on this terminal.
1. Tap the Admin icon Setup Menu Trans Options Settlement ReportTrunc.
2. Select how much card detail you wish to include (Last 4 or Partial Mask) and press OK.
• Last 4 displays the last four digits of the card on reports.
• Partial Mask hides all but irst 6 digits and last 4 digits.
Enable manual invoicing
Use this option to enable the option to see an invoice number or purchase order numbers on the receipts from
this terminal.
1. Tap the Admin icon Setup Menu Trans Options Prompts Invoice.
2. Select your entry option (Off, Invoice or Purchase Order) and press OK.
• Off disables invoice.
• Purchase Order will prompt you to manually enter or automatically create a purchase order
number for any transaction that you perform on this terminal. This will be displayed as
ORDER# on the receipt.
• Invoice number will automatically create an invoice number for any transaction that you perform
on this terminal. This will be displayed as Invoice # on the receipt. This is the default setting.
Report security
The TD Move 5000 allows you to limit who accesses report functionality on your terminal by password and the
user level (supervisor, manager or administrator).
Report passwords
1. Tap the Admin icon Security Report Menu PWs and select one of the following:
• PWDetail – Detail Reports
• PWSummary – Summary Reports
• PWClerkRpt – Clerk Reports
• PWRecentError – Recent Error Reports
• PWPreAuthRpt – Pre-Authorization Reports
• PWEMVRpt – EMV Reports
2. Indicate the minimum user type that must enter their password to access the protected report
(Supervisor, Manager or Admin) and press OK.
Whenever you perform a Host 2 Download, you will overwrite these options with what is on the server. To ensure
that these settings aren’t overwritten, you must call TD Merchant Solutions Help Desk to change them.
Other manuals for Desk 5000
2
This manual suits for next models
1
Table of contents
Other TD Payment Terminal manuals
