manuals.online logo
Brands
  1. Home
  2. •
  3. Brands
  4. •
  5. Travis Industries
  6. •
  7. Fireplace Accessories
  8. •
  9. Travis Industries Arbor User manual

Travis Industries Arbor User manual

Leyden / Arbor Firebox Parts Installation
(see part numbers below)
Page 1 of 4 Printed 6/24/08 © Travis Industries, Inc.
Overview
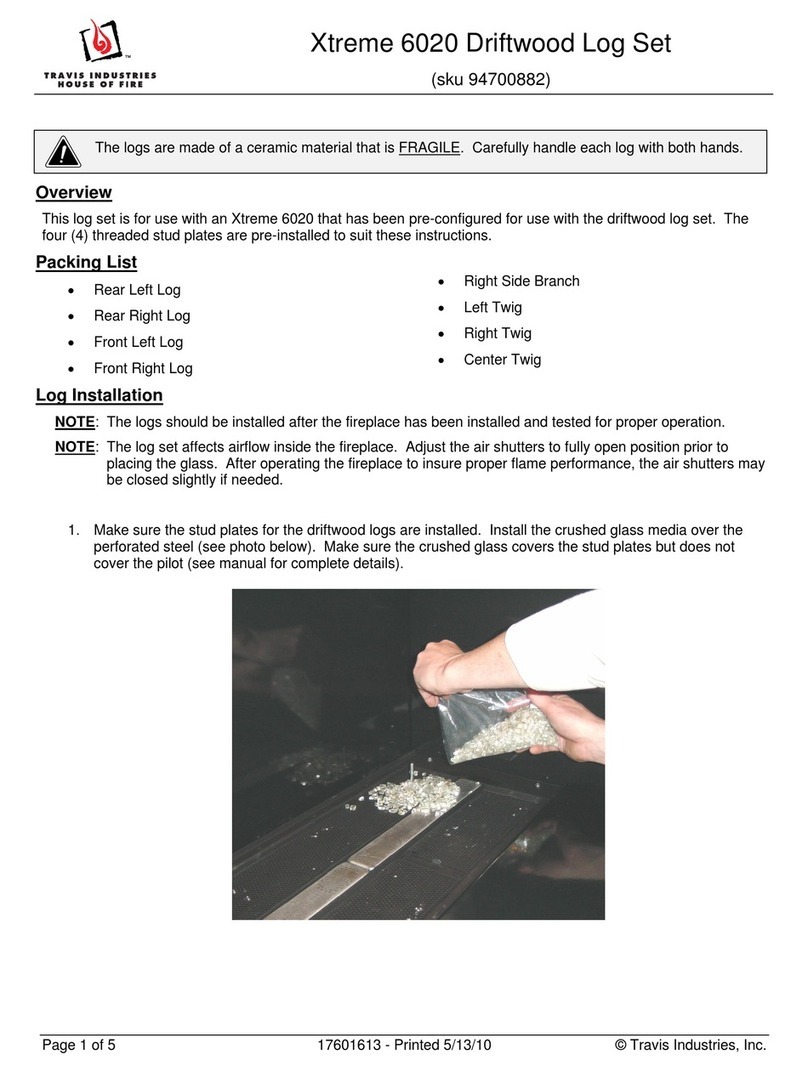
This instruction sheet details installation of the three components listed below. Follow the instructions for to
the component being replaced. Refer to the exploded view diagram for parts reference and overview.
Packing List
Combustor Brick (250-00141)
•Combustor Brick
•Combustor Brick Gasket
•Interram Gasket
Back Plate (250-00704)
•Back Plate
•(2) Push Plugs
•(4) ¼-20 1-1/2” Bolts
•(4) ¼-20 Brass Nuts
Combustor (250-00247)
•Combustor (with gaskets
attached)
Exploded View Diagram
ID # Description Qty Part # ID # Description Qty Part #
1 Side Brick 2 250-00139 2 Combustor Brick w 2 Gaskets 1 250-00141
3 Inter-Ram Gasket 1 250-00294 4 Combustor Brick Gasket 1 250-00145
5 Back Brick 1 250-00140 6 Firebox Back w 4 Nuts & Bolts 1 250-00704
7 Brick Retainers with Bolts 1 250-00144 8 Combustor Pack with Gaskets 1 250-00247
9 Push Plugs (pack of 4) 2 92-1360
2
1
1





7
9
6
3
5
8
Apply penetrating oil (WD40) to the bolts
prior to removal to prevent stripping.
This nut is located on
the exterior of the stove
beneath the rear heat
shield.










7
4
Leyden / Arbor Firebox Parts Installation
(see part numbers below)
Page 2 of 4 Printed 6/24/08 © Travis Industries, Inc.
Combustor Brick Installation
The bolts inside the firebox may become difficult to remove after the stove has been burned. Apply
penetrating oil (WD40™) to the bolts 5 minutes prior to removal to prevent stripping or breaking the bolts.
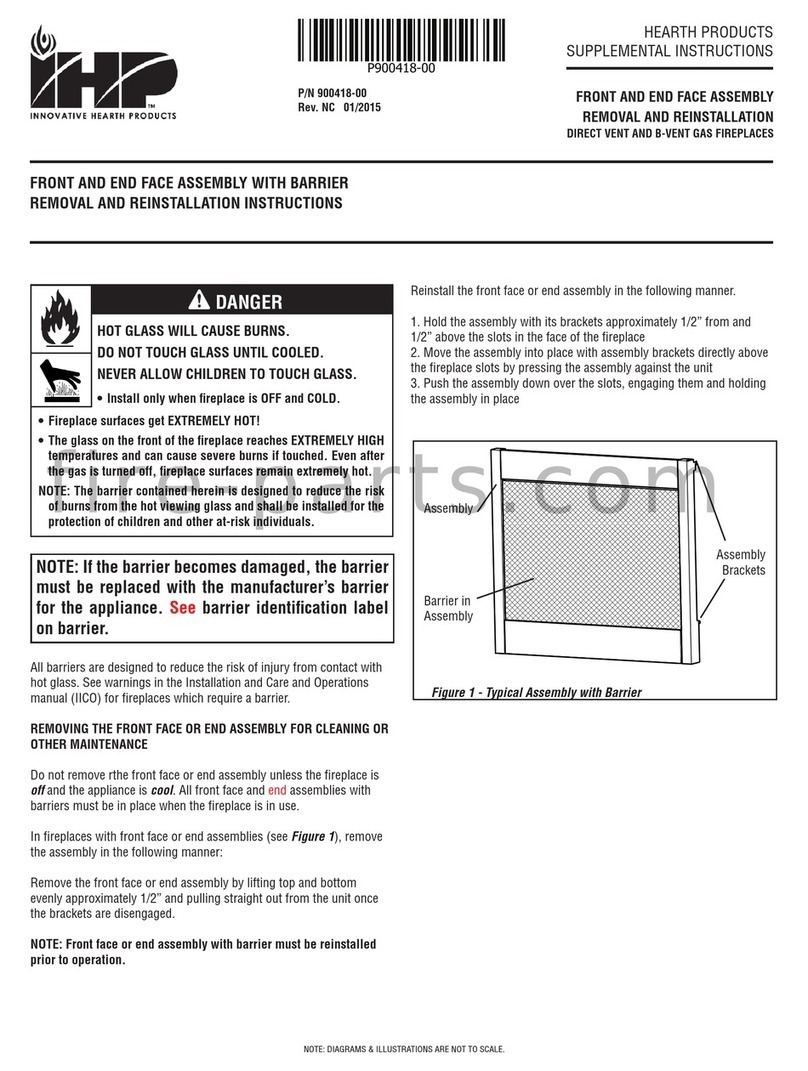
1. Remove the side bricks and retainers (5/16” Nutdriver). See Figure 1.
2. Remove the back brick and retainer (7/16” Socket Wrench). See Figure 2.
Figure 1 Figure 2
3. Grasp the combustor brick with both hands and rotate it forward. See Figure 3. A ledge along the bottom
of the firebox floor helps hold the brick in place, make sure the brick clears this ledge while removing.
Figure 3
4. Before replacing the combustor brick, place the combustor brick gasket along the floor of the firebox,
making sure the slot in the gasket lines up correctly. Install the combustor brick and place the interram
gasket on top of it.
5. Replace the back and side bricks and retainers. You may wish to place high-temperature anti-seize on the
firebox bolts prior to installation to prevent the bolts from seizing.
Leyden / Arbor Firebox Parts Installation
(see part numbers below)
Page 3 of 4 Printed 6/24/08 © Travis Industries, Inc.
Back Plate Installation
1. Follow the instructions for removing the combustor brick (see page 2).
2. Remove the bypass ratcheting mechanism from the stove (see Figure 4). Remove the heat shield from the
back of the stove, exposing the four brass nuts holding the back plate in place (see Figure 5).
Figure 4 Figure 5
3. Unscrew the four screws holding the back plate in place (use a #3 Phillips screwdriver – See Figure 6). If
the bolts on the back of the stove begin to spin, use a wrench to secure.
Figure 6
4. When replacing the back plate, take care to prevent damage to the combustor. Tighten the bolts in an
alternating pattern (upper left, lower right, upper right, lower left) to prevent un-even tension on the plate.
When replacing the back
plate, place a thin bead
of furnace cement
around the perimeter of
the back plate to seal it.
Leyden / Arbor Firebox Parts Installation
(see part numbers below)
Page 4 of 4 Printed 6/24/08 © Travis Industries, Inc.
Combustor Installation
1. Follow the instructions for removing the combustor brick (see page 2).
2. Follow the instructions for removing the back plate (see page 3).
3. Apply penetrating oil (WD40™) to the two nuts holding the bypass assembly to the stove top and the two
bolts holding it to the back of the stove. Allow the oil to absorb for five minutes. Remove the two bolts with
a 7/16” socket wrench (see Figure 7). Remove the two nuts and washers along the stove top with a 7/16”
deep socket wrench. Hold the bypass plate in the closed position and carefully remove the bypass
assembly.
4. Remove the combustor from the firebox.
5. When replacing the combustor, make sure it is centered in the rear of the firebox (see Figure 8). Then re-
install the bypass, using one hand to hold the bypass plate closed while lifting the assembly into place. By
holding the bypass plate closed, it allows the bypass rod to engage the bypass correctly. Hold the bypass
in place and install the washers and nuts that install into the stove top (do not fully tighten at this time).
Take care to prevent damage to the combustor during bypass installation. Install the two bolts into the back
of the bypass assembly. Tighten the bolts in an alternating pattern, making sure the bypass is aligned
correctly. Tighten the nuts along the top in an alternating pattern to secure the bypass.
6. Replace the remaining firebox components (see pages 2 and 3).
Figure 7 Figure 8

Other manuals for Arbor

1

This manual suits for next models

1

Other Travis Industries Fireplace Accessories manuals
Travis Industries 96400717 User manual

Travis Industries

Travis Industries 96400717 User manual

Travis Industries 95400424 User manual

Travis Industries

Travis Industries 95400424 User manual

Travis Industries 96100794 User manual

Travis Industries

Travis Industries 96100794 User manual

Travis Industries 1750 User manual

Travis Industries

Travis Industries 1750 User manual

Travis Industries Illuminations 4915 User manual

Travis Industries

Travis Industries Illuminations 4915 User manual

Travis Industries Answer User manual

Travis Industries

Travis Industries Answer User manual

Travis Industries 864 40K User manual

Travis Industries

Travis Industries 864 40K User manual

Travis Industries 96100150 User manual

Travis Industries

Travis Industries 96100150 User manual

Travis Industries 96100594 User manual

Travis Industries

Travis Industries 96100594 User manual

Travis Industries 250-05727 User manual

Travis Industries

Travis Industries 250-05727 User manual

Travis Industries 95100055 User manual

Travis Industries

Travis Industries 95100055 User manual

Travis Industries Fyre 430 User manual

Travis Industries

Travis Industries Fyre 430 User manual

Travis Industries 94700882 User manual

Travis Industries

Travis Industries 94700882 User manual

Travis Industries GreenSmart 2 User manual
Travis Industries

Travis Industries GreenSmart 2 User manual

Travis Industries 33 DVI User manual

Travis Industries

Travis Industries 33 DVI User manual

Travis Industries GreenStart Igniter 3 User manual
Travis Industries

Travis Industries GreenStart Igniter 3 User manual

Travis Industries DVL GSR User manual

Travis Industries

Travis Industries DVL GSR User manual

Travis Industries 96100110 User manual

Travis Industries

Travis Industries 96100110 User manual

Travis Industries SKU 94400111 User manual

Travis Industries

Travis Industries SKU 94400111 User manual

Travis Industries PB36CF User manual

Travis Industries

Travis Industries PB36CF User manual

Travis Industries 95600654 User manual

Travis Industries

Travis Industries 95600654 User manual

Travis Industries DVL EmberGlo GSR2 Insert User manual

Travis Industries

Travis Industries DVL EmberGlo GSR2 Insert User manual

Travis Industries 94700881 User manual

Travis Industries

Travis Industries 94700881 User manual

Travis Industries 95900352 User manual

Travis Industries

Travis Industries 95900352 User manual

Popular Fireplace Accessories manuals by other brands

Valor L2 1700K quick start guide

Valor

Valor L2 1700K quick start guide

Exodraft Xzense manual

Exodraft

Exodraft Xzense manual

Whalen Ruso MNFP62BF23-6 manual

Whalen

Whalen Ruso MNFP62BF23-6 manual

Woodstock Soapstone Fireview 201 manual

Woodstock Soapstone

Woodstock Soapstone Fireview 201 manual

EdilKamin SERBATOIO 250 Installation, use and maintenance

EdilKamin

EdilKamin SERBATOIO 250 Installation, use and maintenance

Bronpi KIT-1 instructions

Bronpi

Bronpi KIT-1 instructions

Town & Country Fireplaces 22150051 instructions
Town & Country Fireplaces

Town & Country Fireplaces 22150051 instructions

Lopi Hearthview 864 user manual

Lopi

Lopi Hearthview 864 user manual

Lennox Hearth Products LENNOX MPE-33R installation instructions

Lennox Hearth Products

Lennox Hearth Products LENNOX MPE-33R installation instructions

Dimplex DFP6776C install guide

Dimplex

Dimplex DFP6776C install guide

Napoleon W175-0689 instruction manual

Napoleon

Napoleon W175-0689 instruction manual

Osburn ZERO CLEARANCE KIT installation instructions

Osburn

Osburn ZERO CLEARANCE KIT installation instructions

Majestic QUARTZPLA36IN installation instructions

Majestic

Majestic QUARTZPLA36IN installation instructions

Napoleon DBPO36 installation instructions

Napoleon

Napoleon DBPO36 installation instructions

Dimplex SMP-130-E install guide

Dimplex

Dimplex SMP-130-E install guide

Empire Comfort Systems LS50TINF installation instructions

Empire Comfort Systems

Empire Comfort Systems LS50TINF installation instructions

IHP WS-CI150 quick start guide

IHP

IHP WS-CI150 quick start guide

Enviro C34 instruction manual

Enviro

Enviro C34 instruction manual

manuals.online logo
manuals.online logoBrands
  • About & Mission
  • Contact us
  • Privacy Policy
  • Terms and Conditions

Copyright 2025 Manuals.Online. All Rights Reserved.