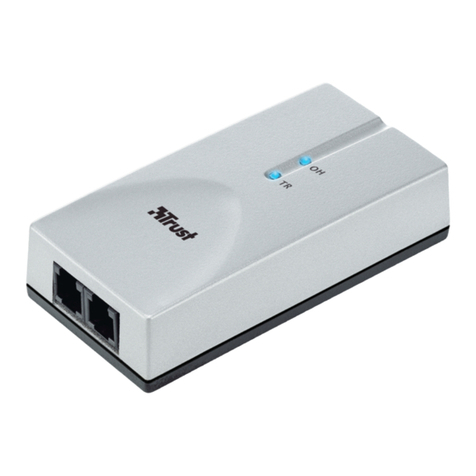
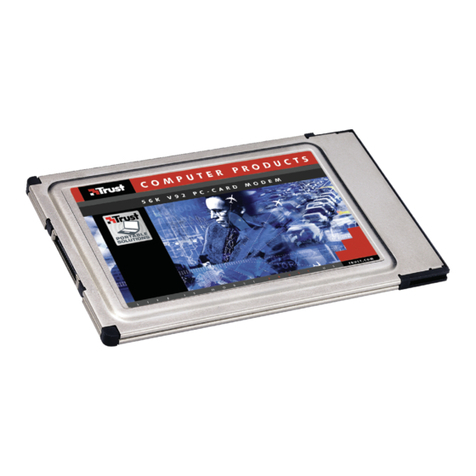
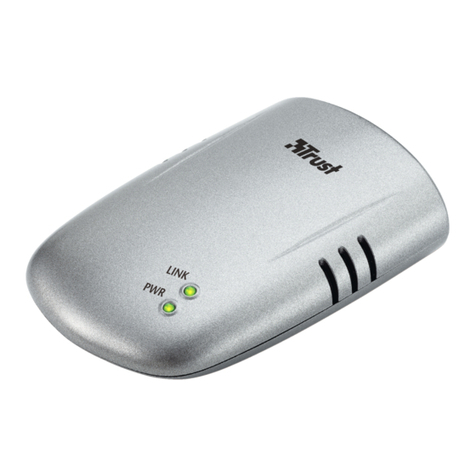
Trust ISDN User manual

Trust ISDN USB Modem & Phone System
GB
TRUST ISDN USB MODEM &
PHONE SYSTEM
Instruction Manual
Version 1.0

Trust ISDN USB Modem & Phone System
01 UK 12220_12221 ISDNUSB CD.DOC
Thank you
Thank you very much for purchasing this product from the Trust range. We wish you hours of fun
with it. Please read this manual carefully before using the product.
Registration
Register your purchase now at the Trust Internet site, www.trust.com, so that you are able to
receive optimal guarantee and service support. You will be automatically informed of
developments to your product and to other Trust products. You will also have the chance to win
some spectacular prizes.
Copyright statement
No part of this instruction manual may be reproduced or transmitted, in any form or by any means,
electronic or mechanical, including photocopying, recording, or information storage and retrieval
systems, for any purpose other than the purchaser's own personal use, without prior written
permission from the manufacturer.
Disclaimer statement
The manufacturer specifically disclaims all warranties, either express or implied, including, but not
limited to, implied warranties for the marketability and suitability for a particular purpose, with
respect to the software, the accompanying product manual(s) and written material, and all other
accompanying hardware. The manufacturer reserves the right to revise or make improvements to
its product at any time and without obligation to notify any person of such revisions or
improvements.
In no event shall the manufacturer be liable for any consequential or incidental damages, including
any loss of business profits or any other commercial damages, arising out of the use of its
products.
All company or product names are trademarks or registered trademarks of their respective
owners.

Trust ISDN USB Modem & Phone System
1
GB
Contents
1. Introduction ..................................................................................................................................... 3
1.1 Conventions used in the manual ........................................................................................... 3
1.2 Contents of the box ................................................................................................................. 3
1.3 Minimum system requirements .............................................................................................. 3
2. Safety ............................................................................................................................................... 4
2.1 General information................................................................................................................. 4
2.2 ISDN........................................................................................................................................... 4
3. Installing the Trust ISDN USB Modem & Phone System ............................................................ 5
3.1 Connecting ............................................................................................................................... 5
3.2 Installation in Windows 98...................................................................................................... 5
3.3 Installation in Windows ME .................................................................................................... 6
3.4 Installation in Windows 2000.................................................................................................. 7
4. Installing the applications............................................................................................................ 10
4.1 Trust ISDN Utility ................................................................................................................... 10
4.2 Trust ISDN Phone .................................................................................................................. 11
4.3 RVS-COM application software (optional)........................................................................... 11
5. Instructions for use ...................................................................................................................... 12
5.1 Indicators................................................................................................................................ 12
5.2 Internet.................................................................................................................................... 13
5.3 Diagnostic program ............................................................................................................... 13
5.4 Configuration program.......................................................................................................... 14
5.4.1 Incoming Properties / MSN ............................................................................................ 14
5.4.2 Outgoing Properties ....................................................................................................... 14
5.4.3 Caller ID............................................................................................................................ 15
5.4.4 Call Filter.......................................................................................................................... 15
5.4.5 Authority .......................................................................................................................... 16
5.4.6 Speed Dialling ................................................................................................................. 16
5.4.7 Ring Pattern..................................................................................................................... 17
5.4.8 System.............................................................................................................................. 17
5.5 ISDN Phone program............................................................................................................. 18
5.5.1 Dialler ............................................................................................................................... 18
5.5.2 Phone Book ..................................................................................................................... 19
5.5.3 Call Log ............................................................................................................................ 20
5.5.4 Dialling Options............................................................................................................... 21
5.5.5 Other Options .................................................................................................................. 21
5.6 Programming via analogue telephones............................................................................... 23
Trust ISDN USB Modem & Phone System
2
5.7 Using the telephone functions ............................................................................................. 26
6. Uninstalling the modem ............................................................................................................... 27
7. Troubleshooting ........................................................................................................................... 28
8. Maintenance .................................................................................................................................. 29
9. Specifications................................................................................................................................ 29
10. Trust Customer Care Centers...................................................................................................... 30

Trust ISDN USB Modem & Phone System
3
GB
1. Introduction
This instruction manual is intended for users of the Trust ISDN USB Modem & Phone System. Basic
knowledge of computers is necessary to be able to install this product. Please consult one of the Trust
Customer Care Centers if you have any problems. The last page of this electronic instruction manual, as well
as the back of the printed quick installation manual, contains more information about these Customer Care
Centers.
1.1 Conventions used in the manual
The following conventions have been used in the manual to indicate instructions:
<key> Here you should press a key. The name of the key is given between brackets.
‘System’ This is a specific term used in a program. These are terms used by, for example, Microsoft
Windows 98.
[DIR] Type the text shown between brackets [….].
(term) The text between the parentheses (….) is the English term, e.g. (File) used in the figure
referred to.
Extra information will be shown as follows:
NOTE: The ISDN USB Modem & Phone System only works in Windows 98, Windows ME and Windows
2000.
The examples assume that the letter "D" has been assigned to your CD-ROM drive. If your system uses a
different letter for your CD-ROM drive, for example "E", you should replace "D" by "E".
1.2 Contents of the box
Check the contents of the box. It should contain the following:
•Trust ISDN Modem & Phone System
•USB cable
•ISDN RJ-45 cable
•Power adapter
•Multilanguage quick installation manual
•CD-ROM containing the drivers, applications and instruction manuals
•CD-ROM containing RVS-COM (optional)
•Speaker telephone set (optional)
If anything is missing or damaged, please contact one of the Trust Customer Care Centers. You can find
more information at the back of this instruction manual.
1.3 Minimum system requirements
•Pentium 166 MMX processor
•32MB RAM
•Free USB port
•2MB free HDD space (for the driver) 60MB free HDD space (for the applications)
•4-speed CD-ROM drive
•Windows 98, Windows ME or Windows 2000
•ISDN telephone line

Trust ISDN USB Modem & Phone System
4
2. Safety
Carefully read the following instructions before use:
2.1 General information
1. Only use this device in a dry environment.
2. Do not try to repair this device yourself.
3. Under the following circumstances, remove the plug from the power socket and have the device repaired
by qualified personnel:
a) The wire or the plug is damaged or has become worn.
b) Fluid has entered the device.
c) The device has been dropped and/or the casing has been damaged.
4. Position the device so that the cables cannot be damaged.
2.2 ISDN
1. The ISDN modem is designed to be connected to a digital ISDN network. Therefore, do not connect it to
a normal analogue telephone system. This may cause damage and is dangerous.
2. During a thunderstorm, it is recommended to remove the ISDN telephone cable from the ISDN socket to
prevent damage resulting from a lightning strike.

Trust ISDN USB Modem & Phone System
5
GB
3. Installing the Trust ISDN USB Modem & Phone System
3.1 Connecting
Figure 1: Connections for the Trust ISDN USB Modem & Phone System
1. Insert the plug from the power adapter into connection (A) at the rear of the modem (see figure 1).
2. Insert the power adapter into the wall socket. All the LED's on the modem will be lit and will then go out
one by one, except for the PWR LED, which remains lit.
3. Insert the ISDN telephone cable into connection (C) at the rear of the modem.
4. Insert the other end of the ISDN telephone cable into the ISDN telephone socket.
5. Connect your analogue telephone and/or fax machine to the connections (D and E) on the modem.
6. Insert the USB cable provided into connection (B) at the rear of the modem.
7. Insert the other end of the USB cable into a free USB port on your computer.
NOTE: The power adapter does not have to be connected if you do not use the analogue telephone
outputs (D and E) and only use the ISDN line (C) for the Internet.
NOTE: If you connect the modem to a USB HUB, then this HUB must have its own power supply.
See the following chapters for instructions on how to install the ISDN Modem & Phone System in Windows
98, Windows ME and Windows 2000.
3.2 Installation in Windows 98
1. Start Windows.
2. Windows will detect new hardware (see figure 2).
Figure 2: New hardware detected
3. Insert the CD-ROM containing the drivers into your CD-ROM drive. Click on 'Next'.

Trust ISDN USB Modem & Phone System
6
4. Select the option for Windows to search for the best driver and click on 'Next' (see figure 3).
Figure 3: Search for the best driver
5. Select the option to search a specific location and give the location as [D:\Win98] (see figure 4).
Figure 4: Specifying a location for the driver
6. Click on 'Next'. The driver for the ISDN Modem & Phone System will be found at the location given.
7. Click on 'Next' again. The driver will now be installed.
8. Click on ‘Finish’ to complete the installation.
9. Restart your computer.
You have now completed the installation of the driver. Continue to chapter 4 for instructions on how to install
the necessary applications.
3.3 Installation in Windows ME
1. Start Windows ME.
2. Windows will detect new hardware (see figure 5).

Trust ISDN USB Modem & Phone System
7
GB
Figure 5: New hardware detected
3. Insert the CD-ROM containing the drivers into your CD-ROM drive.
4. Select the option to search a specific location and click on 'Next'.
5. Select the option to specify a location and give the location as [D:\WinMe] (see figure 6).
Figure 6: Specifying a location for the driver
6. Click on 'Next'. The driver for the ISDN Modem & Phone System will be found at the location given.
7. Click on 'Next' again. The driver will now be installed.
8. Click on ‘Finish’ to complete the installation.
9. Restart your computer.
You have now completed the installation of the driver. Continue to chapter 4 for instructions on how to install
the necessary applications.
3.4 Installation in Windows 2000
1. Start Windows 2000.
2. Windows will detect new hardware (see figure 7).

Trust ISDN USB Modem & Phone System
8
Figure 7: New hardware detected
3. Insert the CD-ROM containing the drivers into your CD-ROM drive. Click on 'Next'.
4. Select the option for Windows to search for a suitable driver and click on 'Next' (see figure 8).
Figure 8: Searching for a suitable driver
5. Select the option to search a specific location and click on 'Next' (see figure 9).
Figure 9: Specifying a location

Trust ISDN USB Modem & Phone System
9
GB
6. Give the location as [D:\Win2000] and click on 'OK' (see figure 10).
Figure 10: Specifying the file location
7. The driver will be found at the location given. Click on 'Next'.
8. Windows 2000 will display a message saying that the Trust ISDN Modem & Phone System has not been
digitally signed by Microsoft. Click on 'Yes' to accept and continue with the installation.
9. Windows 2000 will display a message saying that the driver for the Trust NDIS WAN Miniport Adapter
has not been digitally signed by Microsoft. Click on 'Yes' to accept and continue with the installation.
10. Click on ‘Finish’ to complete the installation.
You have now completed the installation of the driver. Continue to the following chapter for instructions on
how to install the necessary applications.

Trust ISDN USB Modem & Phone System
10
4. Installing the applications
The applications provided must be installed in order to be able to use all the functions available with the Trust
ISDN Modem & Phone System. Follow the instructions given below.
4.1 Trust ISDN Utility
The ISDN Utility provided contains a diagnostic program which can perform a test to check the operation of
the modem and which checks whether there is a stable connection with the ISDN network. The ISDN Utility
also contains a configuration program which can be used to program the modem's various switchboard
functions. The software is installed as follows:
1. Start Windows.
2. Insert the CD-ROM containing the drivers and applications into your CD-ROM drive.
3. Click on 'Start' and select 'Run'.
4. In the commend line, type [D:\Setup.exe] and click on 'OK' to start the Trust Software Installer (see figure
11).
Figure 11: Trust Software Installer
5. In the left-hand window, select the language that you wish to use during the installation.
6. Click on the ‘TRUST ISDN UTILITY’ button to start the installation of this program.
7. Click on 'Next' (see figure 12).

Trust ISDN USB Modem & Phone System
11
GB
Figure 12: Installing the Trust ISDN Utility
8. Click on 'Next' again. The ISDN Utility will now be installed at the location indicated.
9. Click on ‘Finish’ to complete the installation.
You have now completed the installation of the Trust ISDN Utility.
4.2 Trust ISDN Phone
Follow the instructions given below to install the software:
1. If necessary, repeat steps 1 to 5 of chapter 4.1 to start the Trust Software Installer (see figure 11).
2. Click on the ‘TRUST ISDN PHONE’ button to start the installation of this program.
3. Click on 'Next' to continue with the installation (see figure 13).
Figure 13: Installing the Trust ISDN Phone
4. Click on 'Next' again. ISDN Phone will now be installed at the location indicated.
5. Click on ‘Finish’ to complete the installation.
You have now completed the installation of the software for the Trust ISDN Phone.
4.3 RVS-COM application software (optional)
An optional ISDN communication program can be supplied with the ISDN USB Modem & Phone System.
This program can be used to send faxes at a speed of 14400 bps and files at a speed of 2400 bps to an

Trust ISDN USB Modem & Phone System
12
analogue modem. It is also possible to make telephone calls using this software. This program is not
necessary to use the Internet.
The installation is started automatically be inserting the 'RVS-COM' CD-ROM into your CD-ROM drive. Follow
the on-screen instructions.
If you are asked for a code (key), this can be found either on the back of the CD-ROM box or on a separate
card, depending on the version of RVS-COM.
5. Instructions for use
5.1 Indicators
There are a number of indicators on the front of the ISDN USB Modem & Phone System (see figure 14).
These can be used to see whether the modem has made a connection. See the table below for the
description of the functions of these LED indicators:
Figure 14: Indicators
LED Description Function
APWR Is lit if when the power adapter is connected.
BRUN Flashes to indicate that the ISDN USB Modem & Phone System works correctly.
CUSB Is lit when the USB port is connected to your computer. Flashes when the USB is
in the download status.
DISDN Is lit when the ISDN modem is connected to the ISDN network (D channel is
active).
EB1 Is lit as soon as there is a 64k connection (single "B1" line). Flashes during data
transfer.
FB2 Is lit as soon as there is a 64k connection (single "B2" line). Flashes during data
transfer.
GPhone 1 Is lit when the analogue telephone port 1 is in use.
HPhone 2 Is lit when the analogue telephone port 2 is in use.
IPC Is lit when an application on your computer uses the ISDN USB Modem &
Telephone System.

Trust ISDN USB Modem & Phone System
13
GB
5.2 Internet
You may have to make a 'Dial-up' connection in order to connect to your ISP (Internet Service Provider). This
is included in Windows 98, Windows ME and Windows 2000 as standard and is usually automatically
installed when you double-click on the Internet icon.
See Windows Help for more information.
Some Internet providers provide a complete software package for Internet access which makes your
computer suitable for Internet use.
NOTE: First, check whether your Internet provider supports the multilink PPP connection if you wish to
use both of the ISDN lines available with the ISDN USB Modem & Phone System.
5.3 Diagnostic program
If you are not able to make a connection or if the modem does not react, it is recommended to start the
diagnostic software provided. If this has not already been installed, follow the instructions given in chapter
4.1. The diagnosis program is stated as follows:
1. Go to 'Start - Programs - Trust - ISDN Utility' and select 'Diagnostic Program' from the list (see figure 15).
Figure 15: Diagnostic / Test program
2. In the space available for 'Own ISDN Number', fill in the telephone number which is connected to the
ISDN modem.
Note: In some countries, it is also necessary to enter the 'Calling Party Number'. Contact your local
telephone company for more information.
3. Click on the 'Loopback Test' button to start the diagnosis. If all the tests are successful, figure 16 will
appear. If 'OK' was not given for one of the tests, check whether the diver has been correctly installed
and whether the modem is connected to the ISDN network.
Figure 16: Diagnosis successful

Trust ISDN USB Modem & Phone System
14
5.4 Configuration program
The configuration program can be used to program the various switchboard functions of the ISDN Modem &
Phone System. The settings are saved in the modem so that they still work when the computer is turned off.
Note: The power adapter must be connected to use the telephone switchboard.
Go to 'Start - Programs - Trust - ISDN Utility' and select 'Configuration Program' from the list to start the
program. See the chapters below for the description of the various tabs:
5.4.1 Incoming Properties / MSN
Multiple Subscriber Number (MSN) means that you can subscribe more than one telephone number to a
single ISDN line. In this tab (figure 17), you can subscribe more than one telephone number to each line.
Figure 17: Incoming Properties / MSN
For each line, you can also indicate whether all telephone numbers are redirected (Listen all MSNs) or
whether only the numbers specified are redirected (Listen the specified MSNs). You can select 'Do not
disturb' if you do not wish to redirect any incoming calls.
Activate the 'Enable Call Waiting' option if you wish to be notified of a second incoming call during a call via
one of the analogue lines. You will then hear two short beeps.
Activate the 'Enable Internal Call Forwarding' option if you wish to redirect an incoming call from one line to
another line.
5.4.2 Outgoing Properties
In this tab (figure 18), you can specify which telephone number is sent as 'Calling Party Number' (CPN) with
outgoing calls. This telephone number will then be displayed at the location of the person you call.

Trust ISDN USB Modem & Phone System
15
GB
Figure 18: Outgoing Properties
Activate the 'Enable CLIR' (Calling Line Identification Restriction) option if you do not wish your telephone
number to be displayed at the location of the receiving party.
For 'Bearer Capability', select the '3.1 kHz Audio' option if an analogue telephone is connected. Select the 'G3
Fax' option if a G3 fax machine is connected to the analogue port.
5.4.3 Caller ID
The Trust ISDN USB Modem & Phone System supports ‘Caller ID’ on the analogue lines. If you activate the
'Enable Caller ID' option (see figure 19), the information relating to the person who calls you will be displayed.
Figure 19: Caller ID
There are a number of country specific standards for the Caller ID signal. Give your country in the 'Country'
box.
5.4.4 Call Filter
In this tab, you can give the telephone numbers of specific callers who you wish to block. Activate the 'Enable
Call Filter' option (see figure 20) and enter the telephone numbers in the fields below. Each incoming call
from the numbers given will then be blocked.

Trust ISDN USB Modem & Phone System
16
Figure 20: Call Filter
5.4.5 Authority
In this tab (see figure 21), you can make sure that certain numbers cannot be called using the connected
analogue telephones. You can specify telephone numbers up to a maximum length of 4 figures. Each dialled
telephone number that begins with the numbers specified will be blocked.
Figure 21: Authority
Example: If you specify the numbers '00' (international access code), then it will not be possible to make
international calls using the connected analogue telephones.
5.4.6 Speed Dialling
In this tab (see figure 22), give the telephone numbers that you dial regularly. This will save you time when
dialling.

Trust ISDN USB Modem & Phone System
17
GB
Figure 22: Speed Dialling
5.4.7 Ring Pattern
In this tab (see figure 23), you can assign a different ring pattern to each telephone number of your ISDN line
so that you can hear immediately which number is being called. You can also assign a ring pattern to a
telephone call which is placed on hold.
Figure 23: Ring Pattern
5.4.8 System
In this tab (see figure 24), you can specify a password to protect your settings. Activate the 'Password Enable'
option and then click on 'Change Password' to specify a password.
Note: A password cannot be longer than 4 figures. It is not possible to use letters.

Trust ISDN USB Modem & Phone System
18
Figure 24: System
With 'Volume Control for Phones', you can set the speaker and microphone volume of the analogue
telephone.
If a new version of the company software of this program becomes available, it can be installed by clicking on
the 'Upgrade Firmware' button and then specifying the file location.
5.5 ISDN Phone program
With this program, you can use the ISDN USB Modem & Telephone System as an ISDN telephone. To do
so, connect your speakers and microphone to the connections (F and G) at the front of the modem (see
figure 1).
Go to 'Start - Programs - Trust' and select 'ISDN Phone' from the list to start the program. See the chapters
below for the description of the various tabs:
5.5.1 Dialler
In this tab (figure 25), you can make a telephone call by dialling a number and then clicking on the 'Dial'
button. A new window will appear which includes the information relating to the person you are calling. The
information is only displayed if you have saved it in the telephone book (see chapter 5.5.2). Click on the
'Hang Up' button to end the call.
Table of contents
Other Trust Modem manuals

Trust
Trust 450I User manual

Trust
Trust 450I RJ45 User manual

Trust
Trust Communicator 56K ESP-2 User manual

Trust
Trust AP115W User manual

Trust
Trust MD-3100 User manual

Trust
Trust 245B User manual

Trust
Trust MD-4100 User manual

Trust
Trust 215A User manual

Trust
Trust 56K V92 External Modem User manual

Trust
Trust 12284 User manual

Trust
Trust 56K PC-CARD MODEM User manual

Trust
Trust 31065 User manual

Trust
Trust 56K PC-CARD MODEM User manual

Trust
Trust 235A User manual

Trust
Trust 56K V92 External Modem User manual

Trust
Trust 56K PC-CARD MODEM User manual

Trust
Trust MD-1100 56K V92 User manual

Trust
Trust V92 User manual

Trust
Trust MD-1250 56K User manual

Trust
Trust MD-4050 User manual