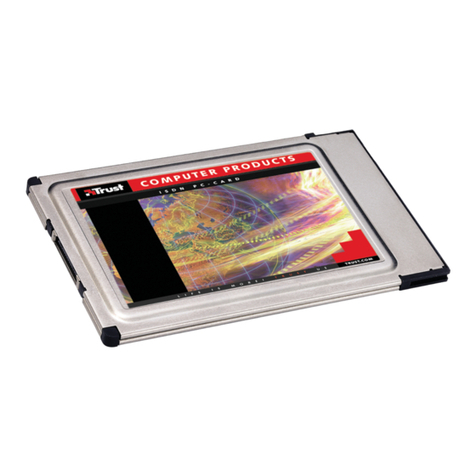
Trust MD-3100 User manual

UK
DE
FR
IT
ES
PL
NL
PT
GR
DK
SE
HU
CZ
FI
NO
TR
RU
User’s manual
USB ADSL MODEM
Version 2.0
SK

USER'S MANUAL
D
CB
A
Insert Trust CD-ROM
1
ON
2
Automatic Installation (select Internet Service Provider from list)
3
4
1
2
2
1

USER'S MANUAL
5
6
7
8
9 10
2
1
4
1
2
3
2
1
Æ18

USER'S MANUAL
Manual Installation (Input ADSL settings manually)
11
12
13
14
4
1
2
12
4
3
3
2
1
15
16

USER'S MANUAL
2
1
17
Connect modem to ADSL line
18
19
S
PLITTER
Connect to Internet
20
21
2x

USER'S MANUAL
2x
22

USER'S MANUAL
1
UK
Product information
A. Power indicator (on: connected to USB and PC on / off: not connected or PC power off
B. ADSL LINK indicator (flashing: searching ADSL line / steady: ADSL line found)
C. ADSL line connection
D. USB connection (to PC)
Insert Trust CD-ROM
1 Turn computer on
Insert installation CD-ROM
2 Install driver
Automatic Installation (Select Internet Service Provider from list)
3 1. ‘Auto installation’
2. ‘Next’
4 1. Select country
2. ‘Next’
Country not listed, select ‘Back’ Æ11
5 1. Select (xDSL) Internet Service Provider (ISP)
2. ‘Next’
ISP not listed, select 2x ‘Back’ Æ11
6
Depending on ISP or setting you have selected this window will appear. If not then go to 7.
Fill in internet account username(1) and (2x) password(2)
3. ‘Next’
For correct username and password check ISP information
If the internet account requires static / fixed IP (RFC1483 routed) fill in the IP address in the
Windows network settings after installing the driver and choosing the correct ISP setting. See CD-
ROM manual to configuure your Windows network settings.
7 ‘Finish’
Continue installation
8 Goto Æ9
9 Connect modem to PC with USB cable
10 1. Yes, reboot the computer now
2. ‘Close’
Æ18

USER'S MANUAL
2
Manual Installation (Input ADSL settings manually)
11 1. ‘manual installation’
2. ‘Next’
12
Specify:
1. Encapsulation
2. VPI / VCI
3. Handshake (default set “multi mode”)
For correct settings check your ISP information
13
Depending on ISP or setting you have selected this window will appear. If not then go to 14.
Fill in internet account username(1) and (2x) password(2)
3. ‘Next’
For correct username and password check ISP information
If the internet account requires static / fixed IP (RFC1483 routed) fill in the IP address in the
Windows network settings after installing the driver and choosing the correct ISP setting. See CD-
ROM manual to configuure your Windows network settings.
14 “Finish”. Continue installation
15 Goto Æ16
16 Connect modem to PC with USB cable
17 1. Yes, reboot the computer now
2. ‘Close’
Æ18
18 Connect modem to (RJ-11) telephone cable
19 Connect other end to splitter and splitter to ADSL line
Splitter/filter only for correct phone functionality

USER'S MANUAL
3
UK
Connect to Internet
20 Double click ‘Dial-Up Connection’ icon on desktop
If dialup connection not on the desktop then ISP does not use one go directly to step 22
21 “Dial”
Sometimes mentioned as “ connect”
22 Open Internet Explorer
Type: www.trust.com [enter]
Note
General use
•Read CD-ROM manuals for checking your Windows internet explorer settings and sharing your internet
connection.
•This modem only works on analogue (POTS, PSTN, Annex A) ADSL or DSL/TDSL line
•If the internet account requires static / fixed IP (RFC1483 routed) fill in the IP address in the Windows
network settings after installing the driver and choosing the correcft ISP setting. See CD-ROM manual to
configure your Windows network settings.
•Before installation make sure your ADSL line and account are activated.
•This modem is not compatible with SDSL standard.
•To automatically start internet when using a dialup connection, copy the dialup from the desktop into the
Windows startup folder.
•To change from ISP or other settings uninstall the modem and reinstall again. Activate Start – (all) Programs
– Trust – MD3100 USB ADSL MODEM – Uninstall. Follow steps on screen. Uninstall is finished after window
“Uninstall finished” -> OK After uninstall finished unplug modem.
•To share ADSL modem connection read Internet sharing manual chapter 3 on CD-ROM
Go to www.trust.com/14359 for up-to-date FAQs, drivers and instruction manuals.
For extensive service register at www.trust.com/register
Safety instructions
•Never open or repair this device
•This device meets the essential requirements and other relevant conditions of the applicable European
directives. The Declaration of Conformity (DoC) is available at www.trust.com/14359/ce
•If possible, dispose of the device at a recycling centre. Do not dispose of the device with the household
waste.
USER'S MANUAL
4
Warranty & copyright
•This device has a two-year product warranty which is valid from the date of purchase. Go to
www.trust.com/warranty for more information.
•It is forbidden to reproduce any part of this instruction manual without the permission of Trust International
B.V.

BENUTZER HANDBUCH
1
DE
Produktinformationen
A. Betriebsanzeige (an: an USB angeschlossen und PC eingeschaltet/aus: nicht angeschlossen oder
PC ausgeschaltet
B. ADSL-Verbindungsanzeige (blinkt: Suche nach ADSL-Leitung/leuchtet: ADSL-Leitung
gefunden)
C. ADSL-Anschluss
D. USB-Anschluss (für PC)
Legen Sie die Trust-CD-ROM ein.
1 Schalten Sie den Computer ein.
Legen Sie die Installations-CD-ROM ein.
2 Installieren Sie den Treiber mit „Install driver“
Automatische Installation (Wählen Sie den Internet Service Provider aus der Liste.)
3 1. Automatische Installation (Auto Installation)
2. „Weiter“ (Next).
4 1. Wählen Sie Ihr Land aus.
2. „Weiter“ (Next).
Ist Ihr Land nicht aufgeführt, klicken Sie auf „Zurück“ (Back) Æ11
5 1. Wählen Sie Ihren (xDSL-) Internetanbieter (ISP) aus.
2. „Weiter“ (Next)
Ist Ihr ISP nicht ausgeführt, klicken Sie zweimal auf „Zurück“ (Back) Æ11
6
Je nach Internetanbieter oder den gewählten Einstellungen wird dieses Fenster geöffnet. Ist das
nicht der Fall, fahren Sie fort mit Punkt 7.
Geben Sie den zu Ihrem Internetkonto gehörigen Benutzernamen (1 Mal) und das entsprechende
Kennwort (2 Mal) ein.
3. „Weiter“ (Next).
Den richtigen Benutzernamen und das richtige Kennwort finden Sie in den Angaben Ihres
Internetanbieters.
Wenn das Internetkonto eine statische/feste IP-Adresse erfordert (RFC1483 Routed),
muss die IP-Adresse nach Installation des Treibers und Eingabe der erforderlichen ISP-Einstellungen
in den Netzwerkeinstellungen von Windows eingetragen werden. Nähere Angaben zur Konfiguration
der Windows-Netzwerkeinstellungen finden Sie in der Anleitung auf der CD-ROM.
7 „Fertig stellen" (Finish).
Setzen Sie die Installation fort
8 Fahren Sie fort (Goto) mit Æ9
9 Schließen Sie das Modem mit dem USB-Kabel an den PC an

BENUTZER HANDBUCH
2
10 1. Ja, den Computer jetzt neu starten (Yes, reboot the computer now).
2. "Schließen" (Close)
Æ18
Manuelle Installation (Geben Sie die ADSL-Einstellungen manuell ein.)
11 1. Manuelle Installation (Manual Installation).
2. „Weiter“ (Next).
12
Geben Sie die Daten für Folgendes an:
1. Datenkapselung (Encapsulation)
2. VPI / VCI
3. Handshake (default set “Multi-Modus” (Multi Mode)
4. „Weiter“ (Next).
Die korrekten Einstellungen finden Sie in den Angaben Ihres Internetanbieters.
13
Je nach Internetanbieter oder den gewählten Einstellungen wird dieses Fenster geöffnet. Ist das
nicht der Fall, fahren Sie fort mit Punkt 14.
Geben Sie den zu Ihrem Internetkonto gehörigen Benutzernamen (1 Mal) und das entsprechende
Kennwort (2 Mal) ein.
3. „Weiter“ (Next).
Den richtigen Benutzernamen und das richtige Kennwort finden Sie in den Angaben Ihres
Internetanbieters.
Wenn das Internetkonto eine statische/feste IP-Adresse erfordert (RFC1483 Routed), muss die
IP-Adresse nach Installation des Treibers und Eingabe der erforderlichen ISP-Einstellungen in den
Netzwerkeinstellungen von Windows eingetragen werden. Nähere Angaben zur Konfiguration der
Windows-Netzwerkeinstellungen finden Sie in der Anleitung auf der CD-ROM.
14 „Fertig stellen" (Finish). Setzen Sie die Installation fort
15 Setzen Sie die Installation fort Æ16
16 Connect modem to PC with USB cable
17 1. Ja, den Computer jetzt neu starten (Yes, reboot the computer now).
2. "Schließen" (Close)
Æ18
18 Schließen Sie das Modem mit dem USB-Kabel an den PC an
19 Schließen Sie das andere Ende an den Splitter und den Splitter an die ADSL-Leitung an.
Ein Splitter/Filter ist nur für eine gute Telefonfunktion erforderlich
Internetanschluss
20 Doppelklicken Sie auf das Symbol für die DFÜ-Verbindung ‘Dial-Up Connection’ auf dem
Desktop.

BENUTZER HANDBUCH
3
DE
Wenn Sie dieses Symbol nicht auf dem Desktop befindet, nutzt der Internetanbieter keine DFÜ-
Verbindung. Fahren Sie gleich fort mit Punkt 22.
21 „Wählen“ (Dial).
Manchmal auch „Verbinden“ (Connect).
22 Öffnen Sie den Internet Explorer
Geben Sie ein: www.trust.com (auf die Eingabetaste drücken).
ENDE
Beschreibung
• Lesen Sie in den Anleitungen auf der CD-ROM nach, wie Ihre Einstellungen für Windows Internet Explorer
lauten und wie Sie Ihre Internetverbindung freigeben können.
• Dieses Modem funktioniert nur mit einer analogen Leitung (POTS, PSTN, Annex A) oder einer ADSL- bzw.
DSL/TDSL-Leitung.
• Wenn das Internetkonto eine statische/feste IP-Adresse erfordert (RFC1483 Routed), muss die IP-Adresse
nach Installation des Treibers und Eingabe der erforderlichen ISP-Einstellungen in den Netzwerkeinstellungen
von Windows eingetragen werden. Nähere Angaben zur Konfiguration der Windows-Netzwerkeinstellungen
finden Sie in der Anleitung auf der CD-ROM.
• Überprüfen Sie vor der Installation, dass Ihre ADSL-Leitung und Ihr Konto aktiviert sind.
• Mit dem SDSL-Standard ist dieses Modem nicht kompatibel.
• Wenn bei Verwendung einer DFÜ-Verbindung das Internet automatisch gestartet werden soll, muss die DFÜ-
Verbindung vom Desktop zum Ordner „Autostart“ kopiert werden.
• Wenn die ISP- oder andere Einstellungen geändert werden sollen, muss das Modem deinstalliert und wieder
neu installiert werden. Aktivieren Sie „Start – Programme – Trust – MD3100 USB ADSL MODEM – Uninstall
MD3100 USB ADSL MODEM“. Befolgen Sie die Anweisungen auf dem Bildschirm. Die Deinstallation ist
abgeschlossen, wenn das Fenster „Uninstall finished“ angezeigt wird. Klicken Sie auf „OK“ und koppeln Sie
das Modem anschließend ab.
• Anweisungen zur gemeinsamen Nutzung der ADSL-Modemverbindung finden Sie in Kapitel 3 der Anleitung
zur Internetfreigabe auf der CD-ROM.
Sollten Sie Probleme haben, finden Sie die FAQ, Treiber und Anleitungen unter www.trust.com/14359.
Um einen umfassenden Service in Anspruch nehmen zu können, lassen Sie Ihr Gerät unter
www.trust.com/register registrieren
Sicherheit
• Öffnen Sie das Gerät nicht und führen Sie keine Reparaturen an diesem Gerät aus.

BENUTZER HANDBUCH
4
• Das Gerät entspricht den grundlegenden Anforderungen und anderen relevanten Bedingungen der
geltenden europäischen Richtlinien. Die Konformitätserklärung (DoC) können Sie unter
www.trust.com/14359/ce nachlesen
• Entsorgen Sie das Gerät nach Möglichkeit in einem Recycling-Center. Entsorgen Sie das Gerät nicht
zusammen mit dem Haushaltsabfall.
Garantie und Urheberrecht
• Für dieses Produkt besteht eine Herstellergarantie von 2 Jahren, die ab dem Zeitpunkt des Erwerbs in Kraft
tritt. Weitere Informationen dazu finden Sie unter www.trust.com/warranty.
• Diese Anleitung darf ohne Genehmigung von Trust International B.V. weder ganz noch auszugsweise
vervielfältigt werden

MANUEL D'UTILISATION
1
FR
Informations sur les produits
A. Voyant d’alimentation (allumé : connecté à l’USB et PC allumé / éteint : pas connecté ou PC
éteint
B. Voyant ADSL LINK (clignotant : recherche ligne ADSL en cours / permanent : ligne ADSL
trouvée)
C. Connexion ligne ADSL
D. Connexion USB (au PC)
Insérez le CD-ROM Trust
1 Allumez l’ordinateur
Insérez le CD-ROM d’installation
2 Installation du pilote (Install driver)
Installation automatique (sélectionnez un fournisseur d’accès à Internet dans la liste)
3 1. ‘Installation automatique’ (Auto Installation)
2. ‘Suivant’ (Next)
4 1. Sélectionnez le pays
2. ‘Suivant’ (Next)
Si le pays n’apparaît pas dans la liste, sélectionnez ‘Retour’ (Back) Æ11
5 1. Sélectionnez un Fournisseur de Services Internet (FSI) (xDSL)
2. ‘Suivant’ (Next)
Si le FSI n’apparaît pas dans la liste, sélectionnez 2x ‘Retour’ (Back) Æ11
6
En fonction du FSI ou du paramètre sélectionné, cette fenêtre s’affiche. Sinon, passez à l’étape
7
Remplissez le nom d’utilisateur(1) et (2x) le mot de passe(2) de votre compte d’accès Internet
3. ‘Suivant’ (Next)
Pour un nom d’utilisateur et un mot de passe corrects, consultez les informations de votre FSI
Si le compte d’accès Internet requiert une adresse IP statique / fixe (RFC1483 routé),
remplissez l’adresse IP dans les paramètres de réseau Windows après avoir installé le pilote et
choisi le paramètre FSI correct. Voir le manuel sur CD-ROM pour configurer vos paramètres de
réseau Windows.
7 ‘Terminer’ (Finish)
Continuez l’installation
8 Allez à Æ9
9 Connectez le modem au PC à l’aide du câble USB
10 1. Oui, redémarrer l’ordinateur maintenant

MANUEL D'UTILISATION
2
2. ‘Fermer’ (Close)
Æ18
Installation manuelle (Saisie manuelle des paramètres ADSL)
11 1. ‘Installation manuelle’ (Manual Installation)
2. ‘Suivant’ (Next)
12
Spécifiez :
1. Encapsulation
2. VPI / VCI
3. Handshake (default set “multi mode”)
4. ‘Suivant’ (Next)
Pour des paramètres corrects, consultez les informations de votre FSI
13
En fonction du FSI ou du paramètre sélectionné, cette fenêtre s’affiche. Sinon, passez à l’étape 14
Remplissez le nom d’utilisateur(1) et (2x) le mot de passe(2) de votre compte d’accès Internet
3. ‘Suivant’ (Next)
Pour un nom d’utilisateur et un mot de passe corrects, consultez les informations de votre FSI
Si le compte d’accès Internet requiert une adresse IP statique / fixe (RFC1483 routé),
remplissez l’adresse IP dans les paramètres de réseau Windows après avoir installé le pilote et
choisi le paramètre FSI correct. Voir le manuel sur CD-ROM pour configurer vos paramètres de
réseau Windows.
14 “Finish”. Continuer l’installation
15 Allez à Æ16
16 Connectez le modem au PC à l’aide du câble USB
17 1. Oui, redémarrer l’ordinateur maintenant
2. ‘Fermer’ (Close)
Æ18
18 Connectez le modem à l’aide du câble téléphonique RJ-11 au séparateur et à la ligne ADSL
19 Connectez l’autre extrémité au filtre et le filtre à la ligne ADSL
Séparateur/filtre uniquement pour une fonction téléphonique correcte
Connexion à Internet
20
Double-cliquez sur l'icône de connexion par ligne commutée ‘Dial-Up Connection’ située sur le
bureau
Si l’icône de connexion par ligne commutée n’apparaît pas sur le bureau, le FSI n’en utilise pas ;
passez directement à l’étape 22

MANUEL D'UTILISATION
3
FR
21 Composition (Dial)
Parfois indiqué en tant que ‘Connexion’ (Connect)
22 Ouvrez Internet Explorer
Tapez : www.trust.com [entrée]
FIN
Remarques
•Consultez les manuels sur CD-ROM pour vérifier vos paramètres Internet Explorer Windows et partager votre
connexion Internet.
•Ce modem fonctionne uniquement sur une ligne ADSL ou DSL/TDSL (POTS, PSTN, Annex A) analogique
•Si le compte d’accès Internet requiert une adresse IP statique / fixe (RFC1483 routé), remplissez l’adresse IP
dans les paramètres de réseau Windows après avoir installé le pilote et choisi le paramètre FSI correct. Voir
le manuel sur CD-ROM pour configurer vos paramètres de réseau Windows.
•Avant l’installation, assurez-vous que votre ligne et votre compte d’accès ADSL soient activés.
•Ce modem n’est pas compatible avec la norme SDSL.
•Pour démarrer automatiquement Internet en utilisant une connexion par ligne commutée, copiez l’icône de
connexion dans le dossier de démarrage Windows.
•Pour changer de FSI ou d'autres paramètres, désinstallez, puis réinstallez le modem. Activez Démarrage –
Programmes – Trust - MD3100 USB ADSL MODEM – Désinstallation MD3100 USB ADSL MODEM. Suivez les
étapes à l’écran. La désinstallation est terminée dès que la fenêtre ‘Désinstallation terminée’ (Uninstall
finished) s’affiche. -> OK Une fois la désinstallation terminée, débranchez le modem.
•Pour partager une connexion par modem ADSL, lisez le chapitre 3 du manuel de partage d’accès à Internet
sur CD-ROM
En cas de problème, rendez-vous sur www.trust.com/14359 pour la FAQ, les pilotes et manuels.
Pour des services étendus, enregistrez-vous sur www.trust.com/register
Sécurité
•N’ouvrez pas et ne réparez pas cet appareil vous-même.
•Ce produit répond aux principales exigences et autres dispositions pertinentes des directives européennes
en vigueur. La Déclaration de Conformité (DoC) est disponible à l’adresse www.trust.com/14359/ce
•Si possible, jetez l’appareil dans un centre de recyclage. Ne jetez pas l’appareil avec les déchets ménagers.

MANUEL D'UTILISATION
4
Garantie et copyright
•Ce produit bénéficie d’une garantie d’usine valable deux ans à compter de la date de l’achat. Pour plus
d’informations, rendez-vous sur www.trust.com/warranty
•Toute reproduction de ce manuel, en totalité ou en partie, est interdite sans l’autorisation de Trust
International B.V.

MANUALE DELL 'UTENTE
1
IT
Informazioni sul prodotto
A Indicatore di stato (on: collegato all'USB e PC acceso / off: non collegato o PC spento)
B. Indicatore di connessione ADSL (luce intermittente: ricerca della linea ADSL in corso / luce
fissa: linea ADSL individuata)
C. Connessione alla linea ADSL
D. Collegamento USB (al PC)
Inserire il CD-ROM di Trust
1 Accendere il computer
Inserire il CD-ROM d'installazione
2 Fare clic su "Installa driver" (Install driver)
Installazione automatica (selezionare dall'elenco l'Internet Service Provider)
3 1. Fare clic su "Auto-installazione" (Auto-Installation)
2. "Avanti" (Next)
4 1. Selezionare il paese
2. "Avanti" (Next)
Se il paese non è nell'elenco fare clic su "Indietro" (Back) Æandare al passo 11
5 1. Selezionare l'Internet Service Provider (ISP)(xDSL)
2. "Avanti" (Next)
Se l'ISP non è elencato fare clic due volte su "Indietro" (Back) Æandare al passo 11
6
A seconda dell'ISP o delle impostazioni selezionate comparirà questa finestra. Se non compare
andare al passo 7
Digitare username (1) e password (2) (2 volte) dell'account Internet
3. "Avanti" (Next)
Per username e password corretti consultare le informazioni dell'ISP
Se l'account Internet richiede un IP statico / fisso (RFC1483 routed), inserire l'indirizzo IP nelle
impostazioni di rete Windows dopo l'installazione dei driver e dopo aver scelto le impostazioni
dell'ISP. Consultare il manuale su CD-ROM per configurare le impostazioni di rete Windows.
7 "Fine" (Finish)
Procedere con l'installazione
8 Selezionare Æ9
9 Collegare il modem al PC tramite il cavo USB
10 1. Sì, riavviare il computer
2. "Chiudi" (Close)
Æ18

MANUALE DELL 'UTENTE
2
Installazione manuale (immettere manualmente le impostazioni ADSL)
11 1. Fare clic su "Installazione manuale" (Manual-Installation)
2. "Avanti" (Next)
12
Specificare:
1. Incapsulamento
2. VPI / VCI
3. Handshake (default set “modalità multipla")
4. "Avanti" (Next)
Per le impostazione corrette consultare le informazioni del proprio ISP
13
A seconda dell'ISP o delle impostazioni selezionate comparirà questa finestra. Se non compare
andare al passo 14
Digitare username (1) e password (2) (2 volte) dell'account Internet
3. "Avanti" (Next)
Per username e password corretti consultare le informazioni dell'ISP
Se l'account Internet richiede un IP statico / fisso (RFC1483 routed), inserire l'indirizzo
IP nelle impostazioni di rete Windows dopo l'installazione dei driver e dopo aver scelto le
impostazioni dell'ISP. Consultare il manuale su CD-ROM per configurare le impostazioni di rete
Windows.
14 “Finish”. Continuare l'installazione
15 Selezionare Æ16
16 Collegare il modem al PC tramite il cavo USB
17 1. Sì, riavviare il computer
2. "Chiudi"
Æ18
18 Collegare il modem tramite il cavo telefonico RJ-11 allo splitter e alla linea ADSL
19 Collegare l'altro capo allo splitter e lo splitter alla linea ADSL
Splitter / filtro solo per il corretto funzionamento del telefono
Connessione a Internet
20 Fare doppio clic sull'icona di connessione " Dial-Up Connection " sul desktop.
Se l'icona di connessione non compare sul desktop significa che l'ISP non la utilizza. Andare
direttamente al passo 22
21 Componi numero (Dial)
Talvolta chiamata "Connetti" (Connect)
Table of contents
Languages:
Other Trust Modem manuals

Trust
Trust V92 User manual

Trust
Trust 235A User manual

Trust
Trust 450I User manual

Trust
Trust 56K PC-CARD MODEM User manual

Trust
Trust 56K PC-CARD MODEM User manual

Trust
Trust 215A User manual

Trust
Trust 450I RJ45 User manual

Trust
Trust Communicator 56K ESP-2 User manual

Trust
Trust 31065 User manual

Trust
Trust MD-4100 User manual

Trust
Trust MD-4050 User manual

Trust
Trust MD-1100 56K V92 User manual

Trust
Trust AP115W User manual

Trust
Trust 245B User manual

Trust
Trust 56K V92 External Modem User manual

Trust
Trust 56K PC-CARD MODEM User manual

Trust
Trust 12284 User manual

Trust
Trust 56K V92 External Modem User manual

Trust
Trust ISDN User manual

Trust
Trust MD-1250 56K User manual