manuals.online logo
Brands
  1. Home
  2. •
  3. Brands
  4. •
  5. VeriFone
  6. •
  7. Touch Terminal
  8. •
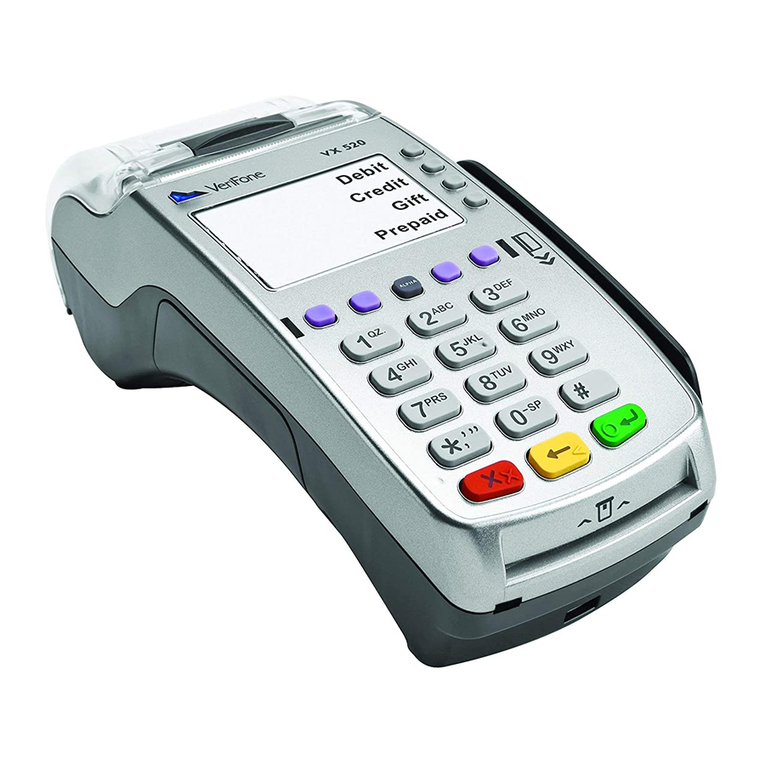
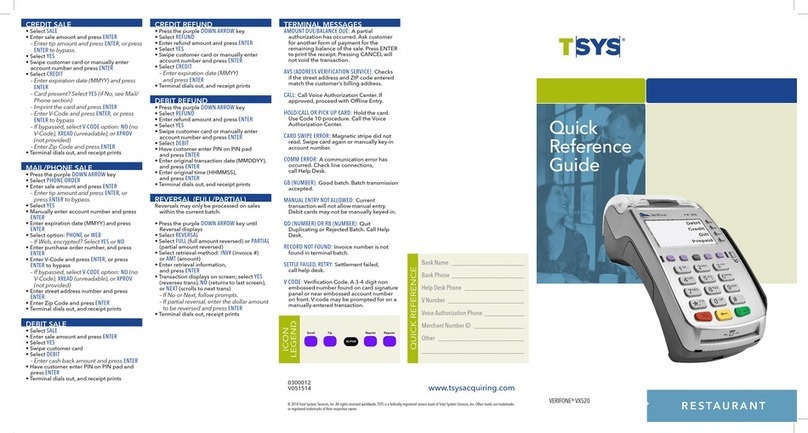
  9. VeriFone Vx-520 Series APACS 40 User manual

VeriFone Vx-520 Series APACS 40 User manual

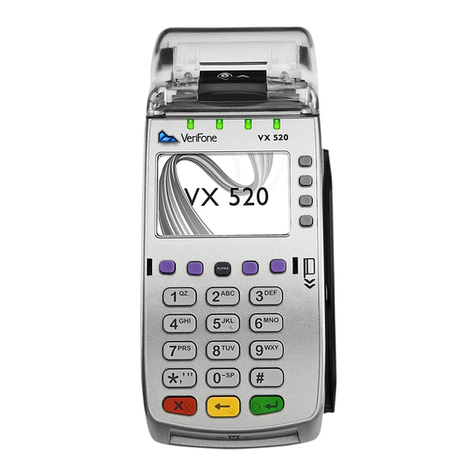
VX520 Shortcuts and Instructions - EPX
Running a transaction
If in the main menu, select “Credit/Debit”
Once in the Sale screen, select the “Sale” option – F2
Enter the amount, push the green button, “enter”
It will ask you to confirm the amount, select “ok” if correct
At this point, you can swipe the card, insert the chip, or use a phone to pay with a mobile app
or other NFC device.
Using the EMV / Chip card
1. Position a smart card with the contacts facing upward (see Figure 21).card transaction
2. Insert the smart card into the smart card reader slot in a smooth, continuous motion
until it seats firmly.
3. Certain Bank issued cards (Debit on the card) will prompt you to select Visa or
MasterCard Debit.
4. Remove the card only when the application indicates the transaction is complete.
Leave the smart card in the card reader until the transaction is complete. Premature card
removal will invalidate the transaction.
***If you swipe a card that has a chip, you will get the message “USE CHIP READER” select the
green “enter” button and wait for it to prompt you to inset the card. DO NOT insert the chip
card during that error message.
The receipt will print and may prompt you to print a customer receipt.
***If the chip reader gets locked out or stops working, unplug the terminal and plug it back in
to reset it.
Gift Cards
If you are in the “Sale” screen press the “*” button to get to the main menu
If in the main menu, select “Valutec” or “Gift Card” and follow those steps
Support Phone Numbers
PayProTec Technical Support 1-800-226-2273
PayProTec Customer Relations 1-800-360-2591
PaymentsHub Support 1-877-464-4218
www.paymentshub.com
Adjusting the Date and time
*The terminals are set up to run on Military (24 hour) time. Make sure your download sheet
specifications reflect that. Example: Auto Close, 22:00
In the sale screen, press the green “enter” button
Select setup (F2)
Enter the password: 000000
Press the green “enter” button
Use the purple “more” key under the arrow, four times until you see “Date/Time” to the right
Select Date/Time (F4)
Enter the date: example 08/02/2015
Enter the time: example 14:23:00
Press the green “enter” button
Press the red “X” button to return to the sale’s screen
Changing the Communication Method
In the sale screen, press the number “6” button
Enter the password: 000000
Press the green “enter” button
Select Communications (F4)
Select View (F2)
If Set as Dial and you need to change it to Commserver:
You will see “NAB Auth Comm” - Dial
Select Edit (F3)
Select Next (F2) – will see “CommServer”
Select Slct (F3)
Select Next (F2) three times until you see “NAB Settle Comm” - Dial
Select Edit (F3)
Select Next (F2) – will see “CommServer”
Select Slct (F3)
Select Exit (F4)
If Set as CommServer and you need to change it to Dial:
You will see “NAB Auth Comm” - Commserver
Select Edit (F3)
Select Next (F2) – will see “Dial”
Select Slct (F3)
Select Next (F2) three times until you see “NAB Settle Comm” - Commserver
Select Edit (F3)
Select Next (F2) – will see “Dial”
Select Slct (F3)
Select Exit (F4)
Press the red “X” button to return to the Sale Screen
Changing the Receipt Printing to Confirm Copy or Auto print
In the sale screen, press the number “6” button
Enter the password: 000000
Press the green “enter” button
Select Terminal (F3)
Select View (F2)
Select next (F2) four times until you see “Customer Copy”
Select Edit (F3)
To change to Auto print receipt:
Select Next (F2) two times, you will see “Automatic”
Select Slct (F3)
Select Exit (F4)
To change to confirm copy receipt:
Select Next (F2) one time, you will see “Confirm”
Select Slct (F3)
Select Exit (F4)
Press the red “X” button to return to the Sale Screen
Changing the Settlement Reports
In the sale screen, press the green “enter” button
Select setup (F2)
Enter the password: 000000
Press the green “enter” button
Use the purple “more” key under the arrow, two times until you see “Merchant IDs” to the
right
Select “Merchant IDs” (F1)
Select Next (F2) eight times until you see “Prt Sttl Rpts”
Select Edit (F3)
To change to Detail report only:
Select Next (F2) one time, you will see “Detail Rpt”
Select Slct (F3)
Select Exit (F4)
When asked to Save Changes, select “OK” (F2)
To change to Total report only:
Select Next (F2) two times, you will see “Total Rpt”
Select Slct (F3)
Select Exit (F4)
When asked to Save Changes, select “OK” (F2)
To change to print both Totals and Detail reports:
Select Next (F2) three times, you will see “Both Rpts”
Select Slct (F3)
Select Exit (F4)
When asked to Save Changes, select “OK” (F2)
Adjusting the Header and Footer Information on a Receipt
In the sale screen, press the green “enter” button
Select “Menu/Keys” (F4)
Enter the password: 000000
Press the green “enter” button
Select “Printer” (F4)
Select “Slct” (F2)
Select Next (F2) and change the lines needed for the (the first four are the header)
Screens 5-7 are to add footer messages
On any lines you need to change, select “edit” (F3)
Type in the desired changes using the keys and “alpha” button
When finished with that line, press the green “enter” button
When finished, Select “Exit” (F4)
When asked to Save Changes, select “OK” (F2)
Press the red “X” button to return to the Sale Screen
Changing the Auto Settle Time – (if you have auto settle)
In the sale screen, press the number “6” button
Enter the password: 000000
Press the green “enter” button
Select Terminal (F3)
Select View (F2)
Select next (F2) twelve times until you see “AutoSett Time”
Select Edit (F3)
Type in the new time, example: 233000
Press the green “enter” button
Select Exit (F4)
Press the red “X” button to return to the Sale Screen
Unlocking the Keyboard
In the sale screen, press the number “8” button
It will ask for a password
Enter the password: 000000
It will then ask, “lock Keyboard?”
Press F2 for NO
Changing the Language between English and Spanish
In the sale screen, press the number “7” button
It will then ask, “language
Press F1 for English
Press F2 for Spanish
Reprinting a Batch Detail
In the sale screen, press the purple “reports” button
Press the purple “more” button two times
Press F1 for Batch History
Press F2 for the Date
Enter the desired date, example 041517
Turning On the Server Prompt – Clerk ID
In the sale screen, press the number “6” button
Enter the password: 000000
Press the green “enter” button
Select Terminal (F3)
Select View (F2)
Select next (F2) three times until you see “Clerk ID”
Select Edit (F3)
To change to Prompt on:
Select Edit (F3)
Select Prompt (F3)
Select Exit (F4)
Turning Off the Server Prompt – Clerk ID
In the sale screen, press the number “6” button
Enter the password: 000000
Press the green “enter” button
Select Terminal (F3)
Select View (F2)
Select next (F2) three times until you see “Clerk ID”
Select Edit (F3)
To change to Prompt off:
Select Edit (F3)
Select None (F1)
Select Exit (F4)
Adding Servers to the Terminal – (each one has to be done individually)
In the sale screen, press the green “enter” button
Select Servers (F3)
Select “Add Server” (F4)
Enter the password: 000000
Press the green “enter” button
It will ask for a Clerk ID #
Enter the desired Server ID
Press the green “enter” button
It will ask for a password (5-10) characters
Enter in the password for that server
Press the green “enter” button
It will ask for confirmation on that password
Enter in the password for that server again
Press the green “enter” button
When finished, press the red “X” key two times to return to the sale screen
! !
!
Trouble!shooting!Connection!Errors!on!a!Verifone!VX520!
!
If!the!terminal!is!not!processing!over!the!internet!or!is!processing!slowly.!
!
In!the!sale!screen,!press!the!number!“6”!button!
Enter!the!password:!000000!
Press!the!green!“enter”!button!
Select!Communications!(F4)!
Select!View!(F2)!
!
Make!sure!that!is!says!“CommServer”!on!the!screen!
If!it!says!“Dial”!follow!the!instructions!to!change!it!to!CommServer!
!
!
To!Test!where!the!breakdown!might!be:!
!
Press!the!“*”!button!next!to!the!number!“0”!button!
!
In!the!Main!Home!Screen!Menu,!You!will!see!
CommServer!–!(F2)!
Credit/Debit!–!(F3)!
!
Press!“CommServer”!(F2)!
!
In!your!terminal!screen!the!image!for!VCS!Ethernet!will!show!up.!
!
At!the!bottom!of!the!screen!you!will!see!the!Wrench!and!Tool!with!a!purple!button!below!
it!“more”!
Press!that!purple!“more”!button!
!
To!check!the!connection!status,!press!“troubleshoot”!–!F3!
!
It!will!Ping!two!IP!addresses!and!some!test!URLs!
!
If!all!is!working!properly,!they!will!flash!up!and!be!“OK”!after!each!
!
It!will!either!take!you!to!the!previous!screen!or!select!the!red!”X”!to!take!you!back!
!
I!recommend!selecting!“Repair”!–!F4!after!checking!
!
If!the!connection!to!the!hardware!in!your!network!is!broken,!you!will!see,!“Not!connected!
to!the!Network”!or!“no!response”!
!
If!the!connection!to!the!network!is!OK,!but!the!internet!connection!to!the!internet!is!
broken,!you!will!see!
IP!XXXXXXXXXX!–!OK!
!
IP!XXXXXXXXXX!–!Ok!or!“failed”!
!
www.verifone.com!-!“Failed”!or!“no!response”!
!
If!the!test!URLs!are!not!connecting,!try!resetting!your!modem!and!router!to!see!if!you!can!
reestablish!the!connection.!
!
Once!that!is!done,!you!may!need!to!perform!the!“repair”!function!in!the!CommServer!
setup!or!unplug!and!plug!back!in!the!terminal.!
!
!
One!way!to!test!your!internet:!
!
Make!sure!your!Wi-Fi!is!turned!on!your!phone!and!connected!to!your!network.!
!
Open!up!a!new!window!in!your!browser!and!enter!a!website.!!If!it!does!not!load,!it!is!your!
internet.!
!
**!you!may!need!to!turn!off!your!cellular!internet!connection!to!properly!test!this!because!
some!phones!will!auto!connect!through!that!if!the!Wi-Fi!does!not!work!or!is!slow.!
!
!
!

Other manuals for Vx-520 Series APACS 40

25

Other VeriFone Touch Terminal manuals

VeriFone UX410 User manual

VeriFone

VeriFone UX410 User manual

VeriFone VX570 User manual

VeriFone

VeriFone VX570 User manual

VeriFone PP1000se User manual

VeriFone

VeriFone PP1000se User manual

VeriFone VX570 User manual

VeriFone

VeriFone VX570 User manual

VeriFone CM5P User manual

VeriFone

VeriFone CM5P User manual

VeriFone evolution series User manual

VeriFone

VeriFone evolution series User manual

VeriFone MX860 Use and care manual

VeriFone

VeriFone MX860 Use and care manual

VeriFone MX 900 Series User manual

VeriFone

VeriFone MX 900 Series User manual

VeriFone Vx680 BT Series User manual

VeriFone

VeriFone Vx680 BT Series User manual

VeriFone 55225 User manual

VeriFone

VeriFone 55225 User manual

VeriFone Vx-520 Series APACS 40 User manual

VeriFone

VeriFone Vx-520 Series APACS 40 User manual

VeriFone VX570 User manual

VeriFone

VeriFone VX570 User manual

VeriFone HICAPS VX680 User manual

VeriFone

VeriFone HICAPS VX680 User manual

VeriFone V400 Series Manual

VeriFone

VeriFone V400 Series Manual

VeriFone VX 675 User manual

VeriFone

VeriFone VX 675 User manual

VeriFone IX90 T650p User manual

VeriFone

VeriFone IX90 T650p User manual

VeriFone T650p User manual

VeriFone

VeriFone T650p User manual

VeriFone VX 680 User manual

VeriFone

VeriFone VX 680 User manual

VeriFone Omni 3350 User manual

VeriFone

VeriFone Omni 3350 User manual

VeriFone UX301 User manual

VeriFone

VeriFone UX301 User manual

VeriFone Vx-520 Series APACS 40 User manual
VeriFone

VeriFone Vx-520 Series APACS 40 User manual

VeriFone V400c User manual

VeriFone

VeriFone V400c User manual

VeriFone ruby2 User manual

VeriFone

VeriFone ruby2 User manual

VeriFone MX800 Series User manual

VeriFone

VeriFone MX800 Series User manual

Popular Touch Terminal manuals by other brands

Tait TD9300 installation manual

Tait

Tait TD9300 installation manual

Festo VTEM Description

Festo

Festo VTEM Description

Olimpia splendid Bi2 Series Instructions for mounting and use

Olimpia splendid

Olimpia splendid Bi2 Series Instructions for mounting and use

Chase Voice Authorization Quick reference guide

Chase

Chase Voice Authorization Quick reference guide

Trox LVC Installation and commissioning instructions

Trox

Trox LVC Installation and commissioning instructions

Compsee apex II Operating & programming manual

Compsee

Compsee apex II Operating & programming manual

AeronSmart S5F2 user guide

AeronSmart

AeronSmart S5F2 user guide

Clover Mobile Features guide

Clover

Clover Mobile Features guide

Festo VIFB13-02 Series manual

Festo

Festo VIFB13-02 Series manual

POSIFLEX HT-3200 SERIES manual

POSIFLEX

POSIFLEX HT-3200 SERIES manual

Advantech POC-WP21 Series user manual

Advantech

Advantech POC-WP21 Series user manual

ATOL Smart Plus E915 user manual

ATOL

ATOL Smart Plus E915 user manual

GIETEK GS220 user manual

GIETEK

GIETEK GS220 user manual

XAC XCL AT-100 SERIES installation guide

XAC

XAC XCL AT-100 SERIES installation guide

Rockwell Automation Allen-Bradley PanelView Plus 7 Product information

Rockwell Automation

Rockwell Automation Allen-Bradley PanelView Plus 7 Product information

Tysso TP-7715 Service manual

Tysso

Tysso TP-7715 Service manual

Unitech HT680 Quick reference guide

Unitech

Unitech HT680 Quick reference guide

Beam Terra 400 quick start guide

Beam

Beam Terra 400 quick start guide

manuals.online logo
manuals.online logoBrands
  • About & Mission
  • Contact us
  • Privacy Policy
  • Terms and Conditions

Copyright 2025 Manuals.Online. All Rights Reserved.