manuals.online logo
Brands
  1. Home
  2. •
  3. Brands
  4. •
  5. WAREMA
  6. •
  7. Controllers
  8. •
  9. WAREMA 1MPF.4 UP User manual

WAREMA 1MPF.4 UP User manual

1
warema_2025028_alhb_en_v5•2022-10-01 We reserve the right to make technical modifications
General information
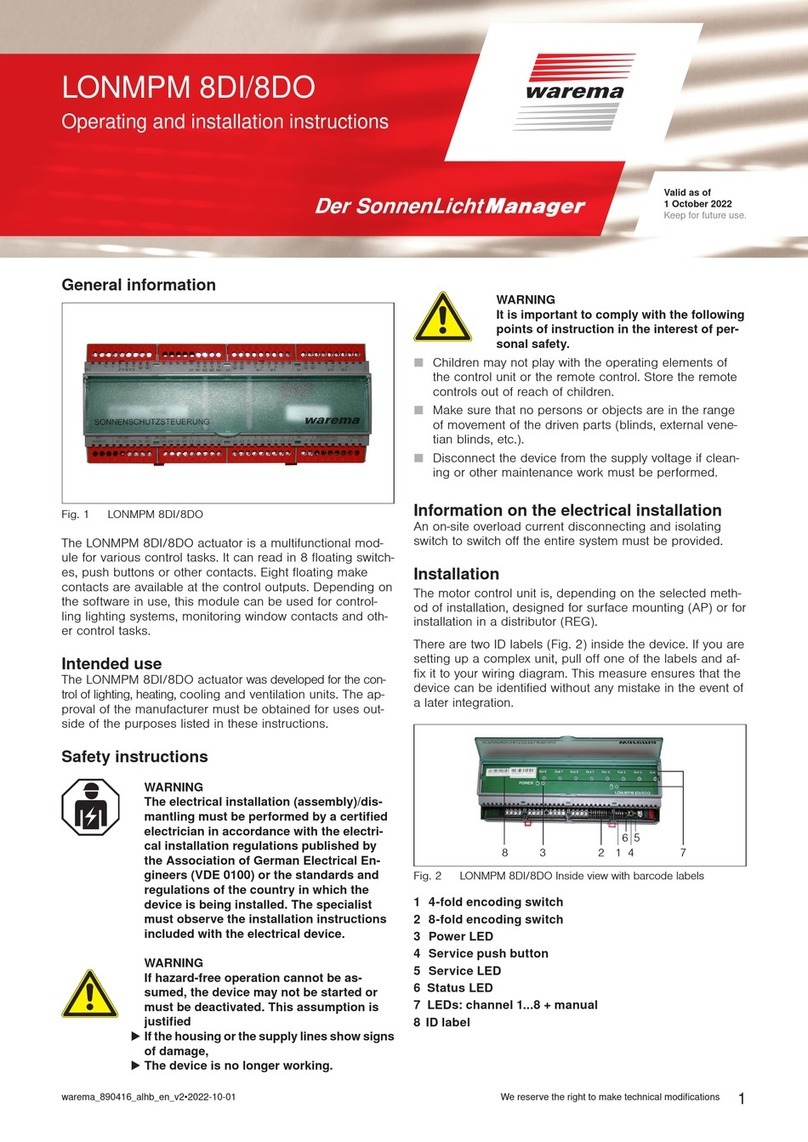
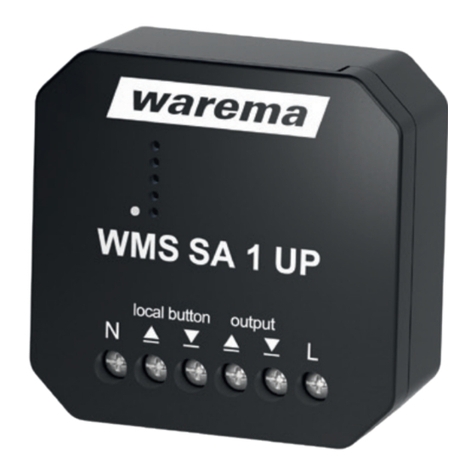
Fig. 1 WAREMA KNX Actuator 1MPF.4 UP
The WAREMA KNX Actuator 1MPF.4 UP is an electronic
control device for the control of a motor or for connecting
two switchable power consumers (ON/OFF). The floating
design of the output allows other systems to be controlled
too, e.g. using the manual switch input of a motor control
device.
4 digital inputs are provided for connecting binary contacts.
Intended use
The WAREMA KNX Actuator 1MPF.4 UP is an electronic
control device for the control of a motor or for connecting
two switchable power consumers (ON/OFF).
Any use other than the purpose described in these
instructions requires approval from the manufacturer.
Safety instructions
ARNINGW
The electrical installation (assembly)/
dismantling must be performed by a
certified electrician in accordance with
VDE 0100 and/or with the standards and
legal requirements of the country in which
the device is being installed. The electrician
must observe the installation instructions
included with the electrical devices
supplied.
AUTIONC
Electrical voltage!
There are unprotected live components
inside the device.
Observe the VDE regulations.
Connect all lines to be installed in a
de-energised state and take safety
precautions against accidental switch-on.
Do not commission the device if it is
damaged.
Deactivate the device or unit and secure
against accidental switch-on if it is to be
assumed that hazard-free operation cannot
be guaranteed.
Installation information
The device is intended for proper use only. All warranty
claims become void if the device is subjected to any
improper modification or use that does not comply with the
operating instructions.
The device must be inspected for potential mechanical
damage immediately after being unpacked. If the device
has been damaged during transport, the supplier must be
notified of this immediately.
The device may only be used as a fixed installation, i.e.
only when fully assembled and after all installation and
commissioning procedures are completed
and only in the intended environment.
WAREMA RenkhoffSE is not liable for any changes to the
norms and standards after publication of the operating
instructions.
Functions:
Floating multifunctional output for a
230V drive (shading, window) or for connecting two
switchable devices (light, fan)
4 binary inputs
Position feedback on moving position
Position memory (moving position) via 1 bit object
(storage and retrieval via push button, for example)
Scene control with 16 scenes
Safety objects of different priority with cyclical
monitoring
Activation or deactivation of the automatic inputs (e.g.
sun control, slat tracking) with parameterisable control
mode return function
Configuration is performed with KNX Software ETS 5. The
product database required for this (.knxprod) can be found
in the online catalogue of the ETS or online at
http://www.warema.de/knx.
Scope of delivery
Actuator
Braided hose for KNX line and inputs
Connecting line for inputs
Short description
WAREMA KNX Actuator
1MPF.4 UP
Valid from
01. October 2022
Keep for future use!
warema_2025028_alhb_en_v5•2022-10-01We reserve the right to make technical modifications
2
Installation location
The device is designed for installation in a flush-mounted
box (electronics box). The housing of the device must not
be opened.
Information on installation and commissioning
Never expose the actuators to water (rain) or dust. This
can damage the electronics. The relative humidity must not
exceed 80%. Avoid condensation.
After the bus voltage is applied, the device performs an
initialising phase lasting a few seconds. No information can
be received or sent by the bus during this time.
In the case of KNX devices with safety functions (for
example a wind or rain barrier), cyclical monitoring of the
safety objects must be set up. A ratio of 1:3 is optimal
(example: if the weather station transmits a value every 5
minutes, the monitoring time in the actuator should be set
to 15 minutes).
Cleaning
Clean the housing with a soft, dry cloth. Do not use
detergents, cleaning agents, solvents, abrasive substances
or steam cleaners!
1
2
3
4
230 V
5
Fig. 2 Installation scheme in an electronics box
1 Binary inputs 2 Installation location for
push button
3 Braided hose 4 KNX bus line
5 Cable tie
Addressing device to bus
The device is supplied with the bus address 15.15.255.
Another address can be programmed in the ETS by
overwriting the address 15.15.255, or taught in using the
programming button.
Connection
1
2
3
4
5
6
Fig. 3 View
1 Binary inputs:
Slot for cable whip
4 Programming button
(recessed)
2 programming LED
(recessed)
5 Label field
3 KNX plug terminal +/- 6 Connection terminal
UA: voltage,
maximum 270VAC
Up/A1: Switch motor upwards
or power consumer 1
Down/A2: Switch motor
downwards or consumer 2
The WAREMA KNX Actuator 1MPF.4 UP is installed in
a flush-mounted box. Connection via KNX connection
terminal to the KNX bus. A power supply is also required
for the connected drive and/or the power consumers
(floating output).
AUTIONC
During installation and line routing on the
KNX connection and the inputs, observe
the regulations and standards applicable
for SELV power circuits!
The physical address is assigned by ETS. The actuator
is equipped with a push button, with control LED, for this
purpose.
Use the accompanying connecting line to connect the
digital inputs (Fig. 1, No. 1). The lines for the inputs can be
extended up to 10 m.
All COM connections of the inputs are bridged internally
(black lines).
Connecting line for digital inputs:
Input 1:
black (COM) / white
Input 2:
black (COM) / yellow
Input 3:
black (COM) / violet
Input 4:
black (COM) / blue
3
warema_2025028_alhb_en_v5•2022-10-01 We reserve the right to make technical modifications
Output connection examples:
LED
KNX Aktor
1MPF.4 UP
2031050
D-97828 Marktheidenfeld
COM
COM
COM
COM
KNX (SELV)
+-
A1 A2
μ
μ
4A
600 VA250V
PRG
TP/S
VA
L
N
PE
N PE
M
▼
▼
Supply line
(230 V AC)
Fig. 4 Drive 230VAC
LED
KNX Aktor
1MPF.4 UP
2031050
D-97828 Marktheidenfeld
COM
COM
COM
COM
KNX (SELV)
+-
A1 A2
μ
μ
4A
600 VA250V
PRG
TP/S
VA
NPEL NPEL
L
N
PE
Supply line
(230 V AC)
Fig. 5 Two power consumers 230VAC
Connection example inputs:
LED
KNX Aktor
1MPF.4 UP
2031050
D-97828 Marktheidenfeld
COM
COM
COM
COM
KNX (SELV)
+-
A1 A2
μ
μ
4A
600 VA250V
PRG
TP/S
AV
BK BK BK BK BUWH YE VT
Fig. 6 Connection example with four push buttons
warema_2025028_alhb_en_v5•2022-10-01We reserve the right to make technical modifications
4
Technical data
Housing Plastic
Colour White
Installation Flush-mounted (electronics box);
The housing of the device must not
be opened
Degree of protection IP 00
Dimensions ∅ approx. 53 mm, depth approx.
24 mm
Total weight < 40 g
Ambient temperature Operation -5...+45°C,
Storage -30...+85°C
Ambient humidity 5... 80% RH, not condensing
Operating voltage KNX bus voltage
Current consumption from
KNX bus
Relays not pulled in: 12mA
2 relays pulled in: 25mA
Output switching capacity
5A, maximum 270 V AC/30 VDC
Inputs 4x digital,
max. line length 10m
Data output KNX +/- bus plug terminal
Medium TP1-256
Configuration Mode S-Mode
Group addresses max. 254
Allocations max. 254
Closing contact µ (<1.2mm)
Switching current
(in ohms)
max. 4A
Total current max. 4A
(protected with integrated
T4A/250 V fuse)
Motor max. 600VA
LEDi (SBL) Lamps per
contact
max. 15W
Fluorescent lamps / CFL/
LED (EVG) per contact
max. 36W
Overvoltage category III
Article number 2031050
The product conforms with the regulations of the EU
directives.
Obligations for the disposal of electrical
devices
A marking with this symbol indicates the following
obligations under the scope of legal regulations:
 The owner of this electrical device must dispose of it
separately from unsorted municipal waste for further
recycling.
 Used batteries and accumulators that are not enclosed
in the old device, as well as lamps/bulbs that can be
removed from the old device without breaking, must be
disposed of separately.
 Distributors of electrical devices and disposal companies
are obliged to take back the equipment free of charge
.
 The owner must take it upon themselves to delete any
personal data contained in the electrical device prior to
disposal.

Other WAREMA Controllers manuals

WAREMA KNX SA Series User manual

WAREMA

WAREMA KNX SA Series User manual

WAREMA 4M230.12 2Down REG User manual

WAREMA

WAREMA 4M230.12 2Down REG User manual

WAREMA KNX SA 16M230.32 SMI AP User manual

WAREMA

WAREMA KNX SA 16M230.32 SMI AP User manual

WAREMA LONMSE 2M230I Manual

WAREMA

WAREMA LONMSE 2M230I Manual

WAREMA Omnexo 2M230 REG User manual

WAREMA

WAREMA Omnexo 2M230 REG User manual

WAREMA KNX SA 16M230 SMI REG User manual

WAREMA

WAREMA KNX SA 16M230 SMI REG User manual

WAREMA KNX 2024236 User manual

WAREMA

WAREMA KNX 2024236 User manual

WAREMA KNX MSE 6M230 Series User manual

WAREMA

WAREMA KNX MSE 6M230 Series User manual

WAREMA KNX SA 2M230 REG User manual

WAREMA

WAREMA KNX SA 2M230 REG User manual

WAREMA KNX secure Series User manual

WAREMA

WAREMA KNX secure Series User manual

WAREMA KNX SA 4MDC REG User manual

WAREMA

WAREMA KNX SA 4MDC REG User manual

WAREMA Omnexo 2M230 AP User manual

WAREMA

WAREMA Omnexo 2M230 AP User manual

WAREMA WMS SA 1 UP User manual

WAREMA

WAREMA WMS SA 1 UP User manual

WAREMA KNX secure Series User manual

WAREMA

WAREMA KNX secure Series User manual

WAREMA KNX SA 2M230 AP Series User manual

WAREMA

WAREMA KNX SA 2M230 AP Series User manual

WAREMA KNX SA 4MDC.8 AP User manual

WAREMA

WAREMA KNX SA 4MDC.8 AP User manual

WAREMA KNX SA 2M230 REG User manual

WAREMA

WAREMA KNX SA 2M230 REG User manual

WAREMA Omnexo 1M230 UP User manual

WAREMA

WAREMA Omnexo 1M230 UP User manual

WAREMA KNX SA 4MDC.8 AP User manual

WAREMA

WAREMA KNX SA 4MDC.8 AP User manual

WAREMA BACnet 4M230.8I AP User manual

WAREMA

WAREMA BACnet 4M230.8I AP User manual

WAREMA LONMSE 2M230 Manual

WAREMA

WAREMA LONMSE 2M230 Manual

WAREMA KNX SA 16M230.32 SMI AP User manual

WAREMA

WAREMA KNX SA 16M230.32 SMI AP User manual

WAREMA LONMSE 6M230 User manual

WAREMA

WAREMA LONMSE 6M230 User manual

WAREMA LONMPM 8DI User manual

WAREMA

WAREMA LONMPM 8DI User manual

Popular Controllers manuals by other brands

Spectronik PRREG user guide

Spectronik

Spectronik PRREG user guide

Pilz PSEN ma1.4a-57 operating manual

Pilz

Pilz PSEN ma1.4a-57 operating manual

Aprilaire 8120 Safety & installation instructions

Aprilaire

Aprilaire 8120 Safety & installation instructions

DynaGen GSC200 Installation and user manual

DynaGen

DynaGen GSC200 Installation and user manual

Emerson Fisher FIELDVUE DVC6200 SIS Mounting instructions

Emerson

Emerson Fisher FIELDVUE DVC6200 SIS Mounting instructions

STEP AS380 Series instruction manual

STEP

STEP AS380 Series instruction manual

Baldor 15H SERIES 15H Installation & operating manual

Baldor

Baldor 15H SERIES 15H Installation & operating manual

TRIGEM TPS-7500 Installation & service manual

TRIGEM

TRIGEM TPS-7500 Installation & service manual

Retroaktiv PG-800 MINI Installation manual & users guide

Retroaktiv

Retroaktiv PG-800 MINI Installation manual & users guide

National Instruments NI PXI-8104 user manual

National Instruments

National Instruments NI PXI-8104 user manual

RKC INSTRUMENT HA400 Series instruction manual

RKC INSTRUMENT

RKC INSTRUMENT HA400 Series instruction manual

Prolon M2000 SERIES Hardware guide

Prolon

Prolon M2000 SERIES Hardware guide

Solo PICO user manual

Solo

Solo PICO user manual

Lutron Electronics Sivoia QED Installation and operating instructions

Lutron Electronics

Lutron Electronics Sivoia QED Installation and operating instructions

Omron NX-ECC201 user manual

Omron

Omron NX-ECC201 user manual

Consort CRX2 Installation and user guide

Consort

Consort CRX2 Installation and user guide

Siemens 25 Replacement Parts and Instruction Guide

Siemens

Siemens 25 Replacement Parts and Instruction Guide

GE D25 user manual

GE

GE D25 user manual

manuals.online logo
manuals.online logoBrands
  • About & Mission
  • Contact us
  • Privacy Policy
  • Terms and Conditions

Copyright 2025 Manuals.Online. All Rights Reserved.