Worx WG430E User manual

WG430E
P06
P12
P19
P25
P31
P38
Leaf mulcher EN
Laubmulcher D
Déchiqueteuse à feuilles F
Tritafoglie I
Trituradora de hojas ES
Bladmulser NL

Original instructions EN
Übersetzung der Originalanleitung D
Traduction des instructions initiales F
Traduzione delle istruzioni originali I
Traducción de las instrucciones originales ES
Vertaling van de oorspronkelijke instructies NL

1
2
3
7
8
4
5
6

a
b
f e
d
a
b
c
d
6
BA C
E1 E2
F
D
G H
I1 I2 I3
J1
KO
J2

a
b
f e
d
a
b
c
d
6
BA C
E1 E2
F
D
G H
I1 I2 I3
J1
KO
J2

Leaf mulcher EN
76
76
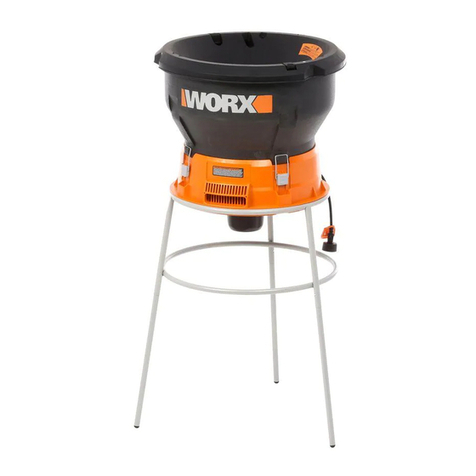
1. FUNNEL COVER
2. FUNNEL
3. CLAMP
4. MAINS SWITCH
5. STAND
6. STAND LEGS
7. MOTOR HOUSING
8. LOCKING BUTTON
* Not all the accessories illustrated or described are included in standard delivery.
TECHNICAL DATA
Voltage 220-240V~50/60Hz
Power input 1200W
No load speed 7200/min
Cutting diameter 340mm
Line diameter 2.4mm
Mulch ratio 11:1
Protection class /II
Machine weight 9.6kg
NOISE AND TECHNICAL DATA
A weighted sound pressure LPA: 98dB(A) KPA: 3dB(A)
A weighted sound power LWA: 105dB(A)
Wear ear protection when sound pressure is over
80dB(A)
ACCESSORIES
Cutting line 24
We recommend that you purchase your accessories from the same store that sold you the tool.
Use good quality accessories marked with a well-known brand name. Choose the type according
to the work you intend to undertake. Refer to the accessory packaging for further details. Store
personnel can assist you and offer advice.

76
Leaf mulcher EN
76
INTENDED USE
Leaf mulcher is designed to shred leaves,
grass clippings, pine needles etc, it can not be
used to shred branches or brushes.
GENERAL SAFETY
WARNINGS
WARNING: Before operation, read
the instructions.
—This appliance is not intended for use by
persons (including children) with reduced
physical, sensory or mental capabilities, or
lack of experience and knowledge, unless they
have been given supervision or instruction
concerning use of the appliance by a person
responsible for their safety.
—Children should be supervised to ensure
that they do not play with the appliance.
— If the supply cord is damaged, it must be
replaced by the manufacturer, its service
agent or similarly qualified persons in order to
avoid a hazard.
Never place fingers or hands into
the inlet while motor is running.
Never place fingers or hands into the
outlet while motor is running.
The Leaf Mulcher shall not be operated
without the guard in place.
Disconnect the plug after an interruption
of the mains supply to avoid unexpected
starting.
IMPORTANT SAFETY
INSTRUCTIONS
TRAINING
Become familiar with the owner’s manual
before attempting to operate this equipment.
PREPARATION
1) Do not allow children to operate this
equipment.
2) Do not operate this equipment in the
vicinity of bystanders.
3) Wear ear protection and safety glasses at
all times while operating the machine.
4) Avoid wearing clothing that is loose fitting
or that has hanging cords or ties.
5) Only operate the machine in open space
(e.g. not close to a wall or other fixed
object) and on a firm, level surface.
6) Before starting the machine, check that all
screws, nuts, bolts, and other fasteners
are properly secured and that guards and
screens are in place. Replace damaged or
unreadable labels.
OPERATION
1) Before starting the machine, look into the
feeding chamber to make certain that it is
empty.
2) Keep your face and body away from the
feed intake opening.
3) Do not allow hands or any other part of
the body or clothing inside the feeding
chamber, discharge chute, or near any
moving part.
4) Keep proper balance and footing at all
times. Do not overreach. Never stand at a
higher level than the base of the machine
when feeding material into it.
5) Always stand clear of the discharge zone
when operating this machine.
6) When feeding material into the machine
be extremely careful that pieces of metals,
rocks, bottles, cans or other foreign objects
are not included.
7) If the cutting mechanism strikes any foreign
objects or if the machine should start
making any unusual noise or vibration,
switch off the machine, disconnect the
supply and take the following steps:
• Inspect for damage;
• Check for and tighten any loose parts ;
• Have any damaged parts replaced or
repaired with parts having equivalent
specifications.
8) If the machine becomes clogged, shut off
the power source and disconnect from
supply before cleaning debris. keep the
power source clear of debris and other
accumulations to prevent damage to the
power source or possible fire. Remember
that operating the starting mechanism on
engine powered machines will still cause
the cutting means to move.

Leaf mulcher EN
98
98
9) Do not tamper with the power source
governor settings; the governor controls
the safe maximum operating speed and
protects the power source and all moving
parts from damage caused by over-speed.
Seek authorized service if a problem exists.
10)Do not transport this machine while the
power source is running.
11)Shut off the power source and disconnect
the plug whenever you leave the work
area.
12)Do not tilt the machine while the power
source is running.
MAINTENANCE AND
STORAGE
1) When the machine is stopped for servicing,
inspection ,or storage, or to change an
accessory, shut off the power source,
disconnect from supply, make sure that
all moving parts have come to a complete
stop and, where a key is fitted remove
the key. Allow the machine to cool before
making any inspections, adjustments, etc.
2) If the supply cord is damaged it must be
replaced by a service agent or a similarly
qualified person in order to avoid hazard.
ADDITIONAL SAFETY INSTRUCTIONS
FOR UNITS WITH BAGGING
ATTACHMENTS
Shut-off the power unit before attaching or
removing the bag.
SYMBOLS
Read instruction handbook before
operation this machine
Keep bystanders away
Remove plug from the mains
immediately if the cable is
damaged or cut.
Wear eye and ear protection
Do not use in the rain or leave out-
doors while it is raining.
Danger – Rotating blades.
Keep hands and feet out of open-
ings while machine is running.
Double insulation
Waste electrical products should
not be disposed of with household
waste. Please recycle where
facilities exist. Check with your
Local Authority or retailer for
recycling advice.

98
Leaf mulcher EN
98
OPERATION INSTRUCTIONS
NOTE: Before using the tool, read the
instruction book carefully.
ASSEMBLE THE MACHINE
CAUTION: Take care when taking
the components out of the color
box. Don’t separate the parts by force
and confirm each part is intact. If any
part is broken, please contact the
service agent.
1. UNPACK THE MACHINE
1) Take the three legs (6) out of the funnel.
(See fig. A)
2) Take the funnel cover off by pressing the
locking button as shown in fig.B.
3) Remove the motor housing from the
funnel. (See fig.C)
4) Take the funnel out of the stand. (See fig.D)
2. ASSEMBLE THE MULCHER STAND
Insert the three legs into the stand as shown
in fig. E1. Make sure the alignment/release
button of each leg (a) is properly positioned
and extended into each hole of the upper
portion of the stand. (See Fig.E2)
3. ASSEMBLING THE MULCHING POWER
HEAD
1). Placing the motor housing on the stand.
Make sure the motor housing is stable on
the stand. (See fig.F)
2). Fit the funnel onto the motor housing.
Make sure it’s locked down by the clamps
found on the motor housing. (See fig.G)
3). Fit the funnel cover over the funnel. Make
sure the locking tabs of the funnel cover
are securely attach to the funnel. (See fig.H)
CAUTION: Properly attach the funnel cover
to the funnel by aligning the notches (b) of
each piece.
4. FITTING A COLLECTION BAG
If you use a plastic collection bag, roll it over
the top of the stand like you would with trash
bag being used on a trash can. (See Fig.I1)
5. REMOVING A FULL COLLECTION BAG
1) When the bag is full, turn off the mulcher
then unplug it. Lift the mulching power
head from the stand. (see fig.I2)
2) Lift the stand off of the collection bag from
the top. (See fig.I3)
OPERATION
1. ON/OFF SWITCH
The ON/OFF switch is located on the lower
side of the motor housing portion of the
power head.To turn on, pull out the switch.
(See Fig.J1)
To turn off, push the switch in. (See Fig.J2)
CAUTION: To prevent exposure to
dusty warm air don’t stand in front
of the motor ventilation slots.
2. LOADING YOUR MACHINE
With the mulcher running, feed double
handfuls of dry leaves, or single handfuls of
wet leaves, into the funnel. Allow the machine
to shred the load completely and regain speed
before inserting the next handful. Do not
overload the machine by letting it labor at low
speed: this may cause the motor to stop. If
this happens, turn the switch off, unplug the
machine, clear the unshredded material from
the funnel, restart the machine, and continue
with your shredding.
WARNING: Filling mulcher with
unshredded material at a rate faster
than the machine can handle may result
in permanent damage to your motor.
Always wear protective glasses and a
mask.
MAINTENANCE
1. CLEANING YOUR UNIT
Your unit requires a minimum of maintenance
other than cleaning. It is recommended that
you clean out built –up residue inside the
housing area during and after each use. When
fully disassembled, clean the funnel cover
and funnel with clean water, while using a
dry cloth to clean the motor housing. Replace
cutting line as often as necessary and clean
air filter frequently. Any other maintenance or
repairs should be performed.

Leaf mulcher EN
1110
1110
CAUTION: Directly cleaning the
motor housing with water will lead
to permanent damage to the motor.
2. REPLACEMENT OF CUTTING LINE(See
Fig.K)
Replace cutting line (e) when a noticeable
decrease in shredding efficiency in observed.
To remove used cutting lines, cut the old lines
and pull the remaining line out of the spinner
head (f). When installing new cutting lines
place each end of the new line through the
two holes in the post on top of the spinner
head and through so that both ends of the line
are even. Then thread the lines through each
corresponding ferrule so that both ends of the
line are even. NOTE: There is a built in line
cutter that will cut and trim lines shortly longer
than desired.
WARNING: For optimum
performance use only WORX
branded replacement lines. Aftermarket
monofilament lines having max diameter
of 2.4mm diameter maximum length
of 370mm long could be temporarily
substituted. Use of thicker lines, lines
made of substitute material, or lines
greater than 370mm long may result in
permanent damage to your motor and/
or injury and will void the manufacturer’s
warranty. Immediately replace any worn
parts of the spinner head.
3. STORAGE (See Fig.L)
When the leaf mulcher is stored at the end
of the season, disassembles and stack in the
following order:
a) Place the funnel into the stand,
b) Fit the motor into the funnel.
c) Place the funnel cover onto the motor.
d) Rest the legs on top of the funnel cover.
ENVIRONMENTAL
PROTECTION
Waste electrical products should not be
disposed of with household waste.
Please recycle where facilities exist.
Check with your Local Authority or retailer for
recycling advice.

1110
Leaf mulcher EN
1110
PLUG REPLACEMENT
(UK & IRELAND ONLY)
If you need to replace the fitted plug then
follow the instructions below.
IMPORTANT
The wires in the mains lead are colored in
accordance with the following code:
Blue = Neutral
Brown = Live
As the colors of the wires in the mains lead of
this appliance may not correspond with the
coloured markings identifying the terminals
in your plug, proceed as follows.The wire
which is coloured blue must be connected to
the terminal which is marked with N.The wire
which is coloured brown must be connected
to the terminal which is marked with L.
WARNING! Never connect live or
neutral wires to the earth terminal of the
plug. Only fit an approved BS1363/A plug and
the correct rated fuse.
NOTE: If a moulded plug is fitted and has to
be removed take great care in disposing of the
plug and severed cable, it must be destroyed
to prevent engaging into a socket.
EC DECLARATION OF
CONFORMITY
We,
POSITEC Germany GmbH
Theodor-Heuss-Ring 1-3
50668 Köln
Declare that the product
Description WORX Leaf mulcher
Type WG430E
Function shred leaves, grass clippings,
pine needles
Complies with the following directives,
EC Low Voltage Directive 2006/95/EC
EC Machinery Directive 2006/42/EC
EC Electromagnetic Compatibility Directive
2004/108/EC
Noise Emission in the Environment by
Equipment for Use Outdoors Directive
2000/14/EC amended by 2005/88/EC
- Conformity assessment procedure as per
Annex V
- Measured sound power level
102.5dB(A)
- Declared guaranteed sound power level
105dB(A)
The notified body involved
Name: IntertekTesting & Certification Ltd
Address: Davy Avenue, Knowlhill, Milton
Keynes, MK5 8NL
Standards conform to,
EN60335-1
EN55014-1
EN55014-2
EN61000-3-2
EN61000-3-3
The person authorized to compile the
technical file,
Name Russell Nicholson
Address Positec Power Tools (Europe)
Ltd, PO Box 152, Leeds, LS10 9DS, UK
2011/04/01
Jacky Zhou
POSITEC Quality Manager
13

Laubmulcher D
1312
1312
1. TRICHTERDECKEL
2. TRICHTER
3. KLAMMER
4. NETZSCHALTER
5. STÄNDER
6. STANDBEINE
7. MOTORGEHÄUSE
8. VERRIEGELUNGSTASTE
*
Abgebildetes oder beschriebenes Zubehör gehört teilweise nicht zum Lieferumfang.
TECHNISCHE DATEN
Nennspannung 220-240V~50/60Hz
Nennleistung 1200W
Leerlaufdrehzahl 7200/min
Schneidradius 340mm
Fadendurchmesser 2.4mm
Mulchverhältnis 11:1
Schutzklasse /II
Gewicht 9.6kg
LÄRMPEGEL UND VIBRATIONEN
Gewichteter Schalldruck LPA: 98dB(A) KPA: 3dB(A)
Gewichtete Schallleistung LWA: 105dB(A)
Tragen Sie bei einem Schalldruck über einen Gehörschutz
80dB(A)
ZUBEHÖRTEILE
Schneideseil 24
Wir empfehlen Ihnen, sämtliche Zubehörteile beim selben Fachhändler zu beziehen, bei dem Sie
auch Ihr Elektrowerkzeug gekauft haben. Verwenden Sie nur hochwertige Zubehörteile von nam-
haften Herstellern. Weitere Informationen finden Sie auf der Verpackung der Zubehörteile. Auch
Ihr Fachhändler berät Sie gerne.

1312
Laubmulcher D
1312
BESTIMMUNGSGEMÄSSER
GEBRAUCH
Der Laubmulcher ist zum Zerkleinern von
Laub, Grasschnitten, Kiefernnadeln usw.
vorgesehen; er darf nicht zum Zerkleinern von
Zweigen oder Sträuchern eingesetzt werden.
ALLGEMEINE
SICHERHEITSHINWEISE
FÜR ELEKTROWERKZEUGE
WARNUNG: Lesen Sie alle
Sicherheitshinweise und
Anweisungen.
—Dieses Gerät ist nicht zurVerwendung durch
Personen (einschließlich Kindern) vorgesehen,
die über reduzierte körperliche Eignung,
Wahrnehmung oder geistige Fähigkeiten,
Mangel an Erfahrung und Wissen verfügen,
sofern diese Personen nicht von einer
verantwortlichen Person beaufsichtigt oder
in derVerwendung des Gerätes unterwiesen
wurden.
—Kinder sollten grundsätzlich beaufsichtigt
werden, damit sie nicht mit dem Gerät spielen.
Wenn ein Ersatz von Stecker oder
Anschlussleitung erforderlich ist, dann ist
dies von unserer Servicestelle oder einer
Elektrofachwerkstatt durchzuführen, um
Sicherheitsgefährdungen zu vermeiden.
Lassen Sie Reparaturen nur durch unsere
Servicestelle oder durch eine Fachwerkstatt
mit Originalersatzteilen durchführen.
Stecken Sie bei laufendem Motor
nie Ihre Finger oder Hände in die
Eintrittsöffnung.
Stecken Sie bei laufendem Motor
nie Ihre Finger oder Hände in die
Austrittsöffnung.
Der Laubmulcher darf nicht ohne
angebrachten Schutz in Betrieb
gesetzt werden.
Ziehen Sie nach Unterbrechung der
Stromversorgung den Stecker ab, um
einen unerwünschten Motorstart zu
vermeiden.
SICHERHEITSHINWEISE
INSTRUCTIONS
Familiarisez-vous avec ce manuel avant de
tenter d’utiliser cet appareil.
PREPARATION
1) Ne laissez pas d’enfants utiliser cet
appareil.
2) N’utilisez pas cet appareil avec des
spectateurs autour.
3) Portez des protections auditives et des
lunettes de protection à tout moment
quand vous utilisez la machine.
4) Évitez de porter des vêtements amples ou
avec des cordons ou des cravates.
5) N’utilisez la machine qu’en espace ouvert
(ex: Pas près d’un mur ni d’un autre objet
fixe) et sur une surface dure et plane.
6) Avant de démarrer la machine, vérifiez que
toutes les vis, tous les écrous, boulons et
autres fixations sont correctement serrés et
que les protections et écrans sont en place.
Remplacez les étiquettes endommagées ou
illisibles.
FONCTIONNEMENT
1) Avant de démarrer la machine, regardez
dans la chambre d’alimentation pour vous
assurer qu’elle est vide.
2) Tenez votre visage et votre corps à
l’écart de l’ouverture de la chamber
d’alimentation.
3) Ne laissez pas les mains ni aucune autre
partie du corps ou des vêtements au
niveau de la chambre d’alimentation, de
la goulotte de décharge ou de toute pièce
mobile.
4) Gardez un bon équilibre et une bonne
position à tout moment. Ne forcez pas. Ne
vous tenez jamais à un niveau plus élevé
que la base de la machine lorsque vous la
chargez en matériau.
5) Tenez vous toujours à l’écart de la zone
de décharge lorsque vous utilisez cette
machine.
6) Lorsque vous chargez des matériaux dans
la machine, soyez extrêmement prudent
afin que des morceaux de métal, de pierre,
des bouteilles et canettes ou autres objets
étrangers ne pénètrent pas.

Laubmulcher D
1514
1514
7) Si le mécanisme de coupe frappe sur
un objet étranger ou si la machine
commence à faire du bruit ou à vibrer de
façon inhabituelle, arrêtez la, débranchez
l’alimentation et effectuez les actions
suivantes :
• Inspectez les dommages;
• Recherchez et reserrez les pieces
desserrées.
• Faites remplacer ou réparer toute
pièce endommagée avec des pièces de
spécification équivalente.
8) Si la machine bourre, arrêtez-la et
débranchez le cable d’alimentation
(machine débranchée du secteur) avant
d’éliminer les débris. Conservez la
chambre d’alimentation libre de tout
débris ou autre accumulation pour éviter
des dommages au moteur ou un possible
incendie. Souvenez-vous que l’utilisation
du mécanisme de démarrage sur des
machines motorisées provoque toujours un
déplacement du moyen de coupe.
9) Ne touchez pas aux réglages du régulateur
du moteur ; le régulateur commande la
vitesse de fonctionnement maximale en
toute sécurité et protège le moteur et
toutes les pièces mobiles des dommages
causes par une survitesse. Faites appel à un
service agréé si le problème persiste.
10)Ne transportez pas cette machine quand le
moteur tourne.
11)Arrêtez le moteur et débranchez la prise dès
que vous quittez la zone de travail.
12)N’inclinez pas cette machine quand le
moteur tourne.
ENTRETIEN
1) Lorsque la machine est arrêtée pour
entretien, inspection, entreposage ou
pour remplacer un accessoire, arrêtez le
moteur, débranchez le cable d’alimentation
(machine débranchée du secteur),
assurezvous que toutes les pièces mobiles
sont complètement arrêtées, et si une clé
est insérée, enlevez-la. Laissez la machine
refroidir avant d’effectuer toute inspection,
tout réglage, etc..
2) Si le cable d’alimentation est endommagé,
il doit être remplacé par le fabricant, son
agent de maintenance ou une personne
qualifiée de façon similaire, afin d’éviter.
tout danger.
Instructions supplémentaires liées à la
sécurité pour les appareils avec un sac
attaché
Arrêtez le moteur avant de fixer ou d’enlever
le sac.

1514
Laubmulcher D
1514
Lesen Sie die Bedienungsanleitung
aufmerksam durch und stellen Sie
sicher
Halten Sie einen Sicherheitsabstand
zu Unbeteiligten ein.
Falls das Netzkabel durchgeschnit-
ten oder beschädigt wird, sofort den
Netzstecker ziehen
Tragen Sie einen Augenschutz &
Gehörschutz.
Nicht in feuchter oder nasser Umge-
bung benutzen. Stromschlaggefahr!
Gefahr – Rotierende Messer.
Stecken Sie Hände und Füße nicht in
eine laufende Maschine.
Doppelte Isolierung
Elektroprodukte dürfen nicht mit dem
normalen Haushaltsmüll entsorgt
werden, sondern sollten nach
Möglichkeit zu einer Recyclingstelle
gebracht werden. Ihre zuständigen
Behörden oder Ihr Fachhändler geben
Ihnen hierzu gerne Auskunft.
SYMBOLE

Laubmulcher D
1716
1716
HINWEISE ZUM BETRIEB
HINWEIS: Lesen Sie das Handbuch
vor Inbetriebnahme desWerkzeuges
sorgfältig durch.
MONTAGE
WARNUNG! Nehmen Sie die
Einzelteile vorsichtig aus dem
bunten Karton heraus. Trennen Sie die
Teile nicht gewaltsam und überzeugen
Sie sich davon, dass sie unversehrt sind.
Ist ein Teil beschädigt, wenden Sie sich
bitte an den Kundenservice.
1. AUSPACKEN DER MASCHINE
1) Nehmen Sie die drei Beine (6) aus dem
Trichter heraus. (Siehe Abb. A)
2) Nehmen Sie denTrichterdeckel durch
Drücken der Verriegelungstaste ab, wie in
Abb. B dargestellt ist.
3) Nehmen Sie das Motorgehäuse aus dem
Trichter heraus. (Siehe Abb.C)
4) Nehmen Sie denTrichter vom Ständer ab.
(Siehe Abb.D)
2. ZUSAMMENBAUEN DES
MULCHERSTÄNDERS
Stecken Sie die drei Beine in den Ständer
gemäß Abb. E1. Achten Sie darauf, dass
die Ausrichtungs-/Entriegelungstaste jedes
einzelnen Beines (a) sachgemäß platziert
und in jedes Loch im oberen Abschnitt des
Ständers eingeführt ist. (Siehe Abb.E2)
3. MONTIEREN DES ANTRIEBSKOPFES
DES MULCHERS
1) Setzen Sie das Motorgehäuse auf den
Ständer. Überzeugen Sie sich davon, dass
das Motorgehäuse stabil auf dem Ständer
steht. (Siehe Abb. F)
2) Bringen Sie denTrichter am Motorgehäuse
an. Achten Sie darauf, dass er mit
Hilfe der Klammern am Motorgehäuse
festgeklammert wird. (Siehe Abb. G)
3) Setzen Sie denTrichterdeckel auf den
Trichter. Achten Sie darauf, dass die
Verrieglungslaschen desTrichterdeckels fest
amTrichter angebracht sind. (Siehe Abb.H)
WARNUNG! Befestigen Sie den
Trichterdeckel durch sachgemäße
Ausrichtung der Kerben (b) jedes Einzelstücks
amTrichter.
4. ANBRINGEN EINES AUFFANGBEUTELS
BeiVerwendung eines Auffangbeutels aus
Kunststoff wickeln Sie ihn über den Oberrand
des Ständers, so wie Sie es mit einem
Müllbeutel in einem Abfalleimer tun würden.
(siehe Abb.I1)
5. ABNEHMEN EINES GEFÜLLTEN
AUFFANGBEUTELS
1) Wenn der Beutel voll ist, schalten Sie
den Mulcher aus und ziehen dann seinen
Stecker ab. Heben Sie den Antriebskopf des
Mulchers aus dem Ständer heraus. (Siehe
Abb.I2)
2) Heben Sie den Ständer hoch und vom
Auffangbeutel weg. (Siehe Abb.I3)
ERSTMALIGE INBETRIEBNAHME
1. EIN/AUS-SCHALTER
Der EIN/AUS-Schalter befindet sich am
unteren Abschnitt des Antriebskopfes des
Motorgehäuses. Ziehen Sie den Schalter zum
Einschalten heraus. (Siehe Abb.J1)
Drücken Sie den Schalter zum Ausschalten
hinein. (Siehe Abb.J2)
WARNUNG! Um sich keiner
warmen, staubigen Luft
auszusetzen, stellen Sie sich nicht vor
die Motorbelüftungsöffnungen.
2. BELADEN IHRER MASCHINE
Geben Sie bei laufendem Mulcher zwei Hände
gefüllt mit trockenem Laub oder eine Hand
gefüllt mit nassem Laub in denTrichter. Warten
Sie, bis die Maschine die gesamte Ladung
zerkleinert hat und ihre Geschwindigkeit
wieder zunimmt, bevor Sie die nächste Hand
voll Laub hineingeben. Überlasten Sie die
Maschine nicht, indem Sie sie bei niedriger
Geschwindigkeit arbeiten lassen: Der Motor
könnte dabei anhalten. Wenn dieser Fall
eintritt, schalten Sie den Schalter aus, ziehen
Sie den Stecker der Maschine ab, nehmen Sie
das unzerkleinerte Material aus demTrichter
heraus, lassen Sie die Maschine wieder an

1716
Laubmulcher D
1716
und fahren Sie mit dem Zerkleinern fort.
WARNUNG! Wenn Sie den Mulcher
schneller mit unzerkleinertem
Material befüllen, als die Maschine
verarbeiten kann, kann der Motor dauerhaft
beschädigt werden. Tragen Sie stets eine
Schutzbrille und eine Staubmaske.
WARTUNG
1. REINIGEN IHRER MASCHINE
Ihre Maschine muss kaum gewartet werden,
abgesehen von einer Reinigung. Es wird
empfohlen, dass Sie Reste, die sich innen
im Gehäuse angesammelt haben, während
und nach jedem Gebrauch entfernen. Ist
die Maschine komplett demontiert, reinigen
Sie denTrichterdeckel und denTrichter mit
sauberemWasser und wischen Sie das
Motorgehäuse mit einem trockenenTuch
ab. Ersetzen Sie das Schneideseil so oft,
wie es erforderlich ist, und reinigen Sie
häufig den Luftfilter. Andere Wartungs- oder
Reparaturarbeiten sollten vom Kundenservice
ausgeführt werden.
WARNUNG! Wenn Sie das
Motorgehäuse direkt mit Wasser
reinigen, wird der Motor dauerhaft
beschädigt.
2. ERSETZEN DES SCHNEIDESEILS (Siehe
Abb.K)
Ersetzen Sie das Schneideseil (e), wenn die
Zerkleinerungsleistung merklich abgenommen
hat. Um die verbrauchten Schneideseile
herauszunehmen, schneiden Sie sie durch und
ziehen Sie die Seilreste aus dem Drehkopf
(f) heraus. Stecken Sie beim Einbau neuer
Schneideseile jedes Ende des neuen Seils
durch die zwei Löcher im Stift oben am
Drehkopf, so dass beide Seilenden gleich
sind. Fädeln Sie dann die Seile so durch
die jeweiligen Pressklemmen, dass beide
Seilenden gleich sind. Hinweis: there is a built
in line cutter that will cut and trim lines shortly
longer than desired.
WARNUNG! Verwenden Sie für eine
optimale Leistung nur Ersatzseile
der Marke WORX. Auf dem Zubehörmarkt
erhältliche monofile Seile mit einem
maximalen Durchmesser von 2,4mm
und einer maximalen Länge von 370mm
dürfen nur vorübergehend eingesetzt
werden. Die Verwendung von dickeren
Seilen, Seilen aus Ersatzmaterial oder
Seile, die länger sind als 370mm, können
Ihren Motor dauerhaft beschädigen
und/oder Sie verletzen und zudem die
Garantie des Herstellers außer Kraft
setzen. Tauschen Sie abgenutzte Teile
des Drehkopfes bitte sofort aus.
3. AUFBEWAHRUNG (Siehe Abb.L)
Zum Einlagern des Laubmulchers am Ende
der Saison zerlegen und stapeln Sie ihn in der
folgenden Reihenfolge:
a) Setzen Sie denTrichter in den Ständer.
b) Legen Sie den Motor in denTrichter.
c) Bedecken Sie den Motor mit dem
Trichterdeckel.
d) Legen Sie die Beine oben auf den
Trichterdeckel.

Laubmulcher D
1918 1918
UMWELTSCHUTZ
Schadhafte und/ oder entsorgte
elektrische oder elektronische geräte
müssen an den dafür vorgesehenen
recycling-stellen abgegeben werden.Wir
möchten sie daher bitten, uns mit ihrem
aktiven beitrag beim umweltschutz zu
unterstützen und dieses gerät bei den
wertstoff-/ recycling-sammelstellen
abzugeben. Bitte erkundigen sie sich bei der
örtlichen behörde oder beim vertragshändler
über müllsammlung und -entsorgung.
EC KONFORMITÄTSERK-
LÄRUNG
Wir,
POSITEC Germany GmbH
Theodor-Heuss-Ring 1-3
50668 Köln
Erklären hiermit, dass unser Produkt
Beschreibung WORX Laubmulcher
Typ WG430E
Funktion Zerkleinert Laub, Grasschnitte,
Kiefernnadeln
Den Bestimmungen der folgenden Richtlinien
entspricht,
EC-Maschinenrichtlinie 2006/42/EC
EC Niederspannungsrichtlinie 2006/95/EC
EC EMV-Richtlinie 2004/108/EC
Umweltbelastende Geräuschemissionen von
zurVerwendung im Freien vorgesehenen
Geräten und Maschinen, Richtlinie
2000/14/EC geändert durch 2005/88/EC
- Konformitätsbewertungsverfahren nach
Annex V
- Gemessene Schallleistung
102.5dB(A)
- Garantierte Schallleistung
105dB(A)
- Zertifizierungsstelle
Name:IntertekTesting & Certification Ltd
Anschrift: Davy Avenue, Knowlhill, Milton
Keynes, MK5 8NL
Normen:
EN60335-1 EN55014-1
EN55014-2 EN61000-3-2
EN61000-3-3
Zur Kompilierung der technischen Datei
ermächtigte Person
Name Russell Nicholson
Adresse Positec Power Tools (Europe)
Ltd, PO Box 152,Leeds,LS10 9DS,UK
2011/04/01
Jacky Zhou
POSITEC Qualitätsleiter

1918 1918
Déchiqueteuse à feuilles F
1. COUVERCLE DE L’ENTONNOIR
2. ENTONNOIR
3. FERMOIR
4. BOUTON MARCHE/ARRÊT
5. SUPPORT
6. PIEDS
7. LOGEMENT MOTEUR
8. BOUTON DE VERROUILLAGE
* Les accessoires reproduits ou décrits ne sont pas tous compris avec le modèle standard livré.
CARACTÉRISTIQUES TECHNIQUES
Tension nominale 220-240V~50/60Hz
Puissance nominale 1200W
Vitesse de régime à vide 7200/min
Diamètre de coupe 340mm
Diamètre du fil 2.4mm
Ratio de broyage 11:1
Classe de protection /II
Masse de la machine 9.6kg
DONNÉES SUR LE BRUIT ET LES VIBRATIONS
Niveau de pression acoustique LPA: 98dB(A) KPA: 3dB(A)
Niveau de puissance acoustique LWA: 105dB(A)
Porter des protections auditives lorsque
la pression sonore est supérieure à
80dB(A)
ACCESSOIRES
Fil de coupe 24
Nous recommandons d’acheter tous les accessoires dans le magasin où l’outil a été acheté.
Utilisez des accessoires de bonne qualité et de marque. Reportez vous à l’emballage pour de plus
amples informations. Le personnel du magasin peut apporter aide et conseils.

2120
Déchiqueteuse à feuilles F
2120
UTILISATION CONFORME
Ce broyeur est conçu pour broyer les feuilles,
l’herbe, les pommes de pin etc. Ne l’utilisez
pas pour broyer des branches ou des buissons.
AVERTISSEMENTS DE
SÉCURITÉ GÉNÉRAUX POUR
L’OUTIL
AVERTISSEMENT: Lire tous les
avertissements de sécurité et
toutes les instructions.
— Cet appareil n’est pas destiné à être utilisé
par des personnes (y compris les enfants)
ayant des capacités physiques, sensorielles
ou mentales réduites, ou un manque
d’expérience et de connaissance, à moins
qu’elles aient été encadrées et formées sur
l’utilisation de l’appareil, par une personne
responsable de leur sécurité.
—Les enfants doivent être encadrés pour
s’assurer qu’ils ne jouent pas avec l’appareil.
Si l’alimentation est endommagée, elle doit
être remplacée par le fabricant, son agent de
maintenance ou une personne qualifiée de
façon similaire, afin d’éviter tout danger.
Ne mettez jamais les mains ou les doigts
dans l’entrée de l’appareil pendant que le
moteur tourne.
Ne mettez jamais les mains ou les doigts
dans la sortie de l’appareil pendant que
le moteur tourne.
Ce broyeur ne doit pas être utilisé
sans la protection en place.
En cas de coupure de courant,
débranchez l’appareil afin d’éviter tout
risque de démarrage intempestif.
MESURES DE SECURITE
INSTRUCTIONS
Familiarisez-vous avec ce manuel avant de
tenter d’utiliser cet appareil.
PREPARATION
1) Ne laissez pas d’enfants utiliser cet
appareil.
2) N’utilisez pas cet appareil avec des
spectateurs autour.
3) Portez des protections auditives et des
lunettes de protection à tout moment
quand vous utilisez la machine.
4) Évitez de porter des vêtements amples ou
avec des cordons ou des cravates.
5) N’utilisez la machine qu’en espace ouvert
(ex : pas près d’un mur ni d’un autre objet
fixe) et sur une surface dure et plane
6) Avant de démarrer la machine, vérifiez que
toutes les vis, tous les écrous, boulons et
autres fixations sont correctement serrés et
que les protections et écrans sont en place.
Remplacez les étiquettes endommagées ou
illisibles.
FONCTIONNEMENT
1) Avant de démarrer la machine, regardez
dans la chambre d’alimentation pour vous
assurer qu’elle est vide.
2)
Tenez votre visage et votre corps à l’écart de
l’ouverture de la chambre d’alimentation.
3) Ne laissez pas les mains ni aucune autre
partie du corps ou des vêtements au
niveau de la chambre d’alimentation, de
la goulotte de décharge ou de toute pièce
mobile.
4) Gardez un bon équilibre et une bonne
position à tout moment. Ne forcez pas. Ne
vous tenez jamais à un niveau plus élevé
que la base de la machine lorsque vous la
chargez en matériau.
5) Tenez vous toujours à l’écart de la zone
de décharge lorsque vous utilisez cette
machine.
6) Lorsque vous chargez des matériaux dans
la machine, soyez extrêmement prudent
afin que des morceaux de métal, de pierre,
des bouteilles et canettes ou autres objets
étrangers ne pénètrent pas .
7) Si le mécanisme de coupe frappe sur
un objet étranger ou si la machine
commence à faire du bruit ou à vibrer de
façon inhabituelle, arrêtez la, débranchez
l’alimentation et effectuez les actions
suivantes :
• Inspectez les dommages;
•
Recherchez et reserrez les pièces desserrées;
•Faites remplacer ou réparer toute
pièce endommagée avec des pièces de
Table of contents
Languages:
Other Worx Lawn And Garden Equipment manuals

Worx
Worx WG801E User manual

Worx
Worx WG801E.X Series Operation instructions

Worx
Worx WG169E Installation manual

Worx
Worx WG800 User manual

Worx
Worx Landroid User manual

Worx
Worx Landroid User manual

Worx
Worx WG430 User manual

Worx
Worx WG800 User manual

Worx
Worx WA0163 User manual

Worx
Worx WG800E Installation manual
Popular Lawn And Garden Equipment manuals by other brands

Anova
Anova VAR700 Installation instructions & user manual

Schiller Grounds Care
Schiller Grounds Care Bunton 632006 parts manual

Agrimate
Agrimate AM-MPT-1100-6D user manual

Garland
Garland SCAR 112 E instruction manual

Recycled Furniture
Recycled Furniture RFPY1220 Assembly guide

Echo
Echo HC-155 Operator's manual