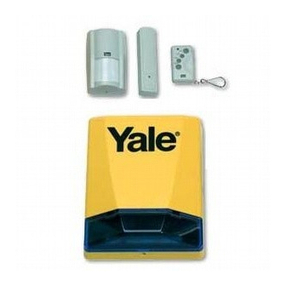
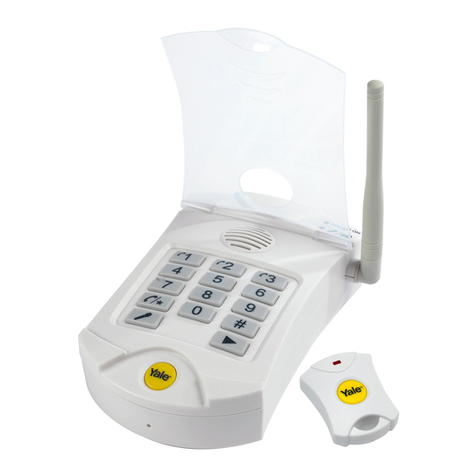
Yale YSGA02-W User manual

Mini Wireless Alarm Kit
YSGA02-W
Part of ASSA ABLOY
12
34
123
Instruction Manual
DE: Bedienungsanleitung
FR: Manuel d'instructions
ES: Manual de instrucciones
IT: Manuale di istruzioni

Battery Installation
1
To insert batteries, open the battery cover.
The unit will beep once to indicate
that the product can now be operated.
Insert 2 x AAA batteries into the battery
compartment. [Please ensure correct polarity.]
LED
PIR Motion Sensor
Screw Fixing
Learn Button
Battery Cover
Battery Compartment
Siren
Keypad
Please note: when
the LED lights remain
‘on’, this indicates the
battery charge is low
and will require
exchanging.
12
34
For the door contact - please remove battery
insulation tab before first use. The device will
beep and can now be used normally.
123
123
Contact Sensor & Magnet
The door contact can be fitted
horizontally or vertically.
TIP:
Siren
1, 2, 3 buttons
Main alarm
Door contact
LED
“Learn” button
CR2 Battery

Setting the 3 Digit PIN code
Change alarm 3 digit pin code
To change the Alarm PIN code, please
enter the default PIN upon initial use:
‘1,2,3’ and then press the 4 key to
acknowledge.
12
34
‘Press 1,2,
3 and 4’.
Save personal 3 digit pin code
Enter 1,2,3, then press the 4 key to acknowledge.
PIN code success
If the red light is OFF,
the PIN code was
successfully
changed.
12
34
Set personal 3 digit pin code
You can then proceed with entering
your 3 digit pin code ‘XXX’.
12
34
‘E.g. 134’
‘Press 1,2,
3 and 4’.
‘4,X,X’
❌
✔
PLEASE NOTE: DO NOT USE the
number ‘4’ at the beginning of your
unique PIN code.
PLEASE NOTE: If the unique PIN code is entered incorrectly 5 times, the beep sound will be emitted
every 2 seconds, ten times and the key bindings will be locked for 5 minutes. After this time, you can
unlock the key bindings by remote control or restore to default settings.
PLEASE NOTE: If a delay of more than 5 seconds occurs between any of the below steps,
the unit will return to standby mode.
PIN code
change failure:
If the red light
flashes 3 times, the
PIN change has
failed and the unit
returns to default
PIN code 1,2,3.
❌
2

Factory reset
Open the battery cover.
Press and hold “Learn” button and
do not release, whilst re-installing
the battery.
Take out the battery.
After three beep sounds, the alarm will return
to the default setting and the password will
restore to default ‘1,2,3’.
PLEASE NOTE: Do not release button
whilst re-installing the battery.
Password defaults to ‘1,2,3’.
3

Pair with remote control
Ensure alarm is UNARMED, open the
battery cover.
Press the “Learn” button and the red
light will flash.
Take the remote control and
open the battery cover.
Press the “Learn” button on the
remote control.
The red light will flash, and the remote
control will send the code. At this time,
you will hear the main alarm beep twice,
indicating that the alarm has
successfully learned the remote
control communication code.
PLEASE NOTE: To allow the main alarm to learn the code of another device, release the learn button to exit the
learning mode. The red light will stop flashing denoting that the operation is complete, and the main alarm will
return to standby status. You can now add another device to the system using the relevant steps.
12
34
If the red lights keep flashing, the battery
is lowand requires replacing.
PLEASE NOTE:
Replace batteries
if red light is
flashing.
4

Pairing the main alarm with the Door Contact
To pair the door contact please ensure the
alarm is disarmed and then remove the
cover of the main alarm unit.
With the battery covers removed from the main alarm and the door contact, please press and hold
the learn button on the main alarm unit, whilst pressing the learn button on the door contact.
Remove the front cover of the door contact.
Release the “Learn” button whereby
the red light will turn off indicating
that the operation is complete and
the main alarm will return to
disarmed mode.
Please replace the battery cover
to the main alarm unit and the
door contact units.
123
123
‘RELEASE’
‘HOLD’
‘HOLD’
5

Unlinking a paired device
Open the battery cover. Take out the
battery, press ‘3’ and do not release
whilst installing the battery.
After three beep sounds, the Contact will
return to the default setting and the password
will restore to default ‘1,2,3’.
123123
123
6
Remove the backing tape from the door
magnet.
Use the 3M tape to fix the door contact
onto the door/window frame.
Align directly opposite the main alarm,
not exceeding an 8mm gap when
door/window is closed.
123
123
123
123
Installing the door contact

Operation Settings: Setting the PIN
To change the Door Contact PIN code,
please enter the default PIN, ‘1,2,3’,
upon initial use.
If the red light is OFF, the PIN code was
successfully changed.
Enter the default code a second time and
the red light will flash. You can then proceed
with entering your unique 3 digit PIN code.
To arm your alarm simply press the "3"
button, then to disarm your alarm enter
your unique 3 digit PIN code.
PLEASE NOTE: If the unique code is entered incorrectly five times, the alarm will beep every two
seconds, 10 times and the key bindings will be locked for five minutes.
123
123123
123123
‘Press 1,2,3.’
123PLEASE NOTE:
Don’t use the
number ‘3’ at the
beginning of your
unique PIN code.
❌
Factory Reset
Open the battery cover and take out the
battery, press and hold the learn button
and do not release whilst reinserting the
battery.
After three beep sounds, the Door Contact will
return to the default setting and the password
will restore to default ‘1,2,3’, the alarm will
be put into an unarmed state.
123123
123
‘Enter your
unique
code’
PLEASE NOTE: If the red light flashes
three times, the PIN code change was not
successful.
‘3,X,X’
❌
7

Alarm sound ON and OFF settings: Turn ON the alarm sound
When the alarm is unarmed, enter your
PIN followed by the ‘4’ key.
The red light will flash three times.
Press 4 and then press 21.
Once the main alarm is armed, if it is
triggered it will automatically notify other
paired devices connected to it.
12
34
12
34
‘E.g 1, 2, 3, 4’
12
34
‘4, 21’
12
34
123
8

Alarm sound ON and OFF settings: Turn OFF the alarm sound
When the alarm is unarmed, enter your
PIN followed by the ‘4’ key.
The red light will flash three times.
Press 4 and then press 22.
Once the device is armed, if this is triggered,
the device will automatically notify other
paired devices around and WILL NOT sound
the alarm.
12
34
12
34
‘4, 22’
12
34
9
123
‘E.g 1, 2, 3, 4’
12
34

10
Enable and disable vibration sensor function
To enable the door contact vibration
sensor: When the door contact is
unarmed enter your unique PIN (if not
changed then enter the default) then
press the number 3 and then press 3,1.
The red light will flash 3 times to indicate the
vibration function is ON. If the vibration sensor
is triggered, the device will now sound and
notify other paired devices.
‘X,X,X
3,3,1’
To disable the door contact vibration
sensor: When the alarm is unarmed, enter
‘1,2,3’ OFF PIN, press the number ‘3’ and
then press ‘23’.
The red light will flash 3 times denoting that
the door magnetic sensor is OFF and the door
magnetic sensor function is cancelled.
PLEASE NOTE: Once
completed, the magnetic
sensor function will be
cancelled.
PLEASE NOTE:
Alarm must be
UNARMED.
123
123
‘X,X,X
3,2,3’
123
123

Installing the unit if required
Take out the wall brackets in the package. Install the product on a wall or other suitable
position at a maximum of 1.5 meters height.
12
34
Select the area you would like to cover
by positioning the alarm in the
appropriate direction.
11

Operating instructions: Arming the main alarm
Operating instructions: Disarming the main alarm
Press the ‘4’ key on the main alarm
to arm.
You will have 5 seconds upon
detection to enter your 3 digit PIN
followed by the 4 key to acknowledge,
once this has been entered the red
light will flash on the main alarm.
The alarm will turn on after 30 seconds.
If the main alarm is not disarmed within 5
seconds the siren will sound for 30 seconds,
the main alarm will then automatically go
back to its armed state.
12
34
12
34
‘E.g 1,3,4
then 4’
12
34
PLEASE NOTE: You have
30 seconds to vacate the
monitored area.
12
34
Main alarm is
unarmed.
12
34
12
34
30 seconds
12

13
Wireless range
Please note: If using as part of the Mini Wireless Alarm Kit,
the range of these parts is a minimum of 1 metre, up to a maximum of 70 metres.
Operation
To pair the remote control to the main Mini Wireless Alarm, open the battery cover and press the “Learn”
button. Take the Main Unit, remove the battery cover and also press the “Learn” button on this unit.
When the device beeps twice, the pairing has been successful and the alarm can be switched
on and off via the remote.
12
34
Mini Wireless
Alarm
Remote
Control
12
34
12
34
12
34

12
34
12
34
Remote control, arming the alarmRemote control, arming the alarm
Remote control, disarming the alarm
Low battery indicator function
Press the locked padlock icon on the
remote control to arm the main alarm.
When the light is on, it means the battery
is low and needs to be changed.
After hearing a beep sound, you have 30
seconds to leave the alarm area.
If the alarm is not going to used for a long
time, the battery should be removed.
You will have 5
seconds upon
detection to disarm
the alarm by using
the unlocked
padlock symbol,
once this has been
pressed and
acknowledged the
red light will flash on
the main alarm.
PLEASE NOTE:
1. Every step of the operations listed above for each device must completed within 5 seconds. any longer than five
seconds and the device will automatically revert to an unarmed state.
2. You can learn up to 20 accessories.
3. For two different accessories to pair with each other, both devices must be set to ‘learn’ mode.
If the main alarm is not
disarmed the siren will
sound for 30 seconds upon
detection, the main alarm
will then automatically go
back to its armed state.
14

15
Precautions
Please only use the correct
batteries (as provided).
Operation: Low battery indicator function
>1m & <70m >1m & <70m
When the red light is on, it means the battery is low and needs to be exchanged.
123
12312
34
Remove batteries before
storage of device
Do not mix used and
new batteries
Check for correct
polarity (+/-)
Battery can explode
or leak if shorted
Keep away from
children
Do not mix different
types of brands
Do not swallow
Do not disassemble Do not recharge
Do not dispose in fireImmediately seek medical
advice if swallowed

www.yalehome.co.uk/contact-us
Support
For further help & advice on how to set up your
device please scan the QR code below, which will
take you to the relevant Product Support Page,
or please visit www.yalehome.co.uk/support.
Alternatively, you can contact our Customer Support Team directly.
For more details, visit the website below.
UK: ASSA ABLOY Ltd., School Street, Willenhall,
West Midlands, England, WV13 3PW
THE YALE BRAND, with its unparalleled global reach and
range of products, reassures more people in more countries
than any other consumer locking solution.
THE ASSA ABLOY GROUP is the world’s leading
manufacturer and supplier of locking solutions, dedicated to
satisfying end-user needs to security, safety and convenience.
Part of ASSA ABLOY
YSGA02-W rev 1.0
16
12
34
123
Table of contents
Other Yale Security System manuals

Yale
Yale HSA 3500 User manual

Yale
Yale HSA 6300 User manual

Yale
Yale Smart Living HSA6210-R User manual

Yale
Yale AC-WS User manual

Yale
Yale SAA8021 User manual

Yale
Yale HSA6200 User manual
Yale
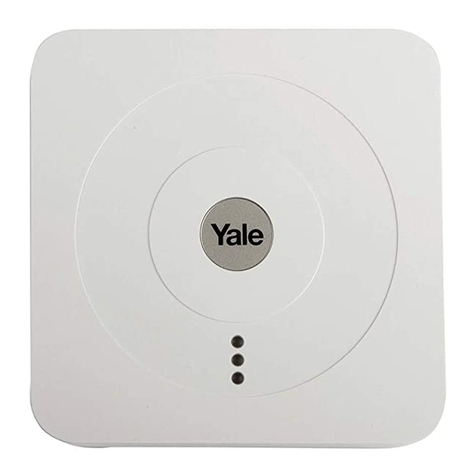
Yale Sync Alarm User manual
Yale
Yale HSA6092 User manual
Yale
Yale HSA3400 User manual

Yale
Yale SmartHome Alarm series User manual