Yedoo S2020 20"/20" User manual

STEEL S2020, S2016
S2016 DISC, S1616
RUNRUN
MEZEQ MULA CITY
NUMBERS
FOUR, THREE
AROUND THE
WORLD 2016
User manual
Cities New York, Tokyo,
Amsterdam, London

2
S2020 20"/20"
Product Number: 12403
Maximum load: 150 kg/330 lb
S2016 20"/ 16"
Product Number: 12404
Maximum load: 150 kg / 330 lb
S2016 Disc 20"/ 16"
Product Number: 12405
Maximum load: 150 kg/330 lb
S1616 16"/ 16"
Product Number: 12406
Maximum load: 150 kg / 330 lb
Around the world 2016 20"/16"
Product Number: 12316
Maximum load: 150 kg/330 lb
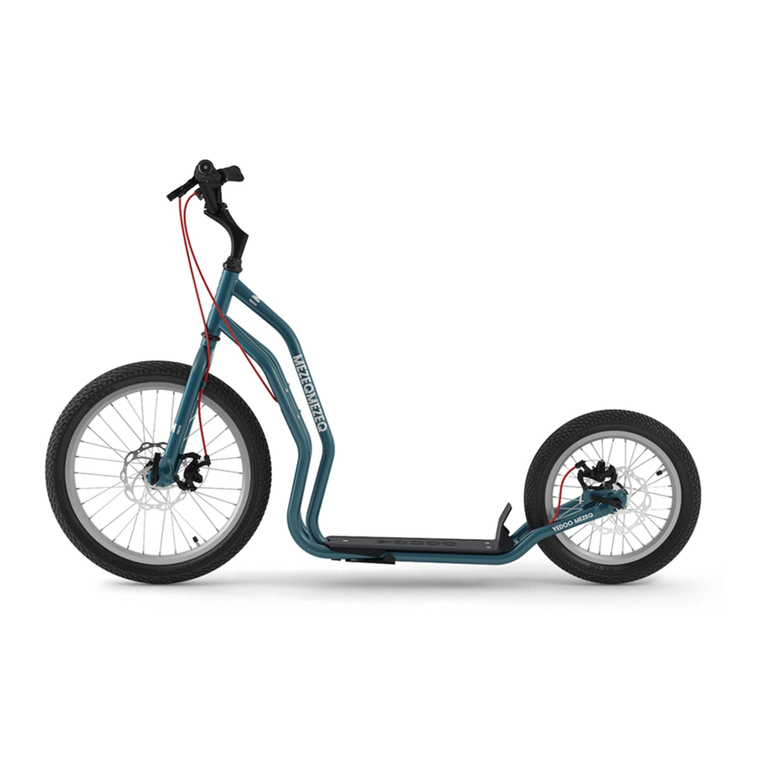
Mezeq 20"/16"
Product Number: 12608
Maximum load: 150 kg/330 lb
Mula 20"/16"
Product Number: 12609
Maximum load: 150 kg/330 lb
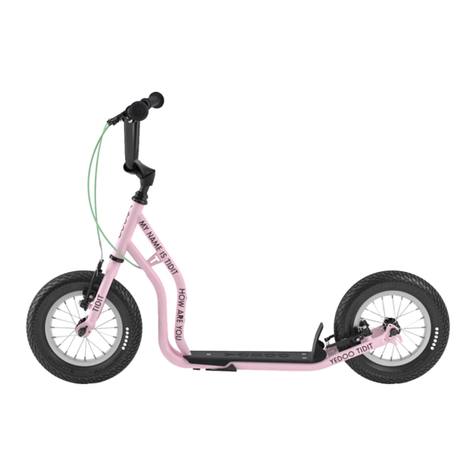
City 16"/12"
Product Number: 12610
Maximum load: 120 kg/265 lb
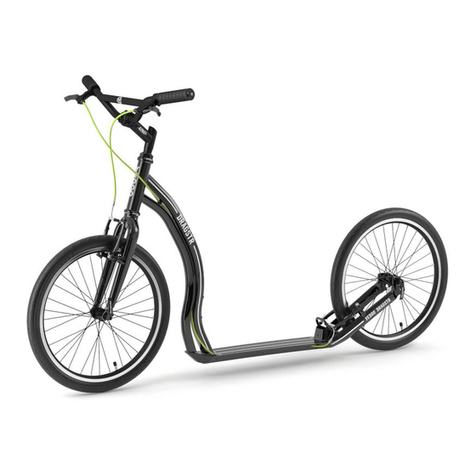
Four 20"/16"
Product Number: 12208
Maximum load: 150 kg/330 lb
Three 16"/12"
Product Number: 12207
Maximum load: 120 kg/265 lb
Amsterdam 16"/12"
Product Number: 12312
Maximum load: 120 kg/265 lb
London 16"/12"
Product Number: 12311
Maximum load: 120 kg/265 lb
New York 16"/12"
Product Number: 12310
Maximum load: 120 kg/265 lb
Tokyo 16"/12"
Product Number: 12313
Maximum load: 120 kg/265 lb
EN 11
CZ 18
DE 25
RU 32
SK 39
FR 46
ES 53
IT 60
HU 67
SV 74
ET 81
PL 88
SL 95
HR 102
Contents
Visit our website www.yedoo.eu
for more language versions.
i
3
S2020
5 mm4 mm 6 mm +

4
S2016 Disc
Torx
5 mm4 mm 6 mm +

5
S2016 / Around the world 2016
5 mm4 mm 6 mm +

6
S1616
5 mm4 mm 6 mm +

7
Mezeq
5 mm4 mm 6 mm +

8
Mula / Four
5 mm4 mm 6 mm +

9
City / Amsterdam / London /
New York / Tokyo
5 mm4 mm 6 mm +

10
Three
5 mm4 mm 6 mm
2×
16 mm
+

Introduction
We recommend that you entrust the installation, adjustment
and regular maintenance to a specialist bicycle shop. Improper
intervention can lead to damage of the scooter or to an accident
with serious health consequences.
If you are technically capable, do not worry; this manual
contains all the information you need to help you assemble
your new scooter.
Send your questions, comments and suggestions for
improvement of our products by e-mail to: info@yedoo.eu.
EN
11
Yedoo frames are protected by
a Registered Community Design
(RCD), the commercial names
are protected by registered
trade marks.
More information from the
world of scooters and the list
of distributors can be found
at www.yedoo.eu.

12
Installing the wheels
Insert the quick release mechanism into
the wheel ensuring that on both sides of
the wheel the narrow ends of the springs
face the centre of the wheel.
First check that the front fork of the
scooter is aligned correctly (the V-brake
arms should be pointing forwards
towards the front of the scooter), then
release the brake cable from the guide.
Insert the wheel into the front fork so it
is exactly in the middle.
Caution:
When
inserting the wheel, ensure that the tyre
pattern points in the direction of rotation
when the scooter is rolling forwards
(on some tyres see direction arrow on
the side).
Direction
of rota-
tion
1.
The assembly procedure
is the same for all models,
it only diers in details, see
accompanying pictures.
When tightening the
connections do not
exceed the specified
tightening torque.
2.
Disc brakes – S2016 Disc / Mezeq
Put the separately packaged brake discs
on wheel hubs. Attach the rotor of the
disc brake so that the arrow on the rotor
would correspond to the rotation of the
wheel. Screw the rotor to the hub using
the attached key (torx).
When fastening the screws, make sure
you follow the sequence according to
the picture.
6
3
1
5
2
4
4a.3.
EN
12
Three
Installation manual

13
4b. 5.
Tighten the adjustment nut of the
quick release mechanism to the correct
position. When it is in the correct
position you will feel a noticeable
resistance just before you close the
mechanism completely. Close the
quick release lever in a position
so it does not touch the fork and
simultaneously it cannot be opened
accidentally while riding.
Three
Make sure that the pad tip fits into the
correct slot and then tighten both nuts.
Handlebars installation
Install the handlebar on the stem.
Tighten the screws only slightly so you
can adjust the angle of the handlebars
later on.
6–8 Nm
6.
6–8 Nm
5–6 Nm
7.a 7.b
Insert the stem into the frame tube of
the scooter and adjust the handlebar
height taking care not to position it
above the marked line, see pic. 7.b.
Make sure that the handlebars are
straight and then tighten the screw
on the stem.
The highest possible height of the
handlebars is marked with vertical
grooves, at the maximum height the
grooves should be visible only partly.
20–22 Nm Max
EN
18–20 Nm
Direction
of rotation

14
8.a
Installing the rear wheel (V-brake)
Release the brake cable from the guide
(
1
), Put the wheel in one of the two fork
dropouts (see 8.b, 8.c.) then centre the
wheel and tighten the quick release
mechanism (
2
).
1
2
9.
8.b 8.c
Installing the brake cables
Squeeze the brake lever to the maximum
and insert the end of the brake cable
into the round lug (
1
). Insert the cable
into the groove and tighten the set
screw (
2
) and the nut (
3
). Repeat the
process with the other brake.
The rear brake cable is usually mounted
on the right brake lever and the front
brake wire on the left.
Use the lower position for riding over
rough terrain. Close the quick release
lever. It should point upwards.
Two-position rear fork enables you to
adjust the height of the footrest above
the ground. The upper fork position,
which reduces the height of the footrest,
is designed for riding on a smooth, flat
surface. Riding will be less physically
demanding. The closed quick release
lever should point downwards.
1
2
3
Rear wheel installation (disc brake)
Put the wheel in the fork dropout, centre
the wheel and fasten the quick-release
lever.
8.e
8.d
1
2
19–20 Nm
Three
Release the brake cable from the guide
(
1
)
, Put the wheel in one of the two fork
dropouts (see 8.b, 8.c.) then centre the
wheel and tighten both nuts (
2
).
Installation manual
EN

15
Check that the brake pads move away
from the rim suiciently (1–2 mm) when
the brake lever is released. The distance
of the brake pads can be adjusted by
tightening or loosening the brake cable
anchor bolt (
1
). If the brake pads come
into contact with the rim while the wheel
spins, adjust the spacing of the brake
arms symmetrically with the tensioning
bolts (
2
).
For the best results, stand on the
footrest, grab the handlebars and stretch
your fingers so they extend in a straight
line from your hands. Set the brake
levers in this position and tighten the
two mounting screws, see 11.a.
11.b 13.
1
2 2
Adjustment of brakes (V-brake)
For both the front and the rear wheel
the brake adjustment is the same.
Insert the brake cable back into the
guide (
1
) and check the brake pads
during braking, ensuring thattheir entire
surface fits tightly against the side of the
rim. If not, adjust the screw (
2
), which
attaches the brake pads to the shoulders
of the V-brakes. The brake pads must not
touch the tyre.
12.
1
2 2
11.a
Adjusting the angle of the brake levers
On both brake levers loosen the screw
on the sleeve.
5–6 Nm
6–8 Nm
10.
Adjusting the handlebars
Adjust the angle of the handlebar
according to the needs and height of
the rider and tighten the screws. A larger
angle gives more space for the rider and
provides a more sporty riding style.
6–8 Nm
EN

16
14.
Fasten the end of the brake cable in
the lock and secure with the cable tie,
then trim the tie (applies to both front
and rear brake).
1.
3.
Assembling the stand
(Steel, Around the world)
The stand is not included. You can
purchase it together with other Yedoo
accessories at your local dealer.
See www.yedoo.eu.
The maximum capacity of the stand is
about 15 kg. Do not stand on the parked
scooter.
Install the stand attaching it to the frame
in front using the prepared hole, see
picture. Before tightening the screw,
make sure it is placed in the centre of
the socket. The oval opening in the
socket enables adjusting the height of
the stand, so as to provide the model
with the greatest possible stability.
In the riding position, the stand should
be aligned with the edge of the scooter
frame.
2.
15.a 15.b
Adjustment of brakes – S2016 Disc /
Mezeq
On the front as well as the rear wheel,
check, if the disc of the brake does
not scrape the brake pad. If so, loosen
the adjusting screws (
1
) and set up the
position of both pads so that their entire
surface would be parallel with the disc,
then fasten the adjusting screws again.
The distance between the brake pads
and the disc should be as small as
possible. You can set it up using an
adjustment roller (
2
), which adjusts the
tension of the brake wire. If this is not
enough, you may loosen the wire in the
anchor bolt (
3
).
2
1 1 3
EN
Installation manual

17
Safety recommendations
The scooter in its basic configuration is designed for riding in daylight in
areas designated for sport and recreation, ideally on a smooth, dry surface.
For riding on roads and in the dark you must equip the scooter with
additional safety devices (lights, reflectors etc.) in compliance with
applicable regulations in your country. Observe traic rules, principles
of safe riding and wear personal protective equipment (helmet, bike
gloves, knee and elbow pads, boots, etc.).
Before each ride check your brakes and the overall technical condition
of the scooter. Inflate the tyres to the recommended maximum
pressure (see the side of the tyre). Do not exceed its capacity. The
scooter is designed only for one rider. Do not overload the scooter.
Thescooter isnot intended for jumps or acrobatic riding.
All components designed to decrease the speed (brake pads, rims,
tyres, etc.) get hot while in use. Do not touch any of the parts until they
have cooled down!
Riding instructions
When riding, always grip the handlebar with both hands. While
pushing with one foot, place the other foot on the footboard
of the scooter. Regularly exchange feet. In order to brake, press
the brake levers on the handlebars. Usually you would use the
right lever which controls the rear brake. The front brake should
only be used to supplement the stopping power of the rear
brake. Never squeeze the front brake without also squeezing
the rear brake with equal or greater force.
Warning
: sudden braking
may cause a fall.
Maintenance
Proper maintenance will improve safety and extend the life of your
scooter. Therefore, tighten the screw connections, check the condition
of the quick release mechanisms, check the tyre pressures and
lubricate moving parts (bearings in the wheels and handlebars, brake
lever pins, brake mechanism pivot points, brake cables, etc.) regularly.
Make sure that the applied lubricant does not get on the rims and brake
pads. Grease reduces their eect! If that happens, degrease soiled
areas with, for example, technical gasoline. Check the tyre tread depth
regularly and replace the tyres with new ones with the same parameters
if necessary. If the scooter is not ready to be used, clearly mark it as
such.
Check the condition of self-locking nuts regularly (if they become loose
spontaneously, replace them with new ones).
Check the wheel spokes regularly. Uneven tension of wires in the
spokes may cause their rupture or loss of wheel centering. It is
important to additionally adjust the new scooter after running
in, when the parts have settled against one another (the period is
individual and should not exceed 150 km). Neglect may lead to
destruction of loosened parts.
Keep the scooter clean, if dirty, wipe with a wet cloth. Store it indoors
in a dry shaded place, do not expose to increased humidity or extreme
temperatures in the long term. In case of long-term storage, for example
over winter, keep tyres suiciently inflated or hang the scooter up, so that
they would not be burdened.
The product complies with the relevant EU standards (EN14619) and it
also received certificates of quality and safety by a leading Czech testing
institute (Strojírenský zkušební ústav,s.p.).
The manufacturer and importer in the EU is INTREA – PIKO, s.r.o.,
Sasanková 2657/2, 106 00 Prague 10, Czech Republic, www.yedoo.eu.
Exercise of rights arising
from defective performance
General provisions
The content, scope and duration of the rights of the buyer from defective
performance is governed by the applicable legal regulations of the
country, in which the goods have been purchased. The rights of the buyer
in the sense of these legal regulations are not aected in any way by this
document or the information stated in it.
Period for exercising of rights arising from defective performance
The purchaser can apply the right from defects in newly bought Yedoo
scooter (hereinafter goods) within a period of 36 months from the day
of receipt. If the buyer defines the defect of the goods legitimately,
the period for exercising rights arising from defective performance is
suspended for the time during which the buyer cannot use the goods.
Specifications of application of rights arising from the defective
performance
Rights arising from the defective performance are applied to the dealer
where the goods were purchased (see details below). We recommend to
submit this document, proof of purchase and a complete scooter free
from any impurities when applying the rights from defects.
The seller will issue a written confirmation of the exercise of rights arising
from defective performance or a confirmation ofrepair.
Specification of rights of defective performance
When assembling the scooter the instructions given in the installation
manual must be followed. The scooter must be used exclusively for
the purpose for which it was made. The scooter must be stored and
maintained according to the provided manufacturer’s instructions. The
manufacturer’s liability does not apply to defects caused exclusively by
improper installation or use of scooters in conflict with the user manual.
Model of the scooter:
Serial number of the frame:
Date of sale:
Vendor:
Stamp and signature:
EN

18
CZ 18
Úvod
Montáž, seřízení a pravidelnou údržbu doporučujeme svěřit
odbornému cykloservisu. Neodborné zásahy mohou vést
k poškození koloběžky či nehodě s vážnými zdravotními následky.
Pokud jste ale technicky zdatní, ničeho se nebojte a s chutí
sedomontáže pusťte s námi.
Dotazy, připomínky a náměty na zlepšení našich výrobků
námprosím posílejte na e-mail: info@yedoo.eu.
Rámy koloběžek Yedoo
jsou chráněny zapsanými
průmyslovými vzory
Společenství, obchodní názvy
jsou chráněny zapsanými
ochrannými známkami.
Více informací ze světa
koloběžek a seznam distributorů
najdete na www.yedoo.eu

19
CZ
Montážní návod
Montáž kol
Do kola vložte rychloupínák tak,
aby na každé straně byla jedna pružinka
se zúžením směřujícím ke středu kola.
Nejprve zkontrolujte, zda je přední
vidlice koloběžky natočená ve
správném směru (ramena V-brzdy
směřují dopředu), pak uvolněte
brzdové lanko z vodítka.
Kolo vsaďte do přední vidlice tak,
aby bylo přesně uprostřed.
Pozor:
Vzorek
pneumatiky by měl směřovat dopředu po
směru jízdy (na některých pneumatikách
viz směrová šipka na boku).
Postup montáže je pro
všechny modely stejný,
liší se jen v detailech viz
doplňující obrázky.
Při utahování spojů
nepřekračujte uvedený
moment utažení.
Kotoučové brzdy – S2016 Disc / Mezeq
Nasaďte samostatně balené brzdové
kotouče na náboje kol. Rotor diskové
brzdy připevněte tak, aby šipka
zobrazená na rotoru odpovídala
rotaci kola. Přišroubujte rotor k náboji
pomocí přiloženého klíče (torx). Během
dotahování šroubů dbejte na dodržení
posloupnosti dle obrázku.
1.
1
2
2.
6
3
1
5
2
4
4a.3.
Směr
otáčení
Three

20
Dotáhněte seřizovací matici
rychloupínáku tak, abyste těsně před
dovřením rychloupínací páčky cítili
znatelný odpor. Páčku zavřete v takové
pozici, aby se nedotýkala vidlice
a zároveň nemohlo dojít k jejímu
náhodnému otevření během jízdy.
Instalace řídítek
Řídítka nasaďte na představec. Šrouby
utáhněte jen lehce, abyste později mohli
upravit náklon řídítek.
Představec zasuňte do trubky rámu
koloběžky a nastavte požadovanou výšku
řídítek, max. však po vyznačenou rysku,
viz obr. 7.b. Zkontrolujte, zda jsou řídítka
rovně (kolmo k ose kola) a dotáhněte
šroub na představci.
Nejvyšší možná výška řídítek je
vyznačena svislými rýhami, ty by pak
v poloze maximálního vysunutí měly
býtviditelné pouze zčásti.
CZ
5.
4b.
18–20 Nm
6–8 Nm
6.
6–8 Nm
5–6 Nm 7.a 7.b
20–22 Nm Max
Směr otáčení
Three
Ujistěte se, že zobáček podložky zapadl
do správného otvoru (viz obrázek)
a pak dotáhněte obě matice.
Montážní návod
This manual suits for next models
27
Table of contents
Languages:
Other Yedoo Scooter manuals

Yedoo
Yedoo OX User manual

Yedoo
Yedoo NUMBERS FOUR User manual

Yedoo
Yedoo Mezeq disc User manual

Yedoo
Yedoo ALLOY DRAGSTR User manual

Yedoo
Yedoo ALLOY WOLFER User manual

Yedoo
Yedoo Mezeq disc User manual

Yedoo
Yedoo CITY User manual

Yedoo
Yedoo Mudguards 12/12 User manual

Yedoo
Yedoo ALLOY Series User manual

Yedoo
Yedoo Mezeq disc User manual