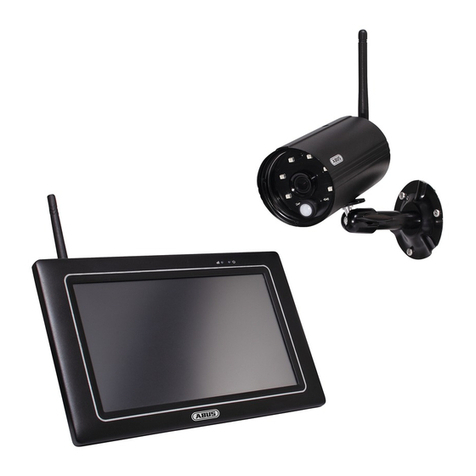
Abus tvac18000c User manual

TVAC18000C
US User guide
FR Notice d’utilisation
PT Manual de instruções
ES Manual de instrucciones
For more information and additional FAQ’s please visit us online at:
www.abus.com/plug-and-play
Version 10/2014

This user guide contains important operating instructions for this device.
This guide should be kept in a convenient location for continued reference.
For a table of contents, see page 9.
Ce manuel d'utilisateur contient des instructions d'utilisation importantes pour cet appareil.
Ce manuel devrait être conservé dans un endroit pratique aux fins de référence.
Pour consulter la table des matières, veuillez ouvrir le manuel à la page 39.
Este guia do usuário contém importantes instruções de operação para este dispositivo.
Este guia deve ser mantido num local conveniente para servir de contínua referência.
Para um índice de conteúdos, ver a página 72.
Esta guía del usuario contiene instrucciones de manejo importantes para este dispositivo.
Esta guía debe conservarse en un lugar apropiado para su consulta permanente.
Véase la tabla de contenido en la página 104.
English
Français
Português
Español

TVAC18000C
Digital wireless surveillance set
User manual
For more information and additional FAQ’s please visit us online at:
www.abus.com/plug-and-play
Version 10/2014
Original user guide in English.
Retain for future reference!

4
English
Introduction
Dear Customer,
Thank you for purchasing the ABUS TVAC18000C Digital Wireless Surveillance Kit.
To ensure optimum performance and condition of this system is maintained, please carefully review the
enclosed operating manual.
This operating manual is meant to guide you through the process of operating the TVAC18000C Digital
Wireless Surveillance Kit. This manual contains instructions for the system’s setup, installation, maintenance
and relevant safety information.
In the event you have questions regarding the system, installation or operating procedures please consult
your local authorized dealer or our customer service team.
ABUS USA, LLC surveillance products are not manufactured and/or sold with the intent to be used for illegal
purposes. ABUS USA, LLC expects consumer’s use of these products to be in compliance with local, state
and federal law. For further information on video and audio recording legal requirements, please consult your
local, state and federal law.
Thank you,
ABUS USA, LLC
Data storage is subject to national data privacy guidelines.
Disclaimer
This user guide has been produced with the greatest of care. Should you discover any missing information or
inaccuracies, please contact us under the address shown on the back of the manual.
ABUS USA, LLC does not accept any liability for technical and typographical errors, and reserves the right to
make changes to the product and user guide at any time and without prior warning.
ABUS USA, LLC is not liable or responsible for direct or indirect damage resulting from the equipment,
performance and use of this product. No forms of guarantee are accepted for the contents of this document.
ABUS USA LLC. products are not manufactured and/or sold with the intent to be used for illegal purposes.
ABUS USA LLC. expects consumer’s use of these products to be in compliance with all local, state and
federal law. For further information on video surveillance and audio recording legal requirements, please
consult your local, state and federal law.
© 2014, All rights allowed by law are hereby reserved.

5
English
Explanation of symbols
Danger of electrical shock.
Important warning regarding operation of device
Important information regarding operation of device
Important safety information
All warranty claims are invalid in the event of damage. caused by operating the system in
non-compliance with this user guide. ABUS USA, LLC cannot be held liable for resulting
damages.
In the event of material or personal damage caused by improper operation or non-
compliance with the safety information, ABUS USA, LLC cannot be held liable. All warranty
claims are voided in such cases.
This device has been manufactured in accordance with international safety standards.
Please read the following safety instructions carefully.
Safety information
1. Power supply
110 V AC voltage, 60 Hz (using a power supply unit for 5 V DC/12 V DC)
Only operate this device using a power source which supplies the grid voltage specified on the type
plate. If you are unsure which voltage is supplied at the installation location, contact your power supply
company. Disconnect the device from the power supply before carrying out maintenance or installation
work. The power supplies are only for indoor usage.
2. Overloading
Avoid overloading electrical sockets, extension cables and adapters, as this can result in fires or electric
shocks.
3. Liquids
Make sure that no liquids of any type are able to enter the device.
4. Cleaning
Only use a damp cloth to clean the device. Do not use corrosive cleaning materials.
Disconnect the device from the power supply while doing so.
5. Accessories
Only connect devices that are suitable for the intended purpose. Otherwise, hazardous situations or
damage to the device can occur.
6. Installation position
This device can be used inside as well as outside.
The product will be damaged even it falls from a low height.
During the installation of the camera please take care that the camera image sensor does not
point directly into the sunlight. Please follow the installation instructions in the corresponding
chapter of this user manual.
Do not place the device near a radiator or heat register.
Only operate the device at temperature range of 14 °F to 122 °F l. Outside the predetermined
temperature range operation is possible, but cannot be guaranteed.

6
English
7. Wireless transmission
The wireless range depends on a variety of environmental factors. The local conditions at the installation
site may have a negative impact on the range. When there are no obstructions between the receiver and
transmitter, a range of up to 325 feet is possible, but this range will be considerably less within buildings.
The following environmental conditions compromise both the range as well as the frame rate:
Mobile communication masts, high-tension pylons, electrical wires, ceilings and walls, devices with the
same or an adjacent wireless frequency.
Disclaimer
ABUS USA, LLC products are not manufactured and/or sold with the intent to be used for
illegal purposes. ABUS USA, LLC expects consumer’s use of these products to be in
compliance with all local, state and federal law. For further information on video surveillance
and audio recording legal requirements, please consult your local, state and federal law. It is
your responsibility to be aware of the local, state and federal regulations regarding image
storage and use.
Warnings
Follow all safety and operating advices before starting-up the device!
1. Follow these directions in order to avoid damage of the power cord or plug:
Do not modify or process the power cord or plug arbitrarily.
Make sure to disconnect the power cord holding the plug.
Keep heating appliances as far as possible from the power cord in order to prevent the vinyl
cover from melting.
The outdoor camera’s power supply unit must be protected against humidity and damp
conditions.
2. Failure to follow these directions may cause electrical shock.
Do not open the main body or the power supply.
Do not insert metal or inflammable objects inside the product.
In order to avoid any damage during lightning use a surge protector.
3. Do not use if it is found to be defective. If you continue to use the product when defective, serious
damage can occur. Make sure to contact your local product distributor if the product is found to be
defective.
During the installation into an existing video surveillance system make sure that all devices are
disconnected from the low supply voltage circuit.
If in doubt allow a professional electrician to mount, install and wire-up your device. Improper
electrical connection to the mains does not only represent at threat to you but also to other persons.
Wire-up the entire system making sure that the mains and low voltage circuit remain separated and
cannot come into contact with each other in normal use or due to any malfunctioning.
Avoid using the device under the following unfavorable conditions:
moisture or excessive air humidity
extreme cold or heat
direct sunlight
dust or combustible gases, vapors or solvents
strong vibration
strong magnetic fields, such as those found in the vicinity of machinery or loudspeakers
the camera must not be directed into the sun as this can destroy the sensor.
the camera may not be installed on unstable surfaces

7
English
Unpacking
While you are unpacking the device please handle it with utmost care.
If you notice any damage to original packaging, please check the device.
If the device shows damage, please contact your local dealer.
FCC Compliance Information
Part 15 Compliance Statement
This device complies with Part 15 of the FCC Rules. Operation is subjected to the following two conditions:
(1) this device may not cause harmful interference, and (2) this device must accept any interference received,
including interference that may cause undesired operation.
This equipment has been tested and found to comply with limits for a Class B digital device, pursuant to
Part 15 of the FCC rules and ETSI (EN) 300328. These limits are designed to provide reasonable protection
against harmful interference in residential installations. This equipment generates, uses, and can radiate
radio frequency energy, and if not installed and used in accordance with the instructions, may cause harmful
interference to radio communications.
However, there is no guarantee that interference will not occur in a particular installation. If this equipment
does cause interference to radio or television equipment reception, which can be determined by turning
the equipment off and on, the user is encouraged to try to correct the interference by one or more of the
following measures:
Reorient or relocate the receiving antenna.
Move the equipment away from the receiver.
Plug the equipment into an outlet on a circuit different from that to which the receiver is connected.
Consult the dealer or an experienced radio/television technician for additional suggestions.
CAUTION! Any changes or modifications to this equipment not expressly approved by the party
responsible for compliance could void your authority to operate the equipment.
RF Exposure Information
The antenna used for this transmitter must be installed to provide a separation distance of at least 8” from all
persons and must not be collocated or operating in conjunction with any other antenna or transmitter.
All declarations and certificates of conformity can be ordered from:
ABUS USA, LLC
23910 N. 19th Ave.
Unit #56
Phoenix, AZ 85085-1850
Ph.: 1-623-516-9933
Mail: customers[email protected]
One-year Limited Warranty
Important: Evidence of original purchase is required for warranty service.
WARRANTOR:
ABUS USA, LLC

8
English
ELEMENTS OF WARRANTY:
ABUS USA, LLC warrants, for one year, to the original retail owner, this ABUS Product to be free from defects
in materials & craftsmanship with only the limitations or exclusions set out below.
WARRANTY DURATION:
This warranty to the original user shall terminate & be of no further effect 12 months after the date of original
retail sale. The warranty is invalid if the Product is (A) damaged or not maintained as reasonable or
necessary, (B) modified, altered, or used as part of any conversion kits, subassemblies, or any configurations
not sold by ABUS USA, LLC, (C) improperly installed, (D) serviced or repaired by someone other than an
authorized ABUS service center for a defect or malfunction covered by this warranty, (E) used in any
conjunction with equipment or parts or as part of any system not manufactured by ABUS, or (F) installed or
programmed by anyone other than as detailed by the owner’s manual for this product.
STATEMENT OF REMEDY:
In the event that the product does not conform to this warranty at any time while this warranty is in effect,
warrantor will either, at its option, repair or replace the defective unit & return it to you without charge for parts,
service, or any other cost (except shipping & handling) incurred by warrantor or its representatives in
connection with the performance of this warranty. Warrantor, at its option, may replace the unit with a new or
refurbished unit. THE LIMITED WARRANTY SET FORTH ABOVE IS THE SOLE & ENTIRE WARRANTY
PERTAINING TO THE PRODUCT & IS IN LIEU OF & EXCLUDES ALL OTHER WARRANTIES OF ANY
NATURE WHATSOEVER, WHETHER EXPRESSED, IMPLIED OR ARISING BY OPERATION OF LAW,
INCLUDING, BUT NOT LIMITED TO ANY IMPLIED WARRANTIES OF MERCHANTABILITY OR FITNESS
FOR A PARTICULAR PURPOSE. THIS WARRANTY DOES NOT COVER OR PROVIDE FOR THE
REIMBURSEMENT OR PAYMENT OF INCIDENTAL OR CONSEQUENTIAL DAMAGES.
Some states do not allow this exclusion or limitation of incidental or consequential damages so the above
limitation or exclusion may not apply to you.
LEGAL REMEDIES:
This warranty gives you specific legal rights, & you may also have other rights which vary from state to state.
This warranty is void outside the United States of America & Canada.
PROCEDURE FOR OBTAINING PERFORMANCE OF WARRANTY:
If, after following the instructions in the owner’s manual you are certain that the Product is defective, pack the
Product carefully (preferably in its original packaging). The Product should include all parts & accessories
originally packaged with the Product. Include evidence of original purchase & a note describing the defect that
has caused you to return it.
The Product should be shipped freight prepaid, by traceable means, to warrantor at:
ABUS USA, LLC
23910 N. 19th Ave.
Unit #56
Phoenix, AZ 85085-1850
Ph.: 1-623-516-9933
Mail: customers[email protected]
Website: www.abus.com/us
(See www.abus.com for current hours of operation.)
9
English
Contents
1. Intended use.............................................................................................................................................10
2. Package Contents....................................................................................................................................10
3. Features and functions............................................................................................................................11
4. Information and FAQs .............................................................................................................................11
5. Device description ...................................................................................................................................11
5.1 Recorder description..........................................................................................................................11
5.2 Camera description.............................................................................................................................12
6. Installation ................................................................................................................................................13
6.1 Recorder installation...........................................................................................................................13
6.2 Connecting an external hard disk drive............................................................................................14
6.3 Connecting the recorder to the router ..............................................................................................14
6.4 Mounting the camera..........................................................................................................................15
6.5 Pairing the camera to the recorder....................................................................................................16
7. Operating and configuring via app ........................................................................................................16
8. Operating the recorder ............................................................................................................................20
8.1 Live view ..............................................................................................................................................20
8.2 Main menu............................................................................................................................................22
8.2.1 Camera settings......................................................................................................................23
8.2.2 Recording................................................................................................................................24
8.2.3 Event list..................................................................................................................................26
8.2.4 System settings......................................................................................................................27
8.2.5 Storage management.............................................................................................................28
9. Maintenance and cleaning ......................................................................................................................30
9.1 Maintenance.........................................................................................................................................30
9.2 Cleaning.................................................................................................................................................30
10. Disposal ....................................................................................................................................................30
11. Tips for troubleshooting..........................................................................................................................31
12. Technical data ..........................................................................................................................................32

10
English
1. Intended use
This wireless recorder and the IR wireless outdoor camera enable you to easily transmit and display video
signals wirelessly across moderate and large distances.
Wireless signal transmission is an advantage everywhere cables are not able to be laid: the camera
transmits the video signal wirelessly to the recorder. The conversion to digital signals means that
malfunctions and interference can be reduced.
As soon as the camera's sensor detects motion, the recording starts on the SD card or on the hard disk
drive.
You have the option of connecting up to four cameras (TVAC18010C) to the recorder and
displaying them in the 4x view on the monitor / TV, as well as recording with QVGA resolution at the same
time.
You can also view the live view from the camera via smartphone using the “TVAC18000” ABUS app and
play recorded data as well as configure the recorder.
For a detailed description of functions, refer to Section 3, “Features and functions”.
2. Package Contents
Wireless recorder
2x IR wireless outdoor camera
2.4 GHz
2x camera mount including
mounting material
3x antenna
Network cable
HDMI cable
Mouse
2 x power supply units, 5 V DC/1
A adapter
1 x power supply unit, 12 V
DC/1 A adapter
8 GB micro SD card

11
English
3. Features and functions
Easy operating and configuring via app.
Complete set with recorder and 2x IR wireless outdoor cameras
Compact IP66 outdoor camera with infrared night vision function and 640 x 480 pixel resolution
Video and audio transmitted using encrypted digital radio
Can be extended to include up to four wireless cameras
4. Information and FAQs
You can find important information and FAQs about this and other products on the website
www.abus.com/plug-and-play. You will find information for troubleshooting under item 11 of these
instructions.
5. Device description
5.1 Recorder description
Front view
Antenna
LED status bar

12
English
Rear view
5.2 Camera description
Front view
LED
Status
Meaning
Power LED
On (red)
Camera on
Off
Camera off
Link LED
Flashing
The camera is in the “Pairing Mode”
On (green)
Camera is connected to the recorder
Off
Camera is in standby
HDMI port
Video & audio output on monitor/TV
2 x USB
Connections for mouse and external hard disk drive
RJ45 connection
LAN interface for internet connection
DC 12V
Power supply connection
Reboot button
System restart
SMA connector
Connection available for the external antenna
Power button
On and off switch of the recorder
Micro SD card slot
Micro SD card slot for recordings of up to 32 GB
Antenna
IR LEDs
Power LED
PIR sensor
Camera mount
Fixed lens
Link LED

13
English
Rear view
6. Installation
6.1 Recorder installation
1. Screw the antenna on to the recorder and plug in the mouse to a USB port.
2. Next, plug in the LAN cable to the recorder and connect it to the router.
3. Then, plug in the HDMI cable to the recorder and a screen.
4. Insert the micro SD card supplied into the card slot on the back.
5. Plug in the 12 V power supply unit supplied into the recorder.
6. Switch on the recorder by pressing the power switch on the back.
7. Switch on the monitor/TV and change to the HDMI input.
SMA connector
Microphone
Pairing button
Power supply connection
Router
Internet
Mobile end
device
Monitor / TV
Mouse
Recorder
Cameras

14
English
6.2 Connecting an external hard disk drive
1. First, connect a mouse (not included) to one of the USB ports.
2. Then connect an external hard disk drive to the second USB port. Please format this before initial
installation. Recommended format: FAT32
Connect the power supply only after you have connected all the USB devices.
The USB connections supply 5 V/1000 mA. If the external hard disk drive requires a higher
output, use an additional power supply.
6.3 Connecting the recorder to the router
Connect the recorder to the router using the LAN cable supplied to access your device with the app.
To gain access with the app, refer to point 7.1. Access via app.

15
English
6.4 Mounting the camera
Use the camera mount to help you find a suitable place for installation. Use the drill holes to mark the
surface then drill the holes. Insert the wall plugs supplied before you attach the bracket with the screws.
Note:
Before you begin installing, make sure that the wireless transmission range is adequate at the
site of the required installation.
To do this, first screw in the antenna supplied.
You can also swivel the mount by 90° into a particular position. First loosen the screw on the side and set
the required angle. Then tighten the screw to secure the required position.
Finally, screw the camera onto the mount and connect the power supply unit with the camera.
Mounting options
Ceiling mounting
Wall mounting

16
English
6.5 Pairing the camera to the recorder
To pair a camera with the recorder, proceed as follows:
1. Connect the camera and the recorder to the power supply.
2. In the recorder menu, select “Camera”, then “Pairing” and the required
camera (1–4). The system counts down from 60 seconds.
3. Press the PAIRING button briefly (approx. 2–3 seconds) on the camera cable during these 60 seconds.
4. The LINK LED is lit up continuously once the connection is established.
Note:
Please note that the connection can take up to 60 seconds.
7. Operating and configuring via app
The wireless recorder gives you the option of switching to the live view on the cameras and to also
configure the recorder. The app for this device can be found in the App Store under the name of
“TVAC18000”.
If you want to access the live picture when you are out and about, proceed as follows:
Network connection
Make sure that the recorder is connected to the internet and that
an internet connection is available.
The recorder is already configured on DHCP as a standard. If
your router is also configured with DHCP you will receive a
network address automatically. You can now start accessing the
app without any additional configuration.
“TVAC18000” app
Download the “TVAC18000” app and install it on your
smartphone.

17
English
Adding the system
Open the app on your mobile phone and select the device in the list.
Click on “new” or “+” to add a new system.
Entering system information
1. Enter a name for your system at “Name” which should then be
displayed on your mobile phone.
2. To enter the DID automatically, click on Scan QR and scan the
QR Code on the bottom of the recorder. You can also enter the
20-digit DID number manually. You can find this in the network
information of your recorder or on the product label.
3. Then enter your password.
The password is the security code which you can also find in
your recorder's network information.
If you have not changed your password on the recorder, this will
be the default password: 123456.
4. Then save the settings with “Add new” and “Complete”.
5. To change the system information, select the system and click
on “Edit”.
6. To obtain the Live view, click on the Play button.
Once you have changed your password in the recorder, it must
also be changed in the app. Click on “Edit” to do this.

18
English
Connection status
If you have added your system successfully, the name of your
system and the name of your system and the corresponding DID
appear in the selection list.
Click on the name to go to the Live view.
Press the Play button to start the Live view.
Note that a maximum of 3 users only are able to access the device
at the same time.
Menu
Click on “System” or the menu item to open the recorder menu.
Note that Live view via HDMI and recording are not possible while
configuring via app.
Camera settings
Pairing
Activation
Resolution
Quality
Recording
Schedule
Motion sensitivity
Motion area
Detection

19
English
System settings:
Date & time
Language
Display
Idle display
Power saving
Storage management:
Storage status
Storage format
Network settings
Network information
You can find a description of each menu item in “8. Operating the
recorder”.

20
English
8. Operating the recorder
To switch the recorder ON or OFF, press the power button on the back of the recorder.
8.1 Live view
The live view starts automatically after the device is switched on in the quad view. To show a camera as
full-screen, left-click with the mouse on the required channel.
Click on the picture once again to change to the original view.
Right-click with the mouse to open the pop-up menu.
To exit the menu, right-click with the mouse once again.
Full-screen view for required camera
Opens the main menu
Quad view
Smart-Quad view
Activates manual recording of a channel.
Deactivates manual recording of a channel.
Starts manual recording for all four channels.
Stops manual recording for all four channels.
Live display
Quad view:
In the quad view, click on a channel using the left mouse button to display this as full-screen.
Click on the full-screen again to change back to the quad view.
Table of contents
Languages:
Other Abus Security System manuals

Abus
Abus TVAC71000 User manual

Abus
Abus CASA10010 User manual

Abus
Abus Secvest FU8006 User manual

Abus
Abus AirSecure CO2WM110 User manual

Abus
Abus Alarmbox 2.0 User manual

Abus
Abus PPIC35520 User manual

Abus
Abus CITADEL Alarm Set Micral Manual

Abus
Abus 56829 9 User manual

Abus
Abus PLSG10000 User manual

Abus
Abus FU 8230 User manual

Abus
Abus Bordo 6000 User manual

Abus
Abus Terxon PSTN User manual

Abus
Abus FUSG50101 Manual

Abus
Abus TVAC16000B User manual

Abus
Abus TVVR30004 User manual

Abus
Abus Terxon SX User manual

Abus
Abus WIRELESS ALARM SYSTEM User manual

Abus
Abus SECVEST 868 User manual

Abus
Abus Security Center Eyseo TV7171 User manual

Abus
Abus SECVEST User guide