manuals.online logo
Brands
  1. Home
  2. •
  3. Brands
  4. •
  5. ADTEK
  6. •
  7. Measuring Instrument
  8. •
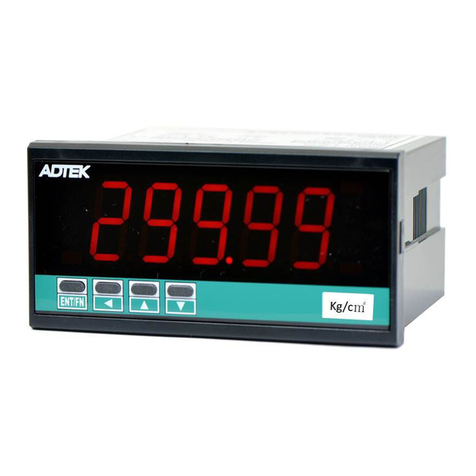
  9. ADTEK CM1-TC User manual

ADTEK CM1-TC User manual

CM1-TC
1 / 4
Rev 1.0
2021-11-18
CM1-TC
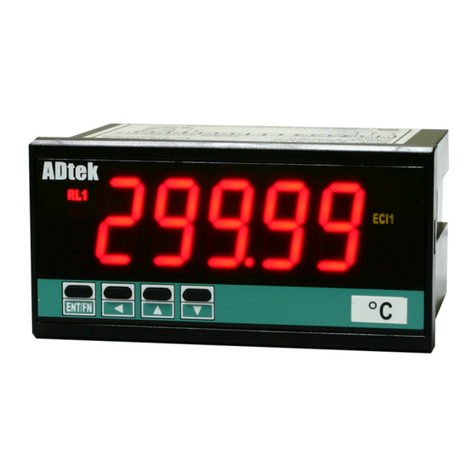
4 Digits Temperature(TC) Meter
Manual
■Pin Assignment
Terminal blocks:
20A/300Vac, M3.5, 0.5~2.0mm2 (22~14AWG)
7
8
5
6
4
3
2
1
15
16
13
14
12
11
10
9
Optional Output
terminal block
Power & Input
terminal block
AC115V
+
-
Thermocouple
AUX.POWER
AC230V
DC24V
+
-
If power connection noise interference, install the EMC Filter.
Power Connection
AC115/230V
EMC Filter
N
L
G
N
L
G
1A Fuse
4
5
7
8
6
Output
Relay output
15
16
13
14
12
11
10
9
RELAY 2
b
c
a
NC
NO
RELAY 1
b
c
a
NC
NO
Analog output RS485 Port
12
11
10
9
Max Distance: 1200M
Terminate Resistancre:
120~300Ω/0.25W
(typical: 150Ω)
A
B
9
12
11
10
■Front Panel
Unit indicator
Display
screen
R L 1
COM
RL2
Relay status
indicator
Communication
status indicator
℃
ENT/FUNC
Sht-KEY
Up-KEY
Down-KEY
Operating
Key
LED Display
Number Screen:
●
: Red high-brightness LED for 4 digital present
value
●℃/ ℉: Temperature unit, ℃green / ℉yellow
high-brightness LED
Output LED:
●Relay action: 2 square red
RL1
:display when Relay 1 action
RL2
:display when Relay 2 action
●
COM
RS485 communication: 1 square orange LED,
COM
will flash when the meter is receive or send data,
and
COM
flash quickly means the data transient
quicker.
Operating Key: 4 keys for
FUN
ENT
Enter(Function) /
Shift(Escape) / Up key / Down key
■Operating Key:
*Please access tothe Programming Level to check and set the parameters when users start to run the meter
Operating Key: 4 keys for Shift(Escape) / Up key / Down key /
FUN
ENT
Enter(Function)
In any page, press
FUN
ENT
key means "enter" or "confirm setting", and press key means "escape" or "shift".
In Programming Level, the screen will return to Measuring Page after do not press any key over 2 minutes, or
press for 1 second.
Function Index
Setting Status
FUN
ENT
Enter/Fun key
(1)In any page, press
FUN
ENT
to access the level or
function index.
(2)From the function index to access setting status.
(3)Setting Confirmed, save to EEProm and go
to next function index.
Shift key
(1)In measuring page, press for 1 second to
access user level.
(2)In function index, press for 1 second to go
back upper level.
(3)In function group index, press for 1 second to
go back measuring page.
(4)In setting status, press to Shift the
setting position.
(5)In setting status, press for 1 second to
abort setting and go back this function
index.
Up key
(1)In function index, press to go back to
previous function index.
(2)In setting status for function, press to
select function.
(3)During number Setting, press can roll
the digit up.
Down key
(1)In Function Index Page, press will go to the
next Function Index Page.
(2)In setting status for function, press to
select function.
(3)During number Setting, press can roll
the digit down.
CM1-TC
2 / 4
Rev 1.0
2021-11-18
Power ON
88888
Self-diagnosis
cm!tc
Show the model number
CM1.TC
ver!0
Show the firmware
version
9999
Measuring page
1Sec.
Into User Level
1Sec.
Leave User Level
FUN
ENT
Pcode
enter
FUN
ENT
Enter the password
to into Programming Level
Password
Default:1000
input
group
FUN
ENT
Into A [ Input
group ], the
related parameter
1Sec.
relay
group
FUN
ENT
Into B [Relay
group ], the
related parameter
1Sec.
ao
group
FUN
ENT
Into D [Analog
output group ],
the related
parameter
1Sec.
rs485
group
FUN
ENT
Into E [RS485
group ], the
related parameter
1Sec.
init
group
FUN
ENT
Into F [ INIT
group ], the
related parameter
1Sec.
■Operating Diagram:(The detail description of operation, please refer
to operating manual.)
0.User Level
9999
1Sec.
0-01
min
0-02
max
0-03
Mrst
Measuring
page
Minimum
value of PV
saving
Maximum
value of PV
saving
Reset the
saved
value of
Maximum
&
Minimum
0-04
ry!sp
Relay 1
Set-point
0-05
ry@sp
Relay 2
Set-point
1Sec.
0-08
cm!tc
0-07
type
0-06
rYrst
Model of
the meter
firmware
version
checking
only
TC type
Reset
Relay
Programming Level
A. Input Group
input
FUN
ENT
A-01
type
A-02
unit
A-03
pVdp
Input type
display
Temperature
unit
selection
°C/°F
Decimal
Point of
PV:0.0
A-04
lOsc
Low scale
of PV:-199.9
A-05
hIsc
High scale
of PV:999.9
A-06
pVzro
Fine
adjustment
zero of PV:
-199.9~999.9
A-07
pVspn
Fine
adjustment
span of PV:
-199.9~999.9
A-08
ZSclr
Clear Zero /
Span
Adjustment
of PV
A-09
avg
Average
update for
PV:1~99
1Sec.
A-12
Pcode
A-11
Dfilt
A-10
Mavg
Digital filter:
1~99
Moving
Average
update for
PV:1~99
correct
Incorrect
Pass Code
setting for
access to
Programming
Level:
0000~9999
CM1-TC
3 / 4
Rev 1.0
2021-11-18
D. Analog Output Group
ao
FUN
ENT
D-01
aOtyp
D-02
aOls
D-03
aOhs
Analog
Output type
selection
Low scale
of AO
High scale
of AO
D-04
aOzro
Fine
Adjustment
zero of AO
1Sec.
D-07
aOlmt
D-06
ZSclr
D-05
aOspn
Analog
Output High
Limit
Clear Zero /
Span
Adjustment
of AO
Fine
Adjustment
span of AO
E. RS485 Group
rs485
FUN
ENT
E-01
adres
E-02
baud
E-03
prity
Address
number
1~255
Baud rate
Parity:
n81/n82/o81
e81
1Sec.
F. INIT Group
init
FUN
ENT
F-01
init
Initialization
:7170
1Sec.
B. Relay Group
relay
FUN
ENT
B-01
rYsb
B-02
rYsd
B-03
ry!md
Start band
for Relay
action
Start delay
time for
Relay
action
Relay 1
action
mode
B-04
ry!hy
Relay 1
Hysteresis
B-05
ry!rd
Relay 1
action
delay time
B-06
ry!fd
Relay 1 off
delay time
1Sec.
B-10
ry@fd
Relay 2 off delay
time
B-07
ry@md
Relay 2
action
mode
B-09
ry@rd
B-08
ry@hy
Relay 2
action
delay time
Relay 2
Hysteresis
CM1-TC
4 / 4
Rev 1.0
2021-11-18
■Address Table Address **Address number are Hexadecimal
User Level
Name
Address
Range
Explain
Initial
Write/Read
PV
0000h
-1999~9999
Present Value
R
MIN
0001h
-1999~9999
The Minimum of PV
R
MAX
0002h
-1999~9999
The Maximum of PV
R
MRST
0003h
0~1
Max & Min of PV Clear 0:NO 1:YES
0
R/W
Engineer Level
【Input Group】
Name
Address
Range
Explain
Initial
Write/Read
TYPE
0004h
0~11
0:K, 1:K1, 2:J, 3:J1, 4:E, 5:E1, 6:T, 7:T1, 8:B,
9:R, 10:S, 11:N
0
R/W
UNIT
0005h
0~1
0:℃1:℉
0
R/W
PVDP
0006h
0~1
PV Decimal Point 0:0 1:0.0
(Automatically set according to TYPE)
0
R
LO.SC
0007h
-1999~9999
Low Scale
(Automatically set according to TYPE)
-1999
R
HI.SC
0008h
-1999~9999
High Scale
(Automatically set according to TYPE)
9999
R
LOCUT
0009h
-1999~9999
Low Cut
0
R/W
AVG
000Ah
1~99
Average
6
R/W
M.AVG
000Bh
1~99
Moving Average
10
R/W
D.FILT
000Ch
1~99
Digital Filter
6
R/W
P.CODE
000Dh
0~9999
Pass Code
1000
R/W
【RS485 Group】
Name
Address
Range
Explain
Initial
Write/Read
ADRES
001CH
1~255
RS485 address
1
R/W
BAUD
001DH
0~5
RS485 baud rate
0:1200 1:2400 2:4800 3:9600
4:19200 5:38400
3
R/W
PRITY
001EH
0~3
RS485 parity check
0: N.8.1 1: N.8.2 2: O.8.1 3: E.8.1
1
R/W
【INIT Group】
Name
Address
Range
Explain
Initial
Write/Read
INIT
001FH
0~9999
Initialization (code:7170)
7170
R/W

Other ADTEK Measuring Instrument manuals

ADTEK NED User manual

ADTEK

ADTEK NED User manual

ADTEK CPM-80 Series User manual

ADTEK

ADTEK CPM-80 Series User manual

ADTEK CS1-SG User manual

ADTEK

ADTEK CS1-SG User manual

ADTEK CS2-VA User manual

ADTEK

ADTEK CS2-VA User manual

ADTEK CS2-T User manual

ADTEK

ADTEK CS2-T User manual

ADTEK CS2-SG User manual

ADTEK

ADTEK CS2-SG User manual

ADTEK CS2-MC User manual

ADTEK

ADTEK CS2-MC User manual

ADTEK CPM-12D User manual

ADTEK

ADTEK CPM-12D User manual

ADTEK CS1-PR User manual

ADTEK

ADTEK CS1-PR User manual

ADTEK CS2-SG User manual

ADTEK

ADTEK CS2-SG User manual

ADTEK CS2-PR User manual

ADTEK

ADTEK CS2-PR User manual

ADTEK CPM-21 User manual

ADTEK

ADTEK CPM-21 User manual

ADTEK CS1 Series User manual

ADTEK

ADTEK CS1 Series User manual

ADTEK CPM-12A User manual

ADTEK

ADTEK CPM-12A User manual

ADTEK AEM-DRB User manual

ADTEK

ADTEK AEM-DRB User manual

ADTEK CS2-RL User manual

ADTEK

ADTEK CS2-RL User manual

ADTEK CM1 Series User manual

ADTEK

ADTEK CM1 Series User manual

ADTEK CS3S VA User manual

ADTEK

ADTEK CS3S VA User manual

ADTEK CS3S-TR User manual

ADTEK

ADTEK CS3S-TR User manual

ADTEK MW-5 User manual

ADTEK

ADTEK MW-5 User manual

ADTEK CPM-12B User manual

ADTEK

ADTEK CPM-12B User manual

ADTEK MWH-10 User manual

ADTEK

ADTEK MWH-10 User manual

ADTEK CS1-RL User manual

ADTEK

ADTEK CS1-RL User manual

ADTEK AFM-8A User manual

ADTEK

ADTEK AFM-8A User manual

Popular Measuring Instrument manuals by other brands

Autel MaxiBAS BT608 manual

Autel

Autel MaxiBAS BT608 manual

PROTMEX PTH-4 user manual

PROTMEX

PROTMEX PTH-4 user manual

Delta Electronics CTA4 user manual

Delta Electronics

Delta Electronics CTA4 user manual

REED R5040 instruction manual

REED

REED R5040 instruction manual

NASA Marine Clipper BM1 manual

NASA Marine

NASA Marine Clipper BM1 manual

Control Company TRACEABLE 3253 instructions

Control Company

Control Company TRACEABLE 3253 instructions

Hanna Instruments 96711C instruction manual

Hanna Instruments

Hanna Instruments 96711C instruction manual

Ditel DINOS DT110/NE Quick installation guide

Ditel

Ditel DINOS DT110/NE Quick installation guide

Knick Protos II 4400(X) user manual

Knick

Knick Protos II 4400(X) user manual

HACH LANGE FP 360 sc user manual

HACH LANGE

HACH LANGE FP 360 sc user manual

Sonel KT-128 user manual

Sonel

Sonel KT-128 user manual

LDetek MD3 user manual

LDetek

LDetek MD3 user manual

EMH ITZ Installation & operation

EMH

EMH ITZ Installation & operation

wtw Cond 7310 operating manual

wtw

wtw Cond 7310 operating manual

Siemens Sitrans F Series operating instructions

Siemens

Siemens Sitrans F Series operating instructions

Trotec BX50 MID operating manual

Trotec

Trotec BX50 MID operating manual

Pyxis SP-395 HST Operational manual

Pyxis

Pyxis SP-395 HST Operational manual

F&F LE-03 quick start guide

F&F

F&F LE-03 quick start guide

manuals.online logo
manuals.online logoBrands
  • About & Mission
  • Contact us
  • Privacy Policy
  • Terms and Conditions

Copyright 2025 Manuals.Online. All Rights Reserved.