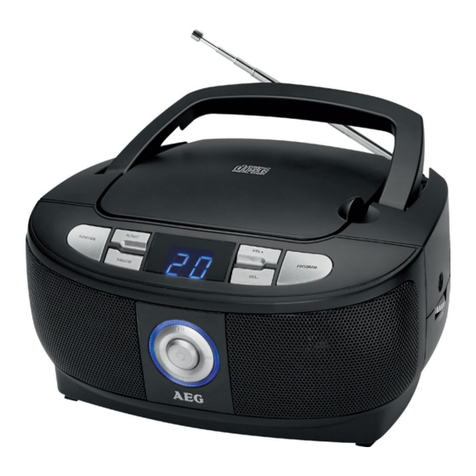
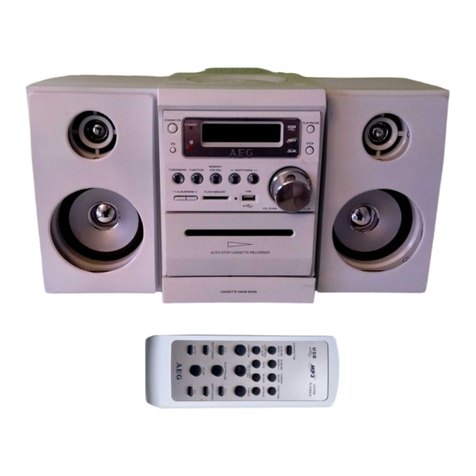
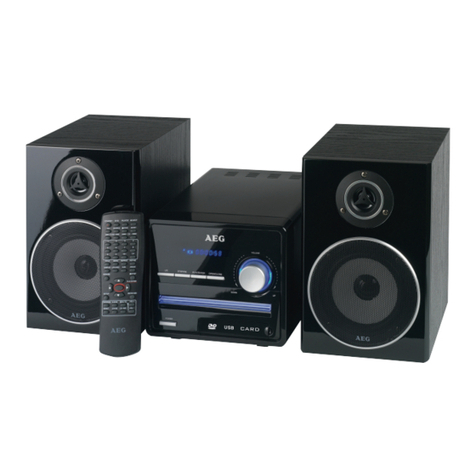
AEG MC 4417 CD/MP3 Technical specifications

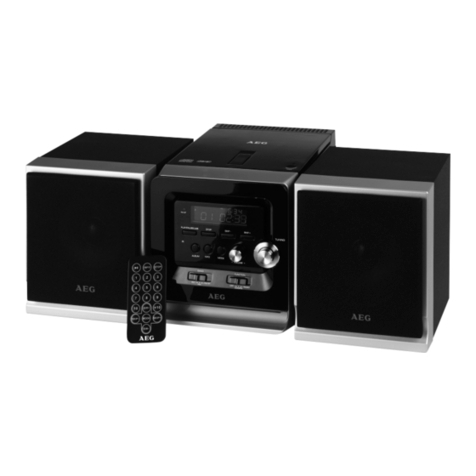
MC 4417 CD/MP3
Musik-
C
enter inkl. Bluetooth
Musik
C
enter incl. Bluetoot
h
Bedienungsanleitung/Garantie
Instruction Manual/Guarantee
05-MC 4417 CD_MP3 AEG.indd 105-MC 4417 CD_MP3 AEG.indd 1 12.02.2008 10:14:15 Uhr12.02.2008 10:14:15 Uhr
28.5.08_TH

2
Deutsch
Inhalt
Übersicht der Bedienelemente..............................Seite 3
Bedienungsanleitung...............................................Seite 4
Technische Daten.......................................................Seite 10
...............................................Seite 10
English
Contents
Overview of the Components................................Page 3
Instruction Manual....................................................Page 12
Technical Data .............................................................Page 18
05-MC 4417 CD_MP3 AEG.indd 205-MC 4417 CD_MP3 AEG.indd 2 12.02.2008 10:14:16 Uhr12.02.2008 10:14:16 Uhr
Garantieben
edi ungng

Übersicht der Bedienelemente
3
Overview of the Components
05-MC 4417 CD_MP3 AEG.indd 305-MC 4417 CD_MP3 AEG.indd 3 12.02.2008 10:14:16 Uhr12.02.2008 10:14:16 Uhr

Deutsch
4
Allgemeine Sicherheitshinweise
Lesen Sie vor Inbetriebnahme dieses Gerätes die Bedie-
nungsanleitung sehr sorgfältig durch und bewahren
Sie diese inkl. Garantieschein, Kassenbon und nach
Möglichkeit den Karton mit Innenverpackung gut auf.
Falls Sie das Gerät an Dritte weitergeben, geben Sie auch
die Bedienungsanleitung mit.
• Um das Risiko von Feuer oder einem elektrischen
Schlag zu vermeiden, sollten Sie das Gerät nicht
Regen oder Feuchtigkeit aussetzen. Das Gerät nicht
in unmittelbarer Nähe von Wasser betreiben (z.B.
Badezimmer, Schwimmbecken, feuchte Keller).
• Verwenden Sie das Gerät nur für den vorgesehenen
Zweck.
• Das Gerät ausschließlich an eine vorschriftsmäßig
installierte Steckdose anschließen. Achten Sie darauf,
dass die angegebene Spannung mit der Spannung
der Steckdose übereinstimmt.
• Bei Verwendung von externen Netzteilen auf die
richtige Polarität und Spannung achten, Batterien
stets richtigherum einlegen.
• Das Gerät so aufstellen, dass vorhandene Lüftungs-
önungen nicht verdeckt werden.
• Niemals das Gehäuse des Gerätes önen. Durch
unsachgemäße Reparaturen können erhebliche Ge-
fahren für den Benutzer entstehen. Bei Beschädigung
des Gerätes, insbesondere des Netzkabels, das Gerät
nicht mehr in Betrieb nehmen, sondern von einem
Fachmann reparieren lassen. Netzkabel regelmäßig
auf Beschädigungen prüfen.
• Ein defektes Netzkabel darf nur vom Hersteller, un-
serem Kundendienst oder einer ähnlich qualizierten
Person durch ein gleichwertiges Kabel ersetzt werden,
um Gefährdungen zu vermeiden.
• Benutzen Sie das Gerät längere Zeit nicht, ziehen Sie
den Netzstecker aus der Steckdose, bzw. entnehmen
Sie die Batterien.
Diese Symbole können sich ggfs. auf dem Gerät benden
und sollen Sie auf folgendes hinweisen:
Das Blitz-Symbol soll den Benutzer auf Teile
im Inneren des Gerätes hinweisen, die gefähr-
lich hohe Spannungen führen.
Das Symbol mit Ausrufezeichen soll den
Benutzer auf wichtige Bedienungs- oder
Wartungs-Hinweise in den Begleitpapieren
hinweisen.
Geräte mit diesem Symbol arbeiten mit
einem „Klasse 1-Laser“ zur Abtastung der CD.
Die eingebauten Sicherheitsschalter sollen
verhindern, dass der Benutzer gefährlichem,
für das menschliche Auge nicht sichtbarem
Laserlicht ausgesetzt wird, wenn das CD-Fach
geönet ist.
Diese Sicherheitsschalter sollten auf keinen Fall
überbrückt oder manipuliert werden, sonst besteht die
Gefahr, dass Sie sich dem Laser-Licht aussetzen.
Kinder und gebrechliche Personen
• Zur Sicherheit Ihrer Kinder lassen Sie keine Verpa-
ckungsteile (Plastikbeutel, Karton, Styropor, etc.)
erreichbar liegen.
WARNUNG!
Lassen Sie kleine Kinder nicht mit Folie spielen.
Es besteht Erstickungsgefahr!
• Um Kinder oder gebrechliche Personen vor den
Gefahren elektrischer Geräte zu schützen, beachten
Sie, dass dieses Gerät nur unter Aufsicht verwendet
wird. Dieses Gerät ist kein Spielzeug. Lassen Sie kleine
Kinder nicht damit spielen.
Symbole in dieser Bedienungsanleitung
Wichtige Hinweise für Ihre Sicherheit sind besonders
gekennzeichnet. Beachten Sie diese Hinweise unbedingt,
um Unfälle und Schäden am Gerät zu vermeiden:
WARNUNG:
Warnt vor Gefahren für Ihre Gesundheit und zeigt
mögliche Verletzungsrisiken auf.
ACHTUNG:
Weist auf mögliche Gefährdungen für das Gerät oder
andere Gegenstände hin.
쫵HINWEIS:
Hebt Tipps und Informationen für Sie hervor.
Spezielle Sicherheitshinweise
Dieses Gerät arbeitet
mit einem Laser der Klasse 1.
Übersicht der Bedienelemente
1 CD-Fach
2 IR Sensor für die Fernbedienung
3 /ITaste (Standby/Betrieb)
4 FUNCTION Funktionswahltaste
5 PAIRING/ANSWER Taste
(Verbinden/Antworten)
6 (Lautstärke) Tasten
7 I/I Tasten
(Suchlauf vorwärts/rückwärts)
8 /BAND/HANG UP Taste
9 /II Taste (Wiedergabe/Pause)
10 (önen/schließen) CD-Fach
11 LCD-Display
12 USB Anschluss
13 SD/MMC Kartenschlitz
14 PHONES Kopfhöreranschluss
15 Mikrofon
05-MC 4417 CD_MP3 AEG.indd 405-MC 4417 CD_MP3 AEG.indd 4 12.02.2008 10:14:17 Uhr12.02.2008 10:14:17 Uhr

Deutsch 5
Rückseite
16 FM ANT. Wurfantenne
17 SPEAKERS R/L Lautsprecheranschlüsse
18 AM ANT Antennenanschluss
19 Netzanschluss
Fernbedienung
1
STANDBY Taste
2 MUTE (Stumm) Taste
3 TIMER Taste
4 /II (Wiedergabe/Pause) Taste
5 ITaste (Suchlauf vorwärts)
6 ST/MO/ID3 Taste
7 VOLUME UP/DN (Lautstärke) Tasten
8 DBBS Taste
9 Zierntasten
10 SLEEP Taste
11 EQ Taste
12 FOLDER UP/DN Tasten (aufwärts/
abwärts Album/Radiospeicherplatz)
13 PLAY MODE Taste
(Wiederholen/Zufallswiedergabe)
14 /PAIRING Taste
15 I (Suchlauf rückwärts)
16 //BAND Taste
17 FUNCTION Funktionswahltaste
18 MEMORY/CLOCK Taste (Speicher/Uhrzeit)
19 OPEN/CLOSE Taste (önen/schließen)
Bestimmungsgemäßer Gebrauch
Dieses Gerät dient zum:
• Empfang von Radioprogrammen
• Wiedergeben/Aufnehmen von Audio Kassetten
• Abspielen von Audio-/MP3-CDs/Dateien
• Abspielen von Dateien über Bluetooth
• Telefonieren via Freisprechfunktion über Bluetooth.
Es ist ausschließlich für diesen Zweck bestimmt und darf
nur dafür verwendet werden. Es darf nur in der Art und
Weise benutzt werden, wie es in dieser Gebrauchsan-
leitung beschrieben ist. Sie dürfen das Gerät nicht für
gewerbliche Zwecke einsetzen.
Jede andere Verwendung gilt als nicht bestimmungsge-
mäß und kann zu Sachschäden oder sogar zu Personen-
schäden führen.
Die ETV – Elektro-Technische Vertriebsgesellschaft mbH
übernimmt keine Haftung für Schäden, die durch nicht
bestimmungsgemäßen Gebrauch entstehen.
Inbetriebnahme des Gerätes/Einführung
• Lesen Sie vor der Inbetriebnahme die Bedienungsan-
leitung sorgfältig durch!
• Wählen Sie einen geeigneten Standort für Gerät und
Lautsprecher. Geeignet wäre eine trockene, ebene,
rutschfeste Fläche, auf der Sie das Gerät gut bedie-
nen können.
• Achten Sie darauf, dass das Gerät ausreichend belüf-
tet wird!
• Schließen Sie die Lautsprecher auf der Rückseite an
„Speaker R und L“ (17) an.
• Entfernen Sie, falls vorhanden, die Schutzfolie vom
Display.
Stromversorgung
• Stecken Sie den Netzstecker in eine vorschriftsmäßig
installierte Schutzkontaktsteckdose, 230 V, 50 Hz.
• Achten Sie darauf, dass die Netzspannung mit den
Angaben auf dem Typenschild übereinstimmt.
• Die Speicherung der Uhrzeit und Sender geht verlo-
ren, sobald die Stromzufuhr unterbrochen wurde.
Einstellen der Uhrzeit (im Standby-Modus)
Batterien der Fernbedienung
(Batterien nicht im Lieferumfang enthalten)
• Önen Sie den Batteriefachdeckel auf der Rückseite
der Fernbedienung.
• Legen Sie 2 Batterien des Typs R03 „AAA“ 1,5V ein.
Achten Sie auf die richtige Polarität (siehe Batte-
riefachboden)!
• Wird die Fernbedienung längere Zeit nicht benutzt,
entnehmen Sie bitte die Batterien, um ein „Auslau-
fen“ von Batteriesäure zu vermeiden.
ACHTUNG:
• Ungleiche Batterietypen oder neue und
gebrauchte Batterien dürfen nicht zusammen
verwendet werden.
• Batterien gehören nicht in den Hausmüll. Bitte
geben Sie verbrauchte Batterien bei zuständi-
gen Sammelstellen oder beim Händler ab.
WARNUNG:
Setzen Sie Batterien keiner hohen Wärme oder
dem direkten Sonnenlicht aus. Werfen Sie Batterien
niemals ins Feuer. Es besteht Explosionsgefahr!
05-MC 4417 CD_MP3 AEG.indd 505-MC 4417 CD_MP3 AEG.indd 5 12.02.2008 10:14:17 Uhr12.02.2008 10:14:17 Uhr
1. Drücken Sie die MEMORY/CLOCK Taste (18 an derFB).
Im Display erscheint die Anzeige „HR“.
2. Wählen Sie mit den
zwischen der 24 Stunden und 12 StundenAnzeige.
Drücken Sie die MEMORY/CLOCK Taste zumBestätigen.
쫵HINWEIS:
Bei der 12 Stunden Anzeige erscheint
AM = Vormittags, PM = Nachmittags.
3. Drücken Sie die um die Stunden
einzustellen. Drücken Sie die MEMORY/CLOCKTaste
zum Bestätigen.
4. Um die Minuten einzustellen, drücken Sie die
5. Drücken Sie erneut auf die MEMORY/CLOCK Taste um
die Uhrzeit abzuspeichern.
I/I Tasten
I/
I Tasten
I/I Tasten (7/5/15
12 )

Deutsch
6
Transportsicherung CD Fach
• Schalten Sie das Gerät ein, betätigen Sie bitte die /I
STANDBY Taste (3/1).
• Önen Sie bitte das CD Fach (1), indem Sie die
OPEN/CLOSE (önen/schließen) Taste (10/19) drü-
cken. Das CD Fach fährt nach oben auf.
• Entfernen Sie vor der Inbetriebnahme, wenn vorhan-
den, die Transportsicherung aus dem CD-Player.
• Drücken Sie erneut die OPEN/CLOSE Taste, um das
CD Fach wieder zu schließen.
Allgemeine Bedienung
쫵HINWEIS:
Einige Tasten nden Sie sowohl am Gerät als auch
auf der Fernbedienung. Gleichlautende Tasten bewir-
ken die gleiche Funktion.
/I STANDBY (3/1)
Schalten Sie das Gerät mit der /I STANDBY Taste in den
Standby-Betrieb (die Uhrzeitanzeige erscheint). Drücken
Sie diese Taste erneut, schaltet sich das Gerät wieder ein.
Lautstärke (6/7)
Zum Einstellen der individuellen Lautstärke. Im Display
erscheint „VOL“ und eine Zier. Dies entspricht der ein-
gestellten Lautstärke bis „VOL MAX“ bzw. „VOL MIN“.
PHONES Kopfhörerbuchse (14)
Benutzen Sie für den Kopfhörerbetrieb einen Kopfhörer
mit einem 3,5 mm Stereo-Klinkenstecker, den Sie in den
Kopfhöreranschluss stecken. Die Lautsprecher werden
abgeschaltet.
DBBS (8 an der FB)
Dient zum Verstärken oder Reduzieren der Bässe.
BBS ON = Eingeschaltet, BBS OFF = Ausgeschaltet.
Infrarot-Fernbedienung
Zur kabellosen Bedienung aus einer Entfernung von
bis zu 5 Metern. Lässt diese Reichweite nach, müssen
die Batterien ausgetauscht werden. Achten Sie bei der
Bedienung auf freie Sicht zwischen Fernbedienung und
dem Sensor (2) am Gerät.
USB Anschluss (12)
Dieses Gerät ist nach den letzten Stand der technischen
Entwicklungen im USB Bereich entwickelt worden. Die
große Anzahl von verschiedenen USB Speichermedien
jeglicher Art die heute angeboten werden, erlauben es
leider nicht, eine volle Kompatibilität mit allen USB Spei-
chermedien zu gewährleisten. Aus diesem Grund kann es
in seltenen Fällen zu Problemen bei der Wiedergabe von
USB Speichermedien kommen. Dies ist keine Fehlfunkti-
on des Gerätes.
1. Schalten Sie das Gerät ein, betätigen Sie bitte die /I
STANDBY Taste (3/1).
2. Wählen Sie nun mit der FUNCTION Taste (4/17) den
Modus USB aus. INSERT USB erscheint im Display.
3. Schließen Sie ein USB Speichermedium an.
4. Drücken Sie die Taste /II (9/4) um die Musikdaten
wiederzugeben.
Für die Bedienung richten Sie sich bitte nach dem Ab-
schnitt „CDs/MP3 abspielen“.
ACHTUNG:
Bevor Sie das USB Speichermedium entfernen, schalten
Sie das Gerät mit der FUNCTION Taste in den TUNER
Betrieb.
SD/MMC-Kartenschlitz (13)
1. Wollen Sie Daten auf einer SD/MMC-Card abspielen,
stecken Sie diese in die dafür vorgesehene Önung.
2. Wählen Sie nun mit der FUNCTION Taste (4/17) den
Modus CARD aus. INSERT CARD erscheint im Display.
3. Drücken Sie die Taste /II (9/4) um die Musikdaten
wiederzugeben.
Für die Bedienung richten Sie sich bitte nach dem Ab-
schnitt „CDs/MP3 abspielen“.
Radio hören
1. Drücken Sie die FUNCTION Taste (4/17) so oft, bis im
Display „TUNER“ erscheint.
2. Wählen Sie durch Drücken der //BAND/HANG
UP Taste (8/16) zwischen FM oder MW.
UKW = FM, Mittelwelle = MW (Mono)
3. Stimmen Sie mit den I/I Tasten (7/5/15) den
gewünschten Sender ab.
4. Die FM.ST-Kontrollleuchte „ “ (im Display) leuchtet
nur, wenn der ausgewählte Sender in Stereo-Qua-
lität empfangen wird. Ist der Empfang zu schwach
und rauscht der empfangene Sender, ackert diese.
Versuchen Sie, durch Drehen und ab- bzw. aufwickeln
der Antenne (16) den Empfang zu verbessern. Bei
FM-Sendern können Sie mit der ST/MO/ID3 Taste (6
an der FB) zwischen MONO und STEREO Empfang
umschalten. Bei schlechtem Empfang empfehlen wir
auf MONO zu schalten.
5. Schließen Sie zum Empfang von AM Sendern eine
AM Antenne an die AM ANT Anschlusse (18) an. Ist
der Empfang zu schwach und rauscht der empfan-
gene Sender, versuchen Sie durch Ausrichten der
AM Antenne den Empfang zu verbessern. In diesem
Frequenzband werden Sendungen nur in Mono
ausgestrahlt.
6. Haben Sie den gewünschten Sender gefunden,
drücken Sie die MEMORY/CLOCK Taste (18 an der FB).
Im Display leuchtet MEMORY und die Programmp-
latznummer blinkt.
7. Zum Wählen des Programmplatzes, drücken Sie die
FOLDER UP/DN Tasten (12 an der FB).
05-MC 4417 CD_MP3 AEG.indd 605-MC 4417 CD_MP3 AEG.indd 6 12.02.2008 10:14:18 Uhr12.02.2008 10:14:18 Uhr

Deutsch 7
8. Zum Abspeichern, drücken Sie die MEMORY/CLOCK
Taste. Bitte beachten Sie, das Sie den Programmplatz
innerhalb von 5 Sekunden eingeben müssen, da der
Vorgang danach abgebrochen wird.
Zum Anwählen eines gespeicherten Senders, drücken Sie
die FOLDER UP oder FOLDER DN Taste (12 an der FB).
CDs/MP3 abspielen
So geben Sie eine CD wieder
1. Drücken Sie die FUNCTION Taste (4/17) so oft, bis im
Display „DISC“ erscheint.
2. Drücken Sie die OPEN/CLOSE (önen/schließen)
Taste (10/19), um das CD-Fach (1) zu önen. Das CD
Fach fährt nach oben auf.
3. Legen Sie eine Audio CD mit dem Aufdruck nach vor-
ne so auf den Zentrierkegel, dass die CD mechanisch
einrastet. Schließen Sie dann den CD Fachdeckel,
indem Sie erneut die OPEN/CLOSE Taste drücken.
4. Bei einer AUDIO CD:
Auf dem Display erscheint „DISC“, die Anzahl der Titel
und die Gesamtlaufzeit. Drücken Sie die /II Taste
(9/4), um die CD wiederzugeben. Die CD wird vom
ersten Titel an abgespielt. Das aktuelle Lied und die
abgelaufene Spielzeit wird im Display angezeigt.
Bei einer CD im MP3 Format:
Auf dem Display erscheint „DISC“, „MP3“, die Anzahl
der Ordner z.B. A04 und die Gesamtzahl der Titel (z.B.
T126). Drücken Sie die /II Taste, um die CD wie-
derzugeben. Die CD wird vom ersten Titel, und dem
ersten Order, an abgespielt. Das aktuelle Lied und die
abgelaufene Spielzeit werden im Display angezeigt.
Mit den FOLDER UP oder FOLDER DN Tasten (12 an
der FB) können Sie die einzelnen Ordner anwählen.
5. Um eine CD zu entnehmen, drücken Sie bitte die
//BAND/HANG UP Taste (8) (16 an der Fernbe-
dienung), önen das CD-Fach mit der OPEN/CLOSE
(önen/schließen) Taste und heben die CD vorsichtig
ab.
Halten Sie den CD-Deckel stets geschlossen.
쫵HINWEIS:
• Bei CDs im MP3 Format, mit Ordner, erscheint beim
Wechsel in einen anderen Ordner 01 für das erste
Lied des neuen Ordners.
• Wenn eine Disk falsch herum eingelegt wird, bzw.
keine Disk eingelegt ist, leuchtet die Meldung
„READING“, und „NO DISC“ (keine Disk) erscheint
auf dem Display.
• Die Wiedergabe anwenderseitig erstellter CD kann
durch die Vielzahl der verfügbaren Software und
CD-Medien nicht garantiert werden.
Beschreibung der CD Tasten
/II (9/4)
Sie können die Wiedergabe kurz unterbrechen und wie-
der starten. Im Display blinkt die abgelaufene Spielzeit.
Nochmaliges Drücken der Taste setzt die Wiedergabe an
derselben Stelle fort.
I/I (7/5/15)
Bei laufender Audio-CD oder einer CD im MP3 Format:
Mit Ikönnen Sie zum nächsten bzw. übernächsten
Titel springen usw. Halten Sie die Taste gedrückt, setzt
ein Musiksuchlauf ein (der Ton wird stumm geschaltet).
Die I Taste können Sie wie folgt bedienen:
1 x drücken = Beginnt das aktuelle Lied wieder von
vorne.
2 x drücken = Springt zum vorherigen Titel.
3 x drücken = Spielt ein Lied davor usw. Halten Sie die
Taste gedrückt, setzt ein Musiksuchlauf
ein (der Ton wird stumm geschaltet).
Im Radiobetrieb:
Zum Abstimmen des gewünschten Radiosenders.
//BAND/HANG UP (8/16)
Die CD wird angehalten.
Im Radiobetrieb:
Zum Umschalten zwischen FM und MW.
Im Bluetooth-Betrieb:
Zum Auegen/Ablehnen eines Telefongesprächs.
MUTE (2 an der FB)
Dient zum schnellen Abstellen der Lautstärke. Die
Anzeige „MUTE“ blinkt im Display. Zum Beheben dieser
Funktion, drücken Sie erneut die MUTE Taste.
EQ (11 an der FB)
(Voreingestellte Equalizer-Funktion). Es stehen verschie-
dene Sound Modi zur Verfügung (CLASSIC, ROCK, POP,
JAZZ, FLAT).
ST/MO/ID3 (6 an der FB)
Im FM-Radiobetrieb:
Zum Umschalten zwischen STEREO und MONO.
Bei einer CD im MP3 Format:
Gedrückt halten: Bei gespeicherter ID-3 Tag Information
erscheint diese im Display als Laufband.
Halten Sie die Taste erneut gedrückt,
um die Funktion wieder auszuschalten.
05-MC 4417 CD_MP3 AEG.indd 705-MC 4417 CD_MP3 AEG.indd 7 12.02.2008 10:14:18 Uhr12.02.2008 10:14:18 Uhr

Deutsch
8
PLAY MODE (13 an der FB)
1x drücken: ( leuchtet) Das aktuelle Lied wird
ständig wiederholt.
2x drücken: ( ALL leuchtet) Die komplette CD
wird ständig wiederholt.
3x drücken: Im Display erscheint die Anzeige „ “
und die erste Titelnummer, welche als
erste gespielt wird. Alle Titel werden
nacheinander in einer zufälligen
Reihenfolge wiedergegeben.
4x drücken: Alle Funktionen sind aufgehoben. Der
normale Abspielbetrieb wird fortge-
setzt.
Nur für CDs im MP3-Format
1x drücken: Das aktuelle Lied wird ständig wieder-
holt (im Display erscheint ).
2x drücken: Der angewählte Ordner der MP3 CD
wird ständig wiederholt (im Display
erscheint ALBUM). Mit den FOLDER
UP/DN Tasten (12 an der FB) können
Sie die einzelnen Ordner anwählen.
3x drücken: Die komplette CD wird ständig wieder-
holt (im Display erscheint ALL).
4x drücken: Im Display erscheint die Anzeige „ “
und die erste Titelnummer, welche als
erste gespielt wird. Alle Titel werden
nacheinander in einer zufälligen
Reihenfolge wiedergegeben.
5x drücken: Die Funktion wird deaktiviert und die
CD wird im normalen Modus abgespielt.
FOLDER UP/DN (12 an der FB)
Bei einer CD im MP3 Format:
Drücken Sie diese Tasten, während der Wiedergabe, um
einen Ordner nach oben bzw. nach unten zu wechseln.
Die Anzeige, z.B. A001T001, wird kurz angezeigt. An-
schließend beginnt selbsttätig die Wiedergabe der MP3
CD. Wird die Taste im Stopp-Modus gedrückt, erscheint
ebenfalls kurz die Anzeige im Display. Starten Sie danach
die Wiedergabe mit der /II Taste.
Im Radiobetrieb:
Zum Anwählen der gespeicherten Radiosender.
SLEEP (10 an der FB)
Hier wird bei eingeschaltetem Gerät in 1 -Minu-
ten-Schritten von 90 bis 1 Minuten der Zeitraum
eingestellt, nachdem sich das Gerät in die Betriebsbe-
reitschaft (Standby) schaltet. Die Taste so oft drücken,
bis die gewünschte Dauer im Display angezeigt wird.
Bei aktivierter Funktion erscheint das Symbol „ “ im
Display. Das Gerät schaltet nach der eingegebenen Zeit
automatisch ab.
Um die noch verbleibende Zeit abzurufen, drücken Sie
die SLEEP Taste. Diese Zeit kann auch nachträglich noch
verkürzt oder wieder abgeschaltet (OFF) werden.
TIMER (3 an der FB)
Sie können das Gerät so einstellen, das es sich zu einer
bestimmten Uhrzeit ein und wieder ausschaltet.
MEMORY/CLOCK (18 an der FB)
Dient zur Einstellung der Uhrzeit, Senderspeicherung und
programmierte Wiedergabe.
Halten Sie diese Taste für ca. 3 Sekunden gedrückt, wird
auf dem Display kurz die Uhrzeit angezeigt.
Programmierte Wiedergabe
Lässt die Programmierung einer beliebigen Titelfolge zu.
1. Drücken Sie die //BAND/HANG UP Taste
(8/16).
2. Drücken Sie die MEMORY/CLOCK Taste (18 an der FB).
Im Display erscheint „01 PR 01“ („Titel“ PR „Speicher-
platz“) und die Anzeige PROGRAM. Wählen Sie mit
den I/I Tasten (7/5/15) den gewünschten Titel
aus und drücken Sie erneut die MEMORY/CLOCK Tas-
te. Die Anzeige im Display wechselt auf Speicherplatz
PR 02.
3. Wählen Sie mit den I/I Tasten den nächsten
Titel aus und drücken Sie erneut die MEMORY/CLOCK
Taste. Wiederholen Sie den Vorgang, bis Sie alle Titel
ausgewählt haben.
05-MC 4417 CD_MP3 AEG.indd 805-MC 4417 CD_MP3 AEG.indd 8 12.02.2008 10:14:18 Uhr12.02.2008 10:14:18 Uhr
1. Schalten Sie das Gerät mit der
den Standby-Betrieb (die Uhrzeitanzeige erscheint).
2. TIMER Taste, die Anzeige
„SELECT SOURCES“ im Displayerscheint. Wählen
dus aus.
3. Drücken Sie die TIMER Taste und wählen Sie mit den
4. Drücken Sie die TIMER Taste, im Display erscheint die
Anzeige „SET ON TIMER“.
5. Drücken Sie erneut die TIMER Taste. Die Stundenan-
zeige beginnt zu blinken. Wählen Sie mit den
die Einschaltzeitstunde.
6. Drücken Sie die TIMER Taste und wählen mit den
die Einschaltzeitminuten.
7. Drücken Sie die TIMER Taste, im Display erscheint
die Anzeige „SET OFF TIMER“. Drücken Sie erneut die
TIMER Taste. Die Stundenanzeige beginnt zu blinken.
8. Verfahren Sie beim Einstellen der Ausschaltzeit, wie
oben beschrieben.
9. Drücken Sie erneut die TIMER Taste. Das Gerät schal-
tet wieder in den Standby-Betrieb. „ “ erscheint im
Display und der Timer ist aktiviert.
Zum Deaktivieren des Timer TIMER Tasted .
Die Anzeige „ “ im Display erlischt.
Drücken Sie die
I/I Tasten
I/
I Tasten
rücken Sie die
(7/5/15)
Sie mit der FUNCTION Taste (4/17) den Einschaltmo-
“ (VOLUME UP/DN) Tasten (6/7) die Einschalt-
lautstärke VOL.
„
/I STANDBY Taste in
00

Deutsch 9
쫵HINWEIS:
Bei CDs im MP3 Format können Sie mit den FOLDER
UP/DN Tasten (12 an der FB) die einzelnen Ordner
anwählen. Die erste Titelnummer des jeweiligen
Ordners wird angezeigt.
4. Drücken Sie die /II Taste (9/4). Die Wiedergabe wird
gestartet. Im Display wird die erste gewählte Titel-
nummern angezeigt. Im Display erscheint die Anzeige
„DISC“ und „PROGRAM“. Mit dieser Taste können Sie
das Programm ebenso kurz unterbrechen.
5. Drücken Sie einmal die //BAND/HANG UP
Taste, wird die Wiedergabe gestoppt, das Programm
bleibt jedoch erhalten. Die programmierte Titelanzahl
z.B. 08 PROG wird im Display angezeigt.
6. Zur erneuten Wiedergabe des Programms, drücken
Sie bitte zuerst 1x die MEMORY/CLOCK Taste und
danach die /II Taste.
7. Zum Löschen des Programms drücken Sie bitte 2x die
//BAND/HANG UP Taste. PROG CLEAR wird
kurz im Display angezeigt und die Anzeige PROGRAM
erlischt.
Das Gerät stoppt automatisch, nachdem alle program-
mierten Titel wiedergegeben wurden. Die Anzeige z.B.
08 PROG wird im Display angezeigt. Die programmierte
Reihenfolge bleibt im Speicher enthalten bis Sie in den
anderen Modus wechseln, oder die CD aus dem CD Fach
entnommen wird bzw. das Gerät ausgeschaltet wird.
Sie haben die Möglichkeit die programmierten Titel mit
der REPEAT-Funktion zu kombinieren. Nachdem Sie
programmiert und das Gerät gestartet haben, drücken
Sie bitte die PLAY MODE Taste (13 an der FB) bis zu 3 x
und die Funktionen können, wie unter Abschnitt „PLAY
MODE“ beschrieben, angewendet werden.
Wiedergabe von Musik im MP3 Format
Sie haben die Möglichkeit mit diesem Gerät Musikstücke
im MP3 Format wiederzugeben. Das Gerät unterstützt
außerdem die gängigen CD Typen: CD, CD-RW, CD-R.
Sie können mit Ihrem Gerät MP3 CDs abspielen. Auf die-
sen CDs können bis zu 200 Titel verdichtet abgespeichert
werden. Ihr Gerät erkennt eine MP3 CD automatisch (im
Display erscheint die Gesamtzahl der Titel und Ordner).
Zum Abspielen dieser CDs gehen Sie bitte vor, wie unter
CDs/MP3 abspielen beschrieben. Die Programmierung
von Titeln können Sie, wie bereits unter „Programmierte
Wiedergabe“ beschrieben, durchführen.
Bitte beachten Sie:
Es gibt eine Vielzahl von Brenn- und Komprimierungs-
verfahren, sowie Qualitätsunterschiede bei CDs und
gebrannten CDs.
Des Weiteren hält die Musikindustrie keine festen Stan-
dards ein (Kopierschutz).
Aus diesen Gründen kann es in seltenen Fällen zu Proble-
men bei der Wiedergabe von CDs und MP3 CDs kommen.
Dies ist keine Fehlfunktion des Gerätes.
Bluetooth-Betrieb
Bei Bluetooth handelt es sich um eine Technologie zur
drahtlosen Funkverbindung von Geräten über eine kurze
Distanz.
쫵HINWEIS:
Der Funktionsradius beschränkt sich dabei auf ca.
3 Meter.
Derzeit wird die Bluetooth Technologie hauptsächlich
für den Freisprechbetrieb von Mobiltelefonen verwendet.
Dieses Gerät bietet Ihnen die Möglichkeit sowohl die
Freisprechfunktion zu nutzen, als auch die Musik von
einem Bluetooth kompatiblen Gerät wiederzugeben.
쫵HINWEIS:
Um diesen Modus nutzen zu können, muss das ange-
schlossene Gerät das A2DP Prol unterstützen.
• A2DP (Advanced Audio Distribution Prole)
Ein Bluetooth-Prol, das Voraussetzung ist, um zwi-
schen Abspielgeräten und Empfangsgeräten Stereo-
Musik bzw. Audio-Daten kabellos zu übertragen.
Für eine optimale Tonqualität eines Telefongesprächs
Stellen Sie die Lautstärke nicht zu hoch ein. Eine Rück-
kopplung (Pfeifton) aus den Lautsprechern könnte die
Folge haben.
Geräte anmelden (PAIRING)
Bevor Sie die Bluetooth-Funktion nutzen können, müs-
sen Sie die Geräte untereinander anmelden.
Bedingt durch die unterschiedlichen Gerätehersteller
und Modelle, kann hier nur eine allgemeine Bedienung
beschrieben werden. Genauere Informationen entneh-
men Sie bitte der Bedienungsanleitung Ihres Bluetooth
Gerätes.
쫵HINWEIS:
• Die Bluetooth Funktion muss bei Ihrem Gerät (z.B.
Mobiltelefon) aktiviert sein.
• Es können nicht mehrere Bluetooth-Geräte gleich-
zeitig an das Radio angemeldet werden.
1. Drücken Sie die FUNCTION Taste (4/17) so oft, bis im
Display „BLUETOOTH“ erscheint.
2. Halten Sie die /PAIRING/ANSWER Taste (5/14)
gedrückt. „PAIRING“ erscheint im Display.
3. Melden Sie, wie in der Bedienungsanleitung Ihres
Mobiltelefons beschrieben, das Radio in Ihrem
Mobiltelefon an. Als Auswahl erscheint das Gerät
„KW1007“ in Ihrem Mobiltelefon.
4. Geben Sie nun das Passwort „0000“ in Ihrem Mobil-
telefon ein. Das Radio ist nun in Ihrem Mobiltelefon
angemeldet.
5. Wurde die Anmeldung erfolgreich durchgeführt,
erscheint im Display des Radios „ “ und der Name
des Mobiltelefons.
05-MC 4417 CD_MP3 AEG.indd 905-MC 4417 CD_MP3 AEG.indd 9 12.02.2008 10:14:19 Uhr12.02.2008 10:14:19 Uhr

Deutsch
10
쫵HINWEIS:
• Je nach Mobiltelefonhersteller müssen Sie die
Anmeldung (PAIRING) erneut durchführen.
• Die Bluetooth-Kompatibilität kann nicht für zu-
künftig erscheinende Geräte gewährleistet werden.
• Um eine optimale Verbindung zu gewährleisten,
achten Sie darauf das der Akku Ihres Mobiltelefons
vollständig geladen ist.
• Einige Mobiltelefonmarken verfügen über einen
Energiesparmodus. Deaktivieren Sie bitte den Ener-
giesparmodus, da es ansonsten zu Problemen beim
Telefonieren über Bluetooth geben kann.
• Um ein ankommendes bzw. abgehendes Gespräch
führen zu können, muss Bluetooth in Ihrem Mo-
biltelefon aktiviert bleiben. Dies gilt auch für die
Wiedergabe von Musikdateien über das A2D Prol.
Bitte beachten Sie die Bedienungsanleitung Ihres
Mobiltelefons.
• Bitte beachten Sie das Sie in Richtung des einge-
bauten Mikrofons sprechen. Der Anschluss eines
externen Mikrofons ist nicht möglich.
Musikübertragung (A2DP)
1. Drücken Sie die FUNCTION Taste (4/17) so oft, bis im
Display „BLUETOOTH“ erscheint.
2. Falls noch nicht geschehen, verbinden Sie die Geräte
wie im vorherigen Abschnitt beschrieben.
3. Rufen Sie in Ihrem Bluetooth Gerät die gewünschte
Musikdatei aus und starten Sie diese.
쫵HINWEIS:
Stellen Sie die Lautstärke Ihres Bluetooth Gerätes auf
eine hörgerechte Lautstärke.
Abgehende Gespräche
1. Drücken Sie die FUNCTION Taste (4/17) so oft, bis im
Display „BLUETOOTH“ erscheint.
2. Falls noch nicht geschehen, verbinden Sie die Geräte
wie im vorherigen Abschnitt beschrieben.
3. Wählen Sie, wie gewohnt über Ihr Mobiltelefon, die
gewünschte Rufnummer. „DIALING“ erscheint im
Display.
4. Sobald der Angerufene das Gespräch entgegen
nimmt, erscheint im Display „CALLING“.
5. Zum Auegen drücken Sie bitte die //BAND/
HANG UP Taste (8/16). „CALL END“ erscheint im
Display.
Ankommende Gespräche
Bei einem ankommenden Anruf, ertönt aus den Laut-
sprechern ein Klingelton und sofern der Anrufer über ein
CLIP „Calling Line Identication Presentation (Rufnum-
mernübermittlung)“-fähiges Telefon verfügt, erscheint
im Display des Radios die Nummer des Anrufers. Ansons-
ten erscheint im Display die Anzeige „IN CALL“.
1. Um ein ankommendes Gespräch entgegen zu neh-
men, betätigen Sie bitte die /PAIRING/ANSWER
Taste (5/14). Sie hören den Anrufer über die Lautspre-
cher.
2. Zum Auegen drücken Sie bitte die //BAND/
HANG UP Taste (8/16). „CALL END“ erscheint im
Display.
쫵HINWEIS:
• Sie haben die Möglichkeit das Gespräch wieder
auf Ihr Mobiltelefon zu übertragen. Drücken Sie
hierfür die /PAIRING/ANSWER Taste. „TRANSFER“
erscheint im Display.
• Je nach Merkmal Ihres Mobiltelefons, ertönt der
eigene Klingelton oder der Standard-Klingelton
vom Radio.
Reinigung und Pege
• Ziehen Sie vor der Reinigung den Netzstecker.
• Äußere Flecken können Sie mit einem leicht feuchten
Tuch, ohne Zusatzmittel, abwischen.
Technische Daten
Modell: ..............................................................MC 4417 CD/MP3
Spannungsversorgung:...........................................230 V, 50 Hz
Ausgangsleistung:...................................................100 W PMPO
Schutzklasse:....................................................................................ΙΙ
Nettogewicht:......................................................................... 3,1 kg
Radioteil:
Frequenzbereiche:............. UKW / FM 87,5 ~ 108,0 MHz
.....................MW / AM 522 ~ 1620 kHz
Technische Änderungen vorbehalten!
Konformitätserklärung
Hiermit erklärt die Firma ETV - Elektro-Technische
Vertriebsgesellschaft mbH, dass sich das Gerät MC 4417
CD/MP3 in Übereinstimmung mit den grundlegenden
Anforderungen, der europäischen Richtlinie für elek-
tromagnetische Verträglichkeit (2004/108/EG) und der
Niederspannungsrichtlinie (93/68/EWG und 2006/95/EG)
bendet.
05-MC 4417 CD_MP3 AEG.indd 1005-MC 4417 CD_MP3 AEG.indd 10 12.02.2008 10:14:20 Uhr12.02.2008 10:14:20 Uhr
Garantiebedingungen
1. Gegenüber Verbrauchern gewähren wir bei privater
Nutzung des
Geräts eine Garantie von 24 Monaten ab
Kaufdatum.
Ist das Gerät zur gewerblichen Nutzung geeignet,
gewähren wir beim
Kauf durch Unternehmer für das
Gerät eine Garantie von 12 Monaten.

Deutsch 11
Bedeutung des Symbols „Mülltonne“
Schonen Sie unsere Umwelt, Elektrogeräte gehören nicht
in den Hausmüll.
Nutzen Sie die für die Entsorgung von Elektrogeräten
vorgesehenen Sammelstellen und geben dort Ihre Elek-
trogeräte ab, die Sie nicht mehr benutzen werden.
Sie helfen damit die potenziellen Auswirkungen, durch
falsche Entsorgung, auf die Umwelt und die menschliche
Gesundheit zu vermeiden.
Sie leisten damit Ihren Beitrag zur Wiederverwertung,
zum Recycling und zu anderen Formen der Verwertung
von Elektro- und Elektronik-Altgeräten.
Informationen, wo die Geräte zu entsorgen sind, erhalten
Sie über Ihre Kommunen oder die Gemeindeverwal-
tungen.
05-MC 4417 CD_MP3 AEG.indd 1105-MC 4417 CD_MP3 AEG.indd 11 12.02.2008 10:14:20 Uhr12.02.2008 10:14:20 Uhr
Die Garantiezeit für Verbraucher reduziert sich auf 12
Monate, sofern sie ein zur gewerblichen Nutzung ge
eignetes Gerät – auch teilweise – gewerblich nutzen.
2. Voraussetzung für unsere Garantieleistungen sind der
Kauf des Geräts in Deutschland bei einem unserer Ver
tragshändler sowie die Übersen -
dung einer Kopie des
Kaufbelegs und dieses Garantiescheins an uns.
Bendet sich das Gerät zum Zeitpunkt des Garantiefalls
im Ausland, muss es auf Kosten des Käufers uns zur
Erbringung der Garantielei -
stungen zur Verfügung ge
stellt werden.
3. Mängel müssen innerhalb von 14 Tagen nach Erkenn
barkeit uns gegenüber schriftlich angezeigt werden.
Besteht der Garantiean
-
spruch zu Recht, entscheiden
wir, auf welche Art der Schaden/Mangel behoben
werden soll, ob durch Reparatur oder durch Austausch
eines gleichwertigen Geräts.
4. Garantieleistungen werden nicht für Mängel erbracht,
die auf der Nichtbeachtung der Gebrauchsanweisung,
unsachgemäßer Behand
-
lung oder normaler Abnutzung
des Geräts beruhen. Garantieansprüche sind ferner
ausgeschlossen für leicht zerbrechliche Teile, wie zum
Beispiel Glas oder Kunststo. Schließlich sind Garantie
ansprüche ausgeschlossen, wenn nicht von uns auto
risierte Stellen Arbeiten an dem Gerät vornehmen.
5. Durch Garantieleistungen wird die Garantiezeit nicht
verlängert. Es besteht auch kein Anspruch auf neue
Garantieleistungen. Diese Garantieerklärung ist eine
freiwillige Leistung von uns als Hersteller des Geräts.
Die gesetzlichen Gewährleistungsrechte (Nacherfüll
ung, Rücktritt, Schadensersatz und Minderung) werden
durch diese Garantie nicht berührt.
ETV Elektro-technische Vertriebsgesellschaft mbH
Industriering Ost 40
47906 Kempen
Stand 03 2008
-
-
-
Garantieabwicklung
Sollte Ihr Gerät innerhalb der Garantiezeit einen Mangel
aufweisen, bitten wir Sie, uns Ihren Garantieanspruch mit
zuteilen.
Die schnellste und komfortabelste Möglichkeit ist die An
meldung über unser SLI (Service Logistik International)
Internet-Serviceportal.
www.sli24.de
Sie können sich dort direkt anmelden und erhalten alle
Informationen zur weiteren Vorgehensweise Ihrer Rekla
mation.
Über einen persönlichen Zugangscode, der Ihnen direkt
nach Ihrer Anmeldung per Email übermittelt wird, können
Sie den Bearbeitungsablauf Ihrer Reklamation auf unserem
Serviceportal online verfolgen.
-
-
-
Alternativ können Sie uns den Servicefall per E-Mail
hotline@etv.de
oder per Fax
0 21 52 – 20 06 15 97
mitteilen.
Bitte teilen Sie uns Ihren Namen, Vornamen, Straße,
Hausnummer, PLZ und Wohnort, Telefon-Nummer,
soweit vorhanden, Fax-Nummer und E-Mail-Adresse mit.
Im weiteren benötigen wir die Typenbezeichnung des rek
lamierten Gerätes, eine kurze Fehlerbeschreibung, das
Kaufdatum und den Händler, bei dem Sie das Neugerät
erworben haben.
Nach Prüfung Ihres Garantieanspruches erhalten Sie von
uns einen fertig ausgefüllten Versandaufkleber. Sie
brauchen diesen Aufkleber nur noch auf die Verpackung
Ihres gut verpackten Gerätes zu kleben und das Paket bei
der nächsten Annahmestelle der Deutschen Post / DHL ab
zugeben. Der Versand erfolgt für Sie kostenlos an unser
Servicecenter bzw. Servicepartner.
Bitte fügen Sie dem Paket eine Kopie Ihres Kaufbeleges
(Kassenbon, Rech
-
nung, Lieferschein) sowie eine kurze
Fehlerbeschreibung bei.
Ohne den Garantienachweis (Kaufbeleg) kann Ihre Re
klamation nicht kostenfrei bearbeitet werden.
Bitte nehmen Sie in keinem Fall eine unfreie Einsendung
Ihres Gerätes vor. Bei unfreien Lieferungen entfällt Ihr An
spruch auf Garantieleistungen.
Haben Sie Fragen zur Bedienung, zur Inbetriebnahme oder
zum Anschluss? Gern hilft Ihnen unser Serviceteam weiter.
Sie erreichen uns Mo.- Do. 8:30 – 17:00 Uhr und
Fr. 8:30 – 14:00 Uhr unter folgender Rufnummer:
0 21 52 – 2006 666
-
-
-
-

English
12
General Safety Instructions
Read the operating instructions carefully before putting
the appliance into operation and keep the instructions in-
cluding the warranty, the receipt and, if possible, the box
with the internal packing. If you give this device to other
people, please also pass on the operating instructions.
• To avoid the risk of re or an electric shock, you
should not expose the device to rain or moisture.
Consequently, do not use the device in the immediate
vicinity of water - for example near a bath tub, a
swimming pool or in a damp cellar.
• Use the device only for the intended purpose.
• Only connect the device at a properly installed plug
socket. Pay attention that the specied voltage
corresponds to the voltage of the plug socket.
• When using external mains supply, pay attention to
the correct polarity and voltage. Always place the
batteries in the correct direction.
• Assemble the device in such a way that the available
ventilation openings are not covered.
• Never open the housing of the device. Incorrect repairs
can constitute a considerable risk for the user. Should
the device become damaged, in particular the mains
supply cable, do not operate the device any longer, but
rather have it repaired by an expert. Check the mains
supply cable regularly for damage.
• For safety reasons a broken or damaged mains lead
may only be replaced by an equivalent lead from the
manufacturer, our customer service department or a
similary qualied person.
• If the device is not used for a longer period, remove
the plug connector from the plug socket or take out
the batteries.
These symbols may be found on the machine and are
intended to indicate the following:
The lightning symbol should advise the user of
parts in the inside of the device which carry
dangerously high voltage levels.
The symbol with an exclamation mark should
advise the user of important operation or
maintenance instructions in the accompany-
ing documentation.
Devices bearing this symbol work with a „class
1 laser“ for tracing the CD. The built-in safety
switches should prevent the user being expo-
sed to dangerous laser light, which is invisible
to the human eye, when the CD compartment
is opened.
Under no circumstances should these safety switches be
bypassed or manipulated, as this could result in a danger
of exposure to the laser light.
Children and Frail Individuals
• In order to ensure your children‘s safety, please keep
all packaging (plastic bags, boxes, polystyrene etc.)
out of their reach.
WARNING!
Caution! Do not allow small children to play with
the foil as there is a danger of suocation!
• In order to protect children or frail individuals from
the hazards of electrical equipment, please ensure
that this device is only used under supervision. This
device is not a toy. Do not allow small children to
play with it.
Symbols in these Instructions for Use
Important information for your safety is specially
marked. It is essential to comply with these instructions
in order to avoid accidents and prevent damage to the
machine:
WARNING:
This warns you of dangers to your health and indicates
possible injury risks.
CAUTION:
This refers to possible hazards to the machine or other
objects.
쫵NOTE: This highlights tips and information.
Special safety information
This device works with
a class 1 laser.
Overview of the Components
1 CD compartment
2 IR Sensor for the remote control
3 /Ibutton (Standby/On)
4 FUNCTION Function selector button
5 PAIRING/ANSWER button
(connect/answer)
6 (volume) buttons
7 I/I buttons
(forward search/reverse search)
8 /BAND/HANG UP button
9 /II button (Play/Pause)
10 (open/close) CD compartment
11 LCD display
12 USB connection
13 SD/MMC Card slot
14 PHONES Headphones connection
15 Mikrophon
Reverse Side
16 FM ANT. throw-out aerial
17 SPEAKERS R/L Loudspeaker connections
18 AM ANT antenna connection
19 Mains connection
05-MC 4417 CD_MP3 AEG.indd 1205-MC 4417 CD_MP3 AEG.indd 12 12.02.2008 10:14:20 Uhr12.02.2008 10:14:20 Uhr

English 13
Remote Control
1
STANDBY button
2 MUTE (sound o) button
3 TIMER button
4 /II button (Play/Pause)
5 Ibutton (forward search)
6 ST/MO/ID3 button
7 VOLUME UP/DN (volume) buttons
8 DBBS button
9 Number buttons
10 SLEEP button
11 EQ button
12 FOLDER UP/DN buttons
(up / down album/Radio memory preset)
13 PLAY MODE button (repeat/random)
14
/PAIRING button
15 I button (reverse search)
16 //BAND button
17 FUNCTION Function selector button
18 MEMORY/CLOCK button (memory/time)
19 OPEN/CLOSE button (open/close)
Intended Use
This device is used for:
• The reception of radio programmes
• Playing back/recording audio cassettes
• Playing back audio/MP3 CDs
• Playing back les via Bluetooth
• Telephoning using a hands-free kit via Bluetooth.
It is intended exclusively for this purpose and may only
be used as such. It may only be used in the manner
described in these instructions for use. The device must
not be used for commercial purposes.
Any other use of this device is considered to be contrary
to the intended use and may result in damage to materi-
als or even personal injury.
The rm ETV – Elektro-Technische Vertriebsgesellschaft
mbH does not accept any liability for damage caused as
a result of the use of this device contrary to its intended
use.
Start-up of the device/Introduction
• Read the operating instructions thoroughly before the
start-up!
• Select an appropriate location for the device, e.g. a
dry, at, non-slip surface on which the device can be
easily operated.
• Make sure that the device is adequately ventilated!
• Connect the loudspeakers to the back of the music
centre to the sockets market „Speaker R and L“ (17).
• Remove the protective lm from the display if it is
still present.
Power Supply
• Insert the plug into a properly installed 230 V, 50 Hz
power socket.
• Please ensure that the mains voltage corresponds to
the information on the type plate.
• The stored time and stations are lost as soon as the
power supply is interrupted.
Setting the Time (in Standby Mode)
Remote Control Batteries (not supplied)
• Open the lid of the battery compartment on the back
of the remote control.
• Insert 2 batteries of type R03 „AAA“ 1,5 V. Ensure
that the polarity is correct (see the oor of the batte-
ry compartment)!
• If the remote control is not used for a prolonged pe-
riod, remove the batteries in order to prevent battery
acid leaking.
CAUTION:
• Dierent battery types or new and used batteries
must not be used together.
• Batteries are not to be disposed of together with
domestic wastes. Dispose of the used batteries at
the relevant collection bin or at your dealer’s.
WARNING:
Do not expose the batteries to high temperatures or
direct sunlight. Never throw batteries into the re.
There is a danger of explosion!
CD deck transport protection
• In order to switch on the device please press the /I
STANDBY button (3/1).
• Please open the CD compartment (1) by pressing the
OPEN/CLOSE (open/close) button (10/19). The CD
compartment opens upwards.
• Remove the transport protection from the CD player
if present before use.
• Press the OPEN/CLOSE button to close the CD
compartment again.
05-MC 4417 CD_MP3 AEG.indd 1305-MC 4417 CD_MP3 AEG.indd 13 12.02.2008 10:14:21 Uhr12.02.2008 10:14:21 Uhr
1. Press the MEMORY/CLOCK button (18 on the remote
control). The words „HR“ appear in the display.
2. Use the to choose
between the 24 hour and 12 hour display. Press the
MEMORY/CLOCK button to con rm.
쫵NOTE:
The following appears in the case of the 12 hour
display AM = in the morning,
PM = in the afternoon/evening.
3. Press the to set the hours. Press
the MEMORY/CLOCK button to con rm.
4. Press the in order to set the
minutes.
5. Press the MEMORY/CLOCK button again to store the time.
I/I buttons
12
I/I buttons
I/I buttons
(7/5/15)

English
14
General Operation
쫵NOTE:
Some keys are to be found both on the device itself
and on the remote control. Keys with the same desi-
gnation have the same function.
/I STANDBY (3/1)
Switch the device to the standby mode with the /I
STANDBY button (the time is displayed). If this button is
pressed once more, the device switches on again.
Volume (6/7)
This is used to set the individual volume. The letters
„VOL“ and a gure appear in the display. This corresponds
to the volume that has been set as far as „VOL MAX“ or
„VOL MIN“.
PHONES Headphone Socket (14)
Please use headphones with a 3.5 mm stereo jack plug;
these should be inserted into the headphone socket. The
loudspeakers are then switched o.
DBBS (8 on the remote control)
To increase or decrease the bass output.
BBS ON = on, BBS OFF = o.
Infrared remote control
For operating the music centre from a distance of up
to 5 metres without a lead. If the range of the remote
control is reduced, the batteries have to be replaced. Du-
ring operation ensure that there is nothing blocking the
direct line between the remote control and the sensor (2)
on the machine.
USB Connexion (12)
This device has been developed in accordance with
the latest technical developments in the USB eld.
Unfortunately the large number of dierent types of
USB storage media on oer today makes it impossible to
guarantee full compatibility with all USB storage media.
For this reason there may be problems in rare cases
with playing back from USB storage media. This is not a
malfunction of the device.
1. In order to switch on the device please press the /I
STANDBY switch (3/1).
2. Now press the FUNCTION button (4/17) to select the
USB mode. INSERT USB appears in the display.
3. Connect a USB storage medium.
4. Press /II (9/4) to play back the music data.
For operating instructions please see the section “Playing
CDs/MP3s”.
CAUTION:
Before removing the USB storage medium, switch the
device to TUNER operation using the FUNCTION button.
SD/MMC Card Slot (13)
1. If you would like to play back data on an SD/MMC
card please insert it into the opening provided.
2. Now press the FUNCTION button (4/17) to select the
CARD mode. INSERT CARD appears in the display.
3. Press /II (9/4) to play back the music data.
For operating instructions please see the section “Playing
CDs/MP3s”.
Listening to the Radio
1. Press the FUNCTION button (4/17) repeatedly until
„TUNER“ appears in the display.
2. Press the //BAND/HANG UP button (8/16) to
select between FM or MW.
VHF = FM, Medium wave = MW (mono)
3. Tune in to the desired station with the help of the
I/I buttons (7/5/15).
4. The FM.ST control lamp „ “ (in the display) only
lights up if the selected station is being received in
stereo quality. If reception is too weak and there is
noise on the station being received, this lamp will
icker. Try to improve reception by turning and
bending or twisting and altering the length of the
antenna (16). In the case of FM stations you can use
the ST/MO/ID3 button (6 on the remote control) to
switch between MONO and STEREO reception. Where
reception is bad we recommend switching to MONO.
5. For the reception of AM stations connect an AM an-
tenna to the AM ANT connections (18). If reception is
too weak and the station being received hisses, try to
improve reception by turning the AM antenna. In this
frequency band programs are transmitted in „mono“
only.
6. If you have found the desired station, press the
MEMORY/CLOCK button (18 on the remote control).
The word MEMORY lights up and the station memory
number ashes.
7. In order to select the program location, press the
FOLDER UP/DN buttons (12 on the remote control).
8. To store this position, press the MEMORY/CLOCK but-
ton. Please note that the programme storage location
must be entered within ve seconds as the procedure
is then cancelled.
To select a stored station press the FOLDER UP or FOLDER
DN button (12 on the remote control).
Playing CDs/MP3
This is how you play a CD
1. Press the FUNCTION button (4/17) repeatedly until
„DISC“ appears in the display.
2. In order to open the CD compartment (1), press the
OPEN/CLOSE (open/close) button (10/19). The CD
compartment opens upwards.
05-MC 4417 CD_MP3 AEG.indd 1405-MC 4417 CD_MP3 AEG.indd 14 12.02.2008 10:14:21 Uhr12.02.2008 10:14:21 Uhr

English 15
3. Place an audio CD with the printed side facing
upwards on to the central cone so that the CD locks
into place. Then close the CD compartment lid by
pressing the OPEN/CLOSE button again.
4. AUDIO CDs:
In the display the symbols “DISC” appear together
with the number of tracks and the total playing time.
Press the /II button (9/4) to play back the CD. The
CD is played from the rst track onwards. The track
currently being played and the time that has elapsed
are shown in the display.
CDs in MP3 Format:
In the display the symbols “DISC” and “MP3” appear
together with the number of folders e.g. A04 and
the total number of tracks (e.g. T126). Press the /II
key to play the CD. The CD is played back from the
rst track onwards and from the rst folder. The song
currently being played and the time that has elapsed
are shown in the display. With the FOLDER UP or
FOLDER DN (12 on the remote control) you can select
the individual folders.
5. To remove a CD, press the //BAND/HANG UP
key (8) (16 on the remote control), open the CD deck
with the OPEN/CLOSE (open/close) key and take
out the CD carefully.
Always keep the CD deck closed.
쫵NOTE:
• In the case of CDs in MP3 format that contain fol-
ders, when the device changes to a dierent folder
01 appears for the rst track of the new folder.
• If a disc is inserted incorrectly or no disc is inserted,
the letters „READING“, and „NO DISC“ (no disc)
appear in the display.
• Playback of CDs produced by the user cannot be
guaranteed due to the large variety of software and
CD media available.
Description of the CD buttons
/II (9/4)
You can briey interrupt and resume playback using this
button. The playing time that has elapsed ashes in the
display. Pressing again continues playback.
I/I (7/5/15)
With an audio CD or a CD in MP3 format playing:
With I you can jump to the next or previous track
etc. If the button is kept pressed down, the machine
starts to search through the tracks (the sound is muted).
The I button can be used as follows:
Press once = This starts the current track again
from the beginning.
Press twice = This jumps back to the previous
track.
Press three times = This plays the song before etc. If
the button is kept pressed down,
the machine starts to search
through the tracks (the sound is
muted).
In radio mode:
To tune the desired radio station.
//BAND/HANG UP (8/16)
The CD stops.
In radio mode:
To change between FM and MW.
In Bluetooth mode:
In order to nish/refuse a telephone call.
MUTE (2 on the remote control)
Used for switching o the sound immediately. The word
„MUTE“ ashes in the display. To cancel this function,
press the MUTE key again.
EQ (11 on the remote control)
(Preset equalizer function). Various sound modes are
available (CLASSIC, ROCK, POP, JAZZ, FLAT).
ST/MO/ID3 (6 on the remote control)
In FM radio mode:
To change between STEREO and MONO.
For a CD in MP3 format:
Keep pressed down: If ID-3 Tag information has been
stored this appears in the display in
the form of an LED ticker display.
Keep the button pressed down
again to switch the function o
again.
PLAY MODE (13 on the remote control)
Press once: (the emits a xed light). The
current track is repeated continuo-
usly.
Press twice: (the ALL emits a xed light).
The whole CD is played continuo-
usly.
Press three times: the display contains „ “ and the
track number that is to be played
rst. All tracks are played back in
random order.
Press four times: all functions are cancelled. The
normal play mode is resumed.
05-MC 4417 CD_MP3 AEG.indd 1505-MC 4417 CD_MP3 AEG.indd 15 12.02.2008 10:14:21 Uhr12.02.2008 10:14:21 Uhr

English
16
Only for CDs in MP3 format:
Press once: the current track is repeated
continuously ( appears in the
display).
Press twice: the selected folder of the MP3 CD
is repeated continuously ( AL-
BUM appears in the display). With
the FOLDER UP/DN buttons (12 on
the remote control) you can select
the individual folders.
Press three times: the whole CD is played conti-
nuously ( ALL appears in the
display).
Press four times: the display contains „ “ and the
track number that is to be played
rst. All tracks are played back in
random order.
Press ve times: the function is deactivated and the
CD is played in the normal mode.
FOLDER UP/DN (12 on the remote control)
Only for CDs in MP3 format:
Press these buttons during playback in order to move
one folder upwards or downwards. The display, e.g.
A001T001, appears briey. Then the MP3 CD begins to
play back automatically. If this button is pressed in stop
mode the display also appears briey. Then start playback
with the /II button.
In radio mode:
To tune the desired radio station.
SLEEP (10 on the remote control)
With the device switched on this sets the period in
1 -minute steps from 90 to 1 minutes after which the
device switches to standby. Press the button repeatedly
until the required duration is shown in the display. When
this function is activated the „ “ symbol appears in the
display. The device switches o automatically after the
set time.
In order to call up the remaining time press the SLEEP
button. This time can also be subsequently shortened or
switched o again (OFF).
TIMER (3 on the remote control)
You can set the device so that it switches on and o
again at a certain time.
1. Switch the device to the standby mode with the /I
STANDBY button (the time is displayed).
2. Keep the TIMER button pressed down until „ SELECT
SOURCES“ appears in the display. Use the FUNCTION
button (4/17) to select the switch-on mode.
3. Press the TIMER button and use the „ “ (VO-
LUME UP/DN buttons (6/7) to select the switch-on
volume VOL.
MEMORY/CLOCK (18 on the remote control)
This is used for setting the time, storing stations and
programming playback.
If this button is pressed down for approximately
3 seconds, the time is shown briey in the display.
Programmed Play
This can be used to program any desired sequence of
tracks.
1. Press the //BAND/HANG UP key (8/16).
2. Press the MEMORY/CLOCK key (18 on the remote
control). „01 PR 01“ („titel“ PR „memory location“)
appears in the display together with the word PRO-
GRAM. Use the I/I buttons (7/5/15) to select
the desired track and then press the MEMORY/CLOCK
button again. The display changes to memory slot PR
02.
3. Select the next track with the I/I key and
press the MEMORY/CLOCK key again. Repeat the
procedure until all the desired tracks are selected.
쫵NOTE:
In the case of CDs in MP3 format you can use the
FOLDER UP/DN buttons (12 on the remote control)
to select the individual folders. The rst track num-
ber of the respective folder is displayed.
4. Press the /II key (9/4). The playback starts. The rst
track number selected appears in the display. The
words „DISC“ and „PROGRAM“ appear in the display.
Press this button to pause briey the playback.
5. Press once the //BAND/HANG UP key to stop
the playback while retaining the program. The pro-
grammed number of tracks, e.g. 08 PROG is shown in
the display.
6. To resume the playback of the program press rst the
MEMORY/CLOCK key once and then the /II key.
05-MC 4417 CD_MP3 AEG.indd 1605-MC 4417 CD_MP3 AEG.indd 16 12.02.2008 10:14:22 Uhr12.02.2008 10:14:22 Uhr
4. When the TIMER button is pressed the word „SET ON
TIMER“ appears in the display
5. Press the TIMER button again. The hours gurebegins
to ash. Use the to select
the switch-on time (hours).
6. Press the TIMER button and use the
to select theswitch-on time (minutes).
7. When the TIMER button is pressed the word „SET OFF
TIMER“ appears in the display. Press the TIMER button
again. The hours gure begins to ash.
8. When setting the switch-otime, please proceed in
the same way as described above.
9. Press the TIMER button again. The device switches
back to standby. „
“disappears from the display.
I/I buttons
I/I buttons
(7/5/15)
“ appears in the display and the
timer is activated.
In order to deactivate the timer the TIMER buttonpress.
The symbol „
00

English 17
7. To delete the program, press the //BAND/
HANG UP key twice. PROG CLEAR is shown briey in
the display and the word PROGRAM goes o.
The device stops automatically once the entire sequence
of programmed tracks is completed. 08 PROG is shown in
the display, for example. The programmed order of tracks
remains in the memory until you change to a dierent
mode, remove the CD from the CD compartment or
switch o the device.
It is also possible to combine the programmed tracks
with the REPEAT function. After you have programmed
and started the device, please press the PLAY MODE
button (13 on the remote control) up to three times and
then you can use the functions as described under „PLAY
MODE“.
Playing back Music in MP3 Format
With this device it is possible to play back pieces of mu-
sic in MP3 format. The device also supports all standard
CD types: CD, CD-RW, CD-R.
This machine of is able to play MP3 CDs. Up to 200 tracks
can be compressed and stored on these CDs. Your machi-
ne detects an MP3 CD automatically (the total number
of tracks and folders appears in the display). If you would
like to play one of these CDs, proceed as described under
„Playing CDs/MP3“. Tracks can be programmed as descri-
bed under „Playing Back Programmed Tracks“.
Please note:
There are a number of dierent recording and compres-
sion methods, as well as quality dierences between CDs
and self-recorded CDs.
Furthermore, the music industry does not adhere to xed
standards (copy protection).
For these reasons it is possible that in rare cases there are
problems with the playback of CDs and MP3 CDs. This is
not a malfunction of the device.
Bluetooth Operation
Bluetooth technology is a wireless radio connection
between devices over a short distance.
쫵NOTE:
The working radius is restricted to approximately
3 metres.
Currently Bluetooth technology is mainly used for the
hands-free operation of mobile telephones. With this
device it is possible to use both the hands-free function
and play back music from a device which is compatible
with Bluetooth.
쫵NOTE:
In order to be able to use this mode the connected
device must support the A2DP prole.
• A2DP (Advanced Audio Distribution Prole)
A Bluetooth prole that is required in order to
transfer stereo music and audio les between play-
back devices and receiving devices without wires.
For Optimum Sound Quality during a Telephone Call
Do not set the volume too high. Otherwise there may be
feedback (a whistling noise) from the loudspeakers.
Registering Devices (PAIRING)
Before you can use the Bluetooth function, the devices
have to be paired with one another.
As there are many dierent models and manufacturers
of such devices, it is only possible here to give a general
description of how to operate such devices. For more de-
tailed information please see the operating instructions
of your Bluetooth device.
쫵NOTE:
• The Bluetooth function has to be activated on your
device (e.g. mobile telephone).
• It is not possible to pair several Bluetooth devices
simultaneously with the radio.
1. Press the FUNCTION button (4/17) repeatedly until
„BLUETOOTH“ appears in the display.
2. Hold the /PAIRING/ANSWER button (5/14) down.
„PAIRING“ appears in the display.
3. Register the radio in your mobile telephone as de-
scribed in the operating instructions for your mobile
telephone. The device designation „KW1007“ appears
as a choice in your mobile telephone.
4. Now enter the password „0000“ in your mobile
telephone. The radio is now registered in your mobile
telephone.
5. Once the registration has been successfully perfor-
med, „ “ appears in the display of the radio together
with the name of the mobile telephone.
쫵NOTE:
• Depending on the make of your mobile telephone,
you may have to repeat the registration (PAIRING).
• Bluetooth compatibility cannot be guaranteed for
devices which are put on the market in future.
• In order to guarantee an optimum connection,
please ensure that the battery of your mobile
telephone is fully charged.
• Some makes of mobile telephone have an energy-
saving mode. Please deactivate the energy-saving
mode, as you may otherwise have problems when
telephoning via Bluetooth.
05-MC 4417 CD_MP3 AEG.indd 1705-MC 4417 CD_MP3 AEG.indd 17 12.02.2008 10:14:22 Uhr12.02.2008 10:14:22 Uhr

English
18
쫵NOTE:
• In order to be able to conduct an incoming or
outgoing telephone call Bluetooth has to remain
activated in your mobile telephone. This also ap-
plies to the playing back of music les via the A2D
prole. Please consult the operating instructions for
your mobile telephone.
• Please ensure that you speak in the direction of the
built-in microphone. The connection of an external
microphone is not possible.
Transferring Music (A2DP)
1. Press the FUNCTION button (4/17) repeatedly until
„BLUETOOTH“ appears in the display.
2. If you have not done so already, connect the devices
as described in the previous paragraph.
3. Select and start the desired music le in your
Bluetooth device.
쫵NOTE:
Turn the volume of your Bluetooth device to a pleasant
volume.
Outgoing Calls
1. Press the FUNCTION button (4/17) repeatedly until
„BLUETOOTH“ appears in the display.
2. If you have not done so already, connect the devices
as described in the previous paragraph.
3. Dial the appropriate telephone number with your
mobile telephone in the usual manner. „DIALING“
appears in the display.
4. As soon as the person you are calling answers the
word „CALLING“ appears in the display.
5. In order to hang up please press the //BAND/
HANG UP button (8/16). „CALL END“ appears in the
display.
Incoming Calls
In the case of incoming calls a ringing tone is heard from
the loudspeakers, and if the caller has a CLIP „Calling
Line Identication Presentation“-capable telephone,
the caller’s number appears in the display of the radio.
Otherwise „IN CALL“ appears in the display.
1. To accept an incoming call, press the /PAIRING/AN-
SWER button (5/14) to conrm. You will now hear
the caller through the loudspeakers.
2. To terminate the call please press the //BAND/
HANG UP button (8/16). „CALL END“ appears in the
display.
쫵NOTE:
• You can transfer the call back to your mobile tele-
phone. In order to do so, keep the /PAIRING/AN-
SWER button pressed. „TRANSFER“ appears in the
display.
쫵NOTE:
• Depending on the features of your mobile tele-
phone you will hear either your own ringing tone
or the standard ringing tone of the radio.
Cleaning and Maintenance
• Always remove the mains plug before cleaning the
machine.
• Any marks on the surface can be wiped o with a
slightly damp cloth without any additives.
Technical Data
Model: ...............................................................MC 4417 CD/MP3
Power supply:.............................................................230 V, 50 Hz
Output rating:...........................................................100 W PMPO
Protection class:..............................................................................ΙΙ
Net weight:.............................................................................. 3,1 kg
Radio section:
Frequency ranges:................VHF / FM 87,5 ~ 108,0 MHz
...................MW / AM 522 ~ 1620 kHz
This device has been tested according to all relevant cur-
rent CE guidelines, such as electromagnetic compatibility
and low voltage directives, and has been constructed in
accordance with the latest safety regulations.
Subject to technical changes without prior notice!
05-MC 4417 CD_MP3 AEG.indd 1805-MC 4417 CD_MP3 AEG.indd 18 12.02.2008 10:14:23 Uhr12.02.2008 10:14:23 Uhr
Meaning of the “Dustbin” Symbol
Protect our environment: do not dispose of electrical
equipment in the domestic waste.
Please return any electrical equipment that you will no
longer use to the collection points provided for their
disposal.
This helps avoid the potential eects of incorrect dispo-
sal on the environment and human health.
This will contribute to the recycling and other forms of
reutilisation of electrical and electronic equipment.
Information concerning where the equipment can be
disposed of can be obtained from your local authority.

05-MC 4417 CD_MP3 AEG.indd 1905-MC 4417 CD_MP3 AEG.indd 19 12.02.2008 10:14:23 Uhr12.02.2008 10:14:23 Uhr

05-MC 4417 CD_MP3 AEG.indd 2005-MC 4417 CD_MP3 AEG.indd 20 12.02.2008 10:14:23 Uhr12.02.2008 10:14:23 Uhr
Table of contents
Languages:
Other AEG Stereo System manuals

AEG
AEG MC 4443 User manual

AEG
AEG MC 4461 BT User manual

AEG
AEG BSS 4818 User manual

AEG
AEG MC 4416 CD/MP3 Technical specifications

AEG
AEG MC 4432 CD User manual

AEG
AEG MC 4401 CD Technical specifications

AEG
AEG MC 4458 iP User manual

AEG
AEG MC 4469 DAB+ User manual

AEG
AEG MC 4413 CD/MP3 Technical specifications

AEG
AEG BSS 4808 User manual

AEG
AEG MC 4448 DVD User manual

AEG
AEG MC 4450 iP User manual

AEG
AEG SR 4375 User manual

AEG
AEG MC 4410 CD/MP3 Technical specifications

AEG
AEG SR 4379 CD User manual

AEG
AEG MC 4455 CD/MP3 User manual

AEG
AEG MC 4431 CD User manual

AEG
AEG BSS 4817 User manual

AEG
AEG SR 4339 User manual

AEG
AEG MC 4412 CD/MP3 Technical specifications