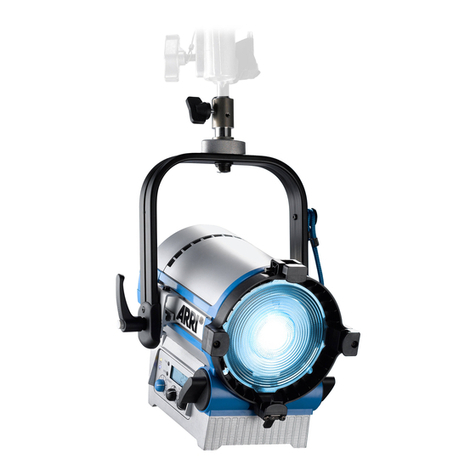
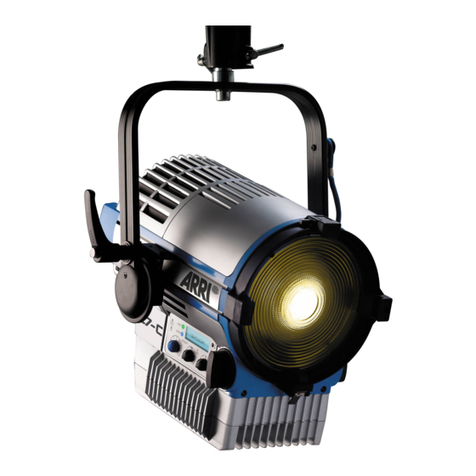
ARRI Orbiter L2.0039421 User manual

Docking Ring
Arnold & Richter Cine Technik GmbH & Co. Betriebs KG, Arriweg 17, D-83071 Stephanskirchen, Germany | www.arri.com
L5.0041728
User Manual
Bedienungsanleitung
Manual de Usuario
Mode d‘emploi
12 / 2021
ドッキングリング
ユーザーマニュアル
L03840

1 Thumb screw
2 Swivel bracket
3 Safety loop attachment
4 Condensor lens
5 Accessory holder
6Fan
7 Digital Optics Interface (5-pin)
8 Second reflector
9 Locking pin
10 Locking slider
11 Guide for locking pin
1 Rändelschraube
2 Schwenkarm
3 Ankerpunkt für Sicherungsseil
4 Kondensorlinse
5 Aufnahme für Zubehör
6 Lüfter
7 Digitale Optikschnittstelle (5-pol.)
8 Sekundärreflektor
9 Sicherungsstift
10 Verriegelungsschieber
11 Aufnahme für Sicherungsstift
1 Tornillo de mariposa
2 Soporte giratorio
3 Fijación del lazo de seguridad
4 Lente del condensador
5 Soporte de accesorios
6 Ventilador
7 Interfaz óptica digital (5 pines)
8 Segundo reflector
9 Pin de bloqueo
10 Deslizador de bloqueo
11 Guía del pin de bloqueo
1 Molette
2 Clapet
3 Fixation de l’élingue de sécurité
4 Lentille condenseur
5 Porte accessoire
6 Ventilateur
7Interface optique numérique (5
broches)
8 Second réflecteur
9 Broche de verrouillage
10 Glissière de verrouillage
11 Guide pour le verrouillage
1 つまみねじ
2 スイベルブラケット
3 セーフティーループアタッチメント
4 コンデンサーレンズ
5 付属品ホルダー
6 ファン
7
デジタル光学インターフェイス(5-pin)
8 セカンドリフレクター
9 ロックピン
10 ロックスライダー
11 ロックピンのガイド
13
45
8
6
7
2
11
10
ARRI, the ARRI Logo, ARRIMAX, ARRISUN, EB, , L-Series, MAX Technology, M-Series, Orbiter, POCKETPAR, Quick
Lighting Mount, True Blue, SkyPanel, SKYPANEL, T 12 and T 24 are registered Trademarks of Arnold & Richter Cine Technik
GmbH & Co. Betriebs KG
12
9

3
Intended use
This product is an accessory for the „Orbiter“ luminaire.
It is intended to mount non-ARRI accessories to the Orbiter to
illuminate persons and objects.
Always follow the safety information.
Any usage other than described above is not permitted and can
damage the product and lead to associated risks such as short-
circuit, fire, electric shock, etc. You are not allowed to modify the
product.
This product fulfills all legal requirements.
Safety Instructions
• Please read and observe all instructions delivered with the
Orbiter Docking Ring, the ARRI Orbiter, accessories and
third-party accessories before use. The instructions contain
important information for safe handling.
• Please observe the weight of the accessories. Refer also to
the leaflet „Operating your ARRI Lampheads Safely“
L5.40731.E.
Observe the safety and warning instructions in the „Orbiter
User Manual“ and the „Safety and Installation Manual“.
They are available for free download on the website
www.arri.com.
• Please keep all instructions delivered with the product for
possible subsequent owners.
• The Orbiter Docking Ring must not be used without an
accessory mounted to the Orbiter Docking Ring. Risk of
damage and pollution of the Orbiter and the Orbiter Docking
Ring.
• Do not hold and carry the Orbiter Docking Ring on the open
swivel arm.
• Danger of crushing / shearing fingers or cables at the swivel
arm.
• Sharp edge! Do not touch the secondary reflector.
• Caution - breaking glass. Replace a broken condensor lens
immediately. Do not use an accessory with broken
condensor lens.
The user must:
• Be qualified for the appropriate use of the accessory.
• Follow the user manual.
• Ensure safe usage.
• Use the product in accordance with regulations.
• Follow the latest regulations and standards.
ARRI is not liable for damages caused by improper use or incor-
rect operation.
To Mount the Orbiter Docking Ring to the
Orbiter
• Remove the protective cap from the Quick Lighting Mount.
• Align the locking pin (9) with the guide for the locking pin
(11) and insert the Docking Ring in the Quick Lighting
Mount.
• Turn the Orbiter Docking Ring clockwise, until the locking
slider (10) audibly engages. The Orbiter will not light up, if
the Orbiter Docking Ring is not mounted properly.
• The Orbiter Docking Ring must be secured with a suitable
safety cable. Pass the safety cable through the safety loop
attachment (3) and the supporting structure or the upper
handle of the Orbiter.
Always secure the Docking Ring against falling with a safe-
ty cable if the primary catch fails!
To Mount an Accessory to the Orbiter
Docking Ring
• Open the thumb screw (1) and fold to the left.
• Open the swivel bracket (2).
• Insert the accessory slightly diagonally from above.
• Close the swivel bracket (2).
• Close the thumb screw (1) and tighten it.
Always secure the accessory against falling with a safety
cable if the primary catch fails!
To Rotate the Accessory
• Loosen the thumb screw (1). Do not remove the thumb
screw nor open the swivel bracket (2).
• Rotate the accessory to the desired position in either direc-
tion from the centered position.
• Once the accessory is positioned, tighten the thumb screw
(1) to lock into position.
Automatic Optic Recognition
The digital optics interface of the Quick Lighting Mount recogniz-
es the Orbiter Docking Ring attached to the luminaire. It adapts
the light output for best performance. If the digital optics inter-
face fails to recognize the Orbiter Docking Ring correctly, please
clean the contacts as described in the Orbiter „Safety and Instal-
lation Manual“ which is available for free download on the ARRI
website.
To Remove an Accessory from the
Orbiter Docking Ring
• Remove the safety cable securing the accessory.
• Open the thumb screw (1) and fold to the left.
• Open the swivel bracket (2).
• Remove the accessory by moving it slightly diagonally to
the top.
• Close the swivel bracket (2).
• Close the thumb screw (1) and tighten it.
To Remove the Orbiter Docking Ring
• Remove the safety cable from the Orbiter Docking Ring.
• Push the locking slider (10) inwards and turn the Orbiter
Docking Ring counterclockwise until it stops.
• Remove the Orbiter Docking Ring and place the protective
cap on the Quick Lighting Mount.
Maintenance and Cleaning
Inspect the product regularly for visible damage.
• Do not use a damaged, deformed or dirty product.
• Remove loose dust and dirt by vacuuming or blowing out
with low-pressure compressed air.
• Remove greasy deposits with a soft, lint-free cloth moist-
ened with plastic cleaner. You can also use benzene-free
petroleum ether or isopropanol. The cleaning agent must
not contain benzene, ethanol, alcohol, organic substances
or thinner. Dry the product with a soft, lint-free cloth.
ENGLISH

Bestimmungsgemäße Verwendung
Das Produkt ist ein Zubehör des Scheinwerfers „Orbiter“.
Es ermöglicht die Montage von Zubehör von Drittanbietern an
den Orbiter, um Personen und Gegenstände zu beleuchten.
Befolgen Sie unbedingt die Sicherheitshinweise!
Eine andere als die beschriebene Verwendung führt zur Be-
schädigung dieses Produktes. Dies ist mit Gefahren, wie z.B.
Kurzschluss, Brand, elektrischer Schlag etc. verbunden. Das
Produkt darf nicht geändert bzw. umgebaut werden.
Dieses Produkt erfüllt alle gesetzlichen Anforderungen.
Sicherheitshinweise
• Bitte lesen Sie diese und alle mit dem Orbiter Docking Ring,
dem ARRI Orbiter, Zubehör und Zubehör von Drittanbietern
gelieferten Anleitungen vor der ersten Verwendung. Sie
enthalten wichtige Hinweise für die sichere Handhabung.
• Beachten Sie das Gewicht des Zubehörs. Beachten Sie die
Hinweise im „Sicherheitsmerkblatt für ARRI-Scheinwerfer“
L5.40731.E.
Beachten Sie die Sicherheits- und Warnhinweise in der
Bedienungsanleitung und den „Sicherheits- und Installati-
onshinweisen“ des Orbiter. Sie stehen zum kostenlosen
Download unter www.arri.com zur Verfügung.
• Bewahren Sie diese und alle mit dem Produkt gelieferten
Anleitungen für eventuelle Nachbesitzer sorgfältig auf.
• Der Orbiter Docking Ring darf nicht ohne Zubehör verwen-
det werden. Gefahr der Beschädigung und Verschmutzung
des Orbiters und des Orbiter Docking Rings.
• Halten und tragen Sie den Orbiter Docking Ring nicht am
geöffneten Schwenkarm.
• Gefahr des Quetschens / Abscherens von Fingern oder
Leitungen am Schwenkbügel.
• Scharfe Kante! Greifen Sie nicht in den Sekundärreflektor.
• Vorsicht - Glasbruch. Eine gesprungene Kondensorlinse ist
unverzüglich zu ersetzen. Zubehör mit gesprungener
Kondensorlinse darf nicht verwendet werden.
Der Anwender muss:
• Für die Verwendung des Zubehörs qualifiziert sein.
• Die Bedienungsanleitung beachten.
• Den gefahrlosen Betrieb sichern.
• Das Produkt bestimmungsgemäß verwenden.
• Die aktuellen Normen und Bestimmungen beachten.
ARRI haftet nicht für Schäden durch nicht bestimmungsgemäße
Verwendung oder falsche Bedienung.
Montage des Orbiter Docking Rings
• Entfernen Sie die Schutzkappe vom Quick Lighting Mount.
• Richten Sie den Sicherungsstift (9) auf die Aufnahme (11)
aus und setzen Sie den Orbiter Docking Ring in den Quick
Lighting Mount ein.
• Drehen Sie den Orbiter Docking Ring im Uhrzeigersinn, bis
der Verriegelungsschieber (10) hörbar einrastet. Der Orbi-
ter leuchtet nicht, wenn der Orbiter Docking Ring nicht kor-
rekt montiert wurde.
• Der Orbiter Docking Ring muss mit einem geeigneten
Sicherungsseil gesichert werden. Führen Sie das Siche-
rungsseil durch den Ankerpunkt für das Sicherungsseil (3)
und zur tragenden Struktur oder den oberen Tragegriff des
Scheinwerfers.
Sichern Sie den Orbiter Docking Ring immer mit einem
Sicherungsseil gegen Absturz, falls die primäre Sicherung
versagt!
Montage eines Zubehörs am Orbiter
Docking Ring
• Öffnen Sie die Rändelschraube (1) und klappen Sie die
Schraube nach links.
• Öffnen Sie den Schwenkbügel (2).
• Führen Sie das Zubehör leicht diagonal von oben in den
Orbiter Docking Ring ein.
• Schließen Sie den Schwenkbügel (2).
• Klappen Sie die Rändelschraube (1) nach rechts, über den
Schwenkbügel (2) und ziehen Sie die Rändelschraube fest.
Sichern Sie das Zubehör immer mit einem Sicherungsseil
gegen Absturz, falls die primäre Sicherung versagt!
Drehen des Zubehörs
• Lösen Sie die Rändelschraube (1). Entfernen Sie die
Rändelschraube nicht und öffnen Sie den Schwenkarm (2)
nicht.
• Drehen Sie das Zubehör in die gewünschte Position in
beiden Richtungen der Mittelposition.
• Ziehen Sie nach Ausrichtung des Zubehörs die Rändel-
schraube (1) fest, um das Zubehör zu blockieren.
Automatische Optikerkennung
Die digitale Optikschnittstelle des Quick Lighting Mounts erkennt
den Orbiter Docking Ring automatisch und passt die optischen
Eigenschaften der Light Engine optimal an. Wenn der Orbiter
Docking Ring nicht automatisch erkannt wird, reinigen Sie bitte
die Kontakte, wie in den Orbiter „Sicherheits- und Installations-
hinweisen“ beschrieben. Sie stehen zum kostenlosen Download
auf der ARRI Webseite zur Verfügung.
Entfernen eines Zubehörs vom
Orbiter Docking Ring
• Entfernen Sie das Sicherungsseil des Zubehörs.
• Öffnen Sie die Rändelschraube (1) und klappen Sie die
Schraube nach links.
• Öffnen Sie den Schwenkbügel (2).
• Ziehen Sie das Zubehör leicht diagonal nach oben aus dem
Orbiter Docking Ring .
• Schließen Sie den Schwenkbügel (2).
• Klappen Sie die Rändelschraube (1) nach rechts, über den
Schwenkbügel (2) und ziehen Sie die Rändelschraube fest.
Demontage des Orbiter Docking Rings
• Lösen Sie das Sicherungsseil vom Orbiter Docking Ring.
• Drücken Sie den Verriegelungsschieber (10) nach innen
und drehen Sie den Orbiter Docking Ring bis zum Anschlag
gegen den Uhrzeigersinn.
• Nehmen Sie den Orbiter Docking Ring ab und setzen Sie
die Schutzkappe auf den Quick Lighting Mount auf.
Wartung und Reinigung
Prüfen Sie das Produkt regelmäßig auf sichtbare Schäden.
• Verwenden Sie kein beschädigtes, deformiertes oder ver-
schmutztes Produkt.
• Entfernen Sie losen Staub und Schmutz durch Saugen oder
Ausblasen mit Druckluft geringen Drucks.
• Entfernen Sie schmierige Ablagerungen mit einem wei-
chen, fusselfreien Tuch, das mit Kunststoffreiniger befeuch-
tet wurde. Sie können auch benzolfreies Reinbenzin oder
Isopropanol verwenden. Das Reinigungsmittel darf kein
Benzol, Ethanol, Alkohol, organische Stoffe oder Verdün-
nungen enthalten. Trocknen Sie das Produkt mit einem wei-
chen, fusselfreien Tuch.
DEUTSCH
5
Intención de uso
Este producto es un accesorio para la luminaria „Orbiter “. Está
diseñado para montar accesorios no pertenecientes a ARRI en
el Orbiter para iluminar personas y objetos.
Siempre siga la información de seguridad.
Otro uso descrito a continuación, no está permitido y puede cau-
sar daño al producto estar asociado a riesgos como corto circui-
to, incendio, descarga eléctrica, etc. No tiene permitido realizar
modificaciones al producto.
El producto cumple todos los requerimientos legales.
Instrucciones de seguridad
• Lea y observe todas las instrucciones entregadas con el Or-
biter Docking Ring, el ARRI Orbiter, accesorios y acceso-
rios de proveedores previamente a su uso. Las
instrucciones contienen información importante para un
manejo seguro.
• Observe el peso de los accesorios. Consulte también el fo-
lleto “Manejo seguro de sus cabezales ARRI L5.40731.E.”
Observe las instrucciones de seguridad y de advertencia en
el “Manual de Usuario Orbiter” e “Seguridad e Instalación
Manual”. Están disponibles para su descarga gratuita en el
sitio web www.arri.com.
• Conserve todas las instrucciones entregadas con el pro-
ducto para dueños subsecuentes.
• El Orbiter Docking Ring, no debe ser utilizado sin algún ac-
cesorio montado en Orbiter Docking Ring. Riesgo de daño
y contaminación del Orbiter y del Orbiter Docking Ring.
• No sostenga ni lleve el Orbiter Docking Ring utilizando el
brazo giratorio.
• Peligro de aplastamiento / cizallamiento de dedos o cables
en el brazo giratorio.
• ¡Borde filoso! No meta la mano en el reflector secundario.
• Precaución -cristal roto. Reemplace un lente roto del con-
densador inmediatamente. No use un accesorio con un len-
te del condensador roto.
El usuario debe:
• Estar calificado para usar apropiadamente el accesorio.
• Seguir el manual de usuario.
• Asegurar un uso adecuado y Seguro.
• Utilizar el producto de acuerdo con las regulaciones.
• Seguir las últimas regulaciones y estándares.
ARRI no se hace responsable de daños causados para un uso
inadecuado o una operación incorrecta.
Para Montar el Orbiter Docking Ring
en el Orbiter
• Retire la tapa protectora del Montaje de Luz Rápido.
• Alinee el pin de bloqueo (9) con la guía del pin de bloqueo
(11) e inserte el anillo de acoplamiento en el Montaje de Luz
Rápido.
• Gire el Orbiter Docking Ring en sentido horario, hasta que
el deslizador de bloqueo (10) se enganche de forma audi-
ble. El Orbiter no iluminará si el Orbiter Docking Ring está
incorrectamente montado.
• El Orbiter Docking Ring debe estar asegurado con un cable
de seguridad. Pase el cable de seguridad a través del so-
porte giratorio (2) y la estructura de soporte o el asa supe-
rior del Orbiter.
¡Siempre asegure el anillo de acoplamiento para evitar caí-
das por medio de un cable de seguridad, si falla el cierre pri-
mario!
Para montar un Accesorio al
Orbiter Docking Ring
• Abra el tornillo de mariposa (1) y doble hacia la izquierda.
• Abra la abrazadera giratoria.
• Inserte el accesorio ligeramente en diagonal desde arriba.
• Cierre la abrazadera giratoria (2).
• Cierre el tornillo de mariposa (1) y apriételo.
¡Siempre asegure el anillo de acoplamiento para evitar caí-
das por medio de un cable de seguridad, si falla el cierre pri-
mario!
Para girar el accesorio
• Afloje el tornillo de mariposa (1). No retire el tornillo de ma-
riposa ni abra el giratoria (2).
• Gire el accesorio hasta la posición deseada en cualquier di-
rección desde la posición centrada.
• Una vez colocado el accesorio, apriete el tornillo de maripo-
sa (1) para fijarlo en su posición.
Reconocimiento Óptico Automático
La interfaz óptica digital del Montaje Rápido de Luz reconoce el
Orbiter Docking Ring acoplado a la iluminaria. Adapta la salida
de luz para un mayor rendimiento. Si la interfaz óptica digital fa-
lla al reconocer el Orbiter Docking Ring correctamente, por fa-
vor, limpie los contactos como es descrito en el Orbiter “Manual
de Seguridad e Instalación” el cual está disponible para una
descarga gratuita en la página web ARRI.
Para Retirar un Accesorio del
Orbiter Docking Ring
• Retire el cable de seguridad asegurando el accesorio.
• Abra el tornillo de mariposa (1) y doble a la izquierda.
• Abra el soporte giratorio (2).
• Retire el accesorio moviéndolo ligeramente en diagonal ha-
cia la parte superior.
• Cierre el soporte giratorio (2).
• Cierre el tornillo de mariposa (1) y apriételo.
Para retirar el Orbiter Docking Ring
• Retire el cable de seguridad del Orbiter Docking Ring.
• Presione el deslizador de bloqueo (10) hacia el interior y
gire el Orbiter Docking Ring en sentido contrario a las ma-
necillas del reloj hasta que tope.
• Retire el Orbiter Docking Ring y coloque la tapa protectora
del Montaje de Luz Rápido.
Mantenimiento y Limpieza
Inspeccione el producto regularmente para detectar daños visi-
bles.
• No utilice un producto dañado, deformado o sucio.
• Retire polvo y suciedad sueltos aspirando o soplando con
aire comprimido a baja presión.
• Retire depósitos de grasa con un paño suave de lino hume-
decido con un limpiador de plástico. Usted puede utilizar
éter de petróleo sin benceno o isopropanol. El producto de
limpieza no debe contener benceno, etanol, alcohol, sus-
tancias orgánicas o diluyentes. Secar el producto con un
paño suave y sin pelusas.
ESPAGÑOL

Conditions d’utilisation
Ce produit est un accessoire pour le luminaire «Orbiter». Il est
conçu pour éclairer des personnes et des objets.
Respectez toujours les précautions d’emploi.
Tout autre usage que ceux décrits ici est interdit et peut endom-
mager le produit et conduire à des risques tels que courts-cir-
cuits, incendie, électrisation etc. Vous n'êtes pas autorisé à
modifier le produit.
Ce produit répond à des dispositions légales.
Précautions d’emploi
• Lisez et respectez toutes les instructions fournies avec
l’Orbiter Docking Ring, l’Orbiter de ARRI et ses accessoires
d’origine ou de tierces parties avant son utilisation. Ces ins-
tructions contiennent des informations de sécurité impor-
tantes.
• Considérez le poids de tous les accessoires. Reportez-vous
à la brochure „Operating your ARRI Lampheads Safely“
L5.40731.E.
Respectez les instructions de sécurité et les mises en garde
présentes dans les manuels d’utilisation et de sécurité de
l’Orbiter. Vous pouvez les télécharger gratuitement sur le
site web www.arri.com.
• Conservez tous les documents fournis pour un prochain uti-
lisateur potentiel.
• L’Orbiter Docking Ring ne doit pas être utilisé sans acces-
soire installé. Vous pourriez endommager et polluer l’Orbi-
ter mais aussi l’Orbiter Docking Ring.
• Ne soulevez pas et ne transportez pas l’Orbiter Docking
Ring par son clapet basculant.
• Risque de cisaillement ou d’écrasement des doigts ou des
câbles avec le clapet.
• Bords tranchants : n’essayez pas d’accéder au second ré-
flecteur.
• Attention : bris de verre - remplacez le condenseur immé-
diatement s’il est endommagé. N’utilisez pas l’accessoire si
cette lentille est brisée.
L’utilisateur doit :
• Être qualifié pour son usage dans les règles de l'art.
• Suivre le manuel d'utilisation.
• Garantir un usage en toute sécurité.
• Utiliser le produit en concordance avec la réglementation.
• Respecter les dernières normes et régulations en vigueur.
ARRI n'est pas responsable des dommages causés par une uti-
lisation ou une mise en œuvre inappropriée du produit.
Installation de l’Orbiter Docking Ring sur
l’Orbiter
• Retirez le bouchon de protection du support d’assemblage
rapide.
• Alignez la broche (9) avec son guide (11) et insérez l’Orbiter
Docking Ring dans le support QLM..
• Tournez l’Orbiter Docking Ring dans le sens horaire jusqu’à
ce que le verrouillage (10) s’engage de façon audible.
L’Orbiter ne s’illuminera pas si l’Orbiter Docking Ring n’est
pas installé correctement.
• L’Orbiter Docking Ring doit être sécurisé avec une élingue
adaptée. Passez l’élingue dans l’oeillet prévu à cet effet (3)
puis autour de la structure porteuse. Sécurisez toujours
l’Orbiter Docking Ring contre les risques de chute en cas de
rupture de la suspension primaire !
Montage d’un accessoire sur le
l‘Orbiter Docking Ring
• Dévissez la molette (1) et laissez-la à pendre à gauche.
• Ouvrez le clapet basculant (2).
• Insérez l’accessoire par le dessus, légèrement en diago-
nale.
• Fermez le clapet (2).
• Verrouillez l’ensemble en resserrant la molette (1) ferme-
ment.
Sécurisez toujours l’accessoire avec une élingue de sécuri-
té en cas de rupture de l’accroche primaire !
Pour faire pivoter l'accessoire
• Desserrez la molette (1). Ne pas retirer la vis à ailettes ni
ouvrir le clapet (2).
• Faites pivoter l'accessoire dans la position souhaitée, dans
un sens ou dans l'autre, à partir de la position centrée.
• Une fois l'accessoire positionné, serrez la molette (1) pour
le verrouiller en position.
Identification automatique
L’interface numérique optique du support de montage reconnait
l’Orbiter Docking Ring monté sur le luminaire. Il adapte la sortie
lumineuse pour obtenir les performances optiques optimales de
l’accessoire installé. Si l’interface numérique ne reconnait pas
l’Orbiter Docking Ring, nettoyez les contacts comme indiqué
dans le manuel d’Installation et de Sécurité de l’Orbiter, télé-
chargeable gratuitement sur le site web www.arri.com.
Démontage d’un accessoire sur l‘Orbiter
Docking Ring
• Retirez l’élingue de sécurité de l’accessoire.
• Dévissez la molette (1) et laissez-la à pendre à gauche.
• Ouvrez le clapet.
• Retirez l’accessoire et le tirant vers le haut, légèrement en
diagonale.
• Fermez le clapet.
• Revissez la molette fermement.
Démontage du l‘Orbiter Docking Ring
• Retirez l’élingue de sécurité du l’Orbiter Docking Ring.
• Poussez la glissière (10) vers l’intérieur et tournez l’Orbiter
Docking Ring Ring dans le sens antihoraire jusqu’à la
butée.
• Déposez l’Orbiter Docking Ring et remontez le capot de
protection sur le support Quick Lighting Mount.
Maintenance et nettoyage
Inspectez le produit régulièrement pour déceler les dommages
visibles.
• N’utilisez pas un produit déformé.
• Retirez la poussière et les particules agglomérées en les
aspirant ou en les soufflant avec de l’air comprimé.
• Retirez les dépôts gras avec un linge doux sans peluche
imbibé d’un nettoyant pour plastiques. Vous pouvez aussi
utiliser du pétrole dénaturé ou de l’alcool isopropylique. Le
produit ne doit contenir ni benzène, ni éthanol, ni alcool, ni
agent organique. Séchez l’appareil avec un linge doux et
sans peluche.
FRANÇAIS

7
使用目的
この製品は照明器具 „Orbiter“ の付属品で ある。人物や物
に 照明を照らす為に使う。
必ず 安全事項に従って使用する。
製品の故障や破損、電気ショックや火事など の事故を防く
゙た め、記載されている以外の目的で の使用は禁止されて
いる。 製品の改造も禁止されている。
この製品は法的必要条件を満たしている
安全事項
• ドッキングリング、ARRI Orbiter、そして付属品にに同封
されている説明書を読んでから使用する。製品を安全に
使うための大切な情報が記載されている。
• 付属品の重量を確認する。”ARRI ランプヘッドを安全に
使用する ” L5.40731.E. を参照。”Orbiter ユーザーマ
ニュアル ” の安全事項と ” 安全事項と取り付けマニュ
アル ” を確認する。ARRI のウェブサイト www.arri.com
で無料ダウンロードができる。
• 説明書は次の利用者の為にも必ず保管する。
• Orbiter ドッキングリングはアクセサリーマウント無しで
使用してはいけない。Orbiter と Orbiter ドッキングリン
グへのダメージと汚染のリスクがある。
• Orbiter ドッキングリングのスイベルアームを持って機器
を運んだり持ち上げたりしない。
• スイベルアームで指やケーブルを潰して / 挟んでしまう
危険性あり。
• 鋭い刃!セカンドリフレクターに触れない。
• 危険ー割れたガラス。コンデンサーレンズを直ちに交換
する。コンデンサーレンズが破損した状態で機器を使用
しない。
利用者は必ず:
• 製品を扱う資格がある事
• ユーザーマニュアルに従う事
• 安全に利用する事
• 規則に従い製品を使用する事
• 最新の規定に従い使用する事
ARRI は不適切に使用した際に起こった故障や事故の責任は一
切負わない。
Orbiter に Orbiter ドッキングリングを固定
• クイックライティングマウントの防護キャップを外す
• ロックピン(9)をロックピンのガイド(11)と並べて、
ドッキングリングをクイックライティングマウントに挿
入する。
• ロックスライダー(10)がかみ合う音がするまで Orbiter
ドッキングリングを時計回りに回す。Orbiter ドッキング
リングが正しく固定されていない場合、Orbiter は光らな
い。
• Orbiter ドッキングリングはセーフティーケーブルで固定
する必要がある。セーフティーケーブルをセーフティー
ループアタッチメント(3) と Orbiter の上部にあるハン
ドルに通す。
必ずドッキングリングを安全ケーブルに繋いで固定する!
Orbiter ドッキングリングに付属品を固定する
• つまみねじ(1)を開いて左に折る。
• スイベルブラケットを開く。
• 付属品を斜め上から挿入する。
• スイベルブラケットを閉じる。
• つまみねじを閉じてきちんと締める。
必ずドッキングリングを安全ケーブルに繋いで固定する!
アクセサリーを回転させるには
• つまみネジ (1) を緩める。つまみネジを外したり、スイ
ベルブラケット (2) を開けたりしないでください。
• アクセサリーを中央の位置からいずれかの方向に希望の
位置まで回転させます。
• アクセサリの位置が決まったら、つまみネジ (1) を締め、
位置を固定します。
自動光学認識
クイックライティングマウントのデジタル光学インターフェ
イスは照明器具に取り付けられている Orbiter ドッキングリ
ングを認識することが できる。 ライトアウトプットも合わせ
て最適化される。 デジタル光学インターフェイスがもし取り付
けられている Orbiter ドッキングリングを正しく認識しない
場合、Orbiter の安全と設置のマニュアルを ARRI のウェブサ
イトからダウンロードして、コンタクトを消去する方法を取
得する。
Orbiter ドッキングリングから付属品を取り外す
• セーフティーケーブルを取る。
• つまみねじ(1)を開いて左に折る。
• スイベルブラケットを開く。
• 付属品を斜め上から取り外す。
• スイベルブラケットを閉じる。
• つまみねじを閉じてきちんと締める。
Orbiter ドッキングリングを外す
• もう片方の Orbiter ドッキングリングからセーフティー
ケーブルを取る。
• ロックスライダー(10)を内側に押して、止まるまで
Orbiter ドッキングリングを反時計回りに回す。
• Orbiter ドッキングリングを外して、防護キャップをク
イックライティングマウントに付ける。
メンテナンスと掃除
破損や不備がないか、製品を定期的に確認する。
• 破損 / 故障している製品、あるいは汚れている製品の使
用はやめる。
• 掃除機や低圧コンプレッサーなどで付着している埃や汚
れを取り除く。
• プラスチッククリーナーと繊維が抜けない柔らかい湿っ
た布を使って油などの汚れを拭き取る。イソプロパノー
ルとベンゼン不使用の石油も使用できる。使用する掃除
用品にベンゼン、エタノール、アルコール、有機物、ま
たはシンナーが含まれていないことを確認する。柔らか
い繊維が抜けない乾いた布で製品を乾かす。
日本の

Specification / Technische Daten / Especificaciones / Spécifications technique /
仕様
Orbiter Docking Ring /
Orbiter ドッキングリング
Ident number
Identnummer
Número de identificación
Référence
買付番号
L2.0039421
Dimensions (WxHxD)
Abmessungen (BxHxT)
Dimensiones (WxHxD)
Dimensions (LxHxP)
寸法 ( 幅x高さ x奥行き )
approx. 246 x 225 x 86 mm / 9.7 x 8.9 x 3.4 in
Weight
Gewicht
Peso
Poids
荷重
approx. 1,2 kg / 2.6 lbs
Max. Belastbarkeit am Schwerpunktabstand
Max. Load at Gravity Center
Masse maximale au centre de gravité
7,9 kg @ 270 mm
17.4 lbs @ 10.6 in
Ingress Protection
Schutzart
Tipo de Protección
Indice de protection
イングレスプロテクション
IP24
conditionally weatherproof
bedingt wetterfest
Protection Class
Schutzklasse
Clase de Protección
Classe de protection
プロテクションクラス
III
Operating temperature
Zulässige Umgebungstemperatur
Temperatura de Operación
Température d’utilisation
起動中温度
ta = -20° C / + 45° C
ta = -4° F / +113° F

Specification for third party accessories / Spezifikation für Zubehör von Drittanbietern / Especificaciones de accesorios
de proveedores / Spécifications pour les accessoires de tierce partie /
付属品の仕様
0.94 in / 24,0 mm
0.52 in / 13,2 mm
⌀5.3 in / 134 mm
⌀6.3 in / 161,35 mm
Longitudinal Section / Längsschnitt / Sección longitudinal / Vue en coupe / 縦断断面
Front Side / Vorderseite / Parte delantera / Face avant / フロントサイド
Orbiter Docking Ring
Third-party accessory
Zubehör
Accesorio de proveedor
Accessoire
サードパーティー付属品


Design and specifications are subject to change without notice.
Technische Änderungen vorbehalten.
El diseño y las especificaciones están sujetos a cambios sin
previo aviso.
Conception et spécifications sujettes à modification sans
préavis.
デザインや仕様は予告なしで変更する場合がある.
ARRI Service
In case of technical problems please visit us at:
Bei technischen Problemen besuchen Sie bitte
En caso de problemas técnicos, por favor consúltenos en
En cas de problème technique, consultez le site
質問や問題がある場合はホームページをアクセスしてく
ださい:
www.arri.com
Arnold & Richter Cine Technik GmbH & Co. Betriebs KG
Global Application & Services
Arriweg 17
D-83071 Stephanskirchen
Germany

Table of contents
Languages:
Other ARRI Lighting Equipment manuals

ARRI
ARRI ARRILITE 2000 Plus Manual

ARRI
ARRI Orbiter User manual

ARRI
ARRI Orbiter How to use

ARRI
ARRI EB MAX 2,5/4 User manual

ARRI
ARRI ARRI D 5 User manual

ARRI
ARRI DAYLIGHT 18/12 PLUS User manual

ARRI
ARRI SkyPanel User manual

ARRI
ARRI X 2 User manual

ARRI
ARRI MAXMOVER Work Light User manual

ARRI
ARRI Orbiter L2.0039438 User manual

ARRI
ARRI SkyPanel Manual

ARRI
ARRI Skypanel PSU S360 User manual

ARRI
ARRI M18 User manual

ARRI
ARRI Skypanel DoPchoice SnapBag User manual

ARRI
ARRI EB 575/800 User manual

ARRI
ARRI ARRIMAX 18/12 User manual

ARRI
ARRI AD 18/12 User manual

ARRI
ARRI Orbiter User manual

ARRI
ARRI SkyPanel S30 User manual

ARRI
ARRI L5 User manual