manuals.online logo
Brands
  1. Home
  2. •
  3. Brands
  4. •
  5. Aseptico
  6. •
  7. Dental Equipment
  8. •
  9. Aseptico CompriCart ADU-20B Manual

Aseptico CompriCart ADU-20B Manual

ADU-20B CompriCart II
OPERATION and MAINTENANCE
INSTRUCTION MANUAL
i.
P.O. Box 1548 • Woodinville, WA 98072
8333 216th Street SE • Woodinville, WA 98072
(425) 487-3157 • (800) 426-5913
www.aseptico.com • [email protected]
TABLE OF CONTENTS:
Introduction................................................................................. 3
Package Contents ...................................................................... 3
Setting Up the Unit ..................................................................... 3
• Figure 1 - ADU-20B System .......................................... 3
• Figure 2 - Air Supply Connector .................................... 3
• Figure 3 HVE Vacuum Assembly................................... 3
• Figure 4 Saliva Ejector Assembly .................................. 4
• Figure 5 Water Supply Tank .......................................... 4
Operation Functions .................................................................. 4
• Figure 6 - Syringe Tip Removal..................................... 4
• Figure 7 - Handpiece Controls....................................... 4
• Figure 8 - Foot Control .................................................. 5
• Figure 9 - Water Tank Removal ..................................... 5
• Figure 10 - Right Side of Chassis.................................. 5
• Figure 11 - HVE Vacuum Assembly............................... 6
• Figure 12 - Saliva Ejector Assembly.............................. 6
• Figure 13 - AA-290CK Central Vacuum Kit.................... 6
Routine Adjustments................................................................... 6
• Figure 14 - Syringe Flow Adjust. Block.......................... 6
• Figure 15 - Handpiece Press Control Block .................. 6
• Figure 16 - Air Pressure Regulator Valve ...................... 6
Cleaning ..................................................................................... 7
Warranty ..................................................................................... 7
SPECIFICATIONS:
Chassis Head
Dimensions: 18” W x 12” L x 3.5” H
(45.72 cm W x 30.38 cm L x 8.89 cm H)
Chassis Height: 23.0” min., adjustable to 32.0” max
(58.42 cm min., adjustable to 81.28 cm max.)
Weight: 38 lbs (17.25 kg)
Air Supply: 70-100 PSI, ltered
(4.92 - 7.03 kg/cm2
To prevent injury to people and damage to property,
please heed relevant warnings and remarks. They are
marked as follows:
• WARNING: Serious injury or death may result if
ignored.
• CAUTION: Damage to property or the
environment may result if ignored.
• NOTE: Important additional information and hints.
3.
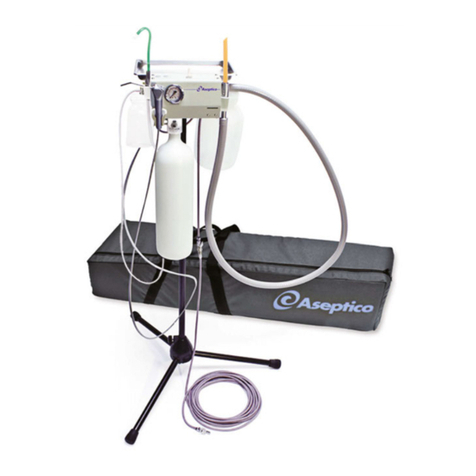
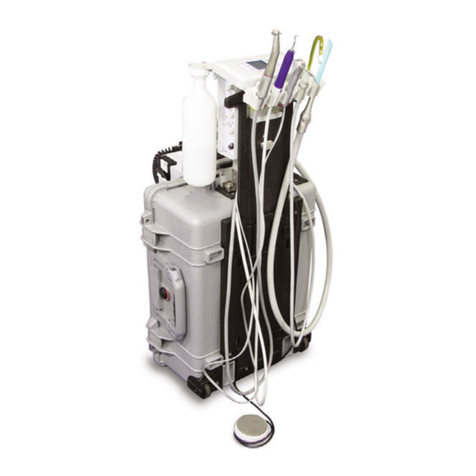
Your new Aseptico ADU-20B CompriCart II delivery system is
one of the nest portable carts available to the dental profession.
The system is designed for portable operatory use and features
a three-way air/water syringe, automatic highspeed and
lowspeed handpiece controls, high volume evacuator and saliva
ejector. A pressurized water tank supplies water for handpiece
coolant and syringe. The system is powered by a single
connection to compressed air via the air supply line.
Congratulations!
This Aseptico ADU-20B system is engineered to provide many
years of reliable service. Please read the instructions provided
in this manual to receive the best and longest service from your
Aseptico equipment.
Separate manuals may be provided to cover the operation and
maintenance of hand-held pieces or other accessories for your
unit.
PACKAGE CONTENTS
• Delivery Unit Cart
• TA-90D Three-Way Syringe
• TA-1 Syringe Tip Autoclavable 3-way
• AA-25 Vacuum Saliva Ejector
• AA-21 Vacuum High Volume AVS
• 2-Liter Water Reservoir
• AA-42W Foot Control
• AA-50 Instrument Tray
• NWS-7i Water Sys Self-cont Installed
• AHP-101 Handpiece 1:1 Straight Low Speed Doriot
(Optional)
• AA-19LED-04 Fiber Optic 1 Hp Illumination System Led
Straight Gray (Tubing 6 Ft) (Optional)
• AA-19EGEN-04T6 6-Pin Self-Generating Fiber Optic
Handpiece Connection (Optional)
• AA-290CK Central Vacuum Kit (Optional)
• AWS-1T Aseptiwater Tap Water option (Optional)
• AWS-1C Aseptiwater Cavitron® Connect (Optional)
Cavitron® is a registered trademark of DENTSPLY International Inc.
SETTING UP THE SYSTEM:
1. Place the ADU-20B CompriCart II in an upright position on a
at, stable surface. Loosen the center column retaining knob
and extend the telescoping upper portion. Tighten the knob
at the desired height (Fig. 1).
2. Check to make sure the syringe, highspeed and lowspeed
handpieces are hanging in their proper holder. Locate the
foot control on the oor (Fig. 1).
Removable
Instrument
Tray
Three-Way
Syringe
Highspeed
Handpiece
Control
Lowspeed
Handpiece
Control
Telescoping
Center Column
with Retaining
Knob
Foot Control
Handpiece
Pressure Gage
AA-21 High
Volume
Evacuator
Assembly
2-Liter HDPE
Water Supply
Tank
Saliva Ejector
System
Figure 1 - ADU-20B System
3. The ADU-20B unit must be connected to a dry, ltered,
70-100 psi air source. Simply extend the 1/4” grey air
supply line from the ADU-20B cart and connect the quick-
disconnect into the compressed air source (Fig. 2).
Figure 2 - Air Supply Connector
Connect to
70-100 PSI Air
Source
4. Remove the high volume vacuum system, saliva ejector
system, and High-Density Polyethylene (HDPE) water
supply tank from packing and install on proper quick
disconnects on the delivery head (Fig. 1).
5. To install the vacuum bottle, press on locking ring tab, push
bottle into quick coupler, and release tab (Fig. 3a).
A. Hang the vacuum head in the holder at the right hand
Figure 3b end of the front holder rack (Fig. 3b).
Figure 3a
Quick Disconnect
Vacuum Bottle
Locking Ring
Tab
Figure 3b
6. To install the saliva ejector system, locate the quick
disconnect at the rear of the delivery head (Fig. 4a). Note
manual release lever on disconnect. Insert metal tting on
4.
top of bottle into quick disconnect. Locking ring will snap into
place. Press release lever on disconnect to remove bottle
from unit (Fig. 4b).
Figure 4a Figure 4b
Release
Lever
A. Insert vacuum line hose into plastic quick disconnect
on top of bottle (Fig. 4c). Hang the saliva ejector valve
in the holder located next to high volume vacuum
handpiece.
Figure 4c
Vacuum
Line Hose
Quick Disconnect
7. To install water supply bottle, thread it into the white plastic
tting at the right rear corner of the chassis (Fig. 5).
Figure 5
OPERATION FUNCTIONS:
1. THREE-WAY AIR/WATER SYRINGE - Depress the right
button for air operation, and the left button for water
operation. Depressing both buttons will create a mist. The
syringe features quick-change autoclavable tips: To remove
a tip, press on the locking collar surrounding the tip socket
and pull the used tip straight out of the socket (see Fig 3). To
insert a new tip, press locking collar and push tip into socket
as far as it will go. Release collar and gently tug on tip
before using to ensure that tip is securely locked into socket.
Syringe Tip Sterilization:
1. Remove contaminated syringe tip.
2. Remove all visible signs of contamination before
autoclaving.
3. Autoclave tip at 132° C (270° F) for ten minutes.
4. Sterilize between each patient use.
DEPRESS LOCKING
COLLAR
FIG. 6
NOTE: Since only the tips can be autoclaved, it is
recommended that the Air/Water Syringe be bagged with a
disposable, single-use plastic sleeve between each patient
use.
2. HANDPIECE CONTROLS (Fig. 7) - The Aseptico ADU-20B
includes two handpieces mounted to the front bar. These
are fully automatic. When a handpiece is removed from it’s
holder, pressure is automatically opened and ready for use
with foot control.
The amount of air pressure supplied to each handpiece may
be adjusted by turning the ow control for that handpiece on
the control block (See page 8).
Figure 7
3-Way
Air/Water
Syringe
Lowspeed
Control
Highspeed
Control
3. WET/DRY FOOT CONTROL (Fig. 8) - The foot control
activates the handpieces and water coolant spray.
Position the foot control on the oor. For handpiece
operation, apply foot pressure to any part of the center disk.
The handpiece must be removed from its holder before
operation can begin. To activate the water coolant, move the
wet/dry toggle switch on the foot pedal to the right position.
Move the toggle switch to the left position to disable water
coolant.
5.
Water On
Water O󰀨
Apply pressure to
activate Handpiece
Figure 8 - Foot Control
4. WATER SUPPLY TANK - The Aseptico ADU-20B
incorporates a self contained pressurized water system (Fig.
9). This consists of a 2-liter HDPE tank dispensing water
through the 3-way syringe and handpiece control. The water
tank is pressurized to a constant 35 pounds per square-inch
gauge (PSIG) during use.
Before removing the tank for relling, it must be
depressurized by turning the tank 1/4 turn counterclockwise.
The tank is removed by unscrewing it from its mount at the
bottom right rear of the chassis After the tank is lled, screw
it back onto the mount. Cleaning and sanitization of the
tank is recommended between uses.
Turn water supply tank 1/4
turn counterclockwise to
release pressure before
unscrewing
Figure 9 - Water Tank Removal
5. PRESSURE GAUGE (Fig. 10) - The pressure gauge on the
right panel gives you a visual indication of the handpiece
drive pressure.
6. WATER COOLANT FLOW CONTROL (FIG. 10) - Adjusts
the ow of water coolant to the handpiece control.
7. FLUSH TOGGLE (FIG. 10) - The ush toggle located
on the right side of the chassis allows you to quickly
and completely ush your handpieces, washing away
contaminants which may have accumulated in the
handpiece and tubing. You should ush the handpieces for
about 5 seconds after every patient, and about 20 seconds
at the beginning of each day to reduce overnight bacterial
accumulation which may have occurred.
To ush your handpieces, remove them from their holder,
directing the spray away from you and into a basin, then ip
the ush toggle and hold the desired number of seconds.
Release the ush toggle.
8. AA-21 HIGH VOLUME EVACUATOR ASSEMBLY - The
HVE assembly is an air powered, self contained oral
evacuator system. It is supplied with a plastic waste
container and a single high velocity hose.(Fig. 11)
Remove the vacuum bottle and hose assembly from
packing and install into the quick disconnect at the back of
the delivery head.
To operate, remove the vacuum hose from holder and insert
a standard oral evacuator tip. Depress the on/o󰀨 switch on
the side of the hose end for vacuum.
Water Coolant
Flow Control
Flush Toggle Saliva
Ejector On/
O󰀨
Optional
Cavitron
Connection Water Supply
Tank
Air Supply
Pressure
Regulator
Air Supply
Line
HVE Connection
Handpiece
Pressure Gauge
Figure 10 - Right Side of Chassis
Waste from the vacuum system will collect in the attached
plastic bottle. When the waste container is 3/4 full it should
be emptied. After each use, the vacuum system should
be cleaned by running clean water or a vacuum system
cleanser through the evacuator hose and thoroughly
cleaning waste bottle. CAUTION: Use only NON-foaming
cleansers in the vacuum lines. A small and large capacity
waste container are available and are interchangeable. The
ADU-20B is supplied with a large capacity container.
Quick
Disconnect
Waste
Container
Vacuum
On/O󰀨
Figure 11 - HVE Vacuum System
9. SALIVA EJECTOR ASSEMBLY - The Saliva Ejector is
an air powered, self contained oral evacuation system. It
is supplied with a plastic waste container and a single low
velocity hose (Fig.12).
To operate, remove the saliva ejector valve from the holder
and insert a standard saliva ejector tip. Turn the vacuum
toggle switch, located on the right side of the cart, to the
‘ON’ position. The lever valve assembly snaps apart at the
swivel and may be autoclaved.
Waste from the vacuum system will collect in the attached
plastic bottle. When the waste container is 3/4 full, it must be
emptied to prevent a back-up in the system. After each use,
the vacuum system should be cleaned by running clean
water or vacuum system cleanser through the evacuator
hose and thoroughly cleaning the waste bottle. CAUTION:
Use only NON-foaming cleansers in the vaccum lines.
6.
Waste Container
Quick Disconnect
Vacuum
Hose Quick
Disconnect
Salive
Ejector
Valve
Waste
Container
Figure 12 - Saliva Ejector Assembly
10. AA-290CK CENTRAL VACUUM KIT (Optional) - The AA-
290CK Kit (Fig.13) is used with a central vacuum system.
It includes a central vacuum canister with disposable solids
collector, an autoclavable central vacuum lever valve (with
5 feet of tubing), and an autoclavable saliva ejector tip
valve (with 5 feet of tubing). An industry-standard 1/2-inch
connection hose provides easy adaptation to the central
vacuum system.
Figure 13 - Saliva Ejector Assembly
ROUTINE ADJUSTMENTS:
1. WATER COOLANT FLOW ADJUSTMENT - The water
coolant to the handpiece control can be varied from a ne
fog spray to a heavy stream.
Install and run a handpiece at a midrange speed. Make
sure the wet/dry toggle is in the ‘ON’ position on the foot
control. Turn the water coolant ow control located along
the right side of the chassis clockwise until it seats softly.
Begin turning counterclockwise until a ne mist is visible.
This will provide excellent cooling while burr is cutting.
Syringe
Water Flow
Adjustment
Screw
Syringe
Air Flow
Adjustment
Screw
Figure 14 - Syringe Flow Adj. Assembly
2. SYRINGE AIR/WATER FLOW ADJUSTMENT (Fig. 14)
- The syringe ow adjustment block is located inside the
delivery head near the left rear corner and has two slotted
adjustment screws on top. To open the chassis, remove the
Ritter tray and pad from atop the unit and lift the lid. The
outside screw adjusts air ow and the inside screw adjusts
water ow. Turning the adjustment screws clockwise will
decrease the pressure and counterclockwise will increase
pressure.
3. HANDPIECE PRESSURE ADJUSTMENT (Fig. 15) - The
amount of air pressure supplied to each handpiece may be
adjusted by turning the ow control for that handpiece on
the control block. The control block is located at the front
right of the unit under the lid.
FRONT OF
CART
Highspeed
Handpiece
Pressure
Adjustment
Lowspeed
Handpiece
Pressure
Adjustment
Figure 15 - Handpiece Pressure Control Block
4. AIR SUPPLY PRESSURE REGULATOR - The regulator
valve located on the underside of the chassis near the
pressure gauge at the right rear corner of the chassis
controls the line pressure from the compressed air source to
the unit. Turning the valve stem clockwise will increase this
pressure and counterclockwise will decrease pressure (Fig.
16).
Figure 16
Air Supply
Pressure
Regulator
5. WATER PRESSURE VALVE - The water tank is pressurized
to a constant 35 PSIG by a xed regulator inside the
chassis. Adjustment is unnecessary.
FRONT OF
CART
7.
CLEANING:
Because of its simple design, the Aseptico ADU-20B CompriCart
II requires very little maintenance. Any maintenance that is
needed can be performed in minutes.
BLEEDING THE SYSTEM - If the unit will not be used for
an extended period of time, or the unit might be subjected to
freezing conditions, you should bleed the system.
Simply empty the contents of the water supply tank and install
the tank back onto the quick disconnect. Operate the air/water
syringe and highspeed handpiece with water coolant ‘ON’ until
just air comes through the water lines. Pack unit and store as
normal.
HANDPIECE FLUSH - Flush the handpieces for about 5
seconds after every patient, and about 20 seconds at the
beginning of each day.
WATER LINES - Disinfect the water lines weekly. Prepare a
1:10 bleach solution (1 part household bleach to 10 parts water).
Remove water reservoir and discard residual water. Replace
empty water supply tank and air purge all waterlines. Fill water
supply tank with bleach solution. Run bleach solution through
all lines. Allow bleach solution to stand in lines for 10 minutes.
Remove water supply tank and discard bleach. Flush water
supply tank and all lines thoroughly with clean water. Air purge
and leave lines dry until next clinical use.
GENERAL CLEANING - he cart exterior is designed to make
cleaning and the use of prophylactic barriers as easy as
possible. The external surfaces of the cart should be cleaned
using a mild solution of liquid detergent and water. Any external
surfaces of the unit that are contacted during use should
carefully be wiped down with a disinfectant at the beginning of
each day and between each patient.
As described in the vacuum section the high and low volume
vacuum systems should always be thoroughly cleaned after use.
PACKING THE UNIT FOR TRANSPORTATION - If the ADU-
20B unit is going to be transported, it is recommended that the
original or similar packing material be put into place to avoid
dents and scratches from parts inside of the box shifting.
WARRANTY:
Aseptico Inc. warrants its new products against defects in material and
workmanship under normal and proper use, care, and maintenance for
a period of two (2) years from date of original invoice. This two (2) year
warranty does NOT apply nor is it extended to products that are not
manufactured by Aseptico. These products may be covered by a separate
limited warranty provided by the particular manufacturer, and all claims
and questions regarding the same are to be directed to the particular
manufacturer.
Expendable components, such as batteries, fuses, light bulbs, and tubing
sets installed on Aseptico products are specically excluded and have no
warranty. Consumable goods are warranted for the stated expiration date
of such goods.
Repair or replacement of any product(s) or part(s) under this warranty
does not extend the term of this warranty, and such product(s) or part(s)
shall remain covered by the unexpired portion of the warranty period, or
for ninety (90) days from the date of return to Aseptico, whichever is later.
This limited warranty applies only to the initial or rst installation of the
product or part.
During the specic warranty periods set forth above, Aseptico will, at its
option, repair or replace the product(s) or particular part(s) that are found
to be defective in either material or workmanship in part or whole. Aseptico
shall be the sole arbiter of such action. In the event of alleged defect
under warranty, the purchaser is to notify Aseptico’s Customer Service
department promptly. Customer Service will provide Return Material
Authorization (RMA) instructions, usually directing that the product be
returned for service, shipping prepaid by the buyer or end user, to Aseptico
or its designated and authorized warranty service center.
This warranty shall not apply to products (1) that have been subjected to
neglect, abuse, misuse, improper installation, inadequate maintenance, or
damage due to improper use of cleaning materials or chemicals, or non-
compliance with Aseptico’s storage, installation, operation, maintenance
or environmental requirements; (2) that have undergone any modication
or repair not previously authorized by Aseptico in writing, or service, repair
or modication by or from any facility other than an authorized Aseptico
service center or technician, or that use non-authorized software or spare
or replacement parts; or (3) that fail due to reasonable and normal use or
wear and tear, or materials made, furnished or specied by the buyer or
end user.
Aseptico does not assume under this warranty any risks or liabilities
arising from the clinical use of its products, whether or not such use
involves coincidental utilization of products manufactured by others.
Under no circumstances will Aseptico be liable or responsible for special,
compensatory, incidental, consequential or punitive damages, lost prots,
lost sales, or loss of use or loss of business opportunity by or through the
use of the product. Aseptico’s sole and maximum liability with respect to
the product, other than its obligations set forth above, shall be the total
purchase price paid for the product.
8.
P.O. Box 1548 • Woodinville, WA 98072
8333 216th Street SE • Woodinville, WA 98072
(425) 487-3157 • (800) 426-5913
www.aseptico.com • [email protected]
PRINTED IN THE
U.S.A.
P/N: 420366
Rev. O
ECO 15499
04/2022

Other manuals for CompriCart ADU-20B

1

Other Aseptico Dental Equipment manuals

Aseptico AEU-6000-70V Manual

Aseptico

Aseptico AEU-6000-70V Manual

Aseptico ADU-04ST Manual

Aseptico

Aseptico ADU-04ST Manual

Aseptico AEU-7000L-70V Manual

Aseptico

Aseptico AEU-7000L-70V Manual

Aseptico ADC-01P-RED AseptiChair User manual

Aseptico

Aseptico ADC-01P-RED AseptiChair User manual

Aseptico AEU-14CF Troubleshooting guide

Aseptico

Aseptico AEU-14CF Troubleshooting guide

Aseptico ADU-17A2 Express Air 2 Manual

Aseptico

Aseptico ADU-17A2 Express Air 2 Manual

Aseptico AEU-525S Manual

Aseptico

Aseptico AEU-525S Manual

Aseptico ADU-07A Administrator Guide

Aseptico

Aseptico ADU-07A Administrator Guide

Aseptico AEU-6000 User manual

Aseptico

Aseptico AEU-6000 User manual

Aseptico ADC-08 User manual

Aseptico

Aseptico ADC-08 User manual

Aseptico ALU-40LED-CF Manual

Aseptico

Aseptico ALU-40LED-CF Manual

Aseptico TRANSPORT II Troubleshooting guide

Aseptico

Aseptico TRANSPORT II Troubleshooting guide

Aseptico ADC-01 AseptiChair User manual

Aseptico

Aseptico ADC-01 AseptiChair User manual

Aseptico ADU-08SX Sealant Express Manual

Aseptico

Aseptico ADU-08SX Sealant Express Manual

Aseptico AMC-20CF Manual

Aseptico

Aseptico AMC-20CF Manual

Aseptico AEU-500 Manual

Aseptico

Aseptico AEU-500 Manual

Aseptico ADU-03ST Manual

Aseptico

Aseptico ADU-03ST Manual

Aseptico Command Air ADC-08CF User manual

Aseptico

Aseptico Command Air ADC-08CF User manual

Aseptico ECONO AIR SYSTEM ADU-07 Administrator Guide

Aseptico

Aseptico ECONO AIR SYSTEM ADU-07 Administrator Guide

Aseptico AEU-14CF User manual

Aseptico

Aseptico AEU-14CF User manual

Aseptico ADC-01C User manual

Aseptico

Aseptico ADC-01C User manual

Aseptico AMC-20CF Troubleshooting guide

Aseptico

Aseptico AMC-20CF Troubleshooting guide

Aseptico AMC-20 Manual

Aseptico

Aseptico AMC-20 Manual

Aseptico ADU-07A ECONO AIR SYSTEM Administrator Guide

Aseptico

Aseptico ADU-07A ECONO AIR SYSTEM Administrator Guide

Popular Dental Equipment manuals by other brands

Waterpik WP-100 Series quick start guide

Waterpik

Waterpik WP-100 Series quick start guide

Bien Air CHIROPRO 3rd Gen Series Instructions for use

Bien Air

Bien Air CHIROPRO 3rd Gen Series Instructions for use

Guilin Woodpecker Medical Instrument X-Cure instruction manual

Guilin Woodpecker Medical Instrument

Guilin Woodpecker Medical Instrument X-Cure instruction manual

Xo 4 troubleshooting guide

Xo

Xo 4 troubleshooting guide

KaVo SMARTmatic PROPHY S31 Instructions for use

KaVo

KaVo SMARTmatic PROPHY S31 Instructions for use

EMS TOM-2B Operator's manual

EMS

EMS TOM-2B Operator's manual

Carestream DENTAL CS 8100 Access user guide

Carestream DENTAL

Carestream DENTAL CS 8100 Access user guide

Komet BKS Series Instructions for use

Komet

Komet BKS Series Instructions for use

DeguDent SOLARIS Instructions for use

DeguDent

DeguDent SOLARIS Instructions for use

RAM Microlab 350/450 instruction manual

RAM

RAM Microlab 350/450 instruction manual

EMS AIRFLOW Prophylaxis Master quick guide

EMS

EMS AIRFLOW Prophylaxis Master quick guide

Schick Q3 instructions

Schick

Schick Q3 instructions

Miele A 317 operating instructions

Miele

Miele A 317 operating instructions

Gendex ORTHORALIX 8500DDE installation manual

Gendex

Gendex ORTHORALIX 8500DDE installation manual

Air Techniques ProVecta 3D Prime operating instructions

Air Techniques

Air Techniques ProVecta 3D Prime operating instructions

KaVo Scan eXam One user manual

KaVo

KaVo Scan eXam One user manual

Medidenta MEDITORQUE ELITE ME-KIT Instructions for use

Medidenta

Medidenta MEDITORQUE ELITE ME-KIT Instructions for use

Digiray FireCR Flash installation manual

Digiray

Digiray FireCR Flash installation manual

manuals.online logo
manuals.online logoBrands
  • About & Mission
  • Contact us
  • Privacy Policy
  • Terms and Conditions

Copyright 2025 Manuals.Online. All Rights Reserved.