Beta 1465 Supplement

1465
Manuale d'uso e istruzioni
IT
Operation manual and instructions
EN
Notice d'utilisation et instructions
FR
Gebruikshandleiding
NL
Bedienungsanleitung
DE
Manual de uso e instrucciones
ES
Manual de uso e instruções
PT
Használati kézikönyv és útmutató
HU
Instrukcja obsługi i zalecenia
PL

2
MANUALE D’USO ED ISTRUZIONI IT
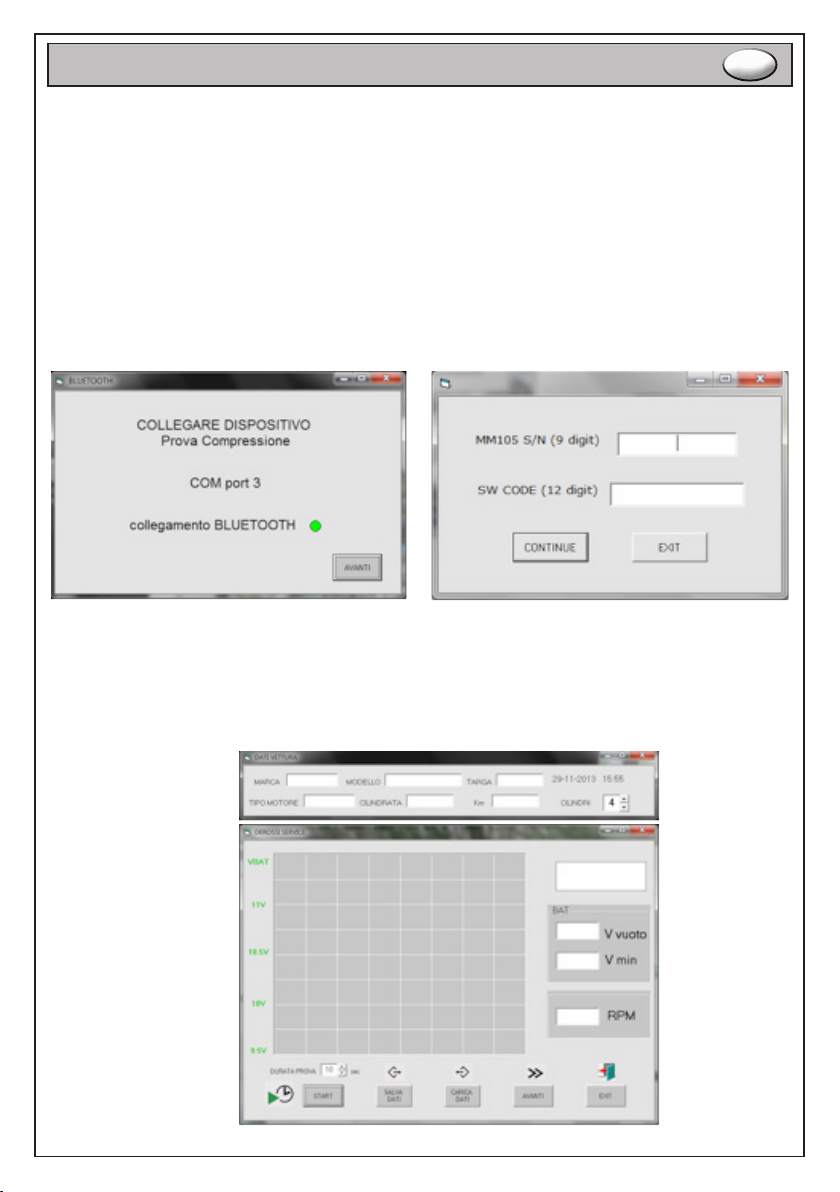
MANUALE D’USO ED ISTRUZIONI PER TESTER EFFICIENZA MOTORE ART. 1465 PRODOTTO DA:
BETA UTENSILI S.P.A.
Via A. Volta 18,
20845 Sovico (MB)
ITALIA
Documentazione redatta originariamente in lingua ITALIANA.
Conservare accuratamente le istruzioni di sicurezza e consegnarle al personale utilizzatore.
DESTINAZIONE D’USO
- Il tester efcienza motore permette di vericare la compressione dei motori endotermici:
• Vericare la compressione di un motore sia a benzina che diesel
- Non sono consentite le seguenti operazioni:
• è vietato l’utilizzo al di fuori delle prescrizioni tecniche contenute nella tabella DATI TECNICI
• è vietato l’utilizzo in ambienti umidi, bagnati o esposti ad intemperie
• è vietato l’utilizzo per tutte quelle applicazioni diverse da quelle indicate
SICUREZZA DELLA POSTAZIONE DI LAVORO
Non utilizzare il tester efcienza motore in ambienti contenenti atmosfere potenzialmente esplosive o materiali inammabili
perché possono svilupparsi scintille in grado di incendiare polveri o vapori.
Impedire che bambini o visitatori possano avvicinarsi alla postazione di lavoro mentre si sta operando con il tester
efcienza motori La presenza di altre persone provoca distrazione e può comportare la perdita del controllo durante
l’utilizzo.
Durante le operazioni di utilizzo, prestare la massima attenzione alle parti in movimento del motore.
Non far cadere utensili metallici sulla batteria del veicolo, si può vericare un corto circuito della batteria stessa.
Utilizzare il tester efcienza motore in una zona asciutta evitando umidità.
INDICAZIONI SICUREZZA TESTER EFFICIENZA MOTORE
- Controllare prima dell’utilizzo che il tester efcienza motore non abbia subito danneggiamenti, e che non vi siano cavi scoperti
o parti usurate.
- Non utilizzare tester efcienza motore se è danneggiato, poiché vi è rischio di scosse elettriche, non cercare di aprirlo o
modicarlo.
- Periodicamente vericare l’integrità del tester efcienza motore, del cavo di alimentazione e delle pinze.
- Non coprire in alcun modo il tester efcienza motore durante il suo l’utilizzo. Garantire uno spazio adeguato per la ventilazione.
- Non utilizzare il tester efcienza motore in ambienti umidi, bagnati, non esporlo a pioggia. Ambienti umidi e contaminati
aumentano il rischio di scosse elettriche.
INDICAZIONE PER LA SICUREZZA DEL PERSONALE
- Si raccomanda la massima attenzione, avendo cura di concentrarsi sempre sulle proprie azioni. Non utilizzare il tester efcienza
motore in caso di stanchezza o sotto l’effetto di droghe, bevande alcoliche o medicinali.
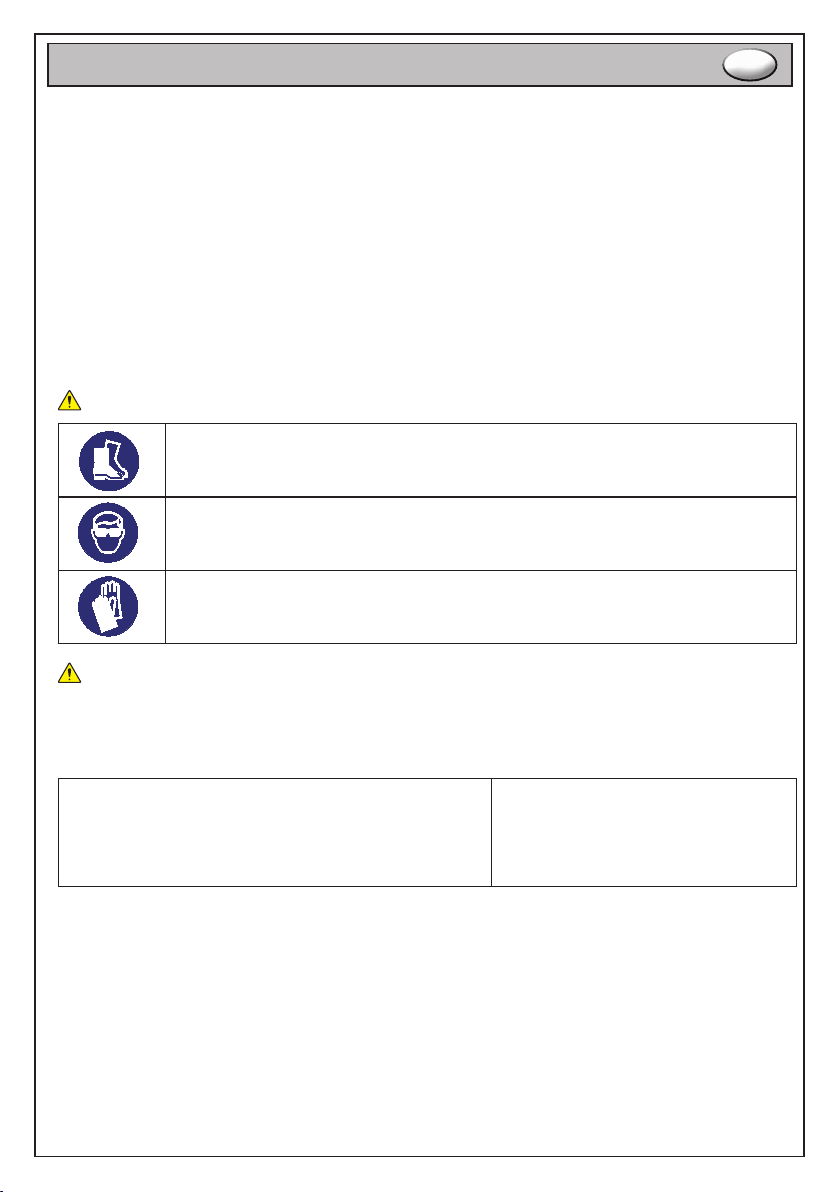
- Utilizzare sempre i seguenti dispositivi individuali di protezione:
• Scarpe di sicurezza
• occhiali di protezione
• guanti di protezione per agenti sici
IMPORTANTE LEGGERE COMPLETAMENTE IL PRESENTE MANUALE PRIMA
DI UTILIZZARE L’UTENSILE PNEUMATICO. IN CASO DI MANCATO RISPETTO
DELLE NORME DI SICUREZZA E DELLE ISTRUZIONI OPERATIVE, POSSONO
VERIFICARSI SERI INFORTUNI.
ATTENZIONE

3
MANUALE D’USO ED ISTRUZIONI IT
- Effettuare tutte le operazioni previste in ambienti adeguatamente areati ed asciutti.
- Assicurarsi che i cavi del tester efcienza motori siano lontani da ventole, parti in movimento e dal condotto del carburante.
- Non indossare vestiti larghi, non portare bracciali, catenine o oggetti metallici quando si lavora sul veicolo.
- Pulire i terminali della batteria, evitando che agenti corrosivi vadano in contatto con la pelle o gli occhi.
UTILIZZO ACCURATO DEL TESTER EFFICIENZA MOTORI
- Non utilizzare il tester efcienza motori se la custodia, le pinze, i cavi o il cavo di alimentazione sono danneggiati. Se si
sentono odori inusuali o se produce troppo calore.
- Il tester efcienza motore non deve essere modicato. Le modiche possono ridurre l’efcacia delle misure di sicurezza ed
aumentare i rischi per l’operatore.
- Far riparare il tester efcienza motore solo ed esclusivamente da personale specializzato e solo impiegando pezzi di
ricambio originali.
- Non utilizzare il tester efcienza motore con tensioni diverse da quelle indicate in tabella DATI TECNICI.
DISPOSITIVI DI PROTEZIONE INDIVIDUALI PREVISTI DURANTE L’UTILIZZO DEL TESTER EFFICIENZA
MOTORE
La mancata osservanza delle seguenti avvertenze può causare lesioni siche e/o patologie.
UTILIZZARE SEMPRE CALZATURE DI SICUREZZA
INDOSSARE SEMPRE GLI OCCHIALI PROTETTIVI
UTILIZZARE SEMPRE GUANTI DI PROTEZIONE PER AGENTI FISICI DURANTE
L’UTILIZZO DELLO STRUMENTO
Può essere necessario l’utilizzo di ulteriori dispositivi di protezione individuali da utilizzare in funzione dei
valori riscontrati nell’indagine di igiene ambientale/analisi rischi, nell’eventualità che i valori superino i limiti
previsti dalle vigenti normative.
TENSIONE DI FUNZIONAMENTO
TEMPERATURA DI IMMAGAZZINAMENTO
DIMENSIONI
LUNGHEZZA CAVO PINZE
PESO
12VDC (batteria veicolo)
5°C - 50°C
140x75x30 mm
1.3 m
0.215 kg
DATI TECNICI

4
MANUALE D’USO ED ISTRUZIONI IT
INSTALLAZIONE PROGRAMMA
Prima di effettuare la prova bisogna assicurarsi che la batteria sia carica ed occorre impedire che il motore si avvii durante il
test. (A seconda del tipo di motore è possibile togliere il fusibile della pompa del combustibile, disabilitare gli iniettori staccando
il sensore giri, ecc.)
Per utilizzare lo strumento è necessario eseguire l’associazione in Bluetooth con un computer sul quale dovrà essere installato
l’apposito software.
Procedere nel seguente modo:
1. Installare il software presente nella chiavetta USB.
2. Alimentare lo strumento collegando i cavi di alimentazione alla batteria del veicolo.
3. Dal menù del Bluetooth lanciare la ricerca di nuovi dispositivi ed associare lo strumento scegliendo un numero di porta COM
inferiore a 15.
4. Lanciare il programma e premere il tasto “AVANTI” a questo punto il programma cerca il dispositivo, quando lo trova si
accende il pallino verde sulla nestra del programma di anco alla scritta Bluetooth.
5. Inserire i codici richiesti “SERIAL NUMBER” e “PASSWORD” solitamente si trovano all’interno della confezione.
UTILIZZO
Dopo aver preso le dovute precauzioni per evitare che il motore possa andare in moto, collegare lo strumento alla batteria del
veicolo tramite le pinze a coccodrillo nel seguente modo:
• ROSSA su terminale positivo, NERA su terminale negativo.
• Collegare lo strumento al PC (tramite Bluetooth) ed avviare il programma che dovrà ricevere ed analizzare i dati della prova.

5
MANUALE D’USO ED ISTRUZIONI IT
• Premere il pulsante “START” quando compare la scritta “AVVIAMENTO” girare la chiave no a metter in moto il motorino di
avviamento.
NB: durante la prova di compressione sui motori a benzina è necessario accelerare a fondo mantenendo premuto il pedale
dell’acceleratore per aprire completamente la farfalla di aspirazione.
• Mantenere in moto il motorino di avviamento (frizione premuta) per tutta la durata della prova ed arrestarlo solo quando
compare sul monitor la dicitura “STOP”.

6
ISTRUZIONI PER L’USO I
MANUALE D’USO ED ISTRUZIONI IT
• La durata può essere impostata da 8 a 15 secondi. La scelta di un tempo più lungo di 10 secondi, garantisce una maggiore
precisione dei risultati.
• Terminata la prova compare il graco dell’analisi in frequenza per il calcolo dei giri al minuto (RPM), dopodiché verrà mostrato
l’andamento della tensione della batteria registrato durante la prova.
• A lato comparirà un graco a barre che permette di analizzare la caduta di tensione per cilindro (in verde) e la potenza
assorbita per compressione (in giallo).
• Premere “AVANTI” vengono visualizzate altre due nestre: la potenza elettrica assorbita e la compressione relativa.
La POTENZA ELETTRICA visualizzata è quella assorbita dal motorino di avviamento nei momenti in cui avviene la
compressione, è un’indicazione della forza esercitata dal motorino e della pressione raggiunta nei cilindri.

7
ISTRUZIONI PER L’USO I
MANUALE D’USO ED ISTRUZIONI IT
Premendo ancora “AVANTI” compare lo stato della batteria. La barra “Tensione a vuoto” indica la tensione misurata prima
dell’inizio della prova, senza assorbimento di corrente, ed indica lo stato di carica della batteria stessa.
Nella barra “Tensione sotto carico” viene riportata la tensione nel momento di massimo assorbimento di corrente.
In questo momento si ha un’indicazione dello stato di salute della batteria:
• Entrambi i valori nella fascia verde -> Esito Positivo
• Uno o più valori in fascia gialla -> Segnalazione di attenzione
• Uno o più valori in fascia rossa -> Malfunzionamento
I valori di potenza assorbita dipendono dalla temperatura del motore e
dalla resistenza interna della batteria. Possono essere confrontati tra una
prova e l’altra ma solo a parità di condizioni.
Nel diagramma della COMPRESSIONE RELATIVA si possono vedere le
differenze tra un cilindro e l’altro. In questo caso i risultati sono scalati in
modo che i cilindri con la compressione maggiore siano al 100% (Max) e
possono essere sempre confrontati tra di loro.

8
ISTRUZIONI PER L’USO I
MANUALE D’USO ED ISTRUZIONI IT
NB: i risultati delle prove potrebbero essere inuenzati dal motorino di avviamento difettoso, dalla batteria scarica, ecc.
Premendo il pulsante “SALVA DATI” al termine di una prova è possibile salvare le prove effettuate.
NOTA: se si vogliono rivedere ed analizzare le prove fatte in precedenza, è possibile proseguire anche senza collegare lo
strumento al PC.
AVVERTIMENTI
Non ci sono abbastanza dati da analizzare. La durata minima di una prova di
6 secondi. Si può avere questa segnalazione se si interrompe l’avviamento
prima del tempo necessario per l’acquisizione dei dati.
In alcuni casi si può avere un risultato in cui si hanno due cilindri “Alti” e due
cilindri “Bassi” alternati e con coppie di valori molto simili. Questa situazione
viene segnalata come caso particolare perché potrebbe essere causata da
un componente meccanico (pompa o altro) che introduce un carico, e quindi
un maggior assorbimento elettrico, sincronizzato con due cilindri (una volta
per ogni giro del motore).
Il fatto che in un cilindro la tenuta di pressione sia molto bassa fa si che,
oltre che nella fase di compressione, anche nelle altre fasi (discesa dopo
compressione, scarico e aspirazione) l’assorbimento di potenza per quel
cilindro sia più basso che nel caso normale. Questo inuisce in modo non
uniforme durante le fasi di compressione degli altri cilindri producendo delle
differenze nella potenza misurata.

9
ISTRUZIONI PER L’USO I
MANUALE D’USO ED ISTRUZIONI IT
MANUTENZIONE
Quando non è in uso lo strumento deve essere mantenuto in una zona asciutta per evitare l’umidità. Per la pulizia utilizzare un
panno asciutto. Non utilizzare mai solventi o detergenti aggressivi.
Gli interventi di manutenzione e di riparazione devono essere eseguiti da personale specializzato. Per tali interventi potete
rivolgervi al centro riparazioni di Beta Utensili S.P.A.
SMALTIMENTO
Il simbolo del cassonetto barrato riportato sull’apparecchiatura o sulla confezione indica che il prodotto, alla ne della sua vita
utile, deve essere smaltito separatamente dagli altri riuti urbani.
L’utilizzatore che intendesse smaltire questo strumento può:
- Consegnarlo presso un centro di raccolta di riuti elettronici od elettrotecnici.
- Riconsegnarlo al proprio rivenditore al momento dell’acquisto di uno strumento equivalente.
- Nel caso di prodotti ad uso esclusivo professionale, contattare il produttore che dovrà disporre una procedura per il corretto
smaltimento.
Il corretto smaltimento di questo prodotto permette il riutilizzo delle materie prime in esso contenute ed evita danni all’ambiente
ed alla salute umana.
Lo smaltimento abusivo del prodotto costituisce una violazione della norma sullo smaltimento di riuti pericolosi, comporta
l’applicazione delle sanzioni previste.
GARANZIA
Questa attrezzatura è fabbricata e collaudata secondo le norme attualmente vigenti nella Comunità Europea. E’ coperta da
garanzia per un periodo di 12 mesi per uso professionale o 24 mesi per uso non professionale.
Vengono riparati guasti dovuti a difetti di materiale o di produzione, mediante ripristino o sostituzione dei pezzi difettosi a nostra
discrezione.
L’effettuazione di uno o più interventi nel periodo di garanzia non modica la data di scadenza della stessa.
Non sono soggetti a garanzia difetti dovuti all’usura, all’uso errato od improprio e a rotture causate da colpi e/o cadute.
La garanzia decade quando vengono apportate modiche, quando lo strumento viene manomesso o quando viene inviato
all’assistenza smontato.
Sono espressamente esclusi danni causati a persone e/o cose di qualsiasi genere e/o natura, diretti e/o indiretti.
DICHIARAZIONE DI CONFORMITÀ
Dichiariamo sotto la nostra responsabilità che il prodotto descritto è conforme a tutte le disposizioni pertinenti alle seguenti
Direttive:
• Direttiva Compatibilità Elettromagnetica (E.M.C.) 2014/30/UE;
• Direttiva sulla restrizione dell’uso di determinate sostanze pericolose nelle apparecchiature elettriche
ed elettroniche (Ro.H.S.) 2011/65/UE;
Il Fascicolo Tecnico è disponibile presso:
BETA UTENSILI S.P.A.
Via A. Volta 18,
20845 Sovico (MB)
ITALIA

10
OPERATION MANUAL AND INSTRUCTIONS FOR ENGINE EFFICIENCY TESTER ITEM 1465 MANUFACTURED BY:
BETA UTENSILI S.P.A.
Via A. Volta 18,
20845, Sovico (MB)
ITALY
Original documentation drawn up in ITALIAN.
Store the safety instructions with care and hand them over to the users.
PURPOSE OF USE
- The engine efciency tester allows endothermic engines to be compressed:
• Testing compression in both petrol and diesel engines
- The reversible air ratchet must not be used for the following operations:
• use outside the technical specications contained in the TECHNICAL DATA table;
• use in humid or wet environments, or in bad weather;
• use for any applications other than the stated ones.
WORK AREA SAFETY
Do not operate the engine efciency tester in environments containing potentially explosive atmospheres or inammable
materials, because sparks may be generated, which can ignite the dust or fumes.
Keep children and bystanders away from your workplace while operating the energy efciency tester. Distractions from
other people can cause you to lose control over the engine efciency tester during use.
While operating the engine efciency tester, pay special attention to the moving parts of the engine.
Do not drop any metal tools on the motor vehicle battery: it may short-circuit.
Use the engine efciency tester in a dry area, avoiding humidity.
ENERGY EFFICIENCY TESTER SAFETY
- Before use, check that the engine efciency tester has not been damaged, and that there are no uncovered cables or worn
parts.
- Do not use the engine efciency tester when damaged, to avoid the risk of electric shocks; do not try to open or modify it.
- Periodically check the engine efciency tester, the power supply cable and the clamps.
- Do not cover the engine efciency tester when using it. Allow adequate space for ventilation.
- Do not use the engine efciency tester in humid or wet environments; do not expose it to rain. Wet and contaminated
environments increase the risk of electric shocks.
PERSONNEL SAFETY
- Stay alert; watch what you are doing. Do not use the engine efciency tester while tired or under the inuence of drugs,
alcohol, or medications.
- Always use the following personal protective equipment:
• safety shoes;
• eye protection;
• protective gloves against physical agents.
- Carry out all operations in well-aired, dry rooms.
- Check that the cables of the engine efciency tester are kept away from fans, moving parts and the fuel pipe.
IMPORTANT! READ THIS MANUAL THOROUGHLY BEFORE USING THE
PNEUMATIC TOOL. FAILURE TO COMPLY WITH THE SAFETY STANDARDS AND
OPERATING INSTRUCTIONS MAY RESULT IN SERIOUS INJURY.
CAUTION
ISTRUZIONI PER L’USO I
OPERATION MANUAL AND INSTRUCTIONS EN

11
- Do not wear loose clothing, jewellery or metal objects when working on the motor vehicle.
- Clean the battery terminals, preventing corrosive agents from coming into contact with the skin or eyes.
ENGINE EFFICIENCY TESTER USE AND CARE
- Do not use the engine efciency tester if the case, the clamps, the cables or the power supply cable have been damaged, if it
gives off unusual smells or too much heat.
- Do not modify the engine efciency tester. This can reduce the effectiveness of safety measures and increase operator risk.
- Have the engine efciency tester repaired only through a trained repair person and only using original replacement parts.
- Do not use the engine efciency tester with any voltages other than those stated in the TECHNICAL DATA table.
ISTRUZIONI PER L’USO I
OPERATION MANUAL AND INSTRUCTIONS EN
PERSONAL PROTECTIVE EQUIPMENT TO WEAR WHILE OPERATING ENGINE EFFICIENCY TESTER
Failure to observe the following warnings may result in physical injury and/or disease.
ALWAYS WEAR SAFETY SHOES
ALWAYS WEAR EYE PROTECTION
ALWAYS WEAR PROTECTIVE GLOVES AGAINST PHYSICAL AGENTS WHILE
OPERATING TOOL
Additional personal protective equipment to wear according to the values found in the environmental
hygiene/risk analysis survey if the values exceed the limits under current regulations.
OPERATING VOLTAGE
STORAGE TEMPERATURE
DIMENSIONS
CLAMP CABLE LENGTH
WEIGHT
12VDC (motor vehicle battery)
5 °C – 50 °C
140x75x30 mm
1.3 m
0.215 kg
TECHNICAL DATA

12
ISTRUZIONI PER L’USO I
OPERATION MANUAL AND INSTRUCTIONS EN
SOFTWARE INSTALLATION
Before performing the test, make sure that the battery is charged; do not allow the engine to start during the test. (Depending
on the type of engine, the fuel pump fuse can be removed, and the injectors disabled by disconnecting the rpm sensor etc.).
Operating the tool requires Bluetooth connection with a computer where the software must be installed.
Take the following steps:
1. Install the software in the USB key.
2. Supply power to the tool, connecting the power supply cables to the battery of the vehicle.
3. From the Bluetooth menu, search for new devices, and pair the tool, choosing a number of COM port lower than 15.
4. Run the software, and press “FORWARD”. The software will search for the device; when the device is found, the green light
on the software window next to the Bluetooth will turn on.
5. Enter the “SERIAL NUMBER” and “PASSWORD”, which are usually found in the packaging.
USE
After taking the necessary precautions, to prevent the engine from running, connect the tool to the motor vehicle battery using
the alligator clamps as follows:
• RED CLAMP to the positive terminal, BLACK CLAMP to the negative terminal;
• Connect the tool to the PC (by Bluetooth) and start the software that must receive and analyse the test data.

13
ISTRUZIONI PER L’USO I
OPERATION MANUAL AND INSTRUCTIONS EN
• Press “START”; when the word “START” is shown, turn the key to make the starter run.
NB: While the compression test is being performed on petrol engines, keep the throttle pedal pressed to accelerate thoroughly.
• Keep the starter running (friction engaged) throughout the test; stop it only when the word “STOP” is displayed on the monitor.

14
ISTRUZIONI PER L’USO I
OPERATION MANUAL AND INSTRUCTIONS EN
• Duration can be set at 8 to 15 seconds. Selecting a time longer than 10 seconds will allow more accurate results to be
obtained.
• After the test has been completed, the frequency analysis chart will be displayed for RPM calculation; then the trend of the
battery voltage recorded during the test will be shown.
• A bar chart will be displayed on the left; it will allow the voltage drop per cylinder (in green) and the power absorbed per
compression (in yellow) to be analysed.
• Press “FORWARD”; two more windows – absorbed power and relative compression – will be shown.
Displayed POWER is the power absorbed by the starter when compression takes place; it shows the force exerted by the starter
and the pressure reached in the cylinders.

15
ISTRUZIONI PER L’USO I
OPERATION MANUAL AND INSTRUCTIONS EN
Pressing “FORWARD” again will allow the state of the battery to be displayed. The “no-load voltage” bar shows the voltage
measured before starting the test, without current absorption, and the state of charge of the battery.
The “under-load voltage” bar shows voltage during maximum current absorption.
The state of health of the battery can now be tracked:
• Both values in the green area -> Positive outcome
• One or more values in the yellow area -> Caution is required
• One or more values in the red area -> Malfunctioning
The absorbed power values depend on both the temperature of the
engine and the internal resistance of the battery. They can be compared
between tests, though only on equal conditions.
The RELATIVE COMPRESSION chart shows the differences between
cylinders. In this case, the results are graded down, so that the cylinders
with the highest compression are at 100% (Max) and can always be
compared to each other.

16
ISTRUZIONI PER L’USO I
OPERATION MANUAL AND INSTRUCTIONS EN
NB: The results of the tests might be inuenced by a defective starter, at battery etc.
Pressing “SAVE DATA” at the end of a test will allow the tests performed to be saved.
NB: If the tests performed before need to be displayed and examined, the tool does not have to be connected to the PC.
WARNINGS
The data to analyse are not enough. A test lasts at least 6 seconds. This
warning is shown if the starting procedure is stopped before the amount of
time required to acquire data has elapsed.
Sometimes the result may be such that two “High” cylinders and two “Low”
cylinders alternate and the pairs of values are very similar. This situation is
reported as a special case, because it might be caused by a mechanical
part (e.g. pump) introducing a load, and thus more power absorption,
synchronized with two cylinders (once for each revolution of the engine).
A low-pressure cylinder results in lower power absorption for that cylinder
than in normal situations, during compression as in the other phases (descent
following compression, discharge and suction). This will have a nonuniform
impact on the compression of the other cylinders, thereby resulting in
differences in the measured power.
RELATIVE COMPRESSION

17
MAINTENANCE
Maintenance and repair jobs must be carried out by trained personnel. For such jobs, you can contact Beta Untensili S.P.A.’s
repair centre.
DISPOSAL
The crossed-out wheelie bin symbol on the equipment or packaging means that the product should be collected separately from
other types of urban waste at the end of its useful life.Any user who is going to dispose of this tool can:
- deliver it to an appropriate collection facility for electronic or electrotechnical equipment;
- return it to the dealer upon purchase of a new, equivalent item of equipment;
- in case of a product for professional use only, contact the manufacturer which will arrange for the product to
be properly disposed of.
Proper disposal of this product allows the raw materials contained in it to be reused and prevents damage to the environment or
human health.Illegal disposal of this product is a violation of the provision concerning the disposal of hazardous waste and will
give way to the application of such nes as provided for under current regulations.
WARRANTY
This tool is manufactured and tested in accordance with current EU regulations. It is covered by a 12-month warranty for
professional use or a 24-month warranty for nonprofessional use.We will repair any breakdowns caused by material or
manufacturing defects by xing the defective pieces orreplacing them at our discretion.Should assistance be required once or
several times during the warranty period, the expiry date of this warranty will remain unchanged.This warranty will not cover
defects due to wear, misuse or breakdowns caused by blows and/or falls.In addition, this warranty will no longer be valid if any
changes are made, or if the tool is damaged or sent to the customer service in pieces.This warranty explicitly excludes any
damage to people and/or things, whether direct or consequential.
DECLARATION OF CONFORMITY
We hereby declare, assuming full responsibility, that the described product complies with all the relevant provisions of the
following Directives:
• Electromagnetic Compatibility Directive (EMC) 2014/30/EU;
• Directive concerning the restriction of the use of certain hazardous substances in electric and electronic equipment (RoHS)
2011/65/EU.
The Technical Brochure is available at:
BETA UTENSILI S.P.A.
Via A. Volta 18,
20845 Sovico (MB)
ITALIA
ISTRUZIONI PER L’USO I
OPERATION MANUAL AND INSTRUCTIONS EN

18
NOTICE D'UTILISATION ET INSTRUCTIONS POUR TESTEUR D’EFFICIENCE MOTEUR ART. 1465 FABRIQUÉ PAR:
BETA UTENSILI S.P.A.
Via A. Volta 18,
20845 Sovico (MB)
ITALIE
Documentation rédigée à l’origine en langue ITALIENNE.
Garder scrupuleusement les instructions sur la sécurité et les remettre au personnel concerné.
DESTINATION D’UTILISATION
- Le testeur d’efcience moteur permet de vérier la compression des moteurs endothermiques
• Vérier la compression d’un moteur essence ou diesel.
- Les opérations suivantes ne sont pas autorisées:
• Utilisation interdite en dehors des prescriptions techniques contenues dans le tableau DONNÉES TECHNIQUES ;
• Utilisation interdite dans les milieux humides, mouillés ou exposés aux intempéries ;
• Utilisation interdite pour toutes les applications autres que celles indiquées.
SÉCURITÉ DU POSTE DE TRAVAIL
Ne pas utiliser le testeur efcience moteur dans des milieux contenant des atmosphères potentiellement explosives ou
des matériaux inammables car des étincelles peuvent se produire et incendier les poussières ou les vapeurs.
Faire en sorte que les enfants ou les visiteurs ne puissent pas s’approcher du poste de travail pendant l’utilisation du
testeur efcience moteur. La présence d’autres personnes provoque des distractions et peut entraîner la perte du contrôle
lors de l’utilisation.
Pendant l’utilisation, faire extrêmement attention aux pièces en mouvement du moteur.
La chute d’outils métalliques sur la batterie du véhicule pourrait en provoquer un court-circuit.
Utiliser le testeur efcience moteur dans une zone sèche, sans humidité.
INDICATIONS DE SÉCURITÉ POUR LE TESTEUR EFFICIENCE MOTEUR
- Avant l’utilisation, contrôler que le testeur efcience moteur n’ait pas subi de dommages et l’absence de câbles découverts ou
de pièces usées.
- Ne pas utiliser le testeur efcience moteur s’il est endommagé à cause du risque de secousses électriques, ne pas essayer de
l’ouvrir ou de le modier.
- Vérier périodiquement l’intégrité du testeur efcience moteur, du câble d’alimentation et des pinces.
- Ne couvrir en aucune façon le testeur efcience moteur pendant son utilisation. Garantir un espace approprié pour la ventilation.
- Ne pas utiliser le testeur efcience moteur dans des milieux humides, mouillés, ne pas l’exposer à la pluie. Des milieux humides
et contaminés augmentent le risque de secousses électriques.
RECOMMANDATIONS POUR LA SÉCURITÉ DU PERSONNEL
- La plus grande attention est recommandée ainsi qu’une concentration extrême sur ses propres actions. Ne pas utiliser le testeur
efcience moteur en cas de fatigue ou sous l’effet de drogues, de boissons alcoolisées ou de médicaments.
- Utiliser systématiquement les équipements de protection individuelle suivants:
• Chaussures de sécurité
• Lunettes de protection
• Gants de protection pour agents physiques
IL EST IMPORTANT DE LIRE INTÉGRALEMENT LE PRÉSENT MANUEL AVANT
D’UTILISER L’OUTIL PNEUMATIQUE. LE NON-RESPECT DES NORMES DE
SÉCURITÉ ET DES INSTRUCTIONS D’UTILISATION PEUT PROVOQUER DE
GRAVES ACCIDENTS.
ATTENTION
ISTRUZIONI PER L’USO I
NOTICE D'UTILISATION ET INSTRUCTIONS FR

19
- Effectuer toutes les opérations prévues dans des milieux correctement aérés et secs.
- S’assurer que les câbles du testeur efcience moteur soient loin de ventilateurs, parties en mouvement et du conduit de
carburant.
- Ne pas porter de vêtements larges, ne pas porter de bracelets, de chaînettes ou d’objets métalliques pendant le travail sur le
véhicule.
- Nettoyer les terminaux de la batterie en évitant que des agents corrosifs n’entrent en contact avec la peau ou les yeux.
UTILISATION ATTENTIVE DU TESTEUR EFFICIENCE MOTEUR
- Ne pas utiliser le testeur efcience moteur si l’étui, les pinces, les câbles ou le câble d’alimentation sont endommagés, en cas
de détection d’odeurs inhabituelles ou s’il produit trop de chaleur.
- Le testeur efcience moteur ne doit pas être modié. Les modications peuvent réduire l’efcacité des mesures de sécurité et
augmenter les risques pour l’opérateur.
- Faire réparer le testeur efcience moteur seulement et exclusivement par un personnel spécialisé et uniquement en employant
des pièces de rechange originales.
- Ne pas utiliser le testeur efcience moteur avec des tensions autres que celles indiquées dans le tableau des DONNÉES
TECHNIQUES.
NOTICE D'UTILISATION ET INSTRUCTIONS FR
TENSION DE FONCTIONNEMENT
TEMPÉRATURE DE STOCKAGE
DIMENSIONS
LONGUEUR CÂBLE PINCES
POIDS
12 VDC (batterie véhicule)
5 °C ÷ 50 °C
140x75x30 mm
1,3 m
0,215 kg
CARACTÉRISTIQUES TECHNIQUES
ÉQUIPEMENTS DE PROTECTION INDIVIDUELLE PRÉVUS PENDANT L’UTILISATION DU TESTEUR
EFFICIENCE MOTEUR
Le non-respect des avertissements suivants peut causer des lésions physiques et/ou des pathologies.
UTILISER SYSTÉMATIQUEMENT DES CHAUSSURES DE SÉCURITÉ
PORTER SYSTÉMATIQUEMENT DES LUNETTES DE PROTECTION
UTILISER SYSTÉMATIQUEMENT DES GANTS DE PROTECTION POUR AGENTS
PHYSIQUES PENDANT L’EMPLOI DE L’INSTRUMENT
L’utilisation d’autres équipements de protection individuelle peut s’avérer nécessaire, en fonction des valeurs
relevées lors de l’enquête d’hygiène environnementale/analyse des risques, si les valeurs dépassent les
limites prévues par les normes en vigueur.

20
ISTRUZIONI PER L’USO I
NOTICE D'UTILISATION ET INSTRUCTIONS FR
INSTALLATION DU PROGRAMME
Avant d’effectuer le test, il faut s’assurer que la batterie soit chargée et empêcher que le moteur ne se mette en marche
pendant le test. (En fonction du type de moteur, il est possible d’enlever le fusible de la pompe du combustible, de désactiver
les injecteurs en détachant le capteur de tours etc.).
Pour utiliser l’instrument, il est nécessaire d’effectuer l’association en Bluetooth avec un ordinateur sur lequel sera installé le
logiciel à utiliser.
Procéder de la façon suivante :
1. Installer le logiciel présent sur la clé USB.
2. Alimenter l’instrument en reliant les câbles d’alimentation à la batterie du véhicule.
3. À partir du menu du Bluetooth, lancer la recherche de nouveaux dispositifs et associer l’instrument en choisissant un
numéro de port COM inférieur à 15.
4. Lancer le programme et appuyer sur la touche “AVANTI”, à ce point le programme cherche le dispositif et lorsqu’il le trouve,
le point vert s’éclaire dans la fenêtre du programme, près de l’indication Bluetooth.
5. Saisir les codes requis “SERIAL NUMBER” et “PASSWORD” qui se trouvent habituellement dans l’emballage.
UTILISATION
Après avoir adopté les précautions d’usage pour éviter que le moteur ne se mette en marche, brancher l’instrument à la
batterie du véhicule au moyen des pinces crocodile de la façon suivante :
• ROUGE sur le terminal positif, NOIR sur terminal négatif.
• Brancher l’instrument à l’ordinateur (par Bluetooth) et lancer le programme qui devra recevoir et analyser les données du
test.
Table of contents
Languages:
Other Beta Test Equipment manuals