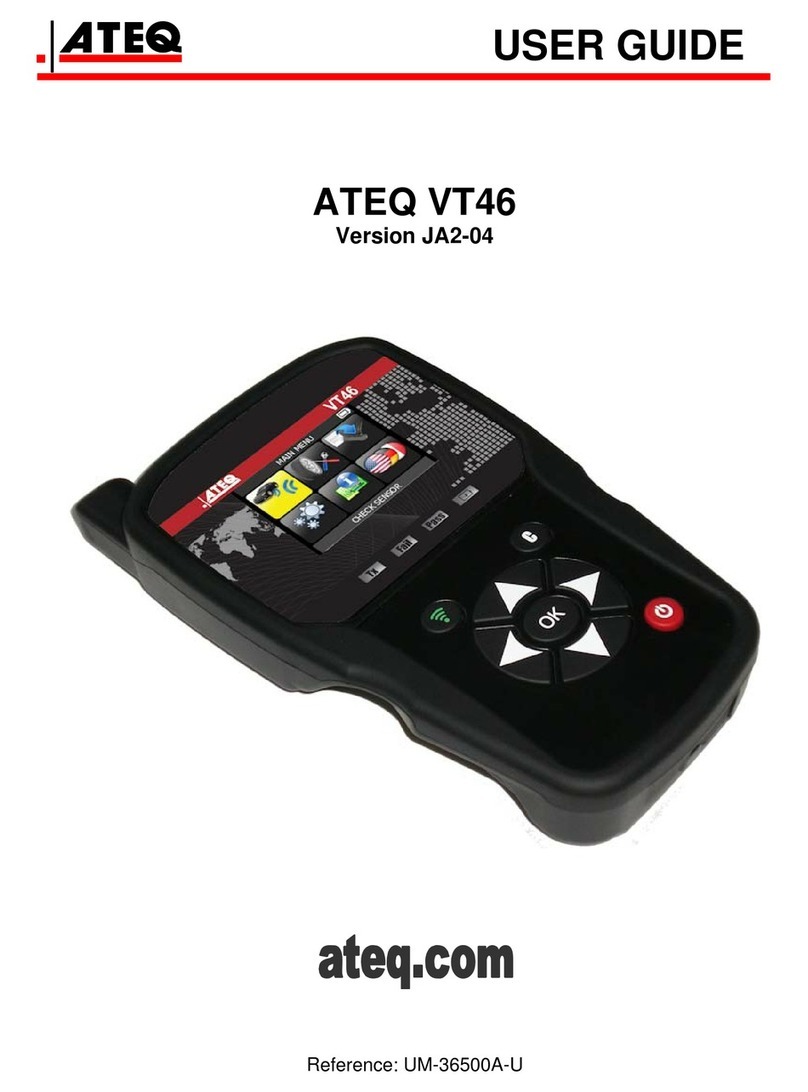
Bosch Mac Tools Mentor Touch ET750 User manual

®
ET750
en
Operating instructions
Diagnostic System ET750 + ET650


1 689 989 240 2015-09-25|Robert Bosch GmbH
1. Symbols used 4
1.1 In the documentation 4
1.1.1 Warning notices -
Structure and meaning 4
1.1.2 Symbols in this documentation 4
1.2 On the product 4
1.3 Electromagnetic compatibility (EMC) 4
1.4 R&TTE Directive 4
1.5 Wireless link 5
1.5.1 Important information on
WLAN and Bluetooth 5
1.5.2 Notes on access point (WLAN) 5
2. Important notes 6
2.1 User group 6
2.2 Agreement 6
2.3 Obligation of workshop operator 7
3. Safety instructions 8
3.1 Risk of electric shocks 8
3.1.1 Low voltages, high voltages 8
3.1.2 High voltages in hybrid vehicles and
electric vehicles as well as their high-
voltage components 8
3.2 Danger of acid burning 9
3.3 Danger of injury, Danger of crushing 9
3.4 Danger of burning 10
3.5 Danger of fire, Danger of explosion 10
3.6 Danger of asphyxiation 10
3.7 Danger of tripping 10
3.8 Noise 10
4. Product description 11
4.1 Intended use 11
4.2 Scope of delivery 11
4.3 Transportation 11
4.4 Description of device 11
4.4.1 Interfaces 11
4.4.2 Functions of On/Off button
with LED 12
4.4.3 Function key ƒ 12
4.4.4 Touch screen 12
4.5 Diagnostic device ET650 12
4.5.1 Diagnosis terminals 12
4.5.2 Terminal strip 12
4.5.3 Functions of LEDs A and B 13
4.6 Connection diagram 13
4.6.1 Notes on control unit diagnosis 14
4.6.2 Firmware update 14
5. Initial commissioning 14
5.1 Fitting the storage battery 14
5.2 Connection 14
5.3 Configuration of the operating system 15
5.4 Starting the HUB 15
6. Operation ET750 15
6.1 Switching on the ET750 15
6.2 Switching off the ET750 15
6.3 Setting power options 15
6.4 Voltage supply 16
6.5 Storage battery operation 16
6.6 Touch screen with stylus 16
6.7 On-screen keyboard 16
6.8 System settings 16
6.8.1 Volume adjustment 16
6.8.2 Calibrating touch screen 16
6.8.3 Windows update 17
6.9 Printing 17
6.10 Module configuration in DDC 17
6.11 Connecting ET650 via USB 17
6.12 HUB update installation 17
6.13 Information in the case of any faults 17
6.13.1 Diagnostic hardware not found 17
6.13.2 No communication with control unit 17
6.13.3 Independently troubleshooting
minor faults 18
7. Maintenance 19
7.1 Cleaning the ET750 and the ET650 19
7.2 Maintenance 19
7.3 Storage battery replacement 19
7.4 Recovery process Win 7 19
7.5 Software installation HUB
with SD memory card 20
7.6 Spare and wearing parts 20
8. Decommissioning 20
8.1 Change of location 20
8.2 Disposal and scrapping 20
9. Technical Data 21
9.1 Temperature and humidity 21
9.2 ET750 21
9.3 ET650 21
9.4 Communication protocol ET650 21
9.5 Power supply unit 21
9.6 Bluetooth Class 1 21
| ET750 | 3 en
Contents English

1 689 989 240 2015-09-25| Robert Bosch GmbH
Druckdatum/ print date: 17.12.2010
Weitergabe sowie Vervielfältigung der Zeich-
nungen sind nicht gestattet und müssen
streng vertraulich behandelt werden. Alle
Rechte sind bei ads-tec GmbH nach DIN 34.
strictly confidential according to DIN 34.
File:Airbag Lenkrad + TT13 Doku 130
( )
Rz 10
CAUTION – Risk of injury from triggering
of airbag with ET750 hanging from steering
wheel.
If the ET750 is attached to (suspended from)
the steering wheel, injuries could result from
unintentional airbag triggering.
¶Never attach the ET750 to the steering
wheel.
1. Symbols used
1.1 In the documentation
1.1.1 Warning notices -
Structure and meaning
Warning notices warn of dangers to the user or people
in the vicinity. Warning notices also indicate the con-
sequences of the hazard as well as preventive action.
Warning notices have the following structure:
Warning
symbol
KEY WORD – Nature and source of hazard!
Consequences of hazard in the event of fail-
ure to observe action and information given.
¶Hazard prevention action and information.
The key word indicates the likelihood of occurrence and
the severity of the hazard in the event of non-obser-
vance:
Key word Probability of
occurrence
Severity of danger if in-
structions not observed
DANGER Immediate impend-
ing danger
Death or severe injury
WARNING Possible impending
danger
Death or severe injury
CAUTION Possible dangerous
situation
Minor injury
1.1.2 Symbols in this documentation
Symbol Designation Explanation
!Attention Warns about possible property damage.
iInformation Practical hints and other
useful information.
1.
2.
Multi-step
operation
Instruction consisting of several steps.
eOne-step
operation
Instruction consisting of one step.
Intermediate
result
An instruction produces a visible inter-
mediate result.
"Final result There is a visible final result on com-
pletion of the instruction.
1.2 On the product
!Observe all warning notices on products and ensure
they remain legible.
1.3 Electromagnetic compatibility (EMC)
The ET750 satisfies the requirements of the EMC direc-
tive 2014/30/EU.
iThe ET750 is a class/category A product as defined
by EN 55 022. The ET750 may cause high-frequency
household interference (radio interference) so that
interference suppression may be necessary. In such
cases the user may be required to take the appropri-
ate action.
4 | ET750 | Symbols useden
1.4 R&TTE Directive
The ET750 is a class2 wireless device (R&TTE 1999/55/
EC) approved for use in Europe. In France, use of the
ET750 is only permissible indoors.
iIn non-European countries the corresponding nation-
al regulations on the operation of wireless devices
in the 2.4 GHz frequency band must be heeded (e.g.
WLAN or Bluetooth).

1 689 989 240 2015-09-25|Robert Bosch GmbH
1.5 Wireless link
!ET750 users are responsible for compliance with the
applicable directives and restrictions in the country
concerned.
1.5.1 Important information on
WLAN and Bluetooth
WLAN (Wireless Local Area Network) is the term used
to describe a wireless local network. Like Bluetooth,
WLAN provides a wireless link on the free 2.4 GHz ISM
band (ISM: Industrial, Scientific, Medical). This frequen-
cy range is subject to state legislation, can however be
used without a license in most countries. Consequently
a large number of applications and devices employ this
frequency band for transmission. This can result in fre-
quency interference.
Depending on ambient conditions, the WLAN link may
therefore deteriorate, e.g. in the case of Bluetooth links,
cordless telephones, radio-controlled thermometers,
radio-controlled garage door openers, radio-controlled
light switches or radio-controlled alarm systems.
iExtreme caution is to be taken if wearing pacemak-
ers or other vital electronic devices when using wire-
less systems, as proper functioning of these items
could be impaired.
Pay attention to the following to ensure the best pos-
sible connection:
RThe WLAN signal always tries to find the most direct
path. When setting up the PC/Laptop and access
point (see Sec.2.5.2), make sure there are as few
obstacles as possible (e.g. steel doors and concrete
walls) which could interfere with the signal from and
to the ET750.
RInside buildings, the range of the WLAN is also
greatly influenced by the construction materials
used. Conventional masonry, wooden walls and vari-
ous types of dry construction wall scarcely impair
the propagation of radio waves. Thin gypsum walls
are however problematic, as considerable amounts
of moisture may accumulate in the gypsum and
result in the absorption of radio signals. Metal walls
and concrete (in particular reinforced concrete)
largely block out radio waves. Cellar ceilings are
often impenetrable. Generally speaking, walls with
a lot of installed metal (e.g. pipes, wires) obstruct
radio waves.
RRadio reception is also impeded by large metal
objects such as radiators and window frames as well
as active sources of interference such as radio tele-
phones, motion detectors and microwave ovens.
RHuman beings are also an obstacle to wireless trans-
mission. It must therefore always be ensured that
no-one stands between the transmitter and receiver.
RWe advise having the network infrastructure in-
stalled and maintained by a network specialist.
RKeep the SSID and the codes for the wireless link
in a safe place. Make sure these data are readily to
hand in case faults occur.
RWe recommend a thorough inspection of the prem-
ises on commissioning: Establish where in the build-
ing the ET750 works properly and where the operat-
ing limits are.
RIf the ET750 is used inside a vehicle (Faraday cage),
wireless communication may be severely impeded.
RThe wireless link is affected by weather conditions.
The reception signal may therefore vary.
RPlease contact your network specialist for any que-
ries.
1.5.2 Notes on access point (WLAN)
An access point is an electronic device which acts as
an interface between a wireless network and a cable-
connected computer network. It provides a wireless
connection between the ET750, the PC/Laptop and a
printer.
iWe recommend using WLAN standard IEEE 802.11n
(data transmission rate max. 600 Mbps) for the
access point. The "extended range" function is not
supported.
iThe WLAN configuration always depends on the con-
figuration of the access point available.
Heed the following:
RThe access point should be located as centrally and
high up as possible, ideally under the ceiling. The
access point is not to be installed behind any metal-
lic objects, such as radiators or in a metal switch
cabinet.
RIf there is only one access point antenna, this should
face downwards towards the floor. If an access point
has several antennas, these should be in three-
dimensional arrangement.
RThe best and highest transmission rates are always
achieved if there is visual contact between the
ET750 and the access point.
RIn the event of a weak link it may be useful to
change the channel set on the access point. Where
possible avoid employing channels adjacent to those
already in use.
RIt is advisable to configure wireless communication
encoding at the access point.
Symbols used | ET750 | 5 en

1 689 989 240 2015-09-25| Robert Bosch GmbH
2. Important notes
Before start up, connecting and operating
Bosch products it is absolutely essential
that the operating instructions/owner’s
manual and, in particular, the safety in-
structions are studied carefully. By doing so you can
eliminate any uncertainties in handling Bosch products
and thus associated safety risks upfront; something
which is in the interests of your own safety and will
ultimately help avoid damage to the device. When a
Bosch product is handed over to another person, not
only the operating instructions but also the safety
instructions and information on its designated use must
be handed over to the person.
2.1 User group
The product may be used by skilled and instructed
personnel only. Personnel scheduled to be trained, fa-
miliarized, instructed or to take part in a general train-
ing course may only work with the product under the
supervision of an experienced person.
All work conducted on electrical and hydraulic devices
may be performed by persons with sufficient knowledge
and experience in the field of electrics and hydraulics.
Children have to be supervised to ensure that they do
not play with the appliance.
2.2 Agreement
By using the product you agree to the following regulations:
Copyright
Software and data are the property of
Robert Bosch GmbH or its suppliers and protected
against copying by copyright laws, international agree-
ments and other national legal regulations. Copying
or selling of data and software or any part thereof is
impermissible and punishable; in the event of any in-
fringements Bosch reserves the right to proceed with
criminal prosecution and to claim for damages.
Liability
All data in this program is based - where possible - on
manufacturer and importer details. Bosch does not ac-
cept liability for the correctness and completeness of
software and data; liability for damage caused by faulty
software and data is ruled out. Whatever the event,
Bosch liability is restricted to the amount for which the
customer actually pays for this product. This disclaimer
of liability does not apply to damages caused by intent
or gross negligence on the part of Bosch.
Warranty
Any use of non-approved hardware and software will
result in a modification to our product and thus to exclu-
sion of any liability and warranty, even if the hardware or
software has in the meantime been removed or deleted.
No changes may be made to our products. Our products
may only be used in combination with original acces-
sories and original service parts. Failing to do so, will
render null and void all warranty claims.
This product may only be operated using Bosch ap-
proved operating systems. If the product is operated
using an operating system other than the approved one,
then our warranty obligation pursuant to our supply
conditions will be rendered null and void. Furthermore,
we will not be held liable for damage and consequential
damage incurred through the use of a non-approved
operating system.
6 | ET750 | Important notesen

1 689 989 240 2015-09-25|Robert Bosch GmbH
2.3 Obligation of workshop operator
The workshop operator is obliged to ensure that all
measures geared towards the prevention of accidents,
industrial diseases, labor-related health risks are taken
and measures towards making the workplace fit for
people to work in are carried out.
Electrical engineering in Germany is subject to the
accident prevention regulations of the trade associa-
tion "Electrical Plant and Equipment as under DGUV
Vorschrift 3 (previously BGV A3)". In all other countries,
the applicable national regulations acts or decrees are
to be adhered to.
Basic rules
The workshop operator is bound to ensure that all
electrical equipment and operating material is set up,
modified and maintained by skilled electricians only
or under the guidance and supervision of a skilled
electrician in accordance with electrical engineering
principles.
Furthermore, the workshop operator must ensure that
all electrical equipment and operating material is oper-
ated in keeping with electrical engineering principles.
If a piece of electrical equipment or operating material
is found to be defective, i.e. it does not or no longer
complies with electrical engineering principles, the
workshop operator must ensure that the fault is recti-
fied immediately and, in the event that imminent danger
exists, also ensure that the electrical equipment or the
electrical operating material is not used.
Tests (taking Germany as an example):
RThe workshop operator must ensure that all electri-
cal systems and equipment are tested by a qualified
electrician or under the guidance of a qualified elec-
trician to ensure they are in proper working order:
$Before starting for the first time.
$After modification or repair before starting for
the first time.
$At given intervals. Set intervals such as to ensure
that faults that can be expected to occur are
determined in good time.
RThe test is to take the electrical engineering prin-
ciples relating hereto into account.
RUpon request of the trade association, a test manual
is to be maintained into which specific entries are
made.
Important notes | ET750 | 7 en

1 689 989 240 2015-09-25| Robert Bosch GmbH
3. Safety instructions
3.1 Risk of electric shocks
3.1.1 Low voltages, high voltages
Hazardous voltages occur in both the lighting
system and the electrical system of a motor
vehicle. If contact is made with live parts
(e.g. with the ignition coil), there is a risk of
electric shock from flashover voltages caused
by damaged insulation (e.g. ignition cables
which have been attacked by martens). These
apply to the secondary and primary sides of
the ignition system, the wiring harness with
connectors, lighting system (Litronic) as well
as connection to the vehicle.
Safety measures:
¶Only connect to a properly grounded outlet.
¶Only the enclosed or a tested power supply cable is
to be used.
¶All extension cables must be fitted with shock-proof
contacts.
¶Do not exceed the voltage limits as specified on the
connection cables.
¶Any cables with damaged insulation must be re-
placed.
¶Check the electrical equipment every two years and
immediately deal with any problems.
¶Only use fuses with specified current ratings.
¶Before connecting it to the vehicle, first connect the
product to the lighting mains and switch on.
¶Before switching on the ignition connect the (B-)
cable to engine ground or the battery (B–) terminal.
¶Always switch off the ignition before performing any
work on the electrical system of the vehicle. Inter-
vention includes, for instance, connection to the
vehicle, replacement of ignition system components,
removal of equipment (e. g. alternators), connection
of equipment to a test bench.
¶Wherever possible, tests and settings should always
be caried out with the ignition switched off and the
engine stationary.
¶If tests or settings are carried out with the ignition
switched on or the engine running, care must be
taken not to touch any live parts. This applies to all
connection cables and leads as well as to connec-
tions of equipment to test benches.
¶Test connections must always be made using suit-
able connectors (e.g. Bosch testing cable set or
vehicle-specific adapter cables).
¶Make sure that all test connections are properly
plugged in and secure.
¶Before disconnecting the (B-) cable from the engine
ground or battery (B–), switch off the ignition.
¶Never open the enclosures.
3.1.2 High voltages in hybrid vehicles and electric ve-
hicles as well as their high-voltage components
If high-voltage components or high-voltage
wires are inexpertly handled, there is a risk of
fatal injury from high voltages and the possi-
ble transmission of current through the body.
¶Deenergization is only to be performed by
a qualified electrician, a qualified electri-
cian for specific tasks (hybrid) or a power
systems engineer.
¶Work on vehicles with high-voltage com-
ponents is only ever to be performed in
a safe, deenergized condition by persons
with the minimum qualification "Trained to
perform electrical work".
¶Even after deactivating the high-voltage
vehicle electrical system, the high-voltage
battery may still be live.
¶Operating condition cannot be established
from any running noise, as the electric ma-
chine is silent when stationary.
¶In gear positions "P" and "N" the engine
or electric motor may start spontaneously
depending on the charge of the high-voltage
battery.
Safety measures:
¶Never open or damage high-voltage batteries.
¶On accident vehicles, never touch high-voltage com-
ponents or exposed high-voltage wires before deac-
tivating the high-voltage vehicle electrical system.
¶Avoid contact with any high-voltage components
and high-voltage wires (orange sheathing) when in
operation.
¶Secure against unauthorized renewed start-up
(e.g. by means of a padlock).
¶After each switch off of the high-voltage system,
observe a waiting time of 5 minutes (depending
on the manufacturer's instructions). Subsequently
ascertain the absence of voltage using a suitable
testing device.
¶Visually inspect the high-voltage components and
high-voltage wires for damage. The power systems
engineer responsible should always be immediately
notified of any irregularities, doubts or defects
found.
$High-voltage components must never exhibit
signs of external damage.
$The insulation of the high-voltage wiring must be
intact and undamaged.
$Watch out for any abnormal deformation of the
high-voltage wiring.
8 | ET750 | Safety instructionsen
1 689 989 240 2015-09-25|Robert Bosch GmbH
3.2 Danger of acid burning
When exhaust gas measurements are taken,
the sampling hoses which are used release
a highly caustic gas (hydrogen fluoride) that
can cause acid burning in the respiratory sys-
tem when heated to temperatures in excess of
250 °C (482 °F) or in the event of fire.
Rules of conduct:
¶Consult a doctor immediately after inhaling!
¶Always wear gloves made of neoprene or PVC when
removing residues left after a fire.
¶Neutralize any residues left after a fire with a cal-
cium hydroxide solution. This produces non-toxic
calcium fluoride, which can be washed away.
Acids and alkalis can cause severe burning on
unprotected skin. Hydrogen fluoride in combi-
nation with moisture (water) forms hydroflu-
oric acid. The condensate, which accumulates
in the sampling hose and in the condensate
container likewise contains acid.
Rules of conduct:
¶When replacing the O2measuring sensor, bear in
mind that it contains alkali.
¶When replacing the NO measuring sensor, bear in
mind that it contains acid.
¶Rinse any affected parts of the skin immediately in
water, then consult a doctor!
¶NO and O2measuring sensors are hazardous waste
and must be disposed of separately. Your Bosch
specialist equipper can dispose of sensors in the
proper manner.
If fluid (electrolyte) escapes from batteries
and rechargeable batteries
, avoid getting it on
your skin or in your eyes.
Rules of conduct:
¶If contact with skin or eyes happens nevertheless,
wash the affected parts immediately with clean wa-
ter and then consult a doctor.
3.3 Danger of injury, Danger of crushing
The vehicle has rotating and moving parts
that can injure fingers and arms.
If the vehicle is not prevented from roll-
ing away, there is a danger of people being
crushed against a workbench, for example.
There is the risk with electrically operated
fans in particular that the fan can start run-
ning unexpectedly even when the engine and
ignition are off.
Safety measures:
¶Take steps to prevent the vehicle from rolling away
while it is being tested. Select the park position if the
vehicle has an automatic transmission and apply the
handbrake or lock the wheels with chocks (wedges).
¶Deactivate the start/stop system when working on a
vehicle in order to prevent uncontrolled engine start.
¶Operating staff must wear work clothes without
loose bands and loops.
¶Do not reach in any area with rotating or moving parts.
¶When working on or in the vicinity of electrically
driven fans, allow the engine to cool down first, then
disconnect the plug of the fan motor.
¶Route cables at a suitable distance from rotating parts.
¶Secure the trolley against rolling away by setting the
brakes.
¶Do not place heavy objects on or lean on the sensor
holder.
¶Transport and operate the equipment only in accor-
dance with the operating instructions.
Safety instructions | ET750 | 9 en

1 689 989 240 2015-09-25| Robert Bosch GmbH
3.4 Danger of burning
When working on a hot engine, there is a risk
of injury from burning if such components as
the exhaust gas manifold, the turbo-charger,
the Lambda sensor, etc. are touched or if
parts of the body come too close to them.
These components may be heated to tem-
peratures of several hundred degrees Celsius.
Depending on the duration of the exhaust
gas measurements, the sampling probe of the
exhaust gas measuring instrument may also
become extremely hot.
Safety measures::
¶Always wear protective clothing, e.g. gloves.
¶Allow the engine to cool down first. This also applies
to auxiliary heating systems.
¶Keep connecting cables well away from all hot parts.
¶Do not leave the engine running any longer than
necessary for the test or setting.
3.5 Danger of fire, Danger of explosion
There is a risk of fire and explosion from fu-
els and fuel vapors when work is performed
on the fuel system or on the mixture control
system.
Safety measures:
¶Switch off the ignition.
¶Allow the engine to cool down first.
¶Avoid naked flames and potential sources of sparks.
¶Do not smoke.
¶Collect any leaked fuel.
¶Always ensure effective ventilation and suction when
working in closed areas.
3.6 Danger of asphyxiation
Car exhaust fumes contain carbon monoxide
(CO) - a colorless, odorless gas. If inhaled,
carbon monoxide causes an oxygen deficiency
in the body. Extreme caution is therefore es-
sential when working in a pit, as some of the
components of the exhaust gas are heavier
than air and settle at the bottom of the pit.
Caution is also necessary when working on
LPG-driven vehicles.
Safety measures:
¶Always ensure effective ventilation and suction (es-
pecially when working in a pit).
¶Always switch on and connect the suction plant in a
closed area.
3.7 Danger of tripping
When conducting tests or making adjust-
ments, the sensor and connection cables in-
crease the risk of tripping.
Safety measures:
¶Route the connecting cables such that any risk of
tripping up is prevented.
3.8 Noise
Noise levels in excess of 70 dB(A) can occur
when measurements are carried out on a ve-
hicle, especially at high engine speeds. Dam-
age to hearing may result if human beings
are exposed to noise at such levels over an
extended period of time.
Safety measures:
¶Noise protection facilities must be provided by the own-
er at all workplaces in the vicinity of the testing area.
¶Suitable personal noise protection facilities must be
used by the operator.
10 | ET750 | Safety instructionsen
1 689 989 240 2015-09-25|Robert Bosch GmbH
!You will find the "END-USER LICENSE AGREEMENT
(EULA) FOR MICROSOFT SOFTWARE" (EULA.XPS)
on the Desktop. Please observe the notes contained
herein.
4.4 Description of device
The ET750 is a portable, mobile tablet PC for workshop
use. It is operated by means of a pen (for the LCD touch
screen) and a virtual keypad. The data and measured
values can be printed out by way of the USB interface on
an external printer (special accessory). The ET750 and
the accessories are supplied in a protective case.
1
3
4
5
459966-02_Re
2
Fig. 1: ET750
1 LCD with touch screen
2 Interfaces
3 Stylus
4 Function key �
5 On/Off button
4.4.1 Interfaces
459966-04_Re
123456
Fig. 2: View of ET750 interfaces
1 RJ-45 network connection (LAN)
2 Monitor connection
3 USB port (2x), USB 2.0, max. 1 A
4 Memory card slot (SD card)
5 Headphone connection
6 Power supply unit connection (12 V DC)
Product description | ET750 | 11 en
4. Product description
4.1 Intended use
The ET750 is a diagnostic system for workshops
and with diagnostic device ET650 solely in-
tended to be used for the control unit diagnosis
with the "HUB" software. The operating system
Windows Embedded POSReady 7 (32-bit) and the
"HUB" software has been installed on the ET750.
HUB can execute the following functions:
RControl unit diagnosis, with e.g.
$read DTCs
$display actual values
$activate actuators
$use other specific control unit functions
!The installation of additional software on the ET750
may impair the performance of the ET750 system and
the ET750 may become slower in general. This ap-
plies in particular to virus scanner programs.
!The ET750 is a precision device which is not to be
subjected to sources of heat (e.g. direct sunlight), im-
pact, vibration, magnetic fields and excessive soiling.
4.2 Scope of delivery
Designation Order number
ET750 –
ET650 –
Storage battery 1 687 335 042
USB connecting cable (1.8m) 1 684 465 507
Connection cable for
cigarette lighter socket
1 684 465 784
OBD connection cable (1.5m) 1 684 465 555
Case 1 685 438 657
Power supply unit1) with
power supply cable and
power supply cable (en)
1 687 023 697
1 684 461 186
S P03 100 647
SD memory card (SW-Recovery) 1 688 400 556
Original operating manuals 1 689 989 240
1) The power supply unit included in the scope of delivery can be
used for the voltage supply of both the ET750 and the ET650.
4.3 Transportation
The ET750 connecting cables must be removed for
transportation purposes. In addition, the ET750 and
ET650 should only to be transported and stored in the
supplied case.

1 689 989 240 2015-09-25| Robert Bosch GmbH
459966-03_Re
1
2
3
1
Fig. 3: Underside of ET750
1 Screws for battery cover
2 Battery cover
3 Stand
4.4.2 Functions of On/Off button with LED
ET750 Power supply
unit
LED Status
Off Not connected Off –
Off Connected Green light
Yellow light
Battery charge
≥80%
Battery charge
<80%
On and LCD
on
Connected Off Battery being
charged
On and LCD
off
Not connected Green light Battery charge
≥10%
On and LCD
off
Not connected Flashing
red
Battery charge
<10%
On, LCD off,
in energy
saving mode
Not connected Flashing
green
Battery charge
≥10%
On, LCD off,
in energy
saving mode
Not connected Flashing
red
Battery charge
<10%
iBriefly pressing the On/Off button sets the ET750 to
standby mode or ends standby mode as applicable.
iPressing the On/Off button for >2 seconds shuts
down the Windows operating system and switches
off the ET750.
iPressing the On/Off button for >12 seconds
switches off the ET750 without first shutting down
the operating system. This mode should only be
used if shutdown of the Windows operating system
is not possible.
4.4.3 Function key ƒ
Pressing the function key ƒ opens or closes the start
menu and task bar of WIN 7 as applicable.
iPressing the function key ƒ for >2 seconds opens or
closes the virtual keypad as applicable.
4.4.4 Touch screen
The touch screen can be operated by hand or using a
pen. To implement an action, touch the appropriate
point on the touch screen with a finger or pen.
iTouch screen calibration is described in Sec.5.8.2.
4.5.1 Diagnosis terminals
459958-02_Ko
1
Fig. 4: Diagnosis terminals
1 Connection OBD diagnosis cable (DIAG)
4.5.2 Terminal strip
459958-01_Ko
123
Fig. 5: Terminal strip
1 Power supply connection
2 LED A and LED B (see chap. 3.5.3)
3 USB connection
12 | ET750 | Product descriptionen
4.5 Diagnostic device ET650
The ET650 is supplied with voltage via the power sup-
ply unit included in the scope of delivery or via the OBD
interface in the vehicle.

1 689 989 240 2015-09-25|Robert Bosch GmbH
4.5.3 Functions of LEDs A and B
Status LED A LED B
ET650 ready for oper-
ation
Does not illumi-
nate
Flashes green
(1 second interval)
Data communication
with the controller
Flashes green
(irregular)
Flashes green
(1 second interval)
Firmware update
in operation
Does not illumi-
nate
Flashes red
(irregular)
LED A Function Measures
Does not illumi-
nate
No data communi-
cation with the con-
troller
Check connection
with the controller
Flashes green
(irregular)
Data communication
with the controller
None
Illuminated green Fault in hardware/
Firmware
*)
Illuminated red Power supply
> 35 Volt.
Check voltage in ve-
hicle
LED B Function Measures
Does not illumi-
nate
Voltage not present Check power
supply
Flashes green
(1 second inter-
val)
ET650 ready for op-
eration
None
Illuminated green Fault in hardware/
Firmware
*)
Flashes yellow
(1 second inter-
val)
Overvoltage on
diagnostic cable
*)
Illuminated yellow Fault in hardware/
Firmware
*)
Flashes red
(irregular)
Firmware update
in operation
None
Illuminated red Fault in firmware-
update
Repeat firmware
update
*) Unplug the USB connection and power supply and connect them
again. If the error still exists, contact customer service.
Product description | ET750 | 13 en
4.6 Connection diagram
The ET650 can be connected to the ET750 via Bluetooth
or the USB interface.
1
2
3
4
5
6
7
8
9
10
11
12
13
14
15
16
459966-05_Re
1
2
3
4
5
6
7
oben/top
®
®
Fig. 6: ET650 connection diagram
1 OBD interface in motor vehicle
2 OBD connection cable
3 ET750
4 ET650
5 Power supply unit
6 USB connecting cable
7 Connection cable for cigarette lighter socket

1 689 989 240 2015-09-25| Robert Bosch GmbH
14 | ET750 | Initial commissioningen
5. Initial commissioning
¶Remove the ET750, the ET650, the storage battery
and the power supply unit with power supply cable
from the case.
5.1 Fitting the storage battery
1. Loosen the screws in the battery cover (fig.3,
item1) on the back of the ET750 and remove the
battery cover.
2. Orient the storage battery properly, place it in the
battery compartment (fig.7, item2) and slide it
onto the battery connector (fig.7, item3).
3. Fasten the storage battery using the two screws on
the battery.
4. Reinstall the battery cover and fasten it with the
screws.
459966-06_Re
1
3
12
Fig. 7: Inserting the storage battery
1 Battery fastening sleeves
2 Battery compartment
3 Battery connector
iIt is advisable to charge the storage battery for at least
three hours before running the ET750 off the battery.
5.2 Connection
Prior to the initial commissioning, make sure the mains
voltage coincides with the voltage specified on the pow-
er supply unit (use the power supply cable provided).
4.6.1 Notes on control unit diagnosis
The ET650 is supplied with voltage either via the power
supply unit provided or the OBD interface in the vehicle.
!If a test step involves starting the engine, the battery
voltage may drop to such an extent that supply via
the vehicle is no longer guaranteed. In such cases
it may be necessary to run the ET650 by way of the
power supply unit.
iOn some vehicles, the ignition must be switched on
for power to be supplied via the OBD interface.
Connection to the diagnostic interface in the vehicle is
done using the OBD connection cable (fig. 6, item. 2).
!Make sure the OBD connection cable is properly
connected to the ET650. Incorrect connection could
cause the pins of the plug to bend or break off. Only
use the OBD connection cable contained in the
scope of delivery of the ET750.
iNotes on control unit diagnosis can be found in the
online help for the HUB software ( ).
4.6.2 Firmware update
After an update of HUB, the firmware of the ET650 is
updated automatically when the control unit diagnosis
is started.
To update the firmware, supply the ET650 using the
provided power supply unit and connect to ET750 us-
ing the USB connecting cable. Do not interrupt the USB
connection during the firmware update. The firmware
update can also be done using DDC (Diagnostic Device
Configuration) (see online help on DDC).
!For the ET650, firmware updates must always be
performed using the USB connecting cable (not by
way of Bluetooth).

1 689 989 240 2015-09-25|Robert Bosch GmbH
Initial commissioning | ET750 | 15 en
5.3 Configuration of the operating system
iIf the storage battery in the ET750 has not been
charged, supply the ET750 with voltage using the
power supply unit.
1. Switch on the ET750.
iThe first time that you start Windows, the ET750
screen can remain black for up to four minutes. Dur-
ing this time it is evident that the ET750 is switched
on and Windows is starting up by the flashing LED
of the on/off button.
!Never turn off the ET750 during this time! Wait until
the Windows start screen appears.
2. After switching on for the first time, use the lan-
guage selection menu to select the Windows operat-
ing system language and follow the message.
iThere is no provision for subsequent alteration of the
Windows operating system language. Should this nev-
ertheless become necessary, the language selection
menu can be re-started under "Start >> All programs
>> Tools >> Localization".
5.4 Starting the HUB
1. Start the HUB.
The dialog box "Language and Country" opens.
2. Choose language and country and continue the
installation with <Next>.
3. Read and accept the user agreement and warranty.
4. Heed and follow the instructions on the screen.
"HUB is started.
HUB has to communicate with ET650 for control unit
diagnosis. To do so, the ET650 must be supplied with
voltage via the power supply unit included in the scope
of delivery or via the OBD interface in the vehicle. A
Bluetooth connection has been configured ex-works
between the ET750 and the ET650.
iTo access all HUB functions and to receive software
updates, HUB must be licensed. Licensing can be
performed either online or with a license file. The
further licensing procedure for initial commissioning
is described in detail in the HUB online help ( ).
6. Operation ET750
6.1 Switching on the ET750
!To avoid the formation of condensed water, allow
the ET750 to adjust to ambient temperature before
switching on the ET750!
1. Switch on the ET750 by pressing the On/Off button .
After the Windows operating system has been
run up, the start mask appears.
2. Use the stylus to touch the application you would
like to work with.
Druckdatum/ print date: 17.12.2010
Weitergabe sowie Vervielfältigung der Zeich-
nungen sind nicht gestattet und müssen
streng vertraulich behandelt werden. Alle
Rechte sind bei ads-tec GmbH nach DIN 34.
strictly confidential according to DIN 34.
File:Airbag Lenkrad + TT13 Doku 130
( )
Rz 10
CAUTION – Risk of injury from triggering
the airbag with attached ET750!
If the ET750 is attached to (suspended from)
the steering wheel, injuries could result from
unintentionally triggering the airbag.
¶Never attach the ET750 to the steering
wheel.
6.2 Switching off the ET750
1. Press the function key f.
The home page and task bar are opened.
2. Select <Shutdown> from the home page.
Windows is shut down.
"The ET750 is switched off.
iPressing the On/Off button for >2 seconds shuts
down the Windows operating system and switches
off the ET750.
iPressing the On/Off button for >12 seconds
switches off the ET750 without first shutting down
the operating system. This mode should only be used
if shutting down the Windows operating system is
not possible.
6.3 Setting power options
The menu "Start >> Control panel >> Power options" can
be used to select and alter the power plan (e.g. the moni-
tor switch-off time or the display brightness setting).

1 689 989 240 2015-09-25| Robert Bosch GmbH
16 | ET750 | Operation ET750en
6.4 Voltage supply
The ET750 can be operated with the following voltage
supply:
RStorage battery
RPower supply unit
!Only use the power supply unit included in the scope of
delivery.
6.5 Storage battery operation
The ET750 features a storage battery for supplying the
ET750 with voltage.
iThe storage battery is charged automatically during
mains operation.
The fully charged storage battery of the ET750 is designed
to guarantee approx. 2 hours of independent operation.
iThe LED of the On/Off button lights up red if
the storage battery charge is less than 10%. IN this
case, connect the power supply unit to allow the
storage battery to re-charge.
iThe battery charge condition can be viewed at any
time by clicking onto the icon in the task bar.
6.6 Touch screen with stylus
The touch screen of the ET750 is operated with a sty-
lus. which basically has the same functions as a mouse:
RA single click with the left mouse key corresponds to
a single touch on an icon for example, or positioning
of the cursor in an input box.
RTouching an icon with the stylus and holding it in
this position corresponds to a single click on the
icon with the right mouse key.
RA double click with the left mouse key corresponds
to touching the touch screen twice with the stylus.
This is used to start an application program for
example.
iFor notes on touch screen calibration see Section 5.8.2.
6.7 On-screen keyboard
The ET750 features a virtual keypad. Pressing the
icon in the task bar or pressing the function key ƒ for
>2 seconds opens or closes the on-screen keyboard as
applicable.
The on-screen keyboard functions in the same way as
a conventional keyboard. The following setting options
are available:
If calling up a function on a standard keyboard would
involve pressing two keys simultaneously (e.g. <Alt> +
<F4>), these keys are to be pressed consecutively on
the on-screen keyboard. The special keys <Shift>, <Alt>
and <Ctrl> must always be pressed first.
!On account of software programming differences, it
cannot be guaranteed that the on-screen keyboard
keypad will work with every type of software.
6.8 System settings
The power plan settings and the screen brightness can
be altered under "Start >> Control panel >> Power op-
tions" or by pressing and holding the icon with the
stylus.
6.8.1 Volume adjustment
By clicking on the icon in the task bar with the stylus,
the volume of the ET750 can be adjusted.
6.8.2 Calibrating touch screen
The purpose of the "HIDeGalaxTouch“ application is to
calibrate the touch screen in the respective view (hori-
zontal or vertical).
1. Start "HIDeGalaxTouch" with a double click on the
touch screen.
2. Select <4-point calibration> or <9-point linearization>.
iBosch recommends the 9-point linearization in order
to achieve sufficiently accurate calibration of the
touch screen.
3. Touch calibration or linear points with the stylus and
hold until the OK symbol appears.
iTo avoid errors, the line of vision must be vertically
above the calibration point. Click onto the calibra-
tion point as accurately as possible.
4. On completion of calibration, end the application
with <OK>.
"This completes the calibration.

1 689 989 240 2015-09-25|Robert Bosch GmbH
Operation ET750 | ET750 | 17 en
6.8.3 Windows update
To avoid disturbance when working with the ET750, the
automatic Windows updating function is deactivated.
If the ET750 is operated with internet access, Windows
updating should be performed every 3 months at the
latest to install security updates.
Procedure:
1. Under "Start >> All programs >> Windows Update"
select the Search for updates button.
Available updates are displayed.
2. Install the desired updates.
6.9 Printing
A printer can be connected by way of the USB port of
the ET750.
iRefer to the printer manufacturer's information for
details of printer drivers and installation.
iInformation on printing can be found in the HUB
online help ( ).
6.10 Module configuration in DDC
iThe configuration procedure of ET650 is described
in detail in the online help. Open the online help
with <Help>. All other important information on DDC
can also be found here.
iIf you have any questions which cannot be answered
by the online help, please contact the HUB Service
Line directly.
6.11 Connecting ET650 via USB
1. Supply the ET650 with voltage via the power supply
unit included in the scope of delivery or via the OBD
interface in the vehicle.
2. Connect the ET650 to the ET750 using the USB con-
necting cable.
3. Configure the ET650 in the DCC for USB connection.
6.12 HUB update installation
iDuring a HUB update installation always supply the
ET750 with voltage by way of the power supply unit.
The further update installation procedure is de-
scribed in detail in the HUB online help ( ).
6.13 Information in the case of any faults
6.13.1 Diagnostic hardware not found
No diagnostic hardware was found when the on-board
diagnosis software was started or during communica-
tion with the control unit. The "Connect diagnostic
hardware and supply it with external volt-
age" or "Wireless connection to the ET650
is faulty" failure indication appears.
Possible causes Action to be taken
No external voltage
supply
Check whether the ET650 is supplied with
external voltage (power supply unit or OBD
connection cable).
LED B on ET650 must flash green.
ET650 is not active
or configured incor-
rectly.
1. End onboard diagnosis.
2. Start the DDC ("Start >> Control panel").
3. Check In DDC whether the ET650 has
been configured correctly and activated.
4. Finally, test the ET650.
Problem with Blue-
tooth link or no link
available (e.g. fol-
lowing PC/Laptop
standby mode).
The connection symbol in the HUB
main-menu bar is white.
1. Reduce distance between Bluetooth USB
adapter and ET650.
2. Test the ET650 in DDC.
6.13.2 No communication with control unit
During the onboard diagnosis, the following failure in-
dication appears: No communication with the
control unit. Adapter cable connected?
Possible causes Action to be taken
Wrong cable
has been connected.
Check whether the correct cable
has been used.
iIf the fault cannot be rectified, contact the Support
Ticket Team (task bar: "Start >> Programme >> Mac
Tools HUB >> Support Ticket").

1 689 989 240 2015-09-25| Robert Bosch GmbH
18 | ET750 | Operation ET750en
6.13.3 Independently troubleshooting minor faults
Fault Note
The ET750 cannot be switched on and
the display remains blank.
The capacity of the internal storage battery is not sufficient to start the ET750.
Connect the external power supply unit.
The first time that you start Windows
or after you select the Windows lan-
guage preference, the screen will re-
main black for up to four minutes.
The same behavior may occur in in-
dividual cases after a program is in-
stalled.
During this time, you cannot tell that the ET750 is turned on.
Never turn off the ET750 during this time! Wait until the Windows start screen appears.
If the ET750 is accidentally turned off during this time and the ET750 then cannot be
switched on, a recovery process is required (see sec. 6.4).
The ET750 does not react to
any key commands.
1. Press and hold the ON button for 10 seconds.
2. Switch on the ET750 again.
This switch-off procedure is only to be employed if the ET750 will not react to any key be-
ing pressed, as it may result in loss of data on the hard disk if it is implemented during regu-
lar operation. Data created in the course of this diagnostic application may have to be entered
again.
After clicking onto the touch screen with
the stylus, the mouse pointer does not
appear at the same location
Touch screen calibration must be performed.
In the start bar under "START >> Programs >> HIDeGalaxTouch", call up the menu "HIDe-
GalaxTouch", see Section 5.8.2
Operation by way of stylus and touch
screen is no longer possible.
Touch screen calibration must be performed. Connect the mouse or keyboard.
In the start bar under "START >> Control panel", call up the menu "HIDeGalaxTouch", see
Section 5.8.2
Problems when moving the circuit di-
agrams.
Check the virtual keyboard settings. Select the Tools tab and then the menu item "Options".
In the Choose where to show the Input Panel icons and tab input box, only the option
Show the icon on the taskbar should be selected.
iIn the case of transmission problems during control unit diagnosis, please see the notes in section 2.5.

1 689 989 240 2015-09-25|Robert Bosch GmbH
Maintenance | ET750 | 19 en
7. Maintenance
7.1 Cleaning the ET750 and the ET650
Only use a soft cloth and neutral detergents to clean
the housing and display of the ET750 and the ET650.
Do not use abrasive cleaning agents and coarse work-
shop cloths!
7.2 Maintenance
In the DDC Customer service tab, various tests can be
performed for the ET650. Some of these tests can only
be performed by customer service.
7.3 Storage battery replacement
WARNING - Risk of explosion on charging
battery!
Risk of explosion and hence burns and injury
when charging the battery improperly!
¶Only use the storage battery specified for
the ET750.
¶Only use the power supply unit specified
for the ET750.
¶Heed the notes on disposal.
¶Storage battery must not be heated,
burnt, short-circuited, mechanically dam-
aged and charged with excessively high
currents or reverse polarity!
¶Suitable extinguishing agents: water, CO2,
sand.
1. Switch off the ET750.
2. Loosen the screws in the battery cover (fig. 3, item
1) on the back of the ET750 and remove the battery
cover (fig. 3, item 2).
3. Loosen the screws on the storage battery (fig. 7,
item 1).
4. Remove the storage battery.
5. Place a new storage battery in the battery compart-
ment and slide it onto the battery connector.
6. Fasten the storage battery using the two screws on
the battery.
7. Reinstall the battery cover and fasten it with the
screws.
8. Switch on the ET750.
iThe storage battery charge indicator can be called
up via the icon.
"The storage battery charge indicator shows the current
battery charge on a scale of 0 to 100%.
iIt is advisable to charge the battery for at least three
hours before running the ET750 off the battery.
7.4 Recovery process Win 7
!All data and applications on the hard disk will be
erased during the recovery process!
1. Connect the ET750 to the power supply unit.
2. Insert the SD memory card (recovery) in the memo-
ry card slot of the ET750(Fig. 2, item 4).
3. Connect USB keyboard.
4. Switch on the ET750.
5. Press any key right after the switch-on.
The message "Would you really want to
recover your Computer?" is displayed after a
few seconds.
6. Confirm message with <Yes>.
Message "WARNING! ALL DATA ON HARD
DISK DRIVE C: WILL BE LOST. Please
be patient while recovery process is
running." is displayed.
7. Confirm message with <Yes>.
ET750 recovery is started – duration approx.
20minutes.
Message "Please remove the recovery
media from the device and click "OK"
to reboot the computer" appears.
8. Remove the SD memory card.
9. Confirm the message with <OK>.
Windows is re-started.
Virtual keyboard is displayed.
10.Close virtual keyboard.
11.Choose the language of the Windows operating sys-
tem via the language selection menu.
12.Confirm with <Yes>.
Message "To nish the language congu-
ration the user will be logged out!"
is displayed.
13.Confirm the message with <OK>.
14.Windows is re-started.
"This completes the recovery process.
iThen, install the HUB again via the SD memory card
and follow the instructions on the screen.

1 689 989 240 2015-09-25| Robert Bosch GmbH
8. Decommissioning
8.1 Change of location
¶If the ET750 is passed on, all the documentation
included in the scope of delivery must be handed over
together with the unit.
¶The ET750 is only ever to be transported in the origi-
nal or equivalent packaging.
¶Unplug the electrical connection.
¶Heed the notes on initial commissioning.
8.2 Disposal and scrapping
1. Disconnect the ET750 from the mains and detach
the power cord.
2. Dismantle the ET750 and sort out and dispose of
the different materials in accordance with the ap-
plicable regulations.
The ET750 is subject to the European direc-
tive 2002/96/EC (WEEE).
Dispose of used electrical and electronic
devices, including cables, accessories and
batteries, separately from household waste.

Make use of the local return and collection
systems for disposal.
¶Proper disposal of ET750 prevents envi-
ronmental pollution and possible health
hazards.
20 | ET750 | Maintenanceen
7.5 Software installation HUB with SD
memory card
1. Supply the ET750 with voltage by way of the power
supply unit.
2. Insert the SD memory card in the memory card slot
of the ET750(Fig°2, item 4).
3. Switch on the ET750.
4. Start "Windows Explorer".
5. Start 'D:\HUBSETUP.EXE' (D = SD memory card
driver letter).
6. Set-up is started.
7. Heed and follow the instructions on the screen.
iNotes on the online update of the HUB software can
be found in the HUB online help ( ).
7.6 Spare and wearing parts
Designation Order number
ET750 1 687 023 763
ET650 1 687 023 014
Storage battery<) 1 687 335 042
USB connecting cable (1.8m)<) 1 684 465 507
Connection cable for
cigarette lighter socket<)
1 684 465 784
OBD connection cable (1.5m)<) 1 684 465 555
Power supply unit
power supply cable<)
1 687 023 697
1 684 461 186
Power supply cable<) (en) S P03 100 647
Stylus (1 pc.) 1 687 010 403
SD memory card (SW-Recovery) 1 688 400 556
Case 1 685 438 657
<) Wearing part
This manual suits for next models
1
Table of contents
Other Bosch Diagnostic Equipment manuals

Bosch
Bosch FSA 740 User manual

Bosch
Bosch TPA 300 User manual

Bosch
Bosch FSA 500 User manual

Bosch
Bosch BSA 43 Series Technical specifications

Bosch
Bosch FWA 46 + Series User manual

Bosch
Bosch TECH 2 User manual

Bosch
Bosch FSA 740 User manual

Bosch
Bosch Mastertech II VCI User manual

Bosch
Bosch KTS 250 User manual

Bosch
Bosch TPA 200 User manual

Bosch
Bosch DCU 100 User manual

Bosch
Bosch FSA 740 User manual

Bosch
Bosch RNM VI User manual

Bosch
Bosch DCI 700 Setup guide

Bosch
Bosch MTS 6520 VCI User manual

Bosch
Bosch TECH 2 User manual

Bosch
Bosch FWA 4650 User manual

Bosch
Bosch MTS 6531 User manual

Bosch
Bosch KTS Truck User manual

Bosch
Bosch KTS 250 User manual