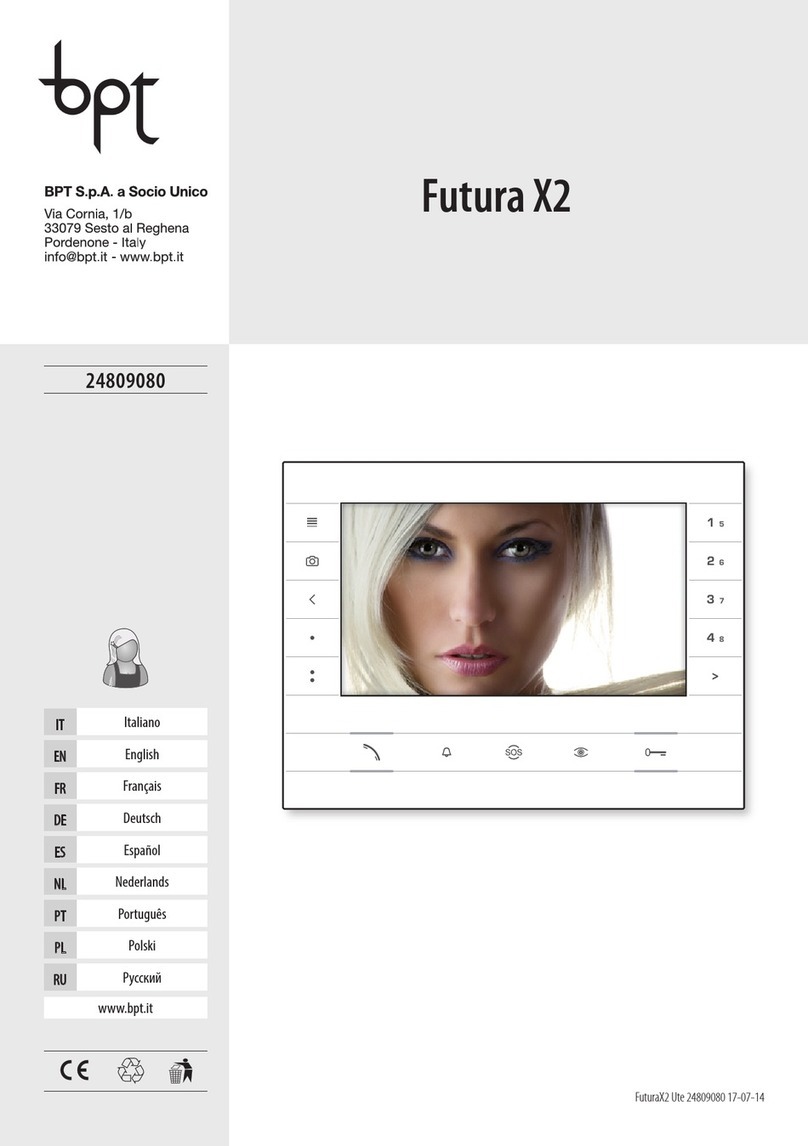
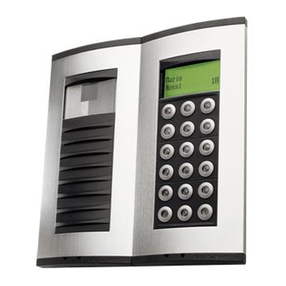
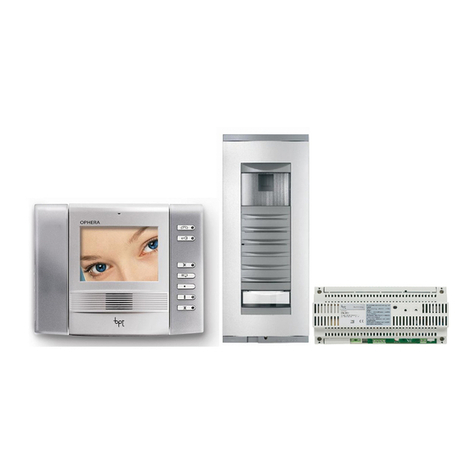
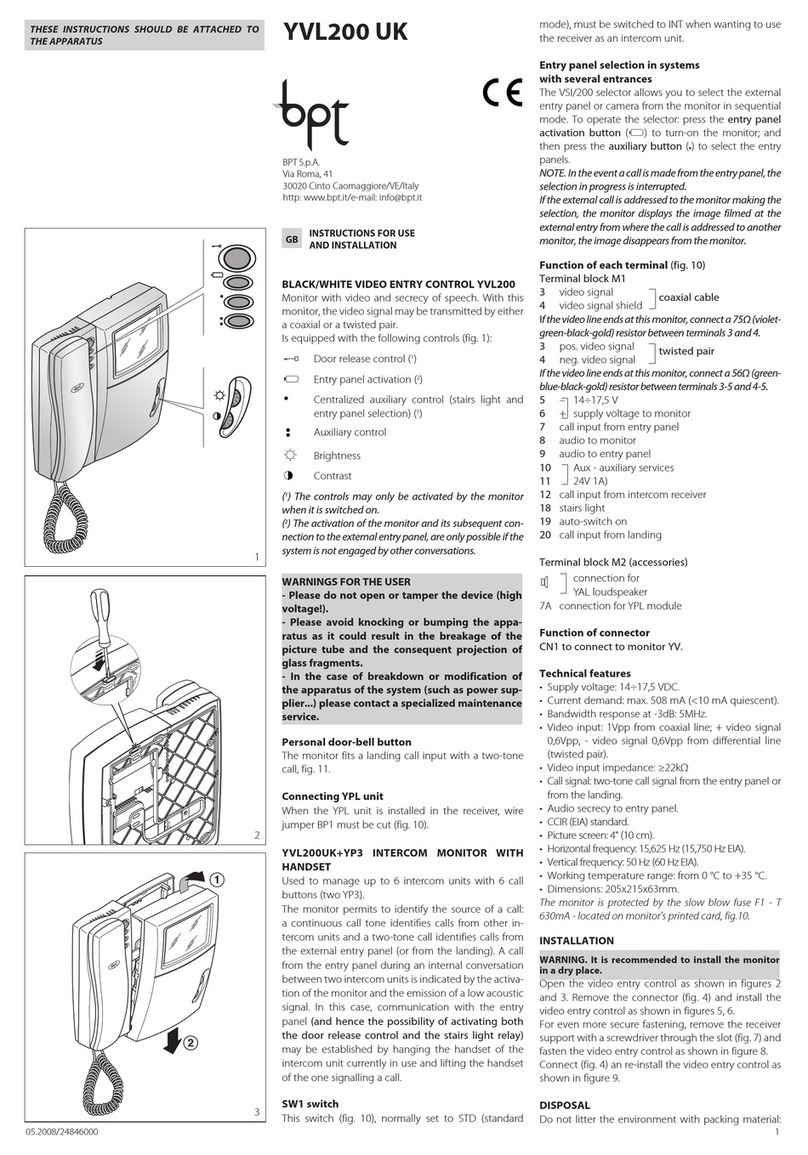
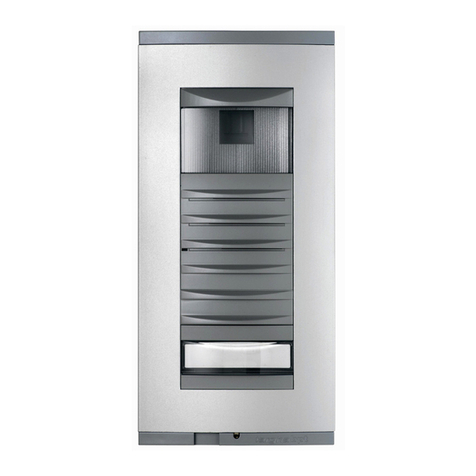
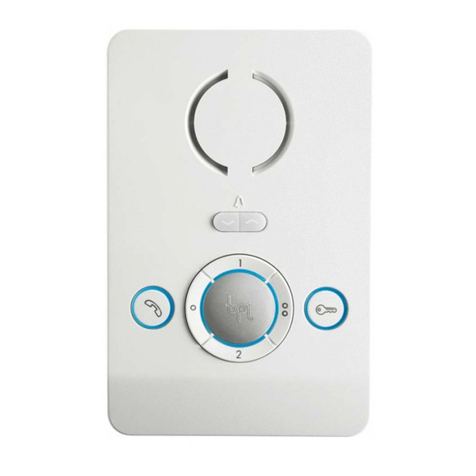
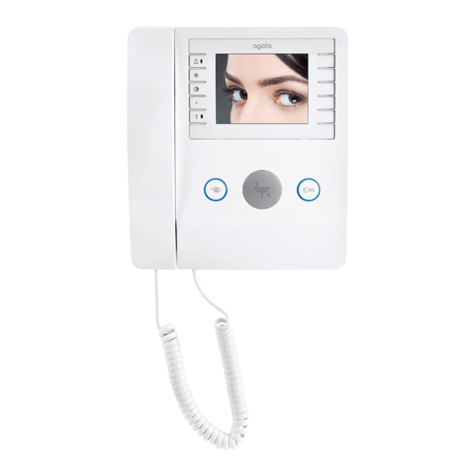
Bpt OPALE User manual

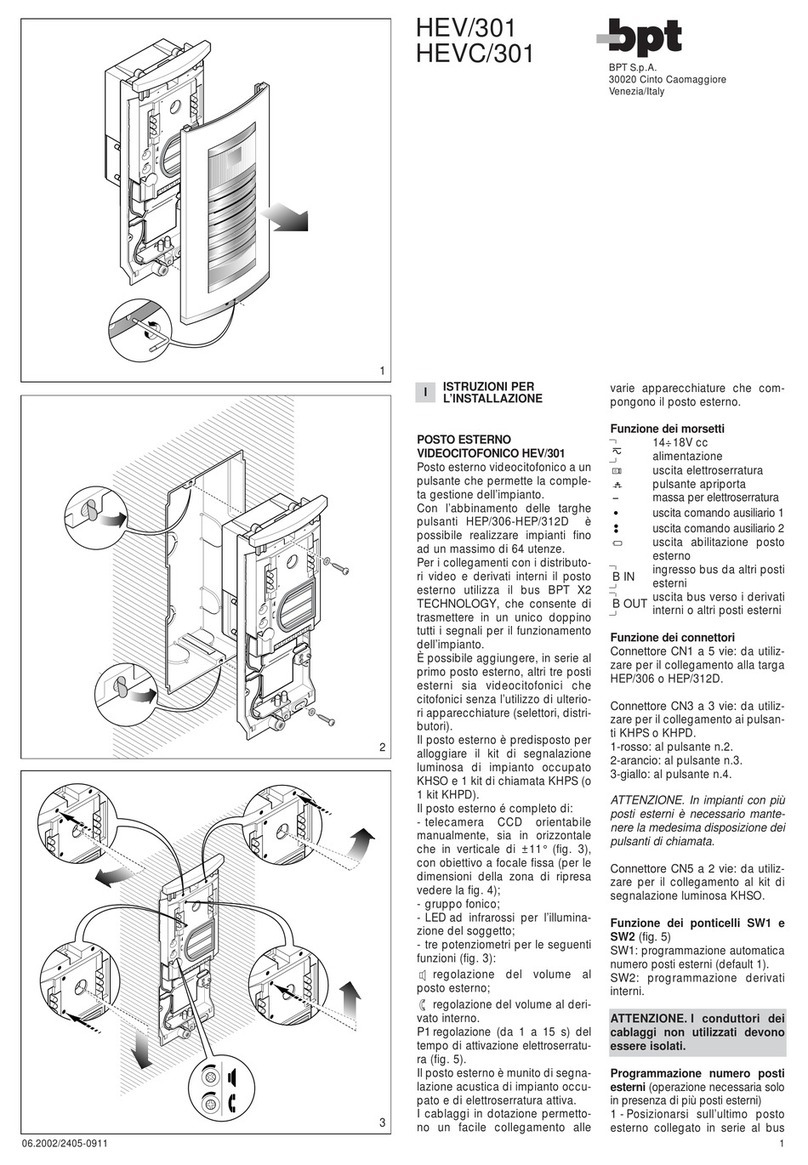
24805201– 03-04-2013
Manuale per l’Utente ________________________________
opale
Manuel de l’Utilisateur ____________________________
Manual de Usuario _____________________________________
IT
FR
ES
EN
DE
PT
NL
User Guide _________________________________________________________
Benutzerhandbuch _____________________________________
Manual do Utilizador _________________________________
Handleiding _________________________________________________________

2
IT
opale
Manuale per l’Utente
INFORMAZIONI GENERALI
Manutenzione ed utilizzo del Terminale
Non esporre lo schermo LCD alla luce diretta del sole. Per la pulizia utilizzare solo panni morbidi ed asciutti
oppure leggermente inumiditi con acqua. Per evitare l’attivazione accidentale del terminale usare un panno
di circa 5 mm di spessore. Non utilizzare alcun tipo di prodotto chimico.
Principali Funzioni associate ai pulsanti
I pulsanti a sfioramento permettono di accedere rapidamente ed in maniera intuitiva a tutte le funzioni ge-
stibili dal terminale Opale e di avere un immediato feed back degli eventi che interessano il sistema.
* Messaggi da portiere
L’icona accesa (rossa) indica la
presenza di messaggi non letti
Accesso alle funzioni
per l’intercomunicazione
Accesso ai
comandi ausiliari aggiuntivi
Accesso alle
regolazioni video
Chiusura audio verso
il chiamante (funzione
mute). L’icona di colore
rosso indica che la
funzione è attiva
Consente di ingrandire
l’immagine visualizzata.
Apriporta
Apre l’elettroserratura
associata al posto esterno
visualizzato
Risponde a una
chiamata in entrata
o termina una
chiamata in corso
Visualizza immagine
da posto esterno
Se previsto, la pressione ripetuta
del pulsante mostra in sequenza
i posti esterni abilitati
Comando ausiliario •
Può essere programmato
per accendere una luce
o aprire una porta
Comando ausiliario ••
Può essere programmato
per accendere una luce, aprire
una porta o (se presente) per
chiamare il Portiere
Esclusione delle
suonerie di chiamata
LED rosso = suonerie OFF
Setup dispositivo
(*) Pulsante attivo solo in presenza di un centralino di portineria.
* Pulsante Panico
Premuto per più di 2 secondi
(icona accesa di colore
rosso), invia al centralino una
segnalazione di “allarme
panico” riportante il numero
dell’interno chiamante.
Opale UT IT 2480520103-04-13

3
IT
opale
Manuale per l’Utente
FUNZIONI BASE
1
3
2
Rispondere ad una chiamata
In caso di chiamata, lo schermo mostrerà l’immagi-
ne del chiamante ripreso dal posto videocitofonico
esterno.
Rispondere alla chiamata entrante premendo il
pulsante .
Aprire la porta del posto esterno visualizzato pre-
mendo il pulsante .
A
Chiusura audio verso il chiamante (funzione mute)
Rispondendo alla chiamata si avranno a disposizio-
ne i seguenti comandi.
Zoom
Il pulsante Bconsente di ingrandire l’immagine
visualizzata.
Premere sulle icone accanto alle frecce direzionali
adws per trovare l’inquadratura desiderata.
Il pulsante ESCI torna all’inquadratura e ingrandi-
mento precedenti.
Regolazioni video
Il pulsante Cconsente di accedere alle regolazioni
video.
Scegliere la funzione ( CL) premendo sulle ico-
ne accanto alle frecce ws e utilizzare i pulsanti a d
per regolare: Contrasto, Luminosità, CL Colore.
Premere il pulsante SALVA per confermare le rego-
lazioni fatte.
4
1
B
C
ESCI
ATTENZIONE!
Il tipo di configurazione dell’impianto, determina il tempo di attivazione del display.
ESCI SALVA

4
IT
opale
Manuale per l’Utente
7
5
FUNZIONI BASE
Trasferire una chiamata verso altri interni
Funzione attiva solo se previsto dalla configurazione
dell’impianto.
Con una comunicazione attiva premere il pulante
D, apparirà un elenco degli interni verso i quali è
possibile deviare la chiamata.
Selezionare l’interno desiderato usando i pulsanti
ws; premere OK, attendere risposta dall’interno
chiamato; per trasferire la chiamata chiudere la
comunicazione con il pulsante .
Intercomunicazione
Funzione attiva solo se previsto dalla configurazione
dell’impianto.
Effettuare una chiamata verso altri
interni
Senza alcuna comunicazione attiva, premere il pul-
sante E, apparirà un elenco degli interni chiamabili.
Selezionare l’interno desiderato usando i pulsanti
ws; premere OK.
Appena il chiamato risponde la comunicazione
audio tra interni è stabilita.
D
E
6
8
ESCI OK
Intercom 1
Intercom 2
Intercom 3
Intercom 4
Intercom 5
Intercom 6
Intercom 7
Intercom 8
ESCI OK
Intercom 1
Intercom 2
Intercom 3
Intercom 4
Intercom 5
Intercom 6
Intercom 7
Intercom 8

5
IT
opale
Manuale per l’Utente
9
10
ESCI OK
Aux 3
Aux 4
Aux 5
Aux 6
Aux 7
Aux 8
Aux 9
FUNZIONI BASE
Comandi ausiliari
Funzione attiva solo se previsto dalla configurazione
dell’impianto.
Attivare un comando ausiliario
Con o senza comunicazione attiva premere il pul-
sante F.
Selezionare il comando ausiliario da attivare usando
i pulsanti ws e premere OK.
F
Comunicazioni con la portineria
Chiamata al Portiere
Se l’impianto video/citofonico prevede la presenza
di un centralino di portineria, il pulsante Gpuò
essere utilizzato per chiamare la portineria.
Elenco chiamate da portiere
L’icona Haccesa (rosso), indica la presenza di chia-
mate senza risposta effettuate dalla portineria verso
il Vostro interno.
Premendo i pulsanti Go Hsi manifesta al portiere
la disponbilità ad essere richiamati; la segnalazione
luminosa cesserà quando la successiva chiamata
proveniente dal portiere riceverà risposta.
11
G
H

6
IT
opale
Manuale per l’Utente
12
13
14
15
ESCI
ESCI
ESCI
OK
OK
OK
Melodie
Lingue
Tecnico
Esterno
Pianerottolo
Intercom
Portiere
Setup
*Melodia 1
Melodia 2
Melodia 3
Melodia 4
SETUP DISPOSITIVO
Impostazioni generali
Dalla schermata principale, premere sull’icona
per accedere all’elenco delle voci di setup.
Scegliere una melodia per le chiamate
Selezionare la voce MELODIE usando i pulsanti ws
e premere OK.
Premere i pulsanti ws per scegliere la tipologia
di chiamata alla quale associare una melodia e
premere OK.
La melodia contrassegnata con l’asterisco è quella
attualmente assegnata al tipo di chiamata.
Per ascoltare le melodie disponibili scorrere l’elenco
mediante i pulsanti ws; premere il pulsante OK per
associare la melodia selezionata al tipo di chiamata.
Premere ESCI per tornare alla finestra precedente.
Una volta assegnate le melodie a tutti i tipi di chia-
mata, selezionare la voce di menù SETUP mediante
i pulsanti ws; premere il pulsante OK.
Scegliere la funzione da regolare premendo sulle
icone accanto alle frecce ws e utilizzare i pulsanti
a d per regolare: volume suoneria, volume toni e
numero squilli.
Premere il pulsante SALVA per confermare le rego-
lazioni fatte.
Premere ESCI per tornare alla finestra precedente.
ESCI
Suoneria 5
6
7
Toni
N° Squilli
SALVA

7
IT
opale
Manuale per l’Utente
SETUP DISPOSITIVO
Impostare la lingua dell’interfaccia
Dall’elenco delle voci di setup (fig. 12), selezionare la
voce Lingue usando i pulsanti ws e premere OK.
La lingua contrassegnata con l’asterisco è quella
attualmente in uso.
Scorrere l’elenco mediante i pulsanti ws; premere
il pulsante OK per scegliere la lingua selezionata.
Premere ESCI per tornare alla finestra precedente.
Setup tecnico
Accesso riservato a personale qualificato
Dall’elenco delle voci di setup (fig. 12), selezionare la
voce Tecnico usando i pulsanti ws e premere OK.
Selezionare la voce Serial Num. usando i pulsanti
ws e premere OK per identificare il dispositivo in
un impianto programmato da PC mediante softwa-
re PCS/300, PCS/XIP.
Selezionare la voce Prog. Man. usando i pulsanti
ws e premere OK per programmare il dispositivo
in impianti di tipo X1 e 300.
Selezionare la voce Standard Video (fig. 17), usan-
do i pulsanti ws e premere OK per accedere alla
schermata di setup. Lo standard contrassegnato con
l’asterisco è quello attualmente in uso. Usare i pulsan-
ti ws per spostare la selezione e premere il pulsante
OK per confermare la scelta.
Premere ESCI per tornare alla finestra precedente.
Selezionare la voce Info usando i pulsanti ws e
premere OK per visualizzare informazioni relative
alla versione firmware del dispositivo.
Premere ESCI per tornare alla finestra precedente.
17
19
18
16
ESCI
ESCI
ESCI
ESCI
OK
OK
OK
OK
Serial Num.
Prog. Man.
Standard Video
Info
Serial Num.
Prog. Man.
Standard Video
Info
*PAL
NTSC
*Italiano
English
Deutsch
Français
Español
Português
Nederlands
8
User Guide
EN
opale
GENERAL INFORMATION
Maintenance and Use of the Terminal
Do not expose the LCD screen to direct sun light. Use only a dry soft cloth, or slightly moistened with water,
for cleaning. To avoid unwanted terminal activation use a cleaning rag approximately 5 mm. thick. Never
use any chemical product.
Main Button functions
The touch keys provide fast, intuitive access to the functions managed by the Opale terminal. They also
provide immediate feedback on events involving the system.
* Porter messages
The icon on (red) indicates
the presence of unread
messages
Access to intercom
functions
Access to additional
auxiliary commands
Access to video
adjustments
Close audio contact
to the caller (mute
function). The red icon
means the function is
active
Allows you to enlarge
the image displayed.
Door lock release
Opens the electric lock
connected to the entry
panel displayed
Responds to an
incoming call or ends
a current call
Display images from entry
panels
If planned in installation, repeat-
edly pressing the button displays
the connected entry panels in
sequence
Auxiliary command •
Can be programmed to switch
on a light or open a door
Auxiliary command ••
Can be programmed to switch
on a light or open a door
(if present) to call the Porter
Call ringtones off
LED red = ringtones OFF
Device setup
(*) Button active only in presence of a porter switchboard.
* Panic Button
Hold it down for more than
2 seconds (icon on and red)
to send the switchboard a
“panic alarm” indicating the
calling receiver.
Opale UT EN 24805201 03-04-13

9
User Guide
EN
opale
STANDARD FUNCTIONS
1
3
2
Answering a call
In the event of a call, the screen shows the image of
the caller filmed from the video entry control panel.
Reply to incoming call by pressing the button .
Open the door of the entry panel displayed by
pressing the button .
A
Close audio contact to the caller (mute function)
When you answer the call, the following controls
will be available.
Zoom
Button Ballows the displayed image to be enlarged.
Press the icons beside arrow keys adws to achieve
the desired frame.
Button EXIT returns to previous frame and zoom
level.
Video settings
Button Cgains access to video settings.
Select the function ( CL) by pressing the icons
beside arrows ws and use buttons a d to adjust
the: Contrast, Luminosity and CL Colour.
Press the SAVE button to confirm the settings made.
4
1
B
C
EXIT
WARNING! - The type of system layout determines whether various functions or screens shown in this manual
are present.
EXIT SAVE

10
User Guide
EN
opale
7
5
STANDARD FUNCTIONS
Transferring a call to other receivers
Function is active only if contemplated in system
configuration.
When an active call is open, press the button Dto
call up a list of receivers to which the call can be
transferred.
Press buttons ws to select the desired receiver;
press OK, wait for the receiver called to answer; to
transfer the call, hang up by pressing button .
Intercommunication
Function is active only if contemplated in system layout.
Making a call to other receivers
While there are no open calls, press button Eto call
up a list of callable receivers.
Select the receiver by pressing buttons ws; then
press OK.
Communication between receivers is established
when the receiver called answers.
D
E
6
8
EXIT OK
Intercom 1
Intercom 2
Intercom 3
Intercom 4
Intercom 5
Intercom 6
Intercom 7
Intercom 8
EXIT OK
Intercom 1
Intercom 2
Intercom 3
Intercom 4
Intercom 5
Intercom 6
Intercom 7
Intercom 8

11
User Guide
EN
opale
9
10
EXIT OK
Aux 3
Aux 4
Aux 5
Aux 6
Aux 7
Aux 8
Aux 9
STANDARD FUNCTIONS
Auxiliary commands
Function is active only if contemplated in system layout.
Activate an auxiliary command
Regardless of whether a call is open or not, press
button F.
Select the auxiliary command to activate by press-
ing buttons ws then press OK.
F
Communicating with the porter
Porter Call
If the video entry control system includes a porter
switchboard, button Gcan be pressed to call the
porter.
Porter call list
Icon Hon (red) indicates the presence of unan-
swered calls made from the porter's office to your
receiver.
Press buttons Gor Hto inform the porter you can
be called back; the luminous signal will be turned
off when the next call from the porter is answered.
11
G
H

12
User Guide
EN
opale
12
13
14
15
EXIT
EXIT
EXIT
OK
OK
OK
Melodies
Languages
Technical
Entry panel
Input
Intercom
Porter
Setup
*Melody 1
Melody 2
Melody 3
Melody 4
DEVICE SETUP
General settings
On the main screen, press icon to access the list
of setup items.
Select a call melody
Select the MELODIES item using buttons ws and
press OK.
Pres buttons ws to select the type of call to which
you want to associate a melody and press OK.
The melody marked with a star is the one currently
assigned to the type of call.
To listen to the melodies available, scroll through
the list using buttons ws; press OK to associate the
selected melody to the type of call.
Press EXIT to return to the previous window.
Once the melodies have been associated to all the
types of call, select the SETUP menu item using but-
tons ws; then press OK.
Select the function to be adjusted by pressing the
icons beside arrows ws and use buttons a d to ad-
just: ring volume, tone volume and number of rings.
Press the SAVE button to confirm the settings made.
Press EXIT to return to the previous window.
EXIT
Ring 5
6
7
Tones
No. of Rings
SAVE

13
User Guide
EN
opale
DEVICE SETUP
Set interface language
In the list of setup items (fig. 12), select the Lan-
guages item using buttons ws then press OK.
The language marked with a star is the one cur-
rently selected.
Scroll through the list using buttons ws; press OK to
choose the selected language.
Press EXIT to return to the previous window.
Technical setup
Access reserved to qualified personnel
In the list of setup items (fig. 12), select the Techni-
cal item using buttons ws then press OK.
Select the Send SN item using buttons ws and
press OK to identify the device in a system pro-
grammed from a PCS/300, PCS/XIP software.
Select item Man. Prog. using buttons ws and
press OK to programme the device in a X1 and 300
type system.
Select the Standard Video item (fig. 17), using the
ws buttons and press OK to access the setup screen.
The standard marked by a star is the one currently in
use. Use the ws buttons to make your selection and
press OK to confirm your choice.
Press EXIT to return to the previous window.
Select the Info item using buttons ws and press
OK to display information about the device firm-
ware version.
Press EXIT to return to the previous window.
19
16
EXIT OK
Italiano
*English
Deutsch
Français
Español
Português
Nederlands
17
EXIT
EXIT
OK
OK
Send SN
Man. Prog.
Standard Video
Info
Send SN
Man. Prog.
Standard Video
Info
18
EXIT OK
*PAL
NTSC

14
Benutzerhandbuch
DE
opale
ALLGEMEINE INFORMATIONEN
Wartung und Gebrauch des Terminals
Schützen Sie den LCD-Bildschirm vor direktem Sonnenlicht. Benutzen Sie für die Reinigung nur weiche und
trockene oder leicht mit Wasser angefeuchtete Lappen. Um die versehentliche Aktivierung des Terminals zu
vermeiden, verwenden Sie einen etwa 5 mm dicken Lappen. Verwenden Sie keinerlei chemische Produkte.
Die wichtigsten Tastenfunktionen
Die Touchtasten gestatten den schnellen und intuitiven Zugriff auf sämtliche Funktionen, die sich über den Ter-
minal Opale bedienen lassen, sowie ein unmittelbares Feedback zu den Ereignissen, die das System betreffen
.
* Nachrichten von der
Pförtnerzentrale
Das (rot) leuchtende Symbol
zeigt an, das nicht gelesene
Nachrichten vorhanden sind
Zugriff auf die Funktionen
für Intercom-Gespräche
Zugriff auf die
Zusatzsteuerungen
Zugriff auf die
Videoeinstellungen
Unterbrechen
des Audiosignals
zum Anrufenden
(Stummschaltung bzw.
Mute-Funktion). Das rote
Symbol zeigt an, dass die
Funktion aktiv ist
Gestattet die Vergrößerung
des angezeigten Bildes.
Türöffner
Öffnet das Elektroschloss
der zugehörigen angezeig-
ten Außenstation
Beantwortet einen
eingehenden Anruf
oder beendet einen
laufenden Anruf
Zeigt Bild von Außenstation an
Wenn vorgesehen, werden bei
wiederholtem Drücken der Taste
nacheinander die aktivierten Au-
ßenstationen angezeigt
Zusatzsteuerung •
Diese kann programmiert wer-
den, um ein Licht einzuschalten
oder eine Tür zu öffnen
Zusatzsteuerung ••
Diese kann programmiert werden,
um ein Licht einzuschalten, eine
Tür zu öffnen oder (wenn vorhan-
den) den Pförtner anzurufen
Läutwerkabschaltung
Rote LED = Läutwerk OFF
Geräteeinrichtung
(*) Die Taste ist nur aktiv, wenn eine Pförtnerzentrale vorhanden ist.
* Paniktaste
Wenn diese für mehr als 2
Sekunden lang gedrückt
wird (Smybol leuchtet rot),
wird an die Zentrale eine
"Panikalarm"-Meldung mit
der Nummer der anrufenden
Innensprechstelle geschickt.
Opale UT DE 24805201 03-04-13

15
Benutzerhandbuch
DE
opale
GRUNDFUNKTIONEN
1
3
2
Einen Anruf beantworten
Bei einem Anruf wird auf dem Hauptbildschirm das
Bild des Anrufenden angezeigt, das von der Außen-
station der Videosprechanlage aufgenommen wird.
Drücken Sie zum Beantworten des eingehenden
Anrufs die Taste .
Öffnen Sie die Tür der angezeigten Außenstation
durch Drücken der Taste .
A
Unterbrechen des Audiosignals zum Anrufenden
(Stummschaltung bzw. Mute-Funktion)
Bei Beantworten des Anrufs stehen Ihnen die fol-
genden Befehle zur Verfügung.
Zoom
Die Taste Bgestattet die Vergrößerung des ange-
zeigten Bildes.
Durch Drücken der Symbole neben den Richtungs-
pfeilen adws können Sie den gewünschten Bild-
ausschnitt wählen.
Mit der Taste ZURÜCK können Sie zum vorherge-
henden Bildausschnitt und zur vorhergehenden
Vergrößerung zurückkehren.
Videoeinstellungen
Die Taste Cgestattet den Zugriff auf die Videoein-
stellungen.
Wählen Sie die Funktion ( CL) durch Drücken
der Symbole neben den Pfeilen ws , und nutzen
Sie die Tasten a d für folgende Einstellungen:
Kontrast, Helligkeit, CL Farbe.
Drücken Sie die Taste SPEICHERN, um die vorge-
nommenen Einstellungen zu bestätigen.
4
1
B
C
ZURÜCK
ACHTUNG! - Von der Art der Konfiguration der Anlage hängt ab, ob einige der in dieser Anleitung dargestell-
ten Funktionen oder Bildschirme vorhanden sind oder nicht.
ZURÜCK SPEICHERN

16
Benutzerhandbuch
DE
opale
7
5
GRUNDFUNKTIONEN
Einen Anruf an andere
Innensprechstellen weiterleiten
Diese Funktion ist nur dann aktiv, wenn sie von der
Konfiguration der Anlage vorgesehen ist.
Drücken Sie bei einer aktiven Kommunikation die
Taste D; daraufhin öffnet sich ein Verzeichnis der
Innensprechstellen, zu denen der Anruf umgeleitet
werden kann.
Wählen Sie die gewünschte Innensprechstelle mit
den Tasten ws; drücken Sie OK, warten Sie die
Antwort von der angerufenen Innensprechstelle
ab; um den Anruf weiterzuleiten, schließen Sie die
Kommunikation mit der Taste .
Intercom-Gespräche
Diese Funktion ist nur dann aktiv, wenn sie von der
Konfiguration der Anlage vorgesehen ist.
Einen Anruf an andere
Innensprechstellen tätigen
Wenn gerade keine Kommunikation stattfindet,
drücken Sie die Taste E, und es erscheint ein Ver-
zeichnis der Innensprechstellen, die angerufen wer-
den können.
Wählen Sie die gewünschte Innensprechstelle mit-
hilfe der Tasten ws, und drücken Sie dann OK.
Sobald der Angerufene antwortet, ist die Kommuni-
kation zwischen den Innensprechstellen hergestellt.
D
E
6
8
ZURÜCK OK
Intercom 1
Intercom 2
Intercom 3
Intercom 4
Intercom 5
Intercom 6
Intercom 7
Intercom 8
ZURÜCK OK
Intercom 1
Intercom 2
Intercom 3
Intercom 4
Intercom 5
Intercom 6
Intercom 7
Intercom 8

17
Benutzerhandbuch
DE
opale
9
10
ZURÜCK OK
Aux 3
Aux 4
Aux 5
Aux 6
Aux 7
Aux 8
Aux 9
GRUNDFUNKTIONEN
Zusatzsteuerungen
Diese Funktion ist nur dann aktiv, wenn sie von der
Konfiguration der Anlage vorgesehen ist.
Aktivieren einer Zusatzsteuerung
Unabhängig davon, ob gerade eine Kommunikati-
on stattfindet, drücken Sie die Taste F.
Wählen Sie die Zusatzsteuerung, die Sie aktivieren
möchten, mit den Tasten ws , und drücken Sie OK.
F
Kommunikation mit der
Pförtnerzentrale
Anrufe zur Pförtnerzentrale tätigen
Wenn die Video-/Sprechanlage das Vorhandensein
einer Pförtnerzentrale vorsieht, kann die Taste G
zum Anrufen dieser verwendet werden.
Verzeichnis der Anrufe vom Pförtner
Das (rot) leuchtende Symbol Hzeigt an, das unbe-
antwortete Anrufe vorhanden sind, die die Pförtner-
zentrale zu unserer Innensprechstelle getätigt hat.
Durch Drücken der Tasten Goder Hteilen Sie der
Pförtnerzentrale mit, dass Sie nun wieder Rückrufe
entgegennehmen können; die Leuchtanzeige geht
aus, wenn der nächste Anruf von der Pförtnerzent-
rale beantwortet wird.
11
G
H

18
Benutzerhandbuch
DE
opale
12
13
14
15
ZURÜCK
ZURÜCK
ZURÜCK
OK
OK
OK
Melodien
Sprachen
Techniker
Außenstation
Treppenhaus
Intercom
Pförtnerzentrale
Setup
*Melodie 1
Melodie 2
Melodie 3
Melodie 4
GERÄTEEINRICHTUNG
Allgemeine Einstellungen
Drücken Sie auf dem Hauptbildschirm das Symbol
, um auf das Verzeichnis der Setup-Punkte zuzu-
greifen.
Auswählen einer Rufmelodie
Wählen Sie den Punkt MELODIEN mithilfe der Tasten
ws, und drücken Sie OK.
Drücken Sie die Tasten ws um den Anruftyp auszu-
wählen, der eine Melodie zugewiesen werden soll,
und drücken Sie OK.
Die mit einem Sternchen gekennzeichnete Melodie
ist die, die aktuell dem Anruftyp zugewiesen ist.
Um die verfügbaren Melodien anzuhören, blättern
Sie das Verzeichnis mithilfe der Tasten ws durch;
drücken Sie die Taste OK, um die gewählte Melodie
dem Anruftyp zuzuordnen. Drücken Sie ZURÜCK,
um zum vorhergehenden Fenster zurückzukehren.
Nachdem Sie jedem Anruftyp eine Melodie zuge-
wiesen haben, wählen Sie den Menüpunkt SETUP
mithilfe der Tasten ws aus; drücken Sie die Taste OK.
Wählen Sie die einzustellende Funktion durch Drü-
cken der Symbole neben den Pfeilen ws aus,
und nutzen Sie die Tasten a d zum Einstellen von:
Lautstärke des Läutwerks, Lautstärke der Töne und
Anzahl des Klingelns.
Drücken Sie die Taste SPEICHERN, um die vorge-
nommenen Einstellungen zu bestätigen.
Drücken Sie ZURÜCK, um zum vorhergehenden
Fenster zurückzukehren.
ZURÜCK
Läutwerk 5
6
7
Töne
Anz. Klingeln
SPEICHERN

19
Benutzerhandbuch
DE
opale
GERÄTEEINRICHTUNG
Einstellen der Sprache der
Benutzerschnittstelle
Aus dem Verzeichnis der Setup-Punkte (Abb. 12) sie
den Punkt Sprachen auswählen mit den Tasten ws,
und drücken Sie OK.
Die mit dem Stern gekennzeichnete Sprache ist die
aktuell genutzte.
Blättern Sie das Verzeichnis mithilfe der Tasten ws
durch; drücken Sie die Taste OK, um die gewählte
Sprache auszuwählen.
Drücken Sie ZURÜCK, um zum vorhergehenden
Fenster zurückzukehren.
Technische Einrichtung
Zugriff nur für technisches Personal
Aus dem Verzeichnis der Setup-Punkte (Abb. 12) sie
den Punkt Techniker auswählen mithilfe der Tas-
ten ws, und drücken Sie OK.
Wählen Sie den Punkt SN senden mithilfe der Tas-
ten ws, und drücken Sie OK, um das Gerät in einer
Anlage zu identifizieren, die von einem PC aus mit
der Software PCS/300, PCS/XIP programmiert wird.
Wählen Sie den Punkt Prog. Man. mithilfe der
Tasten ws aus, und drücken Sie OK, um das Gerät
in Anlagen vom Typ X1 und 300 zu programmieren.
Den Punkt Standard Video (Abb. 17) mithilfe der
Tasten ws auswählen und OK drücken, um auf
den Setup-Bildschirm zuzugreifen. Der mit dem
Stern gekennzeichnete Standardwert ist die aktu-
ell genutzte. Mithilfe der Tasten ws die Auswahl
treffen und zur Bestätigung der Auswahl die Taste
OK drücken.
ZURÜCK drücken, um zum vorhergehenden Fenster
zurückzukehren.
Wählen Sie den Punkt Info mithilfe der Tasten ws
aus, und drücken Sie OK, um Informationen zur Versi-
on der Firmware und des Gerätes anzeigen zu lassen.
Drücken Sie ZURÜCK, um zum vorhergehenden
Fenster zurückzukehren.
16
18
19
17
ZURÜCK
ZURÜCK
ZURÜCK
ZURÜCK
OK
OK
OK
OK
Italiano
English
*Deutsch
Français
Español
Português
Nederlands
*PAL
NTSC
SN senden
Prog. Man.
Standard Video
Info
SN senden
Prog. Man.
Standard Video
Info

20
Manuel pour l’Utilisateur
FR
opale
GÉNÉRALITÉS
Emploi et entretien du Terminal
Ne pas exposer l'écran LCD aux rayons directs du soleil. Pour le nettoyage n'utiliser que des chiffons doux
et secs ou légèrement imbibés d'eau. Pour éviter l'activation accidentelle du terminal, utiliser un chiffon
d'environ 5 mm d'épaisseur. N'utiliser aucun produit chimique.
Principales fonctions associées aux touches
Les touches à effleurement permettent d'accéder rapidement et de manière intuitive à toutes les fonctions pou-
vant être gérées par le terminal Opale et d'obtenir un retour immédiat des évènements concernant le système.
* Messages du concierge
L’icône allumée (rouge)
indique la présence de
messages non lus
Accès aux fonctions
d'intercommunication
Accès aux commandes
auxiliaires supplémentaires
Accès aux
réglages vidéo
Fermeture audio vers
l'appelant (fonction
mute). L'icône de couleur
rouge indique que la
fonction est désactivée
Permet d'agrandir
l'image visualisée.
Ouvre-porte
Ouvre la gâche électrique
associée au poste extérieur
visualisé
Réponse à un appel
en entrée ou fin d'un
appel en cours
Visualise les images
du poste extérieur
Si prévue, la pression répétée sur
le bouton indique en séquence
les postes extérieurs autorisés.
Commande auxiliaire •
Peut être configuré pour allumer
une lumière ou ouvrir une porte
Commande auxiliaire ••
Peut être configuré pour allumer
une lumière, ouvrir une porte
ou (si présent dans le système)
appeler le concierge
Exclusion des
sonneries d'appel
LED rouge = ARRET sonnerie
Configuration du dispositif
(*) Touche active seulement si la centrale du concierge est installée.
* Touche Panique
Si appuyée pendant plus de
2 secondes (icône allumée
de couleur rouge), elle envoie
à la centrale un signal d'
“alarme panique” reportant
le numéro de l'interne
appelant.
Opale UT FR 24805201 03-04-13
Other manuals for OPALE
1
Table of contents
Languages:
Other Bpt Intercom System manuals