manuals.online logo
Brands
  1. Home
  2. •
  3. Brands
  4. •
  5. Bradley
  6. •
  7. Bathroom Fixture
  8. •
  9. Bradley S19-310TW8 User manual

Bradley S19-310TW8 User manual

P.O. Box 309, Menomonee Falls, WI USA 53052-0309
PHONE 1-800-BRADLEY FAX (262) 251-5817
http://www.bradleycorp.com
Installation
215-1474 Rev. C; EN 07-507
© 2007 Bradley Corporation
Page 1 of 6 3/27/07
S19-310TW8
S19-310TW12
S19-310TW18
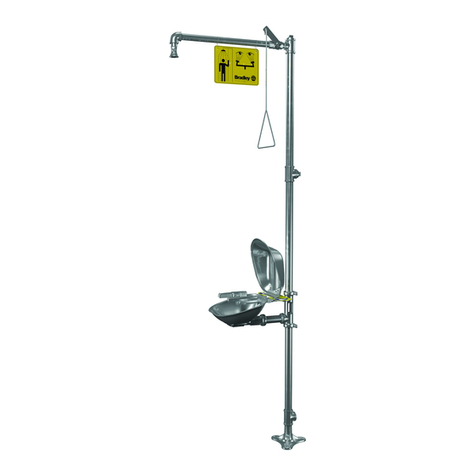
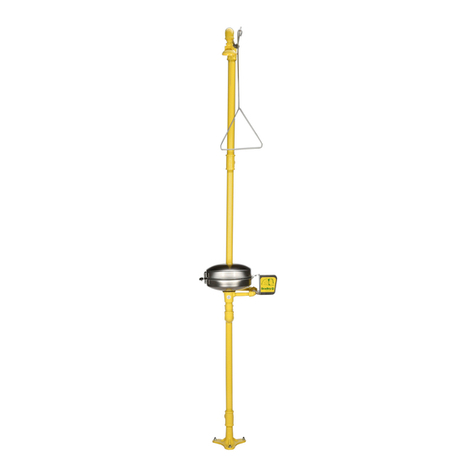
Frostproof Combination
Drench Shower/Eyewash
Table of Contents
Pre-Installation Information . . . . . . . . . . . . . . .2
Installation Instructions . . . . . . . . . . . . . . . . .3–4
Maintenance and Troubleshooting . . . . . . . . . .5
Assembly of Components . . . . . . . . . . . . . . . . .6
Parts List . . . . . . . . . . . . . . . . . . . . . . . . . . . . .6
2
S19-310TW8, S19-310TW12, S19-310TW18 Installation
3/27/07 Bradley Corporation • 215-1474 Rev. C; EN 07-507
Pre-Installation Information
Operation
The drench shower and eyewash are easily activated by pushing the respective flag handles, and
deactivated by pulling the flag handles back.
Components
Showerhead: The impact-resistant plastic showerhead has a 10" (254 mm) diameter.
Shower Valve: The 1" NPT stay-open, chrome-plated brass ball valve is operated by pushing the
flag handle.
Eyewash and Sprayhead: The chrome-plated brass sprayhead assembly has twin soft-flow eyewash
heads. The integral flow control assures safe, steady flow under varying water supply conditions.
Eyewash Valve: The plated 1/2" NPT stay-open eyewash valve is operated by a push flag handle
with stainless steel stops.
Flag Handle: The flag handle operates the freeze-proof stay-open valve and remains open until
manually closed.
Water Supply: Water supply connection is 1-1/4" NPT.
Pipe and Fittings: Pipe and fittings are galvanized steel with Bradtect™ safety yellow coating.
WARNING
Read this installation manual completely to ensure proper installation, then file it
with the owner or maintenance department. Compliance and conformity to drain
requirements and other local codes and ordinances is the responsibility of the
installer.
Separate parts from packaging and make sure all parts are accounted for before
discarding any packaging material. If any parts are missing, do not begin
installation until you obtain the missing parts.
Flush the water supply lines before beginning installation and after installation is
complete. Test the unit for leaks and adequate water flow. Main water supply to
the eyewash should be “ON” at all times. Provisions shall be made to prevent
unauthorized shutoff. Flushing fluid should be tepid per ANSI Z358.1.
The inspection and testing results of this equipment should be recorded weekly
to verify proper operation. This equipment should be inspected annually to
ensure compliance with ANSI Z358.1.
Workers who may come in contact with potentially hazardous materials should
be trained regarding the placement and proper operation of emergency
equipment per ANSI Z358.1.
For questions regarding the operation or installation of this product, visit
www.bradleycorp.com or call 1-800-BRADLEY.
Product warranties may also be found under ”Product Information” on our web
site at www.bradleycorp.com.
Installation
THIS
SIDE
UP
Packing List




P.O.Box309, MenomoneeFalls, WI 53051
R
TESTTHISUNITEACHWEEK
Test-operatevalve(s) each week and sign below.
Reportany malfunctions immediately.
Ventil(e)wöchentlich im Testbetrieb prüfen, bestätigt
durchUnterschrift. Jegliche Störung sofort melden.
Date
Datum
Date
Signed
Unterschrift
Signe
Date
Date
Date Signed
Signed
Signed
DIESESGERÄT1STWÖCHENTLICHZUPRÜFEN.
ESSAIHEBDOMADAIRE
Testle fonctionnement des valves chaque semaine et
signeen bas. S'il y à quelque chose qui ne va pas fait
unrapport immédiatement.
P.O.BOX309, MENOMONEE FALLS,WI 53052-0309 USA
TEL:1-800-BRADLEY FAX: (262-251-5817)
http://www.bradleycorp.com
114-051
3
Installation S19-310TW8, S19-310TW12, S19-310TW18
Bradley Corporation • 215-1474 Rev. C; EN 07-507 3/27/07
S19-310TW Dimensions
16"
(406mm) 10"
(254mm)
1-1/4" NPT
INLET 5-5/8"
(143mm)
48"
(1219mm)
36"
(914mm)
TO FLOOR
12"
(305mm)
53-1/4"
(1352mm)
* NOTE: Use valve sub-assembly (Item 15)
to mark and drill valve stem holes.
USE TEFLON
TAPE ONLY
4
S19-310TW8, S19-310TW12, S19-310TW18 Installation
3/27/07 Bradley Corporation • 215-1474 Rev. C; EN 07-507
Installation
Supplies Required
• Teflon tape and pipe sealant
• Piping to 1-1/4" NPT water supply inlet on unit
• Adequate supply pipe supports
• Minimum 4" (102 mm) drain to accommodate 30 gallons per minute discharge for drench shower waste
• OPTIONAL: Weep valve drain containment
Step 1: Assemble drench shower and eyewash components
IMPORTANT: Some teflon sealants may cause stress cracks in the plastic
showerhead leading to failure. Use teflon tape for sealing the
showerhead.
IMPORTANT: Do not rely on Bradley’s Combination Unit to support supply piping.
1. From the outside of the building, drill a 1" dia. hole in the wall 36" up from the ground floor for
the eyewash piping. Use the sub-assembly (Item 15) to measure, mark and drill two 1-3/8" dia.
holes for the valve operating stems.
NOTE: This unit has been designed to accommodate varying wall thicknesses. When installing the
operating stem support sleeve (Item 27), it will be necessary to cut off one or both ends of the sleeve
so that 5/8" of threaded pipe protrudes from both sides of the wall.
2. Assemble the two valve stems as shown in Figure 2 on page 5 and connect the stems to the
assembly through the holes in the wall.
3. Secure the assembly to the wall with adequate supports supplied by installer. Make sure that
Item 14 is pitched a minimum of 1/2" toward the building to allow for proper weep valve
drainage.
4. Connect Items 4, 8, 9 and another Item 9 (as shown in Figure 1 on page 5) and attach them to
Item 15.
5. Mark and drill a 1-3/8" dia. hole for the shower pipe.
6. Assemble the rest of the unit as shown in Figures 1 and 2.
Step 2: Connect water supply
1. Connect water supply piping to the 1-1/4" NPT inlet on the unit (piping supplied by installer).
Provide adequate supports (supplied by installer) for supply pipe using pipe hangers or other
means.
2. Run the drain’s 5/16" tubing to an adequate drain containment.
3. Mount the safety sign to the wall or pipe.
4. Open the water supply lines. Test for leaks and adequate water flow.
5
Installation S19-310TW8, S19-310TW12, S19-310TW18
Bradley Corporation • 215-1474 Rev. C; EN 07-507 3/27/07
Assembly of Components
NOTE: Use
teflon tape
only. 1.1
1
1.2
1.3
2
3
45
6
4
7
8
9
9
10
10
10
12
14
12.7
12.6
12.5
12.4
12.3
12.2
12.1
15
13
13
30
30
31
18
33
P.O.BOX 309, MENOMONEE FALLS,WI 53052-0309 USA
TEL: 1-800-BRADLEY FAX:(262-251-5817)
http://www.bradleycorp.com
34
16
25
25
27
26 21
19
20
24
24
29
23
22
2322
23 22
25
25
27
26
17
28
11
24
24
29
23
22
32
Parts List
6
S19-310TW8, S19-310TW12, S19-310TW18 Installation
3/27/07 Bradley Corporation • 215-1474 Rev. C; EN 07-507
1 S24-070 1 Showerhead, Plastic
1.1 154-057 1 Plastic Showerhead Shell
1.2 155-005 1 Diffuser
1.3 160-245 3 Screw
2 169-723 1 Elbow, 1" Street
3 113-1107 1 Pipe, 1" NPT x 14"
4 169-1027 2 Coupling, 1" NPT
5 150-212 1 Escutcheon, Shower Pipe
6 150-213 1 Escutcheon, Eyewash Pipe
7 113-1108 1 Pipe, 1" NPT x 11-1/2" (S19-310TW8)
113-1109 1 Pipe, 1" NPT x 15-1/2" (S19-310TW12)
113-1110 1 Pipe, 1" NPT x 21-1/2" (S19-310TW18)
8 169-847 1 Elbow, 1" NPT
9 113-1112 2 Pipe, 1" NPT x 24"
10 169-025 3 Elbow, 1/2" NPT Street
11 140-720 1 Bracket, 1" Ball Valve Adapter
12 S05-063B 1 Eyewash Assembly
12.1 S05-091 1 Eyewash Yoke
12.2 107-371 2 Tethered Dust Cover
12.3 110-237 1 Tailpiece
12.4 142-040 1 Retain, Flo-et
12.5 125-032 1 Flo-et, 3.5 GPM
12.6 124-001AF 1 Washer
12.7 153-146 1 Union Adapter
13 S29-068 2 Weep Valve Assembly
14 113-1116 1 Pipe, 1/2" NPT x 18-3/4" (S19-310TW8)
113-1117 1 Pipe, 1/2" NPT x 22-3/4" (S19-310TW12)
113-1118 1 Pipe, 1/2" NPT x 28-3/4" (S19-310TW18)
15 S08-369 1 Valve Sub-Assy, Eyewash/Shower
16 S08-361 1 Handle, Eyewash
17 S08-360 1 Handle, Shower
18 269-1720 1 Tee, 1-2"-20 UNC Nylon
19 153-372R 1 Adapter, 1/2" Ball Valve
20 142-002DA 1 Lockwasher, 5/16" Internal Tooth
21 128-151 1 Adapter, 1/2" Ball Valve Handle
22 161-036 4 Nut, Hex 5-16"-18 Stn. Steel
23 142-002BK 4 Lockwasher, 5/16" Stn. Steel
24 110-191 4 Nut, 1/2"-14 NPS Connector
25 142-002CB 4 Washer, 7/8" x 2" Stainless Steel
26 S21-067 2 Rod, Operating w/clips (S19-310TW8)
S21-067A 2 Rod, Operating w/clips (S19-310TW12)
S21-067B 2 Rod, Operating w/clips (S19-310TW18)
27 113-006NN 2 Sleeve, Operating Rod (S19-310TW8)
113-006NR 2 Sleeve, Operating Rod (S19-310TW12)
113-006NU 2 Sleeve, Operating Rod (S19-310TW18)
28 128-164 1 Adapter, 1" Ball Valve Handle
29 110-115 2 Nut, Jam
30 269-882 2 Connector, 1/4" NPT, 1/2"-20 UNC Nylon
31 R68-600015 4 ft. Tube, 5/16" Nylon
32 142-002DC 1 Lockwasher, 3/8" Internal Tooth
33 151-001 2 Hook
34 114-052 1 Safety Sign
Item Part No. Qty. Description Item Part No. Qty. Description

This manual suits for next models

2

Other Bradley Bathroom Fixture manuals

Bradley Verge LVRD Series User manual

Bradley

Bradley Verge LVRD Series User manual

Bradley WF2705 User manual

Bradley

Bradley WF2705 User manual

Bradley S19-130BF User manual

Bradley

Bradley S19-130BF User manual

Bradley Terrazzo WF2613 User manual

Bradley

Bradley Terrazzo WF2613 User manual

Bradley SXWS9151 User manual

Bradley

Bradley SXWS9151 User manual

Bradley Verge LVLD Series User manual

Bradley

Bradley Verge LVLD Series User manual

Bradley WS-1X-HN User manual

Bradley

Bradley WS-1X-HN User manual

Bradley S19-310AC User manual

Bradley

Bradley S19-310AC User manual

Bradley SN2005/IR User manual

Bradley

Bradley SN2005/IR User manual

Bradley Vernatherm S59-4004 User manual

Bradley

Bradley Vernatherm S59-4004 User manual

Bradley Express SS Series User manual

Bradley

Bradley Express SS Series User manual

Bradley CBSHWR9000KD User manual

Bradley

Bradley CBSHWR9000KD User manual

Bradley S19-110BF User manual

Bradley

Bradley S19-110BF User manual

Bradley 400 Series User manual

Bradley

Bradley 400 Series User manual

Bradley S19-310SPR User manual

Bradley

Bradley S19-310SPR User manual

Bradley S19345HXB User manual

Bradley

Bradley S19345HXB User manual

Bradley S19-310DC User manual

Bradley

Bradley S19-310DC User manual

Bradley S19-310SBFW User manual

Bradley

Bradley S19-310SBFW User manual

Bradley Terreon Classic WF2500 Series User manual

Bradley

Bradley Terreon Classic WF2500 Series User manual

Bradley Verge LVS Series User manual

Bradley

Bradley Verge LVS Series User manual

Bradley LUCENT Series User manual

Bradley

Bradley LUCENT Series User manual

Bradley Express EXD Series User manual

Bradley

Bradley Express EXD Series User manual

Bradley Express MG Series User manual

Bradley

Bradley Express MG Series User manual

Bradley s19314 series User manual

Bradley

Bradley s19314 series User manual

Popular Bathroom Fixture manuals by other brands

KOLO ATOL PLUS 80x80 installation manual

KOLO

KOLO ATOL PLUS 80x80 installation manual

T&S B-0133 Installation and maintenance instructions

T&S

T&S B-0133 Installation and maintenance instructions

Reece Showerama 610 Single Bowl Technical guide

Reece

Reece Showerama 610 Single Bowl Technical guide

sanindusa SAFIRA Assembly instructions

sanindusa

sanindusa SAFIRA Assembly instructions

Riobel Pro EV39 installation guide

Riobel

Riobel Pro EV39 installation guide

Crosswater Digital Solo Operation and care guide

Crosswater Digital

Crosswater Digital Solo Operation and care guide

Hans Grohe Ecostat Select 13173009 Instructions for use/assembly instructions

Hans Grohe

Hans Grohe Ecostat Select 13173009 Instructions for use/assembly instructions

Fackelmann 82951 Instructions for mounting and use

Fackelmann

Fackelmann 82951 Instructions for mounting and use

Speakman SC-1220 SERIES instructions

Speakman

Speakman SC-1220 SERIES instructions

STIEBEL ELTRON WKM Operating and installation

STIEBEL ELTRON

STIEBEL ELTRON WKM Operating and installation

Sloan OPTIMA plus EAF 350 Series installation instructions

Sloan

Sloan OPTIMA plus EAF 350 Series installation instructions

Kohler K-1278 installation guide

Kohler

Kohler K-1278 installation guide

NOSAG INEOLINE PLUS LW0.0003 Operating and assembly instructions

NOSAG

NOSAG INEOLINE PLUS LW0.0003 Operating and assembly instructions

newform 61152 instructions

newform

newform 61152 instructions

Nuie PMWIN334 quick start guide

Nuie

Nuie PMWIN334 quick start guide

Hans Grohe AXOR Starck 10651 Series Instructions for use/assembly instructions

Hans Grohe

Hans Grohe AXOR Starck 10651 Series Instructions for use/assembly instructions

IKEA VOXNAN manual

IKEA

IKEA VOXNAN manual

Signature Hardware GERVAISE 953092 manual

Signature Hardware

Signature Hardware GERVAISE 953092 manual

manuals.online logo
manuals.online logoBrands
  • About & Mission
  • Contact us
  • Privacy Policy
  • Terms and Conditions

Copyright 2025 Manuals.Online. All Rights Reserved.