manuals.online logo
Brands
  1. Home
  2. •
  3. Brands
  4. •
  5. Bradley
  6. •
  7. Bathroom Fixture
  8. •
  9. Bradley SXWS9557FM User manual

Bradley SXWS9557FM User manual

215-933 Rev. G; ECN 13-10-005
© 2013 Bradley
Page 1 of 3 3/1/2013
P.O. Box 309, Menomonee Falls, WI USA 53052-0309
PHONE 800.BRADLEY (800.272.3539) FAX 262.251.5817
bradleycorp.com
Installation
IMPORTANT!
Read this entire installation manual to ensure proper installation. When
finished with the installation, file this manual with the owner or maintenance
department. Compliance and conformity to local codes and ordinances is
the responsibility of the installer.
Separate parts from packaging and make sure all parts are accounted for
before discarding packaging material. If any parts are missing, do not begin
installation until you obtain the missing parts.
Make sure that all water supply lines have been flushed and then completely
turned off before beginning installation. Debris in supply lines can cause
valves to malfunction.
Product warranties may be found under “Products” on our web site at
bradleycorp.com.
Installation
THIS
SIDE
UP
Packing List
•
•
•
•
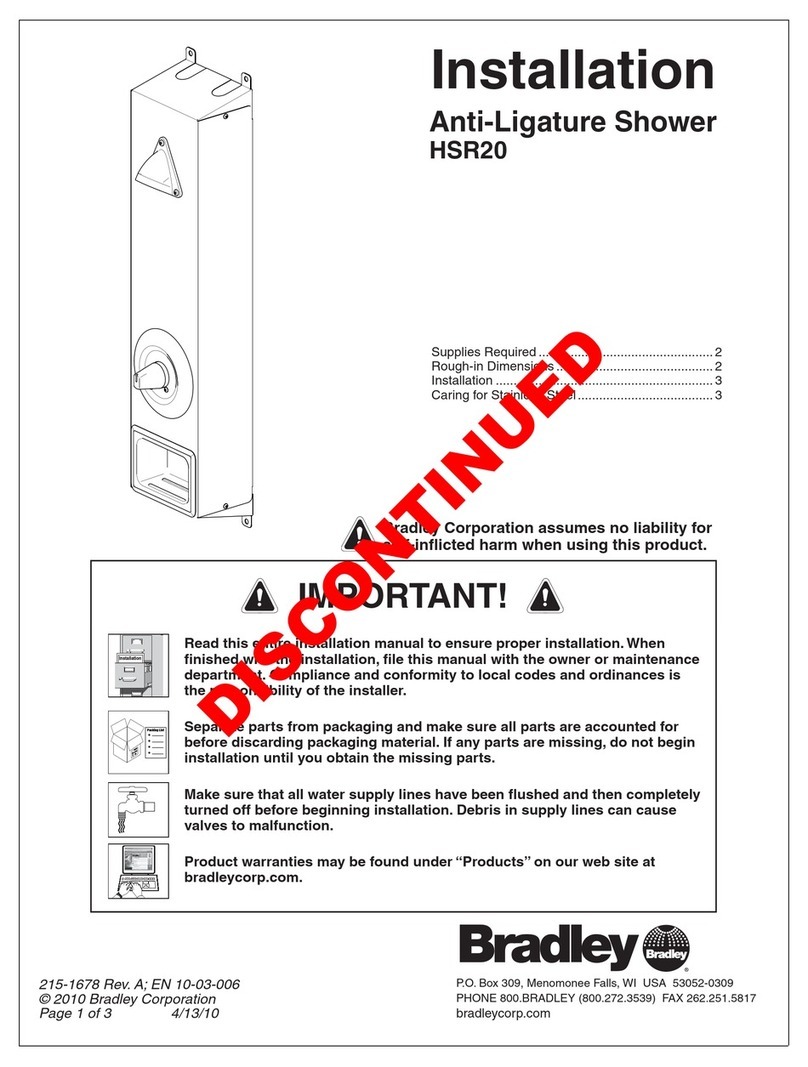
Front-Mounted
SX Panel Shower
SXWS9557FM
Ligature Resistant
Front-Mounted
SX Panel Shower
HSC95
Rough-in Dimensions ............................................ 2
Installation ............................................................. 3
Caring for Stainless Steel...................................... 3
SXWS9557FM with "SX" severe
service showerhead shown
SXWS9557FM, HSC95 Installation
23/1/2013 Bradley • 215-933 Rev. G; ECN 13-10-005
Dimensions
Installation
22⁵⁄₈"
(575mm)
24"
(610mm)
10½"
(267mm)
9¹⁄₈"
(232mm)
53⁷⁄₁₆"
(1357mm)
to Finished
Floor
72"
(1828mm)
to Finished
Floor
64¾"
(1646mm)
to Finished
Floor
SXWS9557FM is shown. Rough-ins
are the same for HSC95.
Wall Opening
AUsing the hex key (taped to the
soap tray), remove the six security
screws from the shower panel and
remove the frame from the panel.
BInstall the frame into the wall
opening per the instructions
included with the frame.
EReattach the panel to the frame
with the six security screws.
C
Install the control button per
instructions included with the
valve assembly. Apply 100%
silicone caulk to escutcheon
backside prior to installation to
ensure a water tight seal. Wipe
excess caulk from front side of
escutcheon and panel.
D
Install the valve assembly and make the
valve connections to the showerhead
and control button per the instructions
included with the valve assembly.
Minimum Wall Depth:
Frame Only = 2" (51mm)
ASTM = 4½" (114mm)
TTST=3" (76mm)
Minimum Wall Depth:
Frame Only = 2" (51mm)
ASTM = 4½" (114mm)
TTST=3" (76mm)
WARNING! After installation, all joints require security
sealant by installer to eliminate gaps (if present)
between wall and fixture.
FEnsure proper shower head
adjustment and tightening of
screws.
Installation SXWS9557FM, HSC95
Bradley • 215-933 Rev. G; ECN 13-10-005 3/1/2013 3
Cleaning and Maintenance for Stainless Steel
Material Description: Stainless steel is extremely durable, and maintenance is simple and inexpensive. Proper care, particularly
under corrosive conditions, is essential. Always start with the simplest solution and work your way toward the more complicated.
Routine cleaning: Daily or as often as needed use a solution of warm water and soap, detergent, or ammonia. Apply the
cleaning solution per the manufacturer's instructions and always use a soft cloth or sponge to avoid damaging the finish.
Stubborn Stains: To remove stains from stainless steel use a stainless steel cleaner and polish such as Ball®stainless steel
cleaner or a soft abrasive. Always follow the manufacturer's instructions and apply in the same direction as the polish lines.
Never use ordinary steel wool or steel brushes on stainless steel. Always use stainless steel wool or stainless
steel brushes.
Fingerprints and Smears: To remove fingerprints or smears use a high quality stainless steel cleaner and polish in accordance
with the manufacturer's instructions. Many of these products leave a protective coating that helps prevent future smears and
fingerprints.
Grease and Oil: To remove grease and oil use a quality commercial detergent or caustic cleaner. Apply in accordance to the
manufacturer's instructions and in the direction of the polish lines.
Precautions: Avoid prolonged contact with chlorides (bleaches, salts), bromides (sanitizing agents), thiocyanates (pesticides,
photography chemicals, and some foods), and iodides on stainless steel equipment, especially if acid conditions exist.
Do not permit salty solutions to evaporate and dry on stainless steel.
The appearance of rust streaks on stainless steel leads to the belief that the stainless steel is rusting. Look for the actual source of
the rust in some iron or steel particles which may be touching, but not actually a part of the stainless steel structure.
Strongly acidic or caustic cleaners may attack the steel causing a reddish film to appear. The use of these cleaners
should be avoided.
Brand Names
Use of brand names is intended only to indicate a type of cleaner. This does not constitute an endorsement, nor does the
omission of any brand name cleaner imply inadequacy. Many products named are regional in distribution, and can be found in
local supermarkets, department and hardware stores, or through your cleaning service. It is emphasized that all products should
be used in strict accordance with package instructions.

This manual suits for next models

1

Other Bradley Bathroom Fixture manuals

Bradley Express MG Series User manual

Bradley

Bradley Express MG Series User manual

Bradley Express SS-3N/IR/STD User manual

Bradley

Bradley Express SS-3N/IR/STD User manual

Bradley Verge LVRD Series User manual

Bradley

Bradley Verge LVRD Series User manual

Bradley Aerada 1200 Series User manual

Bradley

Bradley Aerada 1200 Series User manual

Bradley Verge LVS Series User manual

Bradley

Bradley Verge LVS Series User manual

Bradley Vernatherm S59-4004 User manual

Bradley

Bradley Vernatherm S59-4004 User manual

Bradley TouchTime 1C User manual

Bradley

Bradley TouchTime 1C User manual

Bradley 400 Series User manual

Bradley

Bradley 400 Series User manual

Bradley S19-130SS User manual

Bradley

Bradley S19-130SS User manual

Bradley Verge LVLD Series User manual

Bradley

Bradley Verge LVLD Series User manual

Bradley S19-110HFP User manual

Bradley

Bradley S19-110HFP User manual

Bradley Halo S19314EW User manual

Bradley

Bradley Halo S19314EW User manual

Bradley Express SS Series User manual

Bradley

Bradley Express SS Series User manual

Bradley S19-304C2 User manual

Bradley

Bradley S19-304C2 User manual

Bradley S19-110BF User manual

Bradley

Bradley S19-110BF User manual

Bradley Express SS Series User manual

Bradley

Bradley Express SS Series User manual

Bradley S19-120HFP User manual

Bradley

Bradley S19-120HFP User manual

Bradley E19-130 User manual

Bradley

Bradley E19-130 User manual

Bradley LC700 User manual

Bradley

Bradley LC700 User manual

Bradley S19-310SPR User manual

Bradley

Bradley S19-310SPR User manual

Bradley ABP-1WCA User manual

Bradley

Bradley ABP-1WCA User manual

Bradley Bradmar 700 Series User manual

Bradley

Bradley Bradmar 700 Series User manual

Bradley HSR20 User manual

Bradley

Bradley HSR20 User manual

Bradley S19-120 User manual

Bradley

Bradley S19-120 User manual

Popular Bathroom Fixture manuals by other brands

Kohler Mira Sport Max J03G Installation and user guide

Kohler

Kohler Mira Sport Max J03G Installation and user guide

Moen 186117 Series installation guide

Moen

Moen 186117 Series installation guide

Hans Grohe Raindance Showerpipe 27235000 Instructions for use/assembly instructions

Hans Grohe

Hans Grohe Raindance Showerpipe 27235000 Instructions for use/assembly instructions

Signature Hardware ROUND SWIVEL BODY SPRAY 948942 Install

Signature Hardware

Signature Hardware ROUND SWIVEL BODY SPRAY 948942 Install

fine fixtures AC3TH installation manual

fine fixtures

fine fixtures AC3TH installation manual

LIXIL HP50 Series quick start guide

LIXIL

LIXIL HP50 Series quick start guide

KOLO ATOL PLUS installation manual

KOLO

KOLO ATOL PLUS installation manual

Hans Grohe PuraVida 15073000 Instructions for use/assembly instructions

Hans Grohe

Hans Grohe PuraVida 15073000 Instructions for use/assembly instructions

Toto TS111B8 Installation and owner's manual

Toto

Toto TS111B8 Installation and owner's manual

Kohler K-1158-H2 Homeowner's guide

Kohler

Kohler K-1158-H2 Homeowner's guide

Coram Showers OFFSET QUADRANT manual

Coram Showers

Coram Showers OFFSET QUADRANT manual

baliv DU-2010 manual

baliv

baliv DU-2010 manual

odass OD-1710 instruction manual

odass

odass OD-1710 instruction manual

Oxygenics Evolution Easy installation instructions

Oxygenics

Oxygenics Evolution Easy installation instructions

Helvex TH-974 installation guide

Helvex

Helvex TH-974 installation guide

DURAVIT C.1 C15240 0090 Instructions for mounting and use

DURAVIT

DURAVIT C.1 C15240 0090 Instructions for mounting and use

Sunshower PURE SOLO manual

Sunshower

Sunshower PURE SOLO manual

Heatstore HSTRL500WTN Installation and operating instructions

Heatstore

Heatstore HSTRL500WTN Installation and operating instructions

manuals.online logo
manuals.online logoBrands
  • About & Mission
  • Contact us
  • Privacy Policy
  • Terms and Conditions

Copyright 2025 Manuals.Online. All Rights Reserved.