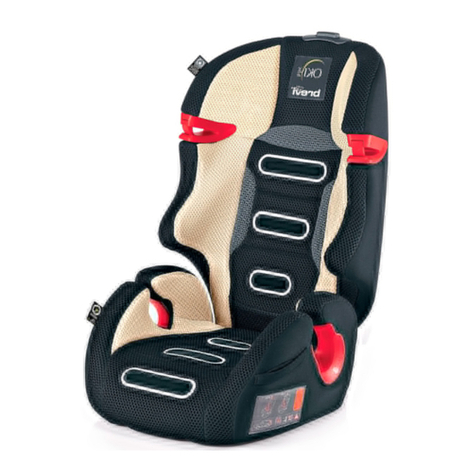
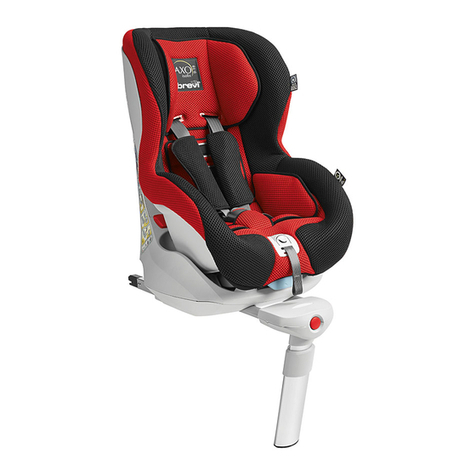
Brevi TAZIO tt User manual

TAZIO tt
Art. 534
(groups I/II/III)
PLEASE READ THIS MANUAL CAREFULLY BEFORE USE.
LEGGERE ATTENTAMENTE QUESTO MANUALE PRIMA
DELL’USO.
Instruction manual
EN
Manual de instruções
PT
Руководство пользователя
RU
Οδηγίες χρήσης
EL
Návod na použitie
SK
Mode d’emploi
FR
Használati utasítás
HU
Manuale istruzioni
IT
Manual de instrucciones
ES
Korisnički priručnik
HR
Manual de utilizare
RO
Bedienungsanleitung
DE
Navodila za uporabo
SI
Инструкция за употреба
BG
AR
534-01-161124-00 ISTRUZIONI SEGGIOLINO AUTO TAZIO TT.indd 1 30/11/2016 15.29.29

2
F1
03
F2
click !
click !
click !
click !
01
01
02
02
PRESS
PRESS
07
08
08 19
19
26
10
F3 F4 F5
F6
07
11
F7
12
534-01-161124-00 ISTRUZIONI SEGGIOLINO AUTO TAZIO TT.indd 2 30/11/2016 15.29.30

3
C L I C K
F8 F9
15
04
F10
17
17
17
F11 F12 F13
20
21
19
19
08
21
26
F14 F15 F16
534-01-161124-00 ISTRUZIONI SEGGIOLINO AUTO TAZIO TT.indd 3 30/11/2016 15.29.32

4
F20 F21 F22
22
23
29
24
25
F27
F26
29
28
11
23
F17 F18 F19
09
19 19
534-01-161124-00 ISTRUZIONI SEGGIOLINO AUTO TAZIO TT.indd 4 30/11/2016 15.29.32

5
F29
F28
23
28
11
30
07
F30 F31 F32
26
10
08
08
39
F33 F34 F35
39
41
10
08
19
40
534-01-161124-00 ISTRUZIONI SEGGIOLINO AUTO TAZIO TT.indd 5 30/11/2016 15.29.33

6
F36 F37 F38
43
42
08
47
F39 F40 F41
42
33
34
1
2
3
4
F42 F43 F44
12
07
43
42
47
08 20
F51 F52 F53
40
19 19
08
08
41
19
10
08
08
39
534-01-161124-00 ISTRUZIONI SEGGIOLINO AUTO TAZIO TT.indd 6 30/11/2016 15.29.35

7
F36 F37 F38
43
42
08
47
F39 F40 F41
42
33
34
1
2
3
4
F42 F43 F44
12
07
43
42
47
08 20
F45 F46 F47
42
21
33
44
21
a
b
F48 F49 F50
32
20
21
08
19
F51 F52 F53
40
19 19
08
08
41
19
10
08
08
39
534-01-161124-00 ISTRUZIONI SEGGIOLINO AUTO TAZIO TT.indd 7 30/11/2016 15.29.36

8
F54 F55 F56
21
20
32
34
33
F57 F58 F59
F60 F61
534-01-161124-00 ISTRUZIONI SEGGIOLINO AUTO TAZIO TT.indd 8 30/11/2016 15.29.37

9
ITALIANO
Modello: TAZIO tt (gruppi I/II/III)
LEGGERE ATTENTAMENTE QUESTO MANUALE
PRIMADELL’USO.
Prima di acquistare questo prodotto accertarsi che il seggiolino
auto sia compatibile con il veicolo in cui sarà utilizzato.
INDICE
1. Avvertenze
2. Uso nel veicolo
3. Preparazione
3.1. Preparazione ISOFIX
3.2. Regolazione del poggiatesta per utilizzo seggiolino con cin-
turino a 5 punti
3.3. Regolazione del poggiatesta per utilizzo seggiolino con cintu-
ra di sicurezza della vettura
4. Installazione
4.1 Gruppo 1 (9-18 kg) con ISOFIX + “top tether” + cinturino a
5 punti
4.1.1 Assicurare il bambino mediante cinturino a 5 punti
4.2 Gruppo 1 (9-18 kg) con cintura di sicurezza della vettura +
cinturino a 5 punti
4.3 Gruppo 2 (15-25 kg) con cintura di sicurezza della vettura +
“top tether” + cinturino a 5 punti
4.4 Gruppo 2 (15-25 kg) & gruppo 3 (22-36 kg) con cintura di
sicurezza della vettura
5. Rimozione del seggiolino
6. Rimozione del cinturino a 5 punti
7. Rimontare il cinturino a 5 punti
8. Cura e manutenzione
8.1 Cura della bbia del cinturino
8.2 Pulizia
9. Garanzia
1. AVVERTENZE
Leggere attentamente prima di installare il seggiolino nel veicolo
1. Questo seggiolino è adatto all’uso come gruppo 1-2-3, per
bambini da 9 mesi a 4 anni circa e 9-36 kg
2. Leggere attentamente queste istruzioni perché una installazio-
ne non corretta può avere serie conseguenze per la sicurezza del
bambino. In caso di incidente dovuto a installazione non corretta,
il costruttore non accetta alcuna responsabilità.
3. Questo seggiolino è costruito nel rispetto del regolamento ECE
R44/04 e può essere installato sulla maggior parte dei veicoli
equipaggiati con punti di ancoraggio, attacchi ISOFIX approvati
secondo il regolamento 16.
Prima dell’acquisto il seggiolino dovrebbe essere sempre testato
nel veicolo, con bambino seduto, per vericare che il modello
soddis i vostri bisogni.
4. Non utilizzare mai il seggiolino senza il suo rivestimento tessile.
5. Proteggere il seggiolino dall’esposizione diretta al sole: il seg-
giolino può diventare caldissimo e nuocere al bambino.
6. Il seggiolino ed accessori devono essere sostituiti quando dan-
neggiati o usati in modo non corretto.
7. Non lasciare nella vettura oggetti pesanti perché in caso di inci-
dente potrebbero ferire il bambino.
8. Assicurarsi che nessuna parte del seggiolino sia intrappolata
nella portiera del veicolo o nel sedile reclinato. Inoltre assicurarsi
che il seggiolino sia correttamente installato e ssato.
9. Non staccare, modicare o aggiungere pezzi al seggiolino o
al cinturino perché comprometterebbe funzionamento base e la
sicurezza offerta dal seggiolino.
10. Il seggiolino deve rimanere installato nel veicolo anche se il
bambino non è seduto nel seggiolino. Il bambino non deve essere
mai lasciato senza sorveglianza mentre è seduto nel seggiolino,
nemmeno fuori dal veicolo.
11. Tenere il seggiolino lontano da prodotti corrosivi.
12. Il costruttore garantisce la qualità dei propri prodotti, ma non
la qualità di prodotti di seconda mano o appartenenti ad altre
aziende.
13. Le illustrazioni hanno solo intenti informativi. Il seggiolino può
avere piccole differenze rispetto a quanto rappresentato nelle im-
magini o fotograe di questo manuale istruzioni.
2. USO NEL VEICOLO
Osservare le istruzioni d’uso del seggiolino descritte nel manuale
del veicolo.
Il seggiolino può essere usato in veicoli dotati di sistemi di anco-
raggio ISOFIX, “top tether” o cinture di sicurezza a 3 punti.
E’ possibile usare il seggiolino in:
Direzione senso di marcia
Direzione opposta a senso di marcia
Con cinture di sicurezza auto a 2 punti (cinture auto)
Con sedili dotati di:
connettori ISOFIX e ancoraggio “top tether”
cintura di sicurezza a 3 punti (cinture auto)
3.PREPARAZIONE
3.1. Preparazione ISOFIX
Qualora il veicolo non abbia in dotazione le guide per l’inserimento
dei connettori ISOFIX, agganciare ai due punti di attacco ISOFIX
01 del veicolo le guide di inserimento 02, fornite con il seggiolino.
SUGGERIMENTO: i punti di attacco ISOFIX sono posizionati tra
la seduta e lo schienale del sedile della vettura (g. F1)
2.Tirare la cinghietta per estrarre al massimo il sistema di blocco
(g. F2).
3.2. Regolazione del poggiatesta per utilizzo seg-
534-01-161124-00 ISTRUZIONI SEGGIOLINO AUTO TAZIO TT.indd 9 30/11/2016 15.29.38

10
giolino con cinturino a 5 punti
La corretta regolazione del poggiatesta garantisce la protezione
ottimale del bambino nel seggiolino: il poggiatesta 07 deve essere
regolato in modo tale che il gli spallacci del cinturino 19 siano allo
stesso livello delle spalle (g. F3).
ATTENZIONE! Gli spallacci del cinturino 19 non devono stare die-
tro le spalle ne sopra le orecchie.
Gli spallacci del cinturino vengono regolati in questo modo:
1.Premere il pulsante di regolazione 26 e contemporaneamente
tirare il cinturino 08 in avanti.
Non tirare gli spallacci 19, allentare il cinturino a 5 punti il più pos-
sibile. (g. F4)
Parte posteriore del seggiolino:
2. Sollevare la leva di blocco del regolatore altezza del cinturino
10 nella parte posteriore del seggiolino. (g. F5)
3. Fare scorrere il regolatore altezza del cinturino 10 no alla cor-
retta altezza degli spallacci 19 e rilasciare la leva per bloccare il
regolatore nella posizione adatta al bambino. (g. F5)
3.3. Regolazione del poggiatesta per utilizzo seg-
giolino con cintura di sicurezza della vettura
Il poggiatesta 07 correttamente regolato assicura che la parte diago-
nale della cintura di sicurezza 11 sia posizionata in modo ottimale e
dia al bambino la massima protezione in caso di incidente.
Il poggiatesta 07 deve essere regolato in modo tale che ci sia uno
spazio di due dita tra il poggiatesta 07 e le spalle del bambino. (g. F6)
Per adattare l’altezza del poggiatesta al bambino:
1. Premere la maniglia di regolazione 12 dietro il poggiatesta 07
per sbloccarlo (g. F7).
2. Regolare il poggiatesta 07 all’altezza desiderata e rilasciare la
maniglia di regolazione 12 per bloccarlo in posizione corretta.
3. Qualora la posizione del poggiatesta 07 non sia all’altezza
adatta al bambino, si può regolare anche l’altezza cinturino 10,
come spiegato nella sezione 3.2
4.INSTALLAZIONE
4.1 Gruppo 1 (9-18 kg) con ISOFIX + “top tether” +
cinturino a 5 punti
1 Assicurarsi che il cinturino a 5 punti del bambino sia corretta-
mente installato (vedere sezione 7).
2. Seguire la procedura della sezione 3.1 (preparazione ISOFIX)
3. Seguire la procedura della sezione 3.2 (regolazione del pog-
giatesta)
4.Prendere il Top thether ed appoggiarlo sul seggiolino.
5. Posizionare il seggiolino in direzione di marcia sul sedile del
veicolo.
6. Afferrare il seggiolino con entrambe le mani e far scorrere con
decisione i due bracci 15 nelle guide 02 no a quando entrambi i
bracci si agganciano con “click” e gli indicatori ISOFIX 04 diventa-
no di colore verde su entrambi i lati (g. F8, F9).
ATTENZIONE! Gli agganci sono connessi correttamente se en-
trambi gli indicatori sono verdi.
7. Spingere con decisione il seggiolino verso lo schienale del sedi-
le della vettura premendo su entrambe i lati (g. F10).
8. Scuotere il seggiolino per assicurarsi che sia collegato in modo
sicuro e ricontrollare che gli indicatori di sicurezza 04 siano com-
pletamente verdi.
9. Prendere il “top tether” e, se necessario, allungare la cinghia
premendo il tasto di blocco e tirare la cinghia per allungarla quan-
to serve (g. F11).
10. Agganciare il moschettone 17 nel punto di ancoraggio “top
tether” indicato nel manuale di istruzioni del veicolo. Cerca questo
simbolo nel veicolo (g. F12).
11. Per tendere il “top tether” rimuovere ogni allentamento tirando
l’estremità libera della cinghia no a quando è sufcientemente
tesa. Il “top tether” è correttamente teso quando l’indicatore è
completamente verde (g. F13)
12. Seguire la procedura per assicurare il bambino mediante cin-
turino a 5 punti (vedere sezione 4)
4.1.1 Assicurare il bambino mediante cinturino a
5 punti
La sicurezza del bambino è direttamente proporzionale a quanto il
cinturino si adatta al corpo del bambino. Quindi evitare di mettere
al bambino vestiti spessi sotto la cinturino.
1.Aprire la bbia 21 premendo il tasto rosso (g. F14).
2. Premere il pulsante di regolazione 26 e allo stesso tempo tirare
il cinturino in avanti. Non tirare gli spallacci 19 (g. F14).
3. Far sedere il bambino nel seggiolino.
4. Assicurarsi che la schiena del bambino sia appoggiata contro lo
schienale del seggiolino.
5. Unire i due connettori 20 della bbia e inserirli nella bbia 21;
sentirete un clic all’inserimento (g. F15, F16, F17).
6. Tirare la cinghia di regolazione 09 no a quando il cinturino sia
piatto e contro il corpo del bambino (g. F18).
Per la sicurezza del bambino, prima di ogni viaggio in vettura
controllare che:
▪ il seggiolino sia connesso su entrambi i lati gli attacchi ISOFIX
15 nelle connessioni ISOFIX 01 e che entrambi gli indicatori di
sicurezza 04 siano completamente verdi (g. F8)
▪ il seggiolino sia saldamente connesso al veicolo
▪ il “top tether” (g. F13) sia teso strettamemente sullo schienale
del seggiolino e l’indicatore di tensione sia verde
▪ il cinturino del seggiolino sia vicino al corpo senza schiacciare
il bambino
▪ il cinturino 08 sia correttamente regolato e non sia attorcigliato
▪ gli spallacci 19 siano allo stesso livello delle spalle del bambino
(g. F3)
▪ i due agganci 20 della bbia siano connessi alla bbia 21 (g. F16)
4.2 Gruppo 1 (9-18 kg) con cintura di sicurezza
della vettura + cinturino a 5 punti
1 Assicurarsi che il cinturino a 5 punti del bambino sia corretta-
mente installato (vedere sezione 7)
2. Seguire la procedura della sezione 3.2 (regolazione del pog-
giatesta)
3. Posizionare il seggiolino in direzione di marcia sul sedile del
veicolo
4. Tirare la cintura di sicurezza del veicolo 22 e inlarla nelle guide
cintura del seggiolino. Assicurarsi che la cintura di sicurezza non
sia attorcigliata (g. F20)
5. Agganciare la linguetta della cintura di sicurezza alla bbia del
534-01-161124-00 ISTRUZIONI SEGGIOLINO AUTO TAZIO TT.indd 10 30/11/2016 15.29.39

11
sedile 29: dovrebbe sentirsi un “click” (g. F21)
6. Sul lato opposto alla bbia della cintura di sicurezza, ruotare
la leva di blocco 24 ed inserire il ramo diagonale della cintura di
sicurezza nel blocco 25 (g. F22)
7. Applicare il peso del vostro corpo al seggiolino (ginocchio ap-
poggiato al seggiolino). Contemporaneamente tendere il ramo
diagonale della cintura di sicurezza verso l’arrotolatore
8. Seguire la procedura per assicurare il bambino mediante cin-
turino a 5 punti
Per la sicurezza del bambino, prima di ogni viaggio in vettura
controllare che:
▪ il seggiolino sia saldamente connesso al veicolo
▪ la cintura di sicurezza non sia attorcigliata
▪ il ramo diagonale della cintura di sicurezza sia trattenuto solo
dal blocco sul lato opposto rispetto alla bbia della cintura di si-
curezza
▪ il cinturino del seggiolino sia vicino al corpo senza schiacciare
il bambino
▪ il cinturino 08 sia correttamente regolato e non sia attorcigliato
▪ gli spallacci 19 siano allo stesso livello delle spalle del bambino
(g. F3)
▪ i due agganci 20 della bbia siano connessi alla bbia 21 (g. F16)
4.3 Gruppo 2 (15-25 kg) con cintura di sicurezza
della vettura + “top tether” + cinturino a 5 punti
1. Seguire la procedura del paragrafo 4.2 (per ssare il seggiolino
alla cintura di sicurezza a 3 punti)
2. Prendere il “top tether” e, se necessario, allungare la cinghia
premendo il tasto di blocco per per rilasciare la cinghia, tirando
per allungarla quanto serve (g. F11).
3. Agganciare il moschettone 17 nel punto di ancoraggio “top te-
ther” raccomandato nel manuale di istruzioni del veicolo. Cerca
questo simbolo nel veicolo (g. F12).
4. Per tendere il “top tether” rimuovere ogni allentamento tirando
l’estremità libera della cinghia no a quando è sufcientemente
tesa. Il “top tether” è correttamente teso quando l’indicatore è
completamente verde (g. F13)
5. Seguire la procedura per assicurare il bambino mediante cin-
turino a 5 punti.
Per la sicurezza del bambino, prima di ogni viaggio in vettura
controllare che:
▪ il seggiolino sia saldamente connesso al veicolo
▪ la cintura di sicurezza non sia attorcigliata
▪ il “top tether” (g. F13) è teso strettamemente sullo schienale del
seggiolino e l’indicatore di tensione sia verde
▪ il ramo diagonale della cintura di sicurezza sia trattenuto solo
dal blocco sul lato opposto rispetto alla bbia della cintura di si-
curezza
▪ il cinturino del seggiolino sia vicino al corpo senza schiacciare
il bambino
▪ il cinturino 08 sia correttamente regolato e non sia attorcigliato
▪ gli spallacci 19 siano allo stesso livello delle spalle del bambino
(g. F3)
▪ i due agganci 20 della bbia siano connessi alla bbia 21 (g. F16)
4.4 Gruppo 2 (15-25 kg) & gruppo 3 (22-36 kg) con
cintura di sicurezza del veicolo
1. Assicurarsi che il cinturino a 5 punti sia correttamente rimosso
(vedi sezione 6)
2. Seguire la procedura della sezione 3.3 (regolazione del pog-
giatesta)
3. Seguire la procedura della sezione 4.1, installazione del seg-
giolino con ISOFIX e “top tether” (opzionale).
SUGGERIMENTO
Per l’utilizzo secondo i gruppi 2 e 3 i connettori ISOFIX e “top te-
ther” sono stati progettati per migliorare la stabilità del seggiolino.
In caso di problemi durante l’uso nel veicolo, è possibile utilizzare
il seggiolino senza questa opzione.
4. Far sedere il bambino nel seggiolino.
5. Tirare la cintura di sicurezza del veicolo e stenderla davanti al
bambino no alla bbia 29 del sedile del veicolo. Agganciare la lin-
guetta della cintura di sicurezza alla bbia del sedile 29: dovrebbe
sentirsi un “click” (g. F26, F27).
ATTENZIONE ! Non attorcigliare la cintura di sicurezza.
6. Orientare il ramo diagonale 11 e il ramo addominale 28 della
cintura di sicurezza verso la bbia 29 sotto il bracciolo e il guida-
cintura rossa 23 del seggiolino (g. F27, F28).
7. Posizionare il ramo addominale 28 sul lato opposto del seggio-
lino nel guida cinghia rosso 23 (g. F28).
8. Far passare il ramo diagonale 11 nel supporto cintura rosso 30
del poggiatesta 07 nché non è inserito completamente all’interno
del supporto 30 e vericare che non sia attorcigliato (g. F29).
9.Assicurarsi che il ramo diagonale 11 della cintura di sicurezza stia
sopra l’osso della spalla del bambino, e non davanti al suo collo.
SUGGERIMENTO
È comunque possibile regolare ancora l’altezza del poggiatesta
07 nel veicolo per adattare correttamente la cintura all’altezza del
bambino.
Per la sicurezza del bambino, prima di ogni viaggio in vettura
controllare che:
•il ramo addominale 28 della cintura di sicurezza passi attraverso
le guide rosse 23 su entrambi i lati della seduta del seggiolino;
•il ramo diagonale 11 passi nella guida rossa 23 della seduta nel
lato della bbia 29 del sedile del veicolo
•il ramo diagonale 11 passi nella guida rossa 30 del poggiatesta
5.RIMOZIONE DEL SEGGIOLINO
1. Per rilasciare la connessione ISOFIX, premere i pulsanti di si-
curezza, prima da un lato e poi dall’altro (g. F8).
2. Aprire la bbia della cintura di sicurezza del veicolo ed estrarre
il ramo diagonale della cintura di sicurezza dal blocco.
3. Per sganciare il “top tether”, allentare la cintura premendo il
pulsante di blocco del regolatore. Poi staccare il moschettone dal
punto di ancoraggio.
4. Far scorrere il telaio ISOFIX all’interno della scocca.
6.RIMOZIONE DEL CINTURINO A 5 PUNTI
1. Allentare il più possibile il cinturino a 5 punti (g. F30).
Lato posteriore del seggiolino:
2. Aprire la leva di blocco del regolatore altezza del cinturino 10
nella parte posteriore del seggiolino. (g. F31).
534-01-161124-00 ISTRUZIONI SEGGIOLINO AUTO TAZIO TT.indd 11 30/11/2016 15.29.39
12
3. Portare il regolatore altezza del cinturino 10 nel punto più alto
e bloccarlo rilasciando la leva.
4. Allentare al massimo la cintura a 5 punti del seggiolino. Sgan-
ciare le cinghie 08 sul lato posteriore del seggiolino dalla piastra
di connessione 39 (g. F32).
5. Inserire la piastra di connessione 39 nella sede prevista per il
ssaggio (g. F33).
6. Staccare gli attacchi dei cinturini degli spallacci 19 dai pro-
lungamenti 41 in plastica del regolatore altezza del cinturino 10
(g. F34).
Lato frontale del seggiolino:
7. Slare gli spallacci 19 e i due rami di cinturino 08 attraverso le
fessure 40 (lato anteriore del seggiolino) (g. F35).
8. Aprire la bbia 21 (premere il pulsante di rilascio rosso) (g.
F36)
9. Aprire l Velcri 42 sul lato sinistro e destro e staccare il rivesti-
mento 43 (g. F37).
10.Arrotolare i cinturini laterali 08 e riporli nei vani laterali (g.
F38).
11.Riposizionare il rivestimento ssandolo con i velcri 42 sul lato
sinistro e destro (g. F39).
12. Reclinare completamente la seduta mediante la maniglia di
reclinazione (g. F40).
13. Afferrare la piastra metallica da sotto e posizionarla verti-
calmente.
14. Spingere verso l’alto la piastra metallica 33 e farla scorrere
attraverso la fessura 34. Rimuovere la bbia (g. F41).
7.RIMONTARE IL CINTURINO A 5 PUNTI
1. Premere la maniglia di regolazione 12 dietro il poggiatesta 07 e
spingere il poggiatesta nella posizione più bassa (g. F42)
2. Aprire i Velcri sul lato sinistro e destro del rivestimento 43 e
lasciare il rivestimento sulla seduta (g. F43).
3. Prendere le cinture 08 e gli attacchi bbia 20 dai vani laterali 47
e srotolare le cinture (g. F44).
4. Riposizionare il rivestimento ssandolo con i velcri 42 sul lato
sinistro e destro (g. F45).
5. Rimontare la bbia 21 e lo spartigambe. Per il gruppo 1 (9-18
kg) usare la fessura più vicino allo schienale, per il gruppo 2 (15-
25 kg) utilizzare quella più lontana.
6. Prendere la bbia 21 e tenere la piastra metallica 33 vertical-
mente. Con il lato più corto verso l’alto, spingere attraverso la fes-
sura della cinghia (a) o (b) nella scocca (g. F46, F47).
7. Guardando da sotto il sedile controllare che la piastra metallica
33 sia in posizione orizzontale e vericare la corretta installazione
tirando la bbia 21 più volte (g. F47).
8. Unire i due attacchi bbia 20 insieme e inserirli nella bbia 21:
l’inserimento genera un “click” (g. F49).
ATTENZIONE! I rami cinturino addominali non devono essere
attorcigliati o invertiti.
9.Inlare gli spallacci 19 sui cinturini 08 orientandoli correttamen-
te, vericando che non ci siano attorcigliamenti. Allineare i due
anelli del cinturino 08 e gli attacchi degli spallacci 19 (g. F50).
10. Spingere i rami cinturino 08 e gli attacchi degli spallacci 19
attraverso le aperture 40 dello schienale (g. F51).
11. Slare i passanti degli spallacci 19 dalle estensioni 41 del re-
golatore altezza cinturino 10 (g.52)
SUGGERIMENTO
una volta inlati, gli attacchi dei cinturini degli spallacci devono
trovarsi sotto il cinturino 08.
ATTENZIONE! I rami cinturino 08 non devono essere attorcigliati
o scambiati.
12. Staccare la piastra di connessione 39 dei cinturini dal punto di
ssaggio sul lato posteriore del seggiolino.
13. Agganciare le cinture 08 di nuovo alla piastra di connessione
39. La cinghia sinistra va connessa sul braccio sinistro della pia-
stra di connessione e la destra sul destro (g. F53).
8. CURA E MANUTENZIONE
8.1 Cura della bbia del cinturino
È di vitale importanza per la sicurezza del bambino che il cinturino
funzioni correttamente.
Malfunzionamenti della bbia del cinturino sono di solito causati
da accumuli di sporcizia o corpi estranei.
I malfunzionamenti sono i seguenti:
• I fermi bbia vengono espulsi lentamente quando si preme il
pulsante rosso di rilascio.
• I fermi bbia non si agganciano (cioè sono espulsi se si cerca
agganciarli).
• I fermi bbia si agganciano senza fare “click”.
• I fermi bbia sono difcili da inserire (si incontra resistenza).
• La bbia si apre solo applicando una grande forza.
Rimedi:
lavare la bbia in modo che funzioni ancora correttamente
Pulizia dello spartigambe con bbia
1. Seguire la sezione 6 per rimuovere la bbia 21 (g. F54, F55,
F56, F57)
2. Mettere in ammollo la bbia 21 in acqua calda con detersivo
delicato per almeno un’ora. Poi risciacquare e asciugare accu-
ratamente.
8.2 Pulizia
Il rivestimento tessile può essere rimosso e lavato. Osservare le
istruzioni sull’etichetta lavaggio.
Rimozione del rivestimento tessile
A) Rivestimento poggiatesta
1. Portare il poggiatesta nella posizione più alta. (g. F58)
2. Estrarre il bordo elastico del rivestimento dalla scocca del pog-
giatesta (g. F59) e rimuovere il rivestimento del poggiatesta.
B) Rivestimento seduta
1. Estrarre il bordo elastico del rivestimento dalla scocca del seg-
giolino (g. F60)
2. Rimuovere il rivestimento della seduta (g. F61).
Per rimontare i rivestimenti seguire la procedura nell’ordine op-
posto.
9. GARANZIA
Garantiamo il prodotto da difetti di fabbricazione per un periodo di
2 anni dalla data di acquisto.
1. La garanzia non copre difetti o rotture causate da uso inappro-
priato e in disaccordo con gli standard di installazione e manuten-
534-01-161124-00 ISTRUZIONI SEGGIOLINO AUTO TAZIO TT.indd 12 30/11/2016 15.29.39

13
zione descritti nelle istruzioni consegnate con il prodotto.
2. La garanzia sarà automaticamente decaduta se l’articolo acqui-
stato è stato riparato o dopo tentativo di riparazione effettuato da
personale non autorizzato dal produttore.
ENGLISH
Model: TAZIO tt (groups I/II/III)
PLEASE READ THIS MANUAL CAREFULLY BEFORE
USE.
Before buying this product make sure the car seat is compatible
with the vehicle it is to be used in.
CONTENTS
1. Warning
2. USE IN THE VEHICLE
3. PREPARATORY WORKS
3.1. Prepare ISOFIX
3.2. Adjusting the headrest in 5-point harness installation
3.3. Adjusting the headrest in vehicle belt installation
4.INSTALLATION
4.1 Group 1 (9-18 kg) with ISOFIX + top tether + 5-point harness
4.1.1 Securing your child with 5-point harness
4.2 Group 1 (9-18 kg) vehicle belt+ 5-point harness
4.3 Group 2 (15-25 kg) vehicle belt+ top tether +5-point harness
4.4 Group 2 (15-25 kg) & group 3 (22-36 kg) vehicle belt
5. REMOVAL OF THE CHILD SEAT
6. REMOVING THE 5-POINT HARNESS
7. REFITTING THE 5-POINT HARNESS
8.Care and maintenance
8.1 Care for the harness buckle
8.2 Cleaning
9.Warranty
1.WARNING
Please read carefully before installing the child seat in the vehicle.
1.This child safety seat is suitable for use as group 1-2-3 from
approx. 9 months to 12 years age/ 9-36kg
2.Please read this instructions carefully, as incorrect installation
could result in serious injury. If any injuries should occur as a
result of incorrect installation, the manufacturer will accept no
responsibility.
3.This child seat is in accordance with the ECE R44/04 regula-
tions and may be installed in the majority of vehicles equipped
with approved points, such as ISOFIX points, in accordance with
ECE regulation 16.
However, prior to purchase, the child seat should always be te-
sted in your vehicle with the child seated, in order to ensure that
the model meets your needs.
4.Never use the child safety seat without its cover.
5.Protect the child safety seat from direct sunlight, as the seat can
get very hot and harm the child.
6.Child seats or accessories that are damaged or have been used
incorrectly must be replaced.
7.Do not leave heavy objects inside the car, as these may injure
the child in the event of an accident.
8.Ensure that no part of the child seat is caught in the door of the
vehicle or in a reclining seat. In addition, ensure that the safety
seat is correctly installed and secured.
9.Do not disassemble, modify, or add any piece to the child seat
or harness, as this would seriously affect its basic functioning and
the safety that the child seat provides.
10.The safety seat must remain installed in the vehicle, even if
the child is not seated in the car seat. The child must never be
left unattended while seated in the safety seat, not even outside
the vehicle.
11.Keep the safety seat away from corrosive products.
12.The manufacturer guarantees the quality of its products, but
not the quality of second-hand products or products belonging to
other companies.
13.Instruction illustrations are for informational purposes only.
The child restraint system may contain small differences compa-
red to the photographs or images in the instruction manual.
2. USE IN THE VEHICLE
Please observe the instructions on the use of child restraint sy-
stems described in your vehicle owner’s manual.
The seat may be used in vehicles equipped with ISOFIX, Top Te-
ther anchoring systems or 3-point belt.
You can use your child car seat as follows:
In the direction of travel
Against the direction of travel
With the 2-point belt (car seatbelt)
On seats featuring:
ISOFIX attachments and Top Tether anchoring
3-point belt (Vehicle belt)
3. PREPARATORY WORKS
3.1 Prepare ISOFIX
1. If your vehicle is not equipped with the ISOFIX insert guides as
standard, clip the two insert guides 02 which are included with the
seat with the cut-out facing upwards onto the two ISOFIX attach-
ment points 01 of your vehicle.
TIP: The ISOFIX attachment points are located between the sur-
face and the backrest of the vehicle seat (g. F1).
2.Pull the fabric loop 03 to pull out both locking arms to longest
positon(g. F2).
534-01-161124-00 ISTRUZIONI SEGGIOLINO AUTO TAZIO TT.indd 13 30/11/2016 15.29.41

14
3.2 Adjusting the headrest in 5-point harness in-
stallation
A correctly adjusted headrest 07 ensures optimal protection for
your child in the safety seat: the headrest 07 must be adjusted
so that the shoulder belts 19 are at the same level as your child’s
shoulders (g. F3).
CAUTION! The shoulder belts 19 must not run behind the back of
the child or at ear height or above the ears.
The shoulder belts are adjusted as follows:
1. Press the adjusting button 26 and at the same time pull both shoul-
der belts 08 forwards. Do not pull on the shoulder pads 19, loosen the
5-point harness of the child seat as much as possible. (g. F4)
Back side of the child seat:
2. Press the button of the shoulder belt height adjuster 10 at the
rear of the seat shell and tilt the shoulder belt height adjuster 10
towards you (g. F5).
3. Slide the shoulder belt height adjuster 10 to select the correct
height of the shoulder belts 19 and engage it in the position that
ts for your child by releasing the button (g. F5).
3.3. Adjusting the headrest in vehicle belt instal-
lation
A correctly adjusted headrest 07 ensures that the diagonal seat
belt section 11 is optimally positioned, and gives your child the
optimal protection.
The headrest 07 must be adjusted so that there is a space two
ngers wide between the headrest 07 and your child’s shoulders.
(g. F6)
To adjust the height of the headrest to t your child:
1. Squeeze the adjustment handle 12 on the back of the headrest
07. This unlocks the headrest (g. F7).
2. You can now move the unlocked headrest 07 to the desired
height. As soon as you release the adjustment handle 12 the he-
adrest 07 will lock into place.
3. If the position of headrest 07 is still not x child, additional
adjustment can be made through the shoulder belt height adjuster
10, as explained in Section 3.2
4. INSTALLATION
4.1 Group 1 (9-18 kg) with isox + top tether +
5-point harness
1. Make sure that the child seat’s 5-point harness is installed cor-
rectly (see section 7).
2. Follow the steps in section 3.1 (to prepare the ISOFIX.)
3. Follow the steps in section 3.2 (to adjust headrest.)
4. Take the Top Tether and lay it over the child seat.
5. Place the child seat facing in the direction of travel on the ve-
hicle seat.
6. Grasp the child seat with both hands and slide the two locking
arms 15 rmly into the insert guides 02 until the locking arms en-
gage with a clicking noise on both sides, the ISOFIX indicator 04
turn green on both sides (g. F8, F9).
CAUTION! The locking arms are only correctly engaged if both of
the safety buttons 04 are completely green.
7. Push the child seat towards the backrest applying rm, even
pressure on both sides (g. F10).
8. Shake the child safety seat to make sure it is safely attached
and re-check the green safety buttons 04 to make sure that both
of them are completely green.
9.Take the top tether and if required, lengthen the belt by pressing
the top tether brake button to release the strap, pulling to adjust
as necessary (g. F11).
10.Hook the snap hook 17 into the Top Tether anchoring point
recommended in your vehicle owner’s guide. Look for this
symbol in your vehicle(g. F12).
11. To tension the top tether, remove any slack by pulling on the
free end of strap until it is suitably tightened. The top tether will
be properly tightened when the tension indicator turns completely
green(g. F13).
12. Follow the steps in section securing your child with 5-point
harness (see section 4)
4.1.1 Securing your child with 5-point harness
The more snugly the harness ts over your child’s body, the better
your child will be protected. Therefore avoid putting thick clothes
on your child under the belt.
1. Open the harness buckle 21 by pressing red button (g. F14).
2. Press the adjusting button 26 and at the same time pull both
shoulder belts forwards. Do not pull on the shoulder pads 19 (g.
F14) .
3. Have your child sit down in the child seat.
4. Make sure that your child’s back lies at against the backrest
of the child seat.
5. Guide the two buckle latches 20 together and engage them
before putting them into the harness buckle 21 - this should make
a click noise (g. F15, F16, F17).
6. Pull on the adjuster strap 09 until the harness lies at and is
close against your child’s body (g. F18).
For the safety of your child, before every journey in the car check
that:
• the child safety seat is engaged on both sides with the ISOFIX
locking arms 15 in the ISOFIX attachment points 01 and that both
green safety buttons 04 are completely green (g. F8)
• the child seat is rmly installed in the vehicle
• the Top Tether (g. F13) is tightly tensioned over the backrest of
the car seat and the tension indicator is green
• the straps of the child safety seat are close to the body without
constricting the child
• the shoulder belts 08 are correctly adjusted and the straps are
not twisted
• the shoulder pads 19 are at the same level as your child′s shoul-
ders (g. F3)
• the buckle latches 20 are engaged in the harness buckle 21
(g. F16)
4.2 Group 1 (9-18 kg) vehicle belt + 5-point har-
ness
1. Make sure that the child seat’s 5-point harness is installed cor-
rectly (see section 7)
2. Follow the steps in section 3.2 (to adjust headrest)
3. Place the child seat facing in the direction of travel on the ve-
hicle seat
534-01-161124-00 ISTRUZIONI SEGGIOLINO AUTO TAZIO TT.indd 14 30/11/2016 15.29.41

15
4. Pull the vehicle belt 22 out and guide it through the belt guides
of the child seat. Make sure that the belt is not twisted (g. F20)
5. Engage the buckle tongue in the vehicle seat buckle 29 this
should make a click noise (g. F21)
6. On the side opposite the car seat belt buckle, swivel clamping
lever 24 and insert diagonal belt in belt lock-off 25 (g. F22)
7. Apply your body weight to the child seat (kneel into the seat). At
the same time pull the diagonal belt strongly to tighten
8. Follow the steps in section securing your child with 5-point
harness
For the safety of your child, before every journey in the car check that:
• the child seat is rmly installed in the vehicle
• the belt is not twisted
• the diagonal belt is only clamped by the lock-off 24 which is
located on the opposite side from the car seat belt buckle 29 (g.
F21, F22)
• the straps of the child safety seat are close to the body without
constricting the child
• the shoulder belts 08 are correctly adjusted and the straps are
not twisted
• the shoulder pads 19 are at the same level as your child’s shoul-
ders (g. F3)
• the buckle latches 20 are engaged in the harness buckle 21
(g. F16)
4.3 Group 2 (15-25 kg) vehicle belt+ top tether
+5-point harness
1.Follow the steps in section 4.2 (to x child seat by three point
belt.)
2.Take the top tether and if required, lengthen the belt by pressing
the top tether brake button to release the strap, pulling to adjust
as necessary (g. F11).
3.Hook the snap hook 17 into the Top Tether anchoring point re-
commended in your vehicle owner guide. Look for this symbol in
your vehicle (g. F12).
4.To tension the top tether, remove any slack by pulling on the
free end of strap until it is suitably tightened. The top tether will
be properly tightened when the tension indicator turns completely
green (g. F13).
5.Follow the steps in section securing your child with 5-point harness
For the safety of your child, before every journey in the car check
that:
• the child seat is rmly installed in the vehicle
• the belt is not twisted
• the Top Tether (g. F13) is tightly tensioned over the backrest of
the car seat and the tension indicator is green
• the diagonal belt is only clamped by the lock-off 24 which is
located on the opposite side from the car seat belt buckle 29 (g.
F21, F22)
• the straps of the child safety seat are close to the body without
constricting the child
• the shoulder belts 08 are correctly adjusted and the straps are
not twisted
• the shoulder pads 19 are at the same level as your child’s shoul-
ders (g. F3)
• the buckle latches 20 are engaged in the harness buckle 21
(g. F16)
4.4 Group 2 (15-25 kg) & group 3 (22-36 kg) vehicle
belt
1. Make sure that the child seats 5-point harness is removed cor-
rectly (see section 6)
2. Follow the steps in section 3.3 (to adjust headrest.)
3. Follow the steps in section 4.1 , install child seat with ISOFIX
and top tether (option).
TIP
For group 2 and 3 the ISOFix connectors and top tether have
been designed to improve stability. In case of problem during use
in your vehicle , it is possible to use without this option.
4. Have your child sit down in the child seat.
5. Pull out the vehicle seat belt and guide it in front of your child
to the vehicle seat buckle 29 . Engage the buckle tongue in the
vehicle seat buckle 29 CLICK! (g. F26, F27)
CAUTION! Do not twist the belt.
6. Place the diagonal seat belt section 11 and lap belt section 28
on the side of the vehicle seat belt buckle 29 under the armrest
and into the red belt guide 23 of the child seat (g. F27, F28).
7. Place the lap belt section 28 on the other side of the child seat
in the red belt guide 23 (g. F28).
8. Guide the diagonal seat belt section 11 into the red belt holder
30 of the headrest 07 until it lies completely in the belt holder 30
and is not twisted (g. F29).
9. Make sure that the diagonal seat belt section 11 runs over your
child shoulder bone, and not in front of his or her neck.
TIP
You can still adjust the height of the headrest 07 again here in
the vehicle.
For the safety of your child, before every journey in the car check
that:
• the lap belt section 28 runs through the light red belt guides 23
on both sides of the seat cushion
• the diagonal seat belt section 11 on the side of the vehicle seat
belt buckle 29 also runs through the light red belt guide 23 of the
seat cushion
• the diagonal seat belt section 11 runs through the dark red belt
holder 30 of the headrest
5. REMOVAL OF THE CHILD SEAT
1.To release the ISOFIX fastening, squeeze the safety buttons,
rst on one side, then on the other (g. F8).
2.Open the buckle of the vehicle seat belt and pull out the diago-
nal from lock-off.
3.To release the Top Tether anchoring, loosen the belt by pressing
the brake button of the adjuster. Then take the spring hook out of
the anchoring point.
4.Slide the ISOFIX locking arms back into the seat shell .
6.REMOVING THE 5-POINT HARNESS
1. Loosen the 5-point harness of the child seat as much as pos-
sible (g. F30).
Back side of the child seat:
534-01-161124-00 ISTRUZIONI SEGGIOLINO AUTO TAZIO TT.indd 15 30/11/2016 15.29.41

16
2. Press the button of the shoulder belt height adjuster 10 at the
rear of the seat shell and tilt the shoulder belt height adjuster 10
towards you (g. F31).
3. Move the shoulder belt height adjuster 10 into the top position
and x the position by releasing the button of the shoulder belt
height adjuster.
4. Loosen the 5-point harness of the child seat as much as pos-
sible. Unhook the shoulder belts 08 on the back side of the child
seat from the connecting piece 39 (g. F32) .
5. Snap the connecting piece 39 in the provided storage (g. F33)
6. Slide the belt loops off of the plastic extensions 41 of the shoul-
der belt height adjuster 10 (g. F34).
Front side of the child seat:
7.Pull below both, the shoulder pads 19 and the two shoulder
belts 08 to the front through the slots 40 (front side of the child
seat) (g. F35).
8. Open the harness buckle 21 (press the red release button) (g. F36)
9. Open the left and right Velcro 42 on the lower part of the cover
43 and lift the cover piece to the front. Slide the buckle latches 20
down into the storage compartments (g. F37).
10. Roll the shoulder belts 08 together and place them also into
the storage compartments (g. F38).
11. Reposition the two cover parts to the rear and lock the Velcro
42 on the left and right side of the cover back side (g. F39).
12. Lift the recline handle and pull at the front to fully recline the
child seat (g. F40).
13. Grasp the metal plate 33 from underneath and turn it into a
vertical position.
14. Push upwards and slide the metal plate 33 through the slot 34.
Remove the harness buckle (g. F41).
7.REFITTING THE 5-POINT HARNESS
1. Squeeze the adjustment handle 12 at the rear of the headrest
07 and push the headrest into the lowest position (g. F42).
2. Open the left and right buttons Velcro on the lower part of the
cover 43 and lay the cover piece on the seating area (g. F43).
3. Take the shoulder belts 08 and the buckle latches 20 from the
storage compartment 47 and unroll the shoulder belts (g. F44).
4. Fold back the two cover pieces and close the left and right
poppers 42 on the lower part of the cover(g. F45).
5. Retting harness buckle 21 and crotch pad. Group 1 (9-18 kg)
use the belt slot closest to the backrest (a) ,for Group 2 (15-25 kg)
use the one furthest away (b) .
6. Take the harness buckle 21 and hold the metal plate 33 vertical-
ly. Push it with the narrow side upwards through the belt slot (a) or
(b) into the seat shell from above (g. F46, F47).
7. Ensure by looking underneath the seat that the metal plate 33
is in a horizontal position and check the installation by pulling on
the harness buckle 21 several times(g. F47).
8. Guide the two buckle latches 20 together and engage them
before putting them into the harness buckle 21 - this should make
a click noise (g. F49).
CAUTION! The lap belts must not be twisted or swapped.
9. Thread the shoulder pads 19 onto the shoulder belts 08 in the
correct orientation as shown ensuring there are no twists. Align
the two loops of the shoulder belts 08 and strap loops of the
shoulder pads 19 (g. F50) .
10. Pull the shoulder belts 08 and the strap loops of the shoulder
pads 19 through the slots 40 (g. F51).
11. Pull the strap loops of the shoulder pads 19 onto the plastic
extensions 41 of the shoulder belt height adjuster 10 (g. F52).
TIP
the strap loops of the shoulder pads should be the lower loop.
CAUTION! The shoulder belts 08 must not be twisted or swapped.
12. Take the connecting piece 39 from the provided storage on the
back side of the child seat.
13. Hook the shoulder belts 08 back onto the connecting piece 39.
The left loop on the left arm of the connecting piece and the right
loop on the right arm (g. F53).
8. CARE AND MAINTENANCE
8.1 Care for the harness buckle
It is vital for the safety of your child that the harness buckle works
correctly.
Malfunctions of the harness buckle are usually caused by accu-
mulations of dirt or foreign bodies.
Malfunctions are as follows:
• The buckle latches are ejected only slowly when the red release
button is pressed.
• The buckle latches will no longer lock home (i.e. they are ejected
again if you try to push them in).
• The buckle latches engage without an audible “click”.
• The buckle latches are difcult to insert (you feel resistance).
• The buckle only opens if extreme force is applied.
Remedy:
wash out the harness buckle so that it functions properly once
again
Cleaning the harness buckle
1.Follow section 6 to Remove the harness buckle 21 (g. F54,
F55, F56, F57)
2.Soak the harness buckle 21 in warm water with light washing-up
liquid for at least an hour. Then rinse and dry it thoroughly.
8.2 Cleaning
The cover can be removed and washed. Please observe the in-
structions on the washing label of the cover.
Removing the cover
A) Headrest
1. Move the headrest of the child seat to the upper position (g.
F58).
2. Take the elastic seam of the cover from the hooks at the back
side of the headrest (g. F59) and remove the cover of the headrest.
B) Cover
1. Undo the hooks on the bottom side (g. F60).
2. Remove the cover (g. F61).
Re-tting simply follow the steps in the opposite order.
9.WARRANTY
We guarantees its products against any manufacturer defect for a
period of 2 years, start from the day of purchase.
1. The warranty does not cover defects or failures caused by
534-01-161124-00 ISTRUZIONI SEGGIOLINO AUTO TAZIO TT.indd 16 30/11/2016 15.29.42

17
inappropriate use or non-compliance with the installation and
maintenance safety standards described in the instruction guides
provided with the products.
2. The warranty shall be automatically considered void if the ar-
ticle acquired has been repaired or if an attempt has been made
to repair it by an individual that is not authorized by our company.
DEUTSCH
Modell: TAZIO tt (gruppe: I+II+III)
LESENSIEDIESEANWEISUNGENVORVERWENDUNG
DESARTIKELS AUFMERKSAM DURCH.
Prüfen Sie vor dem Kauf dieses Produktes, ob der Kinderautositz
mit dem Fahrzeug kompatibel ist, in dem er eingesetzt werden soll.
INDEX
1. Warnung
2. Verwendung im Auto
3. Vorbereitung
3.1. ISOFIX Vorbereitung
3.2.Einstellung der Kopfstütze bei Verwendung des Kindersitzes
mit 5 Punkt Sicherheitsgurt
3.3. Einstellung der Kopfstütze bei Verwendung des Kindersitzes
mit dem Sicherheitsgurt des Autos
4.Installation
4.1 Gruppe 1 (9-18 kg) mit ISOFIX + “top tether” + 5 Punkt- Si-
cherheitsgurt
4.1.1 Sicherung des Kindes mit den 5 Punkt-Sicherheitsgurt
4.2 Gruppe 1 (9-18 kg) mit Sicherheitsgurt des Autos + 5 Punkt-
Sicherheitsgurt
4.3 Gruppe 2 (15-25 kg) mit Sicherheitsgurt des Autos + “top
tether” + 5 Punkt-Sicherheitsgurt
4.4 Gruppe 2 (15-25 kg) & Gruppe 3 (22-36 kg) mit Sicherhei-
tsgurt des Autos
5.Entfernen des Kinderrückhaltesystems
6.Entfernen des 5 Punkt-Sicherheitsgurt
7.Montage des 5 Punkt-Sicherheitsgurtes
8. Pege und Wartung
8.1 Pege der Verschlusschnalle
8.2 Reinigung
9. Garantie
1. HINWEISE
Lesen Sie diese Anweisungen vor Verwendung des Kinder-
rückhaltesystems aufmerksam durch
1. Dieses Kinderrückhaltesystem ist zur Verwendung der Gruppe
1-2-3 geeignet, für Kinder mit einem Alter von 9 Monate bis 4
Jahre und ca. 9-36 kg Gewicht
2. Installieren Sie dieses Kinderrückhaltesystem nicht ohne Be-
achtung der Anweisungen in dieser Bedienungsanleitung; an-
dernfalls könnten Sie Ihr Kind der Gefahr schwerer Verletzungen
aussetzen. Im Falle eines Unfalls durch unsachgemäße Installa-
tion, übernimmt der Hersteller keine Verantwortung.
3. Dieses Kinderrückhaltesystem entspricht der ECE R44/04 Re-
gelung und kann bei den meisten Fahrzeugen installiert werden,
die mit Isox Sicherheitssystem gemäß der ECE Verordnung 16
ausgestattet sind.
Das Kinderrückhaltesystem sollte vor dem Kauf mit Kind im Auto
getestet werden, um sicherzustellen, dass das Modell Ihre Anfor-
derungen erfüllt.
4. Nutzen Sie nie das Kinderrückhaltesystem ohne Textilien.
5. Setzen Sie dieses Kinderrückhaltesystem bitte keiner Sonne-
neinstrahlung aus; andernfalls kann es für die Haut Ihres Kindes
zu heiß werden. Fassen Sie das Kinderrückhaltesystem stets an,
bevor Sie Ihr Kind hineinsetzen.
6. Das Kinderrückhaltesystem oder Teile davon müssen ersetzt
werden, wenn diese beschädigt sind oder nicht ordnungsgemäß
verwendet wurden
7. Lassen Sie das Kinderrückhaltesystem oder andere schwere
Gegenstände nicht lose oder ungesichert im Auto, da bei schar-
fen Kurven, plötzlichem Abbremsen oder Unfällen diese umher-
geschleudert werden und Insassen verletzen können.
8. Achten Sie darauf, dass das Kinderrückhaltesystem so befe-
stigt wird, dass keines seiner Teile die verschiebbaren Sitze oder
das Öffnen und Schließen der Fahrzeugtüren behindern. Stellen
Sie sicher, dass das Kinderrückhaltesystem ordnungsgemäß in-
stalliert ist.
9. Sie dürfen dieses Kinderrückhaltesystem nicht modizieren
oder zusammen mit Einzelteilen anderer Hersteller verwenden.
10. Das Kinderrückhaltesystem muß im Auto installiert bleiben,
auch wenn das Kind nicht darin sitz. Lassen Sie Ihr Kind nie un-
beaufsichtigt in diesem Rückhaltesystem für Kinder sitzen, weder
im Auto noch ausserhalb des Fahrzeuges.
11. Halten Sie den Sitz von korrosiven Gegenständen fern.
12. Der Hersteller garantiert die Qualität seiner Produkte. Verwen-
den Sie niemals ein gebrauchtes Kinderrückhaltesystem oder ein
Kinderrückhaltesytem, dessen Vergangenheit Sie nicht kennen.
Möglicherweise weist es strukturelle Schäden auf, die Ihr Kind
gefährten können. Dafür übernimmt Brevi keine Garantie.
13. Die Abbildungen sind nur zur Information
Das Kinderrückhaltesystem kann kleine Unterschiede im Ver-
gleich zu den Abbildungen oder Bildern dieser Gebrauchsanwei-
sung haben.
2. VERWENDUNG IM AUTO
Bitte beachten Sie die Angaben zur Kompatibilität in den Han-
dbüchern Ihres Fahrzeugherstellers.
Das Kinderrückhaltesystem ist zur Verwendung in Fahrzeugen
mit ISOFIX, “top tether” oder 3 Punkt Sicherheitsgurt geeignet
Man kann das Kinderrückhaltesystem wie folgt verwenden:
Blick in Fahrtrichtung
Blick gegen die Fahrtrichtung
Mit den 2-Punkte Sicherheitsgurt des Autos
Auf Sitzen ausgestattet mit :
ISOFIX Befestigung oder “top tether” Anker
3 Punkt Sicherheitsgurt des Autos
534-01-161124-00 ISTRUZIONI SEGGIOLINO AUTO TAZIO TT.indd 17 30/11/2016 15.29.43

18
gewünschten Position ein.
3. wenn die Position der Kopfstütze 07 nicht zur Körpergröße
Ihres Kindes passt, können zusätzlich mit der Einstellung des
Schultergurtes Anpassungen vorgenommen werden, wie in Ab-
schnitt 3.2 dargestellt
4.INSTALLATION
4.1 Gruppe 1 (9-18 kg) mit ISOFIX + “top tether” +
5 Punkt Sicherheitsgurt
1. Stellen Sie sicher, daß der 5 Punkt Sicherheitsgurt korrekt mon-
tiert ist (siehe Abschnitt 7)
2. Folgen Sie denAnweisung inAbschnitt 3.1 – (Vorbereitung ISOFIX)
3. Folgen Sie die Anweisung des Abschnittes 3.2 (Einstellung der
Kopfstütz)
4. Nehmen Sie den Top Tether und legen Sie diesen über die
Rückenlehne des Sitzes mit dem Kinderrückhaltesystem.
5. Stellen Sie den Sitz in Fahrtrichtung auf dem Fahrzeugsitz.
6. Nehmen Sie den Sitz mit beiden Händen und schieben Sie
fest die beiden Isox-Verbindungen 15 in die Isox-Verankerung-
spunkte 02, bis zwei Klickgeräusche hören. Die Anzeige an bei-
den Isox- Verbindungen 04 sollte vollständig grün sein.
(Abb. F8, F9 ).
ACHTUNG! Die Isox-Verbindung ist nur korrekt, wenn beide An-
zeigen an den Verbindungen vollständig grün sind.
7. Drücken Sie das Kinderrückhaltesystem mit Kraft gegen
die Rückenlehne des Fahrzeugs, indem Sie auf beiden Seiten
gleichmäßigen Druck ausüben (Abb. F10)
8. Rütteln Sie das Kinderrückhaltesystem um sicherzustellen,
dass es sicher befestigt ist und überprüfen Sie erneut, dass die
beiden Sicherheitsindikatoren vollständig grün sind.
9. Nehmen Sie den “top tether” und drücken Sie die Metallzunge
vom Gurt weg, um den Gurt zu verlängern (Abb. F11).
10. Hängen Sie den Schnapphaken 17 in den in der Betriebsan-
leitung Ihres Fahrzeugs empfohlenen top tether Verankerung-
spunkt ein. Suchen Sie nach diesem Symbol in Ihrem Fahrzeug
(Abb. F12)
11. Straffen Sie den top tether, indem Sie das freie Ende des
Gurts durch die Metallzunge ziehen, so dass die Gurtspannung
auf beiden Seiten gleich ist. Der top tether ist richtig gespannt,
wenn die Spannungsanzeige komplett grün ist (Abb. F13)
12. Folgen Sie diesen Anweisungen um Ihr Kind mit dem 5-Punkt-
Gurt zu sichern (Abschnitt 4)
4.1.1 Sichern Ihres Kindes mit dem 5-Punkt-Gurt
Je enger der Gurt am Körper Ihres Kindes anliegt, desto besser
geschützt ist Ihr Kind. Vermeiden Sie daher möglichst dicke Klei-
dung unter dem Gurt.
1. Öffnen Sie das Gurtschloss 21 durch Drücken der roten Taste
(Abb. F14)
2. Drücken Sie die Verstellknöpfe 26 und ziehen Sie gleichzeitg
die beiden Schultergurte nach vorne. Nicht an den Schulterpol-
stern 19 ziehen (Abb. F14).
3. Lassen Sie Ihr Kind im Kinderrückhaltesystem Platz nehmen
4. Vergewissern Sie sich, dass Ihr Kind mit dem Rücken an der
Rückenlehne des Kinderrückhaltesystems lehnt.
3. VORBEREITUNG
3.1. ISOFIX Vorbereitung
Falls Ihr Auto nicht mit den Isox –Verbindung ausgestattet ist,
befestigen Sie die beigefügten Isox-Adapter 02 an den Isox-
Verankerungspunkten 01 Ihres Fahrzeuges. Die Aussparung
muss nach oben zeigen.
TIP: ISOFIX Verankerungspunkte benden sich zwischen dem
Sitz und der Rückenlehne des Autositzes (Abb. F1)
2. Ziehen Sie an der Schlaufe 03 die Isox Verbindung so weit
wie möglich heraus (Abb. F2).
3.2. Einstellung der Kopfstütze zur Verwendung
des Kinderrückhaltesystems mit dem 5 Punkt Si-
cherheitsgurt
Die korrekte Einstellung der Kopfstütze gewährleistet einen op-
timalen Schutz des Kindes im Kinderrückhaltesystem: Kopfstütz
07 muß so eingestellt sein, dass die Schultergurte 19 auf der glei-
chen Höhe wie die Schultern des Kindes sind (Abb. F3).
ACHTUNG! Die Schultergurte 19 dürfen nicht hinter dem Rücken
des Kindes, bzw. oberhalb der Schulterlinie liegen.
Die Schultergurte werden wie folgt angepasst:
1.Drücken Sie die Einstellungstaste 26 und ziehen Sie gleichzei-
tig beide Schultergurte 08 vorwärts.
Ziehen Sie nicht and den Schultergurtpolsterungen 19! Lockern
Sie den 5-Punkte Gurt des Kinderrückhaltesystems so weit wie
möglich (Abb. F4)
Rückseite des Kinderrückhaltesystems
2. Drücken Sie den Knopf des Schultergurtverstellers 10 auf der
Rückseite des Kinderrückhaltesystem und ziehen Sie den Gurt
auf sich zu (Abb. F5).
3. Schieben Sie den Schultergurtversteller bis zur richtigen Höhe 19
und rasten Sie den Schultergurtversteller in der Position ein (Abb. F5)
3.3. Einstellung der Kopfstütze zur Verwendung
des Kindersitzes mit Sicherheitsgurt des Auto
Eine korrekte eingestellte Kopfstütze 07 stellt sicher, dass der
diagonale Gurt optimal positioniert ist und Ihr Kind sicher geschüt-
zt.
Die Anpassung der Kopfstütze hat so zu erfolgen, dass zwischen
der unteren Kante der Kopfstütze und der Schulter des Kindes
noch 2 Fingerbreit Platz ist (Abb. 6).
Um die Höhe der Kopfstütze der Körpergröße Ihres Kindes an-
zupassen:
1. Drücken Sie den Einstellhebel für die Kopfstütze 12 hinten an
der Kopfstütze 07 um die Einstellung der Kopfstütze zu entsper-
ren (Abb. 7).
2. Schieben Sie die entsicherte Kopfstütze 07 gleichzeitig herauf
oder herunter, bis sie in der gewünschten Position ist. Sobald Sie
den Einstellhebel 12 loslassen, rastet die Kopfstütze 07 in der
534-01-161124-00 ISTRUZIONI SEGGIOLINO AUTO TAZIO TT.indd 18 30/11/2016 15.29.43

19
5. Führen Sie die beiden Schlosszungen 20 zusammen und ver-
binden Sie diese miteinander, bevor Sie diese in das Gurtschloss
21 stecken – es sollte ein Klickgeräusch zu hören sein. (Abb. F15,
F16, F17)
6. Ziehen Sie am Gurtverstellband 09 bis das Gurtzeug ach und
eng am Körper Ihres Kindes anliegt (Abb. F18).
Prüfen Sie zur Sicherheit Ihres Kindes vor jeder Autofahrt, dass:
• das Kinderrückhaltesystem auf beiden Seiten mit den Isox
Verriegelungsarmen 15 in den Isox Befestigungspunkten 01
eingerastet ist und beide Sicherungsknöpfe 04 vollständig grün
sind (Abb. F8).
• das Kinderrückhaltesystem fest im Fahrzeug eingebaut ist.
• Der top tether (Abb. F13) straff über die Rückenlehne des Auto-
sitzes gespannt ist und der Gurtspannungsanzeiger grün ist
• Die Gurte des Kinderrückhaltesystems körpernah anliegen,
ohne Ihr Kind einzuengen
• Die Schultergurte 08 richtig eingestellt sind und die Gurte nicht
verdreht sind
• Die Schulterpolster 19 auf Schulterhöhe Ihres Kindes liegen
(Abb. F3).
• Die Schlosszungen 20 im Gurtschloss 21 eingerastet sind (Abb. F16).
4.2 Gruppe 1 (9-18) kg mit Fahrzeuggurt und
5-Punkt-Gurt
1. Vergewissern Sie sich, dass der 5-Punkt-Gurt des Kinder-
rückhaltesystems richtig angebracht ist. (Abschnitt 7)
2. Befolgen Sie die Schritte in Abschnitt 3.2 (Einstellung der
Kopfstütze)
3. Stellen Sie das Kinderrückhaltesystem in Fahrtrichtung auf den
Autositz
4. Ziehen Sie den Fahrzeuggurt 22 heraus und führen Sie Ihn
durch die Gurtführung des Kinderrückhaltesystems. Vergewis-
sern Sie sich, dass der Gurt nicht verdreht ist. (Abb. F20)
5. Rasten Sie die Schlosszunge im Auto-Gurtschloss 29 mit ei-
nem hörbaren Klick ein. (Abb. F21)
6. Stecken Sie den Diagonalgurt auf auf der gegenüberliegenden
Seite 24 des Auto-Gurtschlosses in die Gurtklemme 25. (Abb.
F22)
7. Verlagern Sie Ihre Körpergewicht auf das Kinderrückhaltesy-
stem (knien Sie sich in den Sitz). Ziehen Sie gleichzeitig den Dia-
gonalgurt fest nach oben straff.
8. Befolgen Sie die Anweisung sichern Ihres Kindes mit dem
5-Punkt-Gurt.
• Prüfen Sie zur Sicherheit Ihres Kindes vor jeder Autofahrt, dass
das Kinderrückhaltesystem fest im Fahrzeug eingebaut ist.
• Der Gurt nicht verdreht ist
• Stecken Sie den Diagonalgurt auf der gegenüberliegenden Sei-
te des Auto-Gurtschlosses in die dunkelrote Gurtklemme (Abb.
F22) und rasten Sie die Schlosszunge im Auto-Gurtschloss 29
mit hörbaren Klick ein
• Die Gurte des Kinderrückhaltesystems körpernah anliegen,
ohne Ihr Kind einzugengen
• Die Schultergurte 08 richtig eingestellt sind und die Gurte nicht
verdreht sind.
• Die Schulterpolster 19 auf Schulterhöhe Ihres Kindes liegen
(Abb. F3).
• Die Schlosszungen 20 im Gurtschloss 21 eingerastet sind (Abb. F16).
4.3 Gruppe 2 (15-25 kg) Fahrzeuggurt + to tether
+ 5-Punkt Gurt
1. Befolgen Sie die Schritte in Abschnitt 4.2 (das Kind mit dem
3-Punkt-Gurt sichern)
2. Nehmen Sie den top tether und drücken Sie die Metallzunge
vom Gurt weg um den Gurt wenn nötig zu verlängern (Abb. F11)
3. Hängen Sie den Schnapphaken 17 in den in der Betriebsan-
leitung Ihres Fahrzeuges empfohlenen top tether Verankerung-
spunkt ein. Suchen Sie dieses Symbol in Ihrem Auto (Abb. F12)
4. Straffen Sie den top tether, indem Sie das freie Ende des Gurts
durch die Metallzunge ziehen, so dass die Gurtspannung auf bei-
den Seiten gleich ist. Der top tether ist richtig gespannt wenn die
Spannungsanzeige komplett grün ist (Abb. F13)
5. Befolgen Sie die Schritte im Abschnitt Sichern Ihres Kindes mit
dem 5-Punkt-Gurt’. Prüfen Sie zur Sicherheit Ihres Kindes vor
jeder Autofahrt, dass:
• Das Kinderrückhaltesystem fest im Fahrzeug eingebaut ist
• Der Gurt nicht verdreht ist
• Der top tether (Abb. F13) straff über die Rückenlehne des Auto-
sitzes gespannt ist und der Gurtspannungsanzeiger grün ist
• Stecken Sie den Diagonalgurt auf der gegenüberliegenden Sei-
te des Auto-Gurtschlosses in die dunkelrote Gurtklemme (Abb.
F22) und rasten Sie die Schlosszunge im Auto-Gurtschloss 29
mit hörbaren Klick ein
• Die Gurte des Kinderrückhaltesystems körpernah anliegen,
ohne Ihr Kind zugengen
• Die Schultergurte 08 richtig eingestellt sind und die Gurte nicht
verdreht sind.
• Die Schulterpolster 19 auf Schulterhöhe Ihres Kindes liegen
(Abb. F3)
• Die Schlosszungen 20 im Gurtschloss 21 eingerastet sind (Abb. F16).
4.4 Gruppe 2 (15-25 kg) & Gruppe 3 (22-36 kg) mit
dem Fahrzeuggurt
1. Vergewissern Sie sich, dass der 5-Punkt-Gurt des Kinder-
rückhaltesystems richtig abgenommen wurde (siehe Abschnitt 6)
2. Befolgen Sie die Schritte in Abschnitt 3.3 (Einstellung der
Kopfstütze)
3. Befolgen Sie die Schritte in Abschnitt 4.1, Einbau des Kinder-
rückhaltesystems mit Isox und optional mit top tether
TIP
Für Gruppe 2 und 3 wurden die Isox Verbindung und top te-
ther als erhöhen die Stabilität und Sicherheit des Sitzes. Sollten
Probleme bei der Benutzung dieser zusätzlichen Verbindungen
in Ihrem Fahrzeug auftreten, ist eine Nutzung auch ohne diese
Optionen möglich.
4. Setzen Sie Ihr Kind in das Kinderrückhaltesystem
5. Ziehen Sie den Fahrzeuggurt heraus und führen Sie Ihn vor
Ihrem Kind zum Auto-Gurtschloss 29. Rasten Sie die Schlosszun-
ge im Auto-Gurtschloss 29 mit einem Klick ein. (Abb. F26, F27)
VORSICHT! Gurt nicht verdrehen
6. Legen Sie den Diagonalgurt 11 und den Beckengurt 28 auf
der Seite des Auto-Gurtschlosses 29 unter die Armlehne und in
die hellrote Gurtführung 23 des Kinderrückhaltesystems. (Abb.
534-01-161124-00 ISTRUZIONI SEGGIOLINO AUTO TAZIO TT.indd 19 30/11/2016 15.29.44

20
F27, F28)
7. Legen Sie den Beckengurt 28 auf der anderen Seite des Sit-
zkissen ebenfalls in die hellrote Gurtführung (Abb. F28)
8. Führen Sie den Diagonalgurt 11 in den dunkelroten Gurthalter
30 der Kopfstütze 07 ein, bis er vollständig und unverdreht im
Gurthalter 30 liegt. (Abb. F29)
9. Vergewissern Sie sich, dass der Diagonalgurt 11 über das
Schlüsselbein Ihre Kindes verläuft und nicht am Hals anliegt.
TIP
Sie können die Kopfstütze 07 auch noch im Fahrzeug in der Höhe
anpassen.
Prüfen Sie zur Sicherheit Ihres Kindes vor jeder Autofahrt, dass
der Beckengut 28 auf beiden Seiten des Sitzkissens in den hellro-
ten Gurtführungen 23 des Sitzkissens verläuft
Der Diagonalgurt 11 auf der Seite des Auto-Gurtschlosses 29
ebenfalls in der hellroten Gurtführung 23 des Sitzkissens verläuft
Der Digonalgurt 11 durch den dunkelroten Gurthalter 30 der
Kopfstütze verläuft
5. AUSBAU DES KINDERRÜCKHALTESYSTEMS
1. Drücken Sie zum Lösen der Isox Befestigung die Sicherung-
sknöpfe erst auf der einen und dann auf der anderen Seite (Abb. F8).
2. Öffnen Sie dasAuto-Gurtschloss und lösen Sie den Diagonalgurt
3. Lockern Sie zum Lösen der top tether Verankerung den Gurt,
indem Sie die Metallzunge des Verstellers vom Gurt weg ziehen.
Hängen Sie den Karabinerhaken aus dem Verankerungspunkt aus.
4. Schieben Sie die Isox Verriegelungsarme zurück in die Sit-
zschale
6. ABNEHMEN DES 5-PUNKT-GURTES
1. Lockern Sie den 5-Punkt-Gurt des Kinderrückhaltesystems so
weit wie möglich (Abb. F30)
Rückseite des Kinderrückhaltesystems
2. Drücken Sie den Knopf des Schulterhöhenverstellers 10 hinten
an der Sitzschale und kippen Sie den Schultergurtversteller 10
nach vorne (Abb. F31).
3. Schieben Sie den Schultergurthöhenversteller 10 in die oberste
Position und verriegeln Sie ihn in dieser Position, indem Sie den
Knopf des Schultergurthöhenverstellers los lassen.
4. Lockern Sie den 5-Punkt-Gurt des Kinderrückhaltesystems so weit
wie möglich. Lösen Sie die Schultergurte 08 auf der Rückseite des
Kinderrückhaltesystems aus dem Verbindungsteil 39 (Abb. F32)
5. Stecken Sie das Verbindungsteil 39 in die vorgesehene Aufbe-
wahrung. (Abb. F33)
6. Schieben Sie die Gurtschlaufen von den Kunststoffstegen 41
des Schultergurthöhenverstellers 10 (Abb. F34)
Vorderseite des Kinderrückhaltesystems:
7. Ziehen Sie beide Schulterpolster 19 durch die Schultergurte 08
durch die Schlitze 40 nach vorne (Abb. F35)
8. Öffnen Sie das Gurtschloss 21 (Drücken der roten Taste) (Abb.
F36)
9. Öffnen Sie das Klettband rechts und links 42 am unteren Teil
des Bezugs 43 und heben Sie den Teil des Bezugs nach vorne.
Schieben Sie die Schlosszungen 20 nach unten in die Aufbe-
wahrungsfächer (Abb. F37)
10. Rollen Sie die Schultergurte 08 zusammen und legen Sie die-
se ebenfalls in die Aufbewahrungsfächer (Abb. F38)
11. Falten Sie die beiden Bezugteile nach hinten und schließen
Sie das Klettband 42 recht und links an der Rückseite des Be-
zugs (Abb. F39)
12. Ziehen Sie am Neigungsverstellhebel und ziehen Sie das Kin-
derrückhaltesystem in die hinterste Position (Abb. F40)
13. Greifen Sie von unten die Metallplatte 33 und drehen Sie die-
se in eine senkrechte Stellung.
14. Drücken Sie nach oben und schieben Sie die Metallplatte 33
durch den Schlitz 34. Entfernen Sie das Gurtschloss (Abb. F41)
7. WIEDERANBRINGUNG DES 5-PUNKT-GURT
1. Heben Sie den Verstellgriff 12 an der Rückseite der Kopfstütze
07 und drücken Sie die Kopfstütze in die unterste Position (Abb.
F42)
2. Öffnen Sie das Klettband rechts und links am unteren Teil des
Bezugs 43 und legen Sie den Teil des Bezugs auf die Sitzäche
um (Abb. F43)
3. Nehmen Sie die Schultergurte 08 und die Schlosszungen 20
aus dem Aufbewahrungsfach 47 und entrollen Sie die Schulter-
gurte. (Abb. F44)
4. Falten Sie die beiden Bezugsteile zurück und schließen Sie
das Klettband 42 rechts und links am unteren Teil des Bezugs
(Abb. F45)
5. Wiederanbringung von Gurtschloss 21 und Schrittpolster
32. Gruppe 1 (9-18 kg) verwenden Sie den Gurtschlitz, der der
Kopfstütze an nächsten ist (a), für Gruppe 2 (15-25 kg) verwen-
den sie das am weitesten entfernteste (b)
6. Nehmen Sie das Gurtschloss 21 und halten Sie die Metallplatte
33 vertikal. Drücken Sie sie mit der schmalen Seite nach oben
durch den Gurtschlitz (a) oder (b). (Abb. F46, F47)
7. Schauen Sie unter dem Sitz nach, ob sich die Metallplatte 33
in einer waagerechten Position bendet und überprüfen Sie den
richtigen Einbau, indem Sie das Gurtschloss 21 mehrmals nach
oben ziehen (Abb. F47)
8. Führen Sie die beiden Schlosszungen 20 zusammen und
verbinden Sie sie miteinander, bevor Sie sie in das Gurtschloss
stecken 21 – es sollte Klickgeräusch zu hören sein. (Abb. F49)
VORSICHT! Die Beckengurte dürfen nicht verdreht oder vertau-
scht sein.
9. Ziehen Sie die Schulterpolster 19 auf den Schultergurten 08 in
die richtige Richtung wie abgebildet, so dass sie sich nicht verdre-
hen. Passen Sie die beiden Schlaufen der Schultergurte 08 und
die Gurtschlaufen der Schulterpolster 19 an (Abb. F50)
10. Ziehen Sie die Schultergurte 08 und die Gurtschlaufen der
Schulterpolster 19 durch die Schlitze 40 (Abb. F51)
11. Ziehen Sie die Gurtschlaufen der Schulterpolster 19 über die
Kunststoffstege 41 des Schultergurthöhenverstellers 10 (Abb.
F52)
TIPP
Die Gurtschlaufen der Schulterpolster sollten die untere Schlaufe sein.
VORSICHT! Die Schultergurte 08 dürfen nicht verdreht oder ver-
tauscht sein.
12. Nehmen Sie das Verbindungsteil 39 aus der vorgesehenen
Aufbewahrung an der Rückseite des Kinderrückhaltesystems.
534-01-161124-00 ISTRUZIONI SEGGIOLINO AUTO TAZIO TT.indd 20 30/11/2016 15.29.44
Table of contents
Languages:
Other Brevi Car Seat manuals

Brevi
Brevi Smart seggiolino auto 545 User manual

Brevi
Brevi CX isofix tt User manual

Brevi
Brevi base auto 544 User manual

Brevi
Brevi OKI b fix User manual

Brevi
Brevi GP Sport User manual

Brevi
Brevi ALLROAD User manual

Brevi
Brevi ASTON b.fix User manual

Brevi
Brevi Axo User manual

Brevi
Brevi AXO Isofix User manual

Brevi
Brevi Touring Booster Plus User manual

Brevi
Brevi Tao User manual

Brevi
Brevi Fuego Sprint User manual

Brevi
Brevi Smart 545 User manual

Brevi
Brevi Smart 545 User manual

Brevi
Brevi ECE R44 04 User manual

Brevi
Brevi Axo Ifix User manual

Brevi
Brevi LEWIS Isofix tt User manual

Brevi
Brevi KIO User manual

Brevi
Brevi Smart 545 User manual

Brevi
Brevi ALLROAD User manual