manuals.online logo
Brands
  1. Home
  2. •
  3. Brands
  4. •
  5. Burg
  6. •
  7. Lock
  8. •
  9. Burg Intro.Code User manual

Burg Intro.Code User manual

www.burg.de
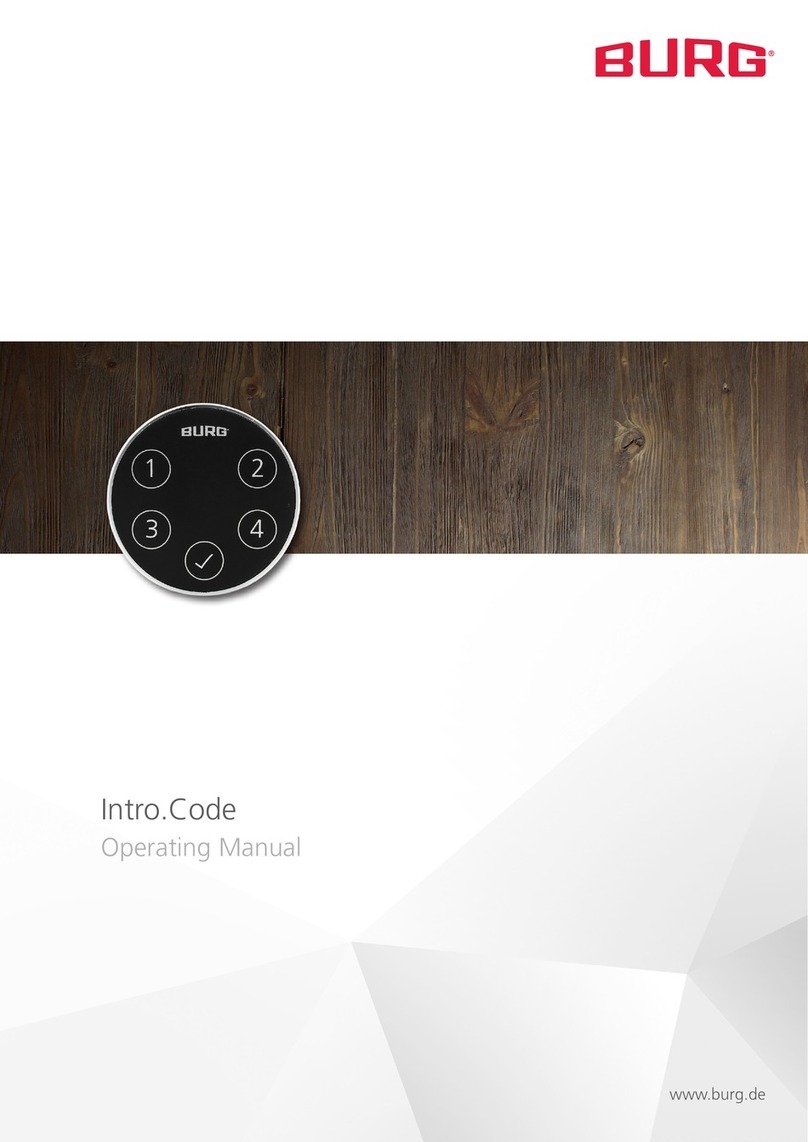
Intro.Code
Operating Manual
Intro.Code | 09-2021 Rev. 01 | English | 2
12
34
Dear customers,
Thank you for choosing the Intro - the electronic numeric code
lock for convenient and secure locking of cabinets and valuables
compartments.
The Intro can be conveniently installed in both wooden and
steel furniture. Thanks to its simple operation, the lock makes
everyday life easier and shines with its high-quality design and
ergonomic handling. Thanks to the easy retrofitting and the
flexibly adjustable latch, the lock easily adapts to any installation
situation.
Important: Please note all warnings and read through the
entire operating manual before you begin configuration.
We hope you enjoy using your new locking system.
Sincerely, BURG F.W. Lüling KG
Introduction
The latest version of this guide is available at:
www.burg.de
General
Intro.Code
ALED Bnumber key
Cconfirmation key Dreset hole
Estator Fbattery compartment
Gmicro USB port Hclosure hole
Introduction 2
General 2
Technical data 3
Scope of delivery 3
Optional accessories 3
Default settings 3
Features 3
Product dimensions 3
Functional description 4
Configuration 4
Operation 5
Battery replacement 6
Reset to default settings 6
Disposal and battery note 6
Content
A
C
B
D
E
F
H
G
Intro.Code | 09-2021 Rev. 01 | English | 3
Dimension Ø 43,3 mm
Battery CR2450 (1x)
Locking cycles 3,000
Mode Multi User Mode,
Private Mode
Material Housing: Zamak
Front cap: plastic
Latch: steel
Mounting dimension 16 mm x 19 mm
Lock attachment M19 nut (1x)
Locking direction Left (90°)
Max. door thickness 18 mm
Code / Master Code
length
4 to 15 digits
Code (default) 1234
Master Code (default) 4321
No. of Master Codes max. 1
No. of Codes max. 1
Factsheet
Technical Data
Front view Back view
Product Dimensions
Scope of delivery
ergonomic handling
high-quality design
external battery change
easy to retrofit, e.g. for replacement of mechanical cam locks
no additional transponder media necessary
latch adjustable in 45° steps
emergency power supply via micro USB port
Features
1x locking system
1x M19 nut
1x latch (38 mm)
1x latch fixing screw
Optional Accessories
opening and reset pin
anti-twist protection (W-MSZ-01)
23,3 mm25,6 mm
4,5 mm
19 mm
43,3 mm
38 mm
16 mm
Side view
Top view
Mode Private Mode
Fake code function Off
Default Settings
Intro.Code | 09-2021 Rev. 01 | English | 4
Multi User Mode
This mode is suitable for constantly changing users who use the
compartment only temporarily or once. The code is valid for a
single locking operation and is deleted by the lock during the
opening operation.
Private Mode (default)
In this mode, the lock is permanently assigned to a user who is
permanently authorized to operate the lock.
Battery Warning
If the battery voltage falls below a certain level, the red LED
lights up briefly when the code is entered. If the battery level
falls into the critical range, the lock can no longer be operated.
Block Mode
If the code is entered incorrectly four times in succession, the
lock blocks for 60 seconds. During this time, the lock rejects any
code entry.
Fake Code Function
To prevent the code from being copied, a fake code is entered
before or after the code entry (maximum 16 digits). This func-
tion can be set as an option. This function is switched off in the
factory settings.
Functional Description
Configuration
1Change Mode
a) Multi User Mode
1. Enter Master Code and press . A longer signal tone
and the green LED confirm the successful process.
2. Directly press and hold the button for 2 seconds.
The green LED starts flashing.
3. Press again. Enter the numbers 4 and 4 .
4. Confirm with . A longer signal tone confirms
the successfull process.
b) Private Mode (default)
1. Enter Master Code and press . A longer signal tone
and the green LED confirm the successful process.
2. Directly press and hold the button for 2 seconds.
The green LED starts flashing.
3. Press again. Enter the numbers 4 and 3 .
4. Confirm with . A longer signal tone confirms
the successfull process.
Note: Changing the mode does not reset the lock
to the default setting.
2Set Master Code and Code
a) Master Code (Private Mode / Multi User Mode)
1. Enter Master Code and press . A longer signal tone
and the green LED confirm the successful process.
2. Directly press and hold the button for 2 seconds.
The green LED starts flashing.
3. Enter new Master Code and confirm with . A longer
signal tone confirms the successful process.
b) Code (Private Mode)
1. Enter Master Code and press . A longer signal tone
and the green LED confirm the successful process.
2. Directly press and hold the button for 2 seconds.
The green LED starts flashing.
3. Enter new Code and confirm with . A longer
signal tone confirms the successful process.
Note: Code and Master Code must not be the same. Only
one Code / Master Code can be stored. During the storage
process, the old code or Master Code is overwritten.
c) Reset Code (Private Mode / Multi User Mode)
To reset the code, enter the Master Code. Entering the
Master Code also unlocks the lock.
Multi User Mode
The active code is deleted.
Private Mode
The active code is reset to the default setting (1 - 2 - 3 - 4).
3Activate / Deactivate Fake-Code Function
1. Enter Master Code and press . A longer signal tone
and the green LED confirm the successful process.
2. Directly press and hold the button for 2 seconds.
The green LED starts flashing.
3. Press again.
To activate enter numbers 4 and 2 .
To deactivate enter numbers 4 and 1 .
4. Confirm with . A longer signal tone confirms
the successfull process.
Intro.Code | 09-2021 Rev. 01 | English | 5
b) Unlock
1. Enter code and press . A longer signal tone and
the green LED confirm the successful process.
2. Turn the knob to the right (clockwise) within
3 seconds.
2Mutli User Mode
a) Lock
1. Press . The green LED starts flashing.
2. Enter code and confirm with . A longer signal
tone and the green LED confirm the successful process.
3. To close, turn the knob to the left (counterclockwise).
1Private Mode
a) Unlock
1. Enter code and press . A longer signal tone and
the green LED confirm the successful process.
2. Turn the knob to the right (clockwise) within
3 seconds.
Bildrechte: Titelblatt, Holzstruktur, Maksym Chornii / 123rf
Operation
12
34
b) Lock
The lock closes automatically within 4 seconds. The red LED
flashes briefly. To close, turn the knob to the left (counter-
clockwise).
12
34
12
34
3Unlock via Master Code
1. Enter Master Code. A longer signal tone and
the green LED confirm the successful process.
Note: The lock signals an incorrect Master Code entry with
three consecutive beeps. Unlocking by Master Code resets
the code to the factory setting (1 - 2 - 3 - 4) in Private
Mode. In Multi User Mode, the code used for locking is
deleted by the lock.
12
34
Note: The lock signals an incorrect code entry with three
consecutive beeps.
Note: The lock signals an incorrect code entry with three
consecutive beeps.
Intro.Code | 09-2021 Rev. 01 | English | 6
EU Directive 2012/19/EU regulates the proper take-back, treat-
ment and recycling of used electronic equipment.Every con-
sumer is required by law to dispose of batteries, accumulators
or electrical and electronic equipment („waste equipment“)
powered by batteries or accumulators separately from house-
hold waste, as they contain harmful substances and valuable re-
sources. Disposal can be done at a collection or take-back point
approved for this purpose, e.g. a local recycling center. Waste
equipment, batteries or rechargeable batteries are accepted
there free of charge and recycled in an environmentally friendly
and resource-saving manner. Waste equipment, used batteries
or rechargeable batteries can also be returned to us. The return
must be sufficiently stamped to the address below.
BURG F.W. Lüling KG
Volmarsteiner Str. 52
58089 Hagen
The following symbol on the waste electrical equipment, batte-
ries or accumulators indicates that they must not be disposed of
with household waste:
Caution when using batteries!
The battery may explode or release flammable gases if it is mis-
handled, destroyed, or the wrong type of battery is used. Do not
recharge the battery, disassemble it, expose it to extremely high
temperatures or throw it into a fire.
On batteries containing harmful substances, you will find indica-
tions in the form of abbreviations for the ingredients cadmium
(Cd), mercury (Hg) and lead (Pb) in each case.
BURG F.W. Lüling KG
Volmarsteiner Str. 52
58089 Hagen (Germany)
Fon +49 (0)23 35/ 6308-0
info@burg.de
www.burg.de
Disposal and Battery Note
Image rights: title page, wood texture, Maksym Chornii / 123rf
Battery Replacement
It is recommended to change the battery as soon as the lock
shows a low battery level. After the battery change, the last
stored code is active.
3. Remove the battery compartment according to the
illustration. The battery can now be replaced.
1. Push the opening/ reset pin into the closure hole on the side
of the lock as shown in the illustration. Turn the housing
slightly to the left and then pull it forward.
4. Replace the battery compartment. Carefully slide the housing
of the lock and turn it back until it snaps back into place.
Note: If the lock can no longer be operated due to a flat battery,
it is possible to supply it with emergency power via a micro USB
connection. To reach the connection, the lock must be pulled
forward as described above. It is recommended to change the
battery immediately.
Reset to Default Settings
To reset the lock to the default setting, the reset pin must be
pressed into the reset hole on the back. All stored data will be
deleted from the lock during this process.

Other Burg Lock manuals

Burg B-Smart-Lock Combipad RTC User manual

Burg

Burg B-Smart-Lock Combipad RTC User manual

Burg Corona User manual

Burg

Burg Corona User manual

Burg sPinLock 410 User manual

Burg

Burg sPinLock 410 User manual

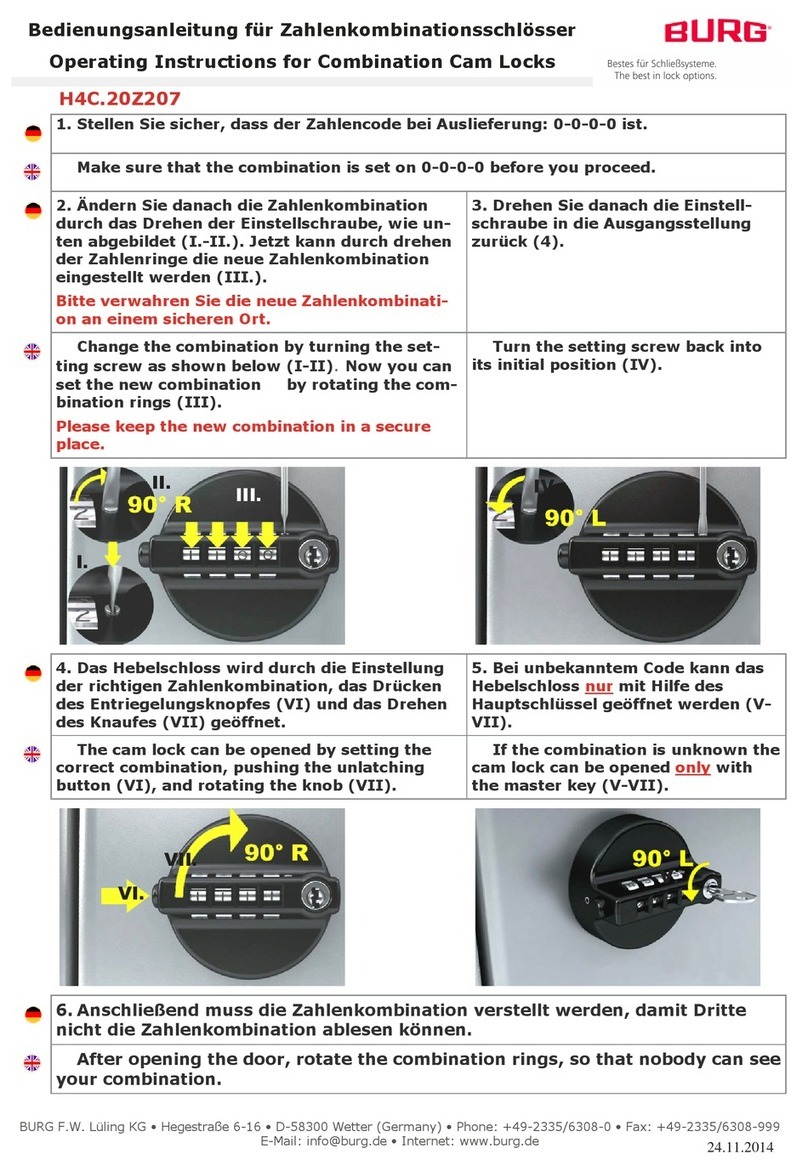
Burg H4C.20Z207 User manual

Burg

Burg H4C.20Z207 User manual

Burg Intro.Code User manual

Burg

Burg Intro.Code User manual

Burg B-Smart-Lock Corona User manual

Burg

Burg B-Smart-Lock Corona User manual

Burg Flexo.Code User manual

Burg

Burg Flexo.Code User manual

Burg Intro.RFID User manual

Burg

Burg Intro.RFID User manual

Burg Intro.RFID User manual

Burg

Burg Intro.RFID User manual

Burg Intro.Code User manual

Burg

Burg Intro.Code User manual

Burg sPinLock 200 User manual

Burg

Burg sPinLock 200 User manual

Burg sPinLock 410 User manual

Burg

Burg sPinLock 410 User manual

Burg TwinPad User manual

Burg

Burg TwinPad User manual

Burg Master User manual

Burg

Burg Master User manual

Burg Coreo Pro User manual

Burg

Burg Coreo Pro User manual

Burg B-Smart-Lock MASTER Instruction Manual

Burg

Burg B-Smart-Lock MASTER Instruction Manual

Burg sPinLock 510 User manual

Burg

Burg sPinLock 510 User manual

Burg m.options sPinLock 200 User manual

Burg

Burg m.options sPinLock 200 User manual

Burg Master Pro User manual

Burg

Burg Master Pro User manual

Burg KeyPad Outdoor IP54 User manual

Burg

Burg KeyPad Outdoor IP54 User manual

Burg Combipad User manual

Burg

Burg Combipad User manual

Burg Combipad User manual

Burg

Burg Combipad User manual

Burg Master Pro User manual

Burg

Burg Master Pro User manual

Burg B-Smart-Lock Combipad User manual

Burg

Burg B-Smart-Lock Combipad User manual

Popular Lock manuals by other brands

Kaba Mas CDX-10 Installation & operating instructions

Kaba Mas

Kaba Mas CDX-10 Installation & operating instructions

BFT T-Box installation manual

BFT

BFT T-Box installation manual

Axelent Storeroom X-It Electric F Assembly manual

Axelent

Axelent Storeroom X-It Electric F Assembly manual

Safelock Systems LA GARD 701 User operating instructions

Safelock Systems

Safelock Systems LA GARD 701 User operating instructions

BEST ACCESS SYSTEMS Keypad EZ Remote Unlock installation instructions

BEST ACCESS SYSTEMS

BEST ACCESS SYSTEMS Keypad EZ Remote Unlock installation instructions

Assa Abloy 841C Instruction

Assa Abloy

Assa Abloy 841C Instruction

Richelieu M400 TA operating instructions

Richelieu

Richelieu M400 TA operating instructions

Burg Wächter SECUTRONIC operating instructions

Burg Wächter

Burg Wächter SECUTRONIC operating instructions

Ebelco 300-S Installation instruction guide

Ebelco

Ebelco 300-S Installation instruction guide

Sargent 7800 installation instructions

Sargent

Sargent 7800 installation instructions

MSW MSW-ETT-VW-119 user manual

MSW

MSW MSW-ETT-VW-119 user manual

hd EZ lock Universal HDMI Quick start installation guide

hd EZ lock

hd EZ lock Universal HDMI Quick start installation guide

Dorel Safety 1st OutSmart user guide

Dorel

Dorel Safety 1st OutSmart user guide

prudhomme LR150-PR7 quick start guide

prudhomme

prudhomme LR150-PR7 quick start guide

M-LOCKS Rotobolt EM2050 Mounting instructions

M-LOCKS

M-LOCKS Rotobolt EM2050 Mounting instructions

VisAccess AXS-10 installation guide

VisAccess

VisAccess AXS-10 installation guide

amig Remock Lockey user guide

amig

amig Remock Lockey user guide

Assa Abloy Corbin Russwin BLSS ML2000 Series installation instructions

Assa Abloy

Assa Abloy Corbin Russwin BLSS ML2000 Series installation instructions

manuals.online logo
manuals.online logoBrands
  • About & Mission
  • Contact us
  • Privacy Policy
  • Terms and Conditions

Copyright 2025 Manuals.Online. All Rights Reserved.