Combipad | 08-2022 Rev. 02 | English | 4
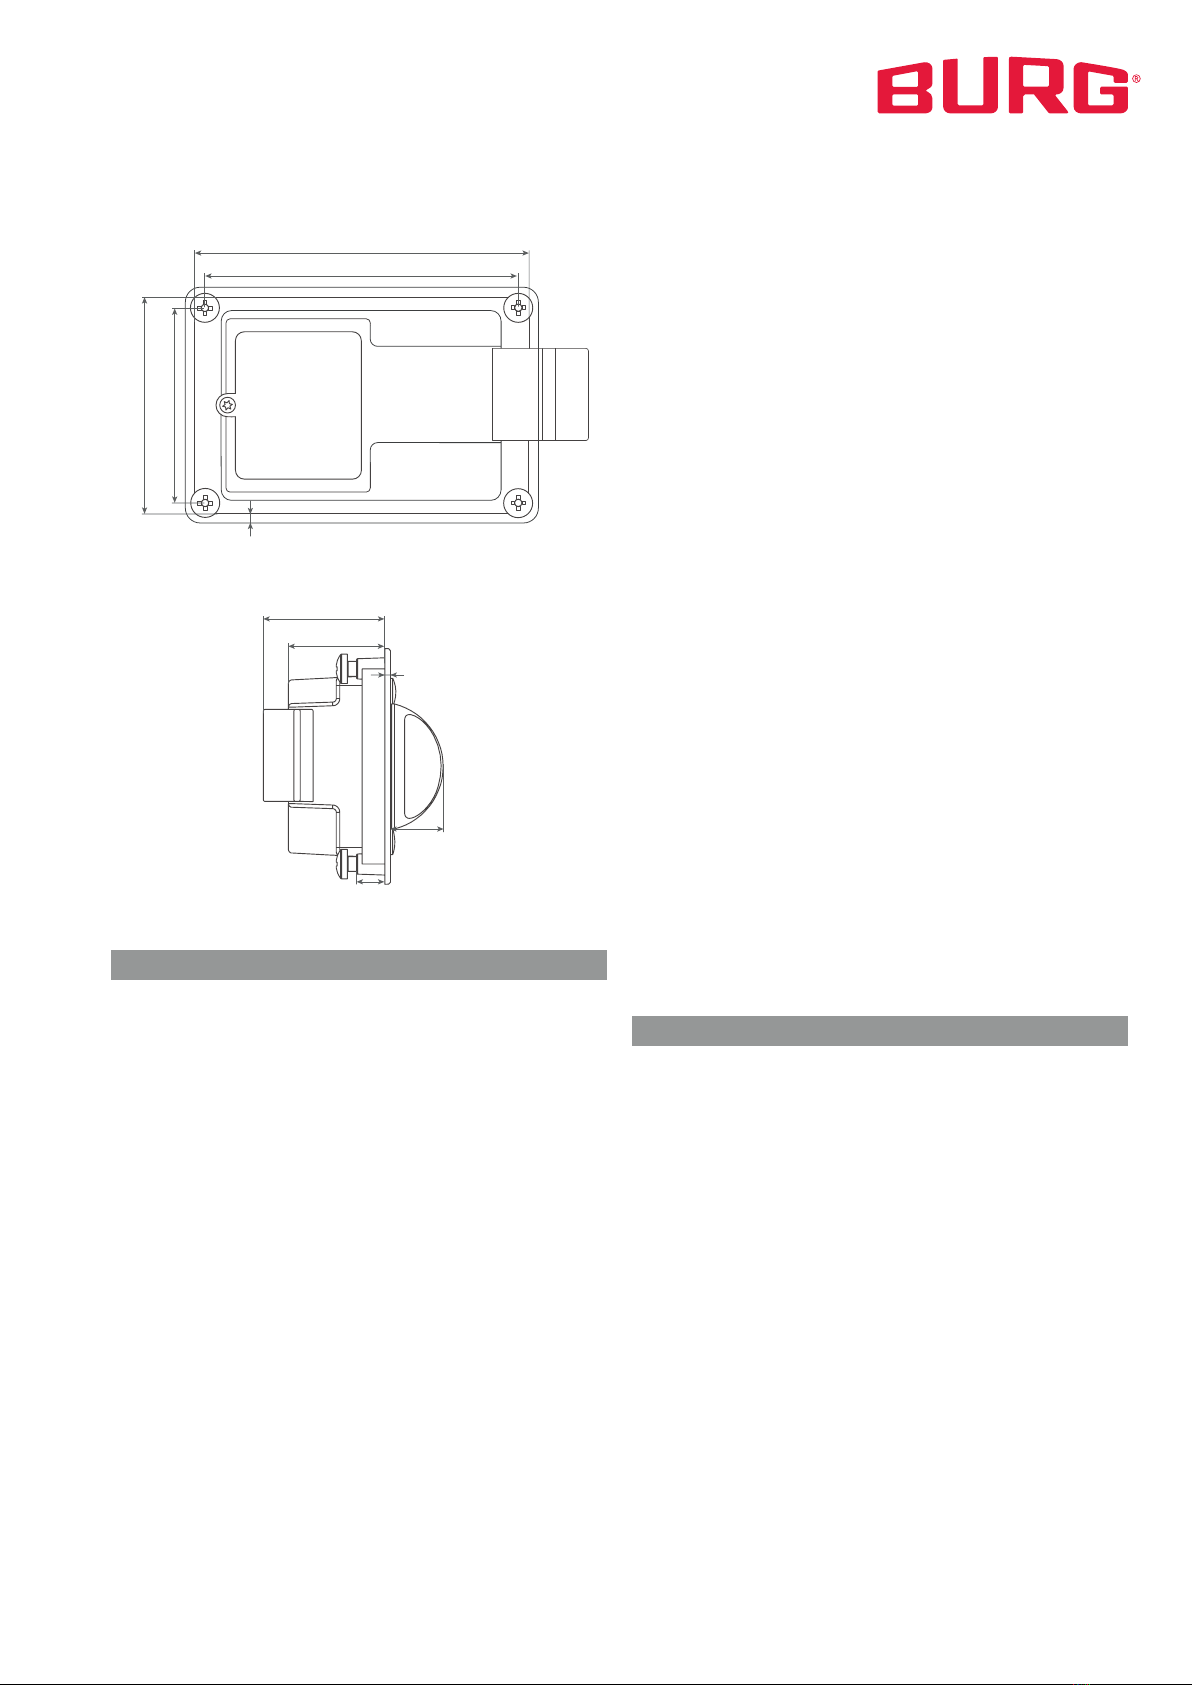
13 mm
64 mm
96 mm
25 mm
Ø 34 mm
3 mm
53 mm
58 mm
85 mm
91 mm
33 mm
26 mm
1,5 mm
13,5 mm
7,7 mm
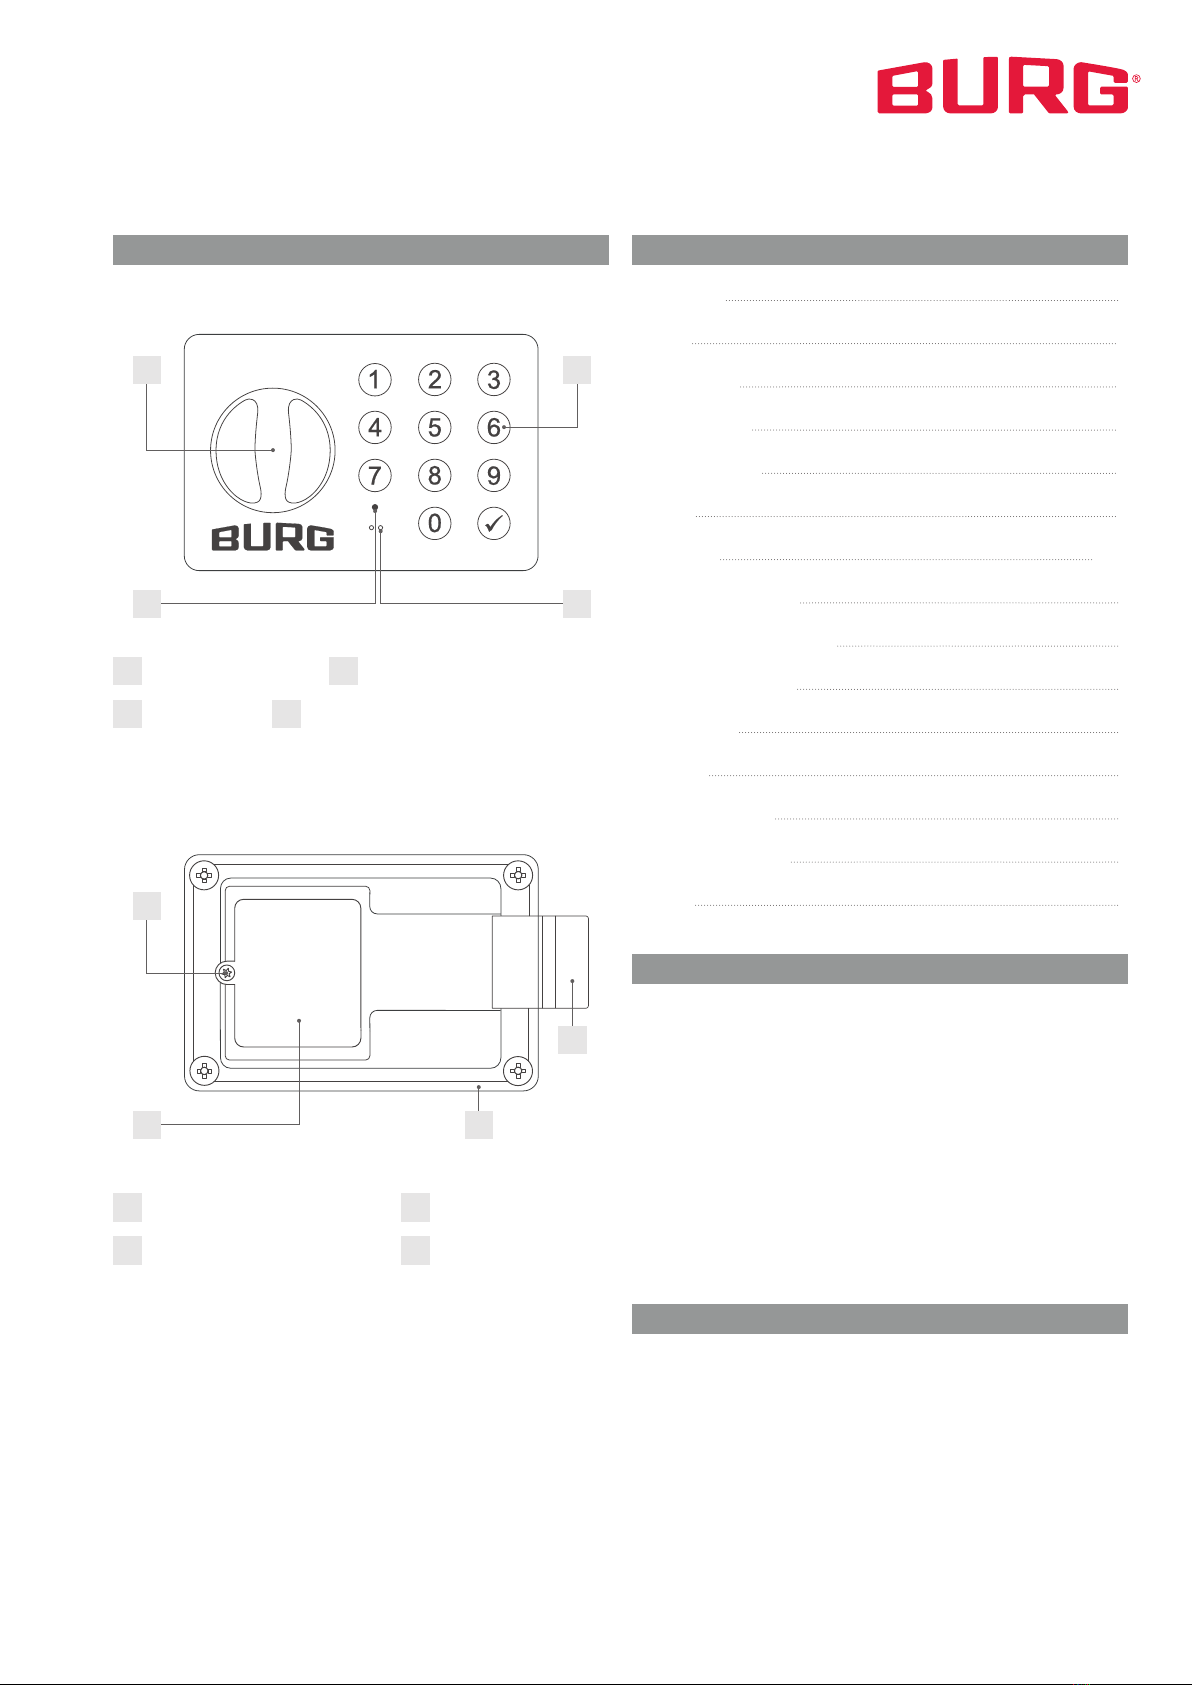
Combipad
Gehäuse
13 mm
64 mm
96 mm
25 mm
Ø 34 mm
3 mm
53 mm
58 mm
85 mm
91 mm
33 mm
26 mm
1,5 mm
13,5 mm
7,7 mm
Mode: Fixed Assigned Authorization (Private Mode)
In this mode, a code is pre-set with which the lock can be ope-
rated. This mode is suitable for user groups where user rights
do not have to change permanently, e.g. in an office cabinet. To
close, the user enters a stored code. The lock is opened by ent-
ering this or another stored code. Up to 50 codes can be stored.
A code that has not been stored is rejected by the lock.
Mode: Multi User Authorization (Multi User Mode)
This mode is suitable for constantly changing users who only use
the compartment temporarily or once, e.g. in a sports facility.
Codes are valid for a single locking process and are deleted by
the lock when the compartment is reopened so that a new code
can be used. The locking bolt remains open until a new code
locks the lock again. Before locking, the door must be closed
(slightly pressed). The user enters a code of choice (4 or 6 digits)
to close. The green LED starts flashing. The lock is opened by
entering the same code.
Code Confirmation
To lock the lock, the code must be entered twice. The lock only
locks after the second entry. The second entry is made after the
green LED flashes briefly. A simple code entry is sufficient to
open the lock. This function can be turned on or off.
Functional Description
Master Code
The Master Code authorizes the programming of the lock. In
addition, the Master Code can unlock the lock independently
of the set mode (emergency opening) and terminate the block
mode. In Multi User Mode, the code used for locking is deleted
after the Master Code is entered.
Note: We recommend programming a private Master Code
before putting the lock into operation.
LED Locking Indication
The lock indicates the locked state by flashing the red LED every
second. This function can be turned on or off.
Automatic Locking (Private Mode)
The lock locks automatically after three seconds after unlocking.
The door does not have to be closed for this. The latch function
allows the door to be closed by pressing slightly even with the
lock locked. This function can be turned on or off.
Battery Warning
If the battery capacity falls below a certain limit, the red LED
lights up for three seconds after the code has been entered. If
the critical level is reached, the lock can no longer be locked or
can only be opened with the Master Code.
Note: We recommend changing the battery already after the
first warning.
Block Mode
After three consecutive failed opening attempts, the lock locks
for 45 seconds. During this period, no action is possible on the
lock. The locking time is indicated by the red LED flashing every
second. The locking mode can be cancelled by entering the
Master Code.
The Combipad RTC also has an integrated software real-time
clock that can be used to program time-related functions. The
functions and the defined times must be specified when orde-
ring.
Automatic Locking / Unlocking at a certain time
The lock locks and unlocks automatically at a defined time. The
times can be set separately for each day of the week. Pro-
gramming is carried out by BURG.
Time Window Usage
The lock can only be operated within the individually defined
time-of-use period. The lock cannot be operated outside this pe-
riod. The times can be set separately for each day of the week.
Programming is carried out by BURG.
Closure Duration
The closure duration defines the maximum period for which a
lock may be locked from the time of locking. After expiry of the
locking period, the lock opens automatically. Programming is
carried out by BURG.
Functional Description RTC