Intro.RFID | 09-2022 Rev. 01 | English | 4
Mode: Fixed Assigned Authorization (Private Mode)
In this mode, a transponder medium is pre-set with which the
lock can be operated. This mode is suitable for user groups
where user rights do not have to change permanently, e.g. in
an office cabinet. To unlock, the transponder medium is held
centrally in front of the lock. To lock, the knob is turned back
(counterclockwise) until the lock snaps in.
Mode: Multi User Authorization (Multi User Mode)
This mode is suitable for constantly changing users who only use
the compartment temporarily or once, e.g. in a sports facility.
Transponder media are valid for a single locking process and
are deleted by the lock when the compartment is reopened so
that a new transponder medium can be used. The locking bolt
remains open until a new transponder medium locks the lock
again. Before locking, the door must be closed and the knob
turned counterclockwise. To lock, the transponder medium is
held centrally in front of the lock. The LED starts to flash. The
lock can only be unlocked with the same transponder medium.
Master Card
The Master Card can open the lock independently of the set
mode (emergency opening). In Multi User Mode, the trans-
ponder medium used for locking is deleted from the lock. The
Master Card authorizes to assign and delete transponder media
in private mode, as well as to delete all other assigned cards.
Manager Card (Private Mode)
The Manager Card can open the lock independently of the set
mode (emergency opening).
Mode Card
The mode is changed with the Mode Card. Hold the Mode Card
centrally in front of the lock. The mode changes automatically.
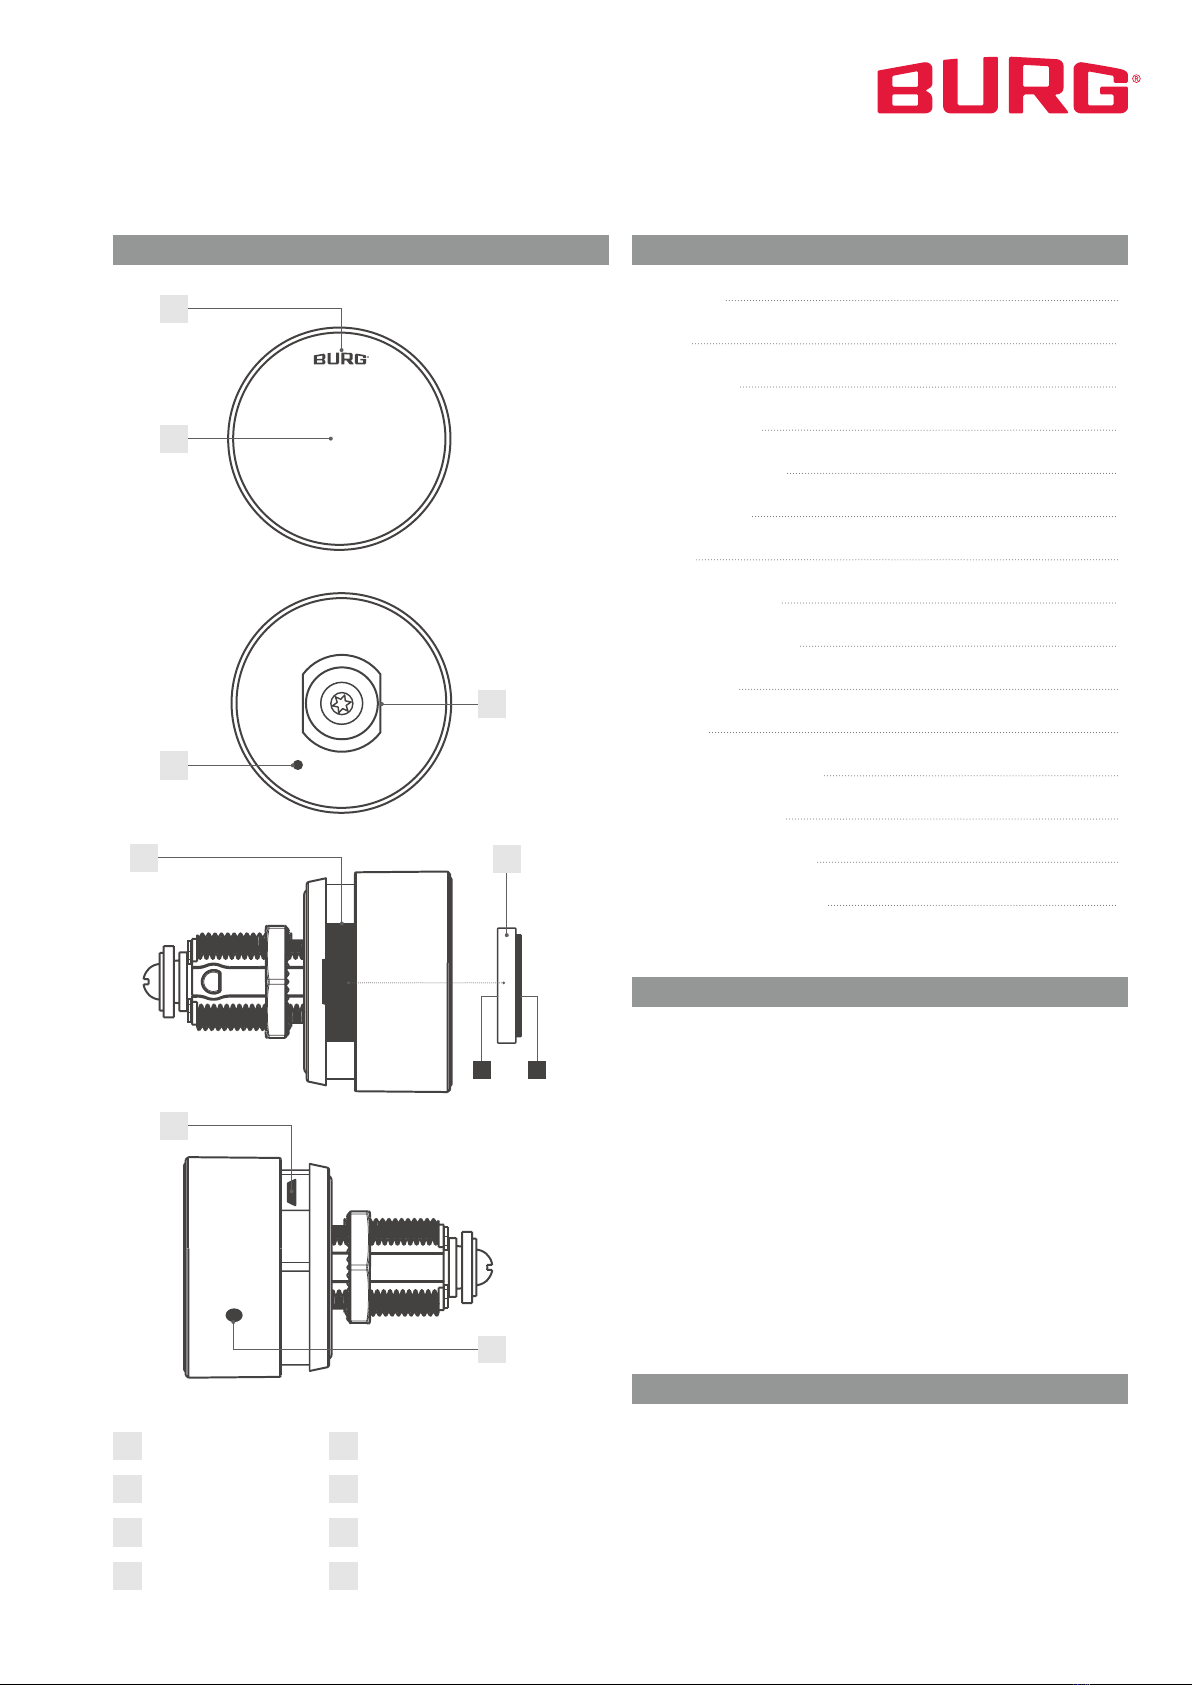
LED Locking Indication
When the lock is locked, the green LED flashes briefly every
three seconds.
Battery Warning
If the battery voltage falls below a certain level, the LED lights
up briefly when a transponder is held in front of the lock. If the
voltage falls into the critical range, the lock can no longer be
operated.
Functional Description Configuration
Observe the following notes before you start the configu-
ration:
The first card held in front of the lock during start-up is
stored as the Master Card.
The mode change and the reset via reset pin only
work in the disassembled state.
1Assign Cards
a) Master Card
1. Insert battery into the lock. (p. 6, „Battery Replacement“).
2. Hold the Master Card to be assigned centrally in
front of the knob.
3. A beep confirms the successful process.
Note: max. 3 Master Cards can be assigned.
b) Manager Card (Private Mode)
1. Hold the Master Card four times centrally in front
of the knob. The green LED starts flashing.
2. Hold the manager card to be assigned centrally in
front of the knob.
3. A beep confirms the successful process.
4. Wait until the LED stops flashing.
Note: max. 2 manager cards can be assigned.
c) User Card (Private Mode)
1. Hold the Master Card three times centrally in front
of the knob. The green LED starts flashing.
2. Hold the user card to be assigned centrally in
front of the knob.
3. A beep confirms the successful process.
4. Wait until the LED stops flashing.
Note: max. 6 user cards can be assigned.
2Delete Cards
This process deletes all cards from the lock. Cards cannot be
deleted individually. The set mode remains active.
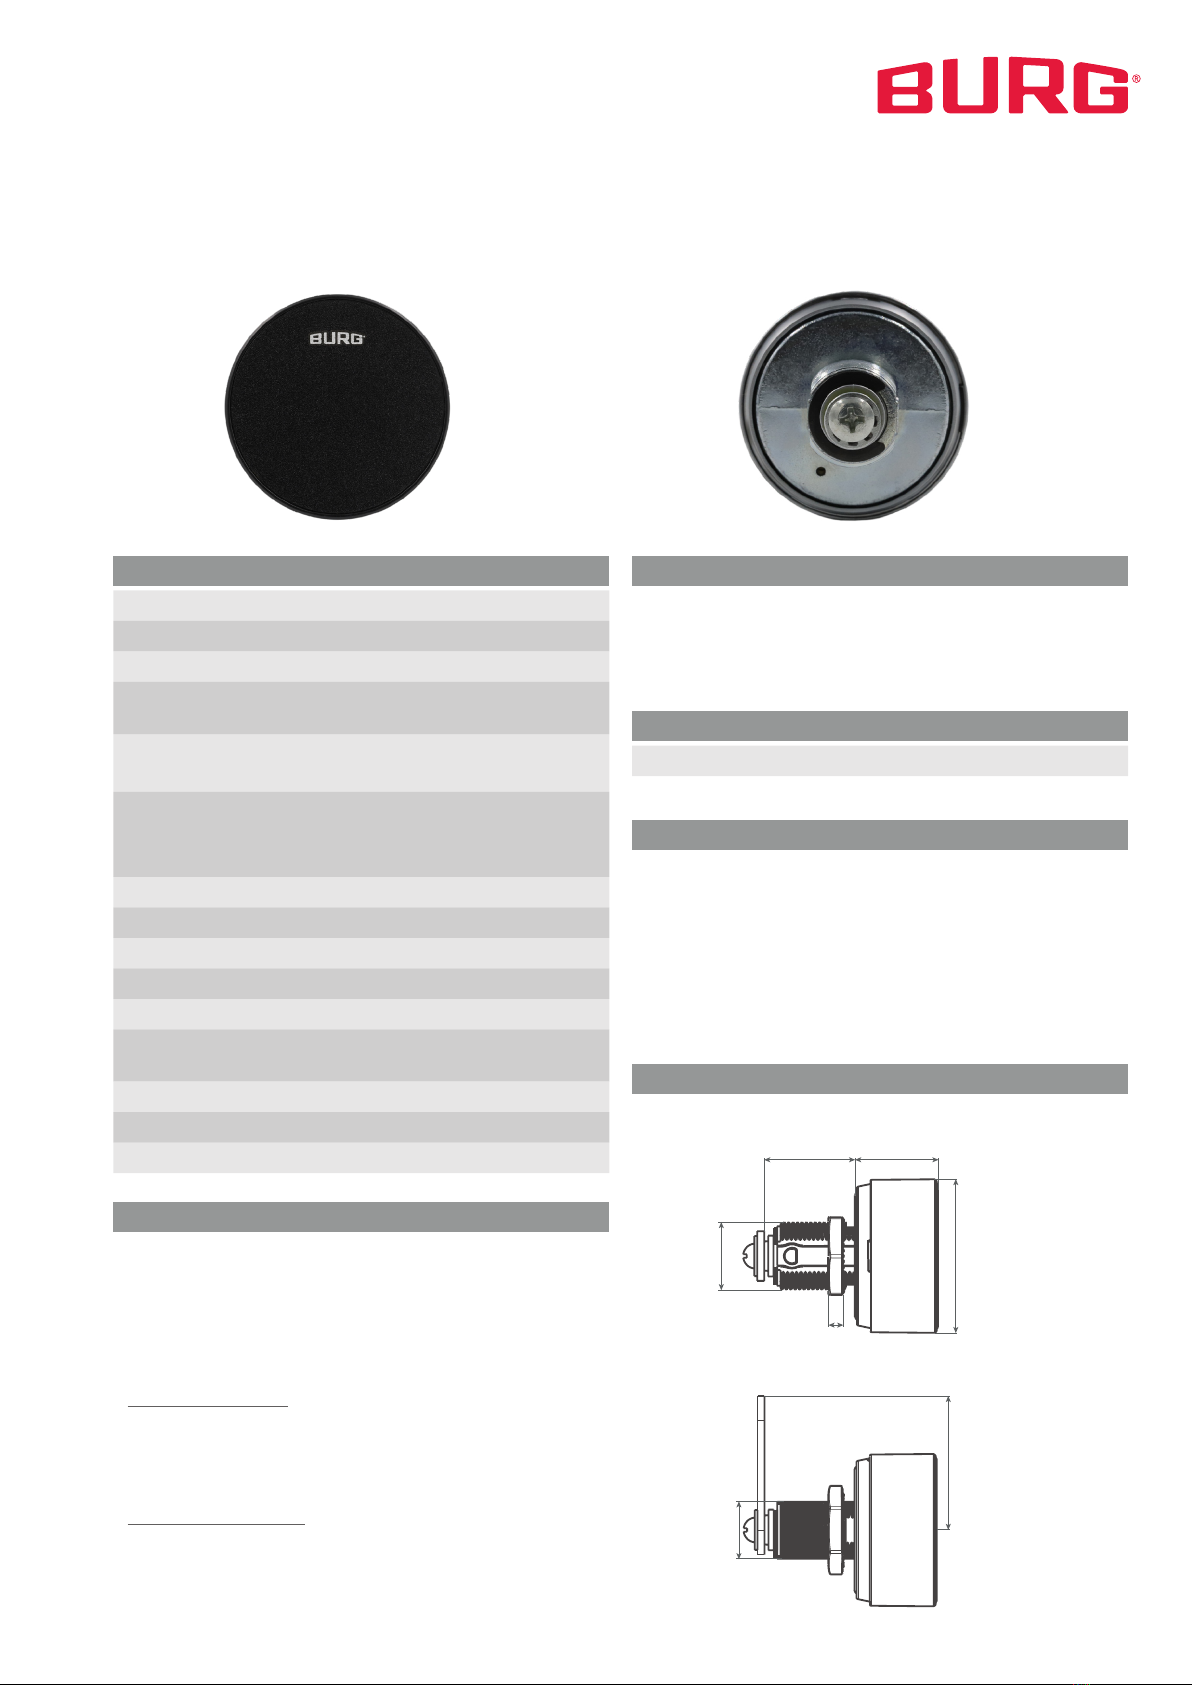
a) Via Reset Pin
1. Briefly press the reset pin into the reset hole
on the back of the lock.
2. Two beeps confirm the successful process.
3. Remove the reset pin.
Note: The reset button can only be operated in the disas-
sembled state.