CAREL Industries HQs
Via dell’Industria, 11 - 35020 Brugine - Padova (Italy)
T
el.
(+39)
0499716611
–
F
ax
(+39)
0499716600
–
w
ww.car
el.com
–
e-mail:
[email protected] +050001898 - rel. 1.3 - 19.09.2019CAREL INDUSTRIES reserves the right to modify the features of its products without prior notice.
Технические характеристики
Дисплей
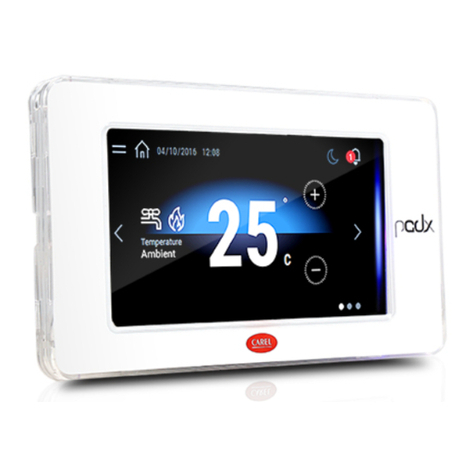
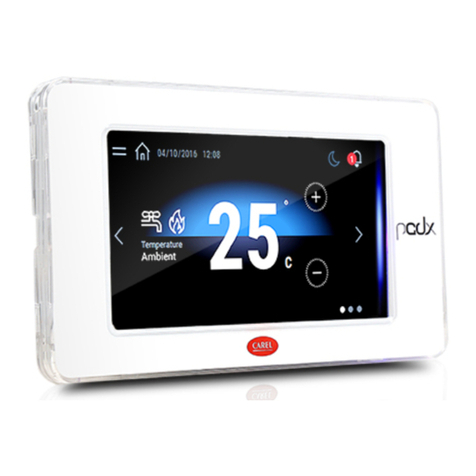
Тип LCD TFT
Разрешение 480x272, широкоформатный
Размер активной части дисплея 4.3”по диагонали
Количество цветов 65 000
Подсветка срок службы 20 000 часов при 25 °C
Настройка яркости да-авто-выкл по умолчанию через 15 мин
Углы обзора (CR ≥10; Сверху/снизу (40/50 град.) - Слева/справа (50/50 град.)
Контрастность (стандартная) 350 (φ = 0°)
Яркость (стандартная) 200 кд/м2
Графический терминал
Сенсорный дисплей резистивный
Светодиоды состояния 8-цветная шкала состояния
Интерфейсы
Порт Ethernet Auto-MDIX 10/100 Mbit - розетка RJ45
кабель STP CAT 5 Lmax = 100 м
Wi Fi EEE 802.11 b/g/n - режим СТАНЦИЯ/ТОЧКА ДОСТУПА
Встроенная/внешняя антенна в зависимости от режима
Максимальная мощность передачи = 17дБм
Дальность размещения внешней антенны Lmax = 2 м
Розетка RP-SMA для подключения 1 внешней антенны
(модели PG*04***D[H,R,W]***)
Порт USB () Хост интерфейс 2.0 - micro USB -B - 150 мА макс
(не использовать для зарядки) - Lmax = 1м
Последовательный порт RJ12 RS485 до 115.2 кбит/сек
6-проводной телефонный кабель длиной до 2м
Последовательный порт с
винтовыми зажимами ()
RS485 до 115,2 кбит/сек
Съемный винтовой разъем, шаг 3,81 мм
Экранированная витая пара AWG 20-22 для ±
Lmax = 500м - момент 0,25Нм (2,2фунт-силы x дюйм)
Датчик температуры и
влажности
от 0 до 50 °C / от 20 до 80% отн. влажности
от 0 до 50 °C ±1 °C (неподвижный воздух)
от 20 до 80% ±5% (неподвижный воздух)
() только для сервисных работ. Порт USB чувствителен к электростатическим разрядам.
Рекомендуется принимать меры, чтобы не повредить его электростатическими разрядами.
() Оптоизолированный порт в модели PGR04****[C,R]***
Функции
Векторная графика Да, включая поддержку SVG 1.0
Динамические объекты Да, прозрачность, положение, вращение
Шрифты TrueType Да
Несколько протоколов Да
Журналы и графики Да зависит от объема флэш-памяти
Многоязычная поддержка Да, выбор язык интерфейса, зависит только от объема памяти
Варианты конфигураций Да зависит от объема флэш-памяти
Тревога Да
Список событий Да
Пароли Да
Часы (3) Да, с резервной батареей
Скринсейвер Да
Звуковое оповещение (3) "Короткие гудки" при касании сенсорного дисплея
(настраивается)
(3) только в определенных моделях
Электрические характеристики
Питание PGR04****A*** От контроллера pCO по телефонному разъему RJ12
(питание контроллера должно соответствовать мощности
потребления терминала PGDx)
Питание
PG*04****[B,C,E,H,R,W]***
24В= от PGTA00TRX0 (принадлежность)
Lmax = 50 m(4-5-6)- сечение кабеля AWG 12-20
момент 0,8 Нм (7 фунт-силы x дюйм)
Мощность потребления, не более 7Вт, кроме PGR04****A*** = 3Вт
Предохранитель Авто
Вес примерно 250 грам
Батарея литиевая батарейка BR2330
Класс и структура
программного обеспечения
A
Назначение управление
Контроллер отдельно устанавливаемый (PG*04***[F,T]****)
встроенный (PG*04***[R,D,W]****)
Тип действия тип 1
Тепло- и огнестойкость кат. D
Категория сверхнапряжения кат. II
Класс изоляции класс III
() В моделях PGR04***[F,T]**** минусовой контакт питания постоянного тока
подсоединяется к земле по схеме соединений.
() В моделях для скрытого монтажа опция PGTA00TRX0 устанавливается в отдельную
монтажную коробку
() Питание: постоянный ток напряжением 24В ± 10%
Условия окружающей среды
Рабочая температура PG*04***[T,D]****: от -20 до 60 °C
PG*04***[F,R,W]****: 0...50°C
Температура хранения PG*04*******: от -30 до 70 °C
Максимальная относительная
влажность (рабочая и хранения)
85% при 40 °C, без конденсата
Класс защиты PG*04***T****: IP65, NEMA тип 1 (спереди)
если с PGTA**F [B,W][0,1]* (рамка)
PG*04***[D,F,R,W]****: IP20, NEMA тип 1 (спереди)
Класс загрязнения 3
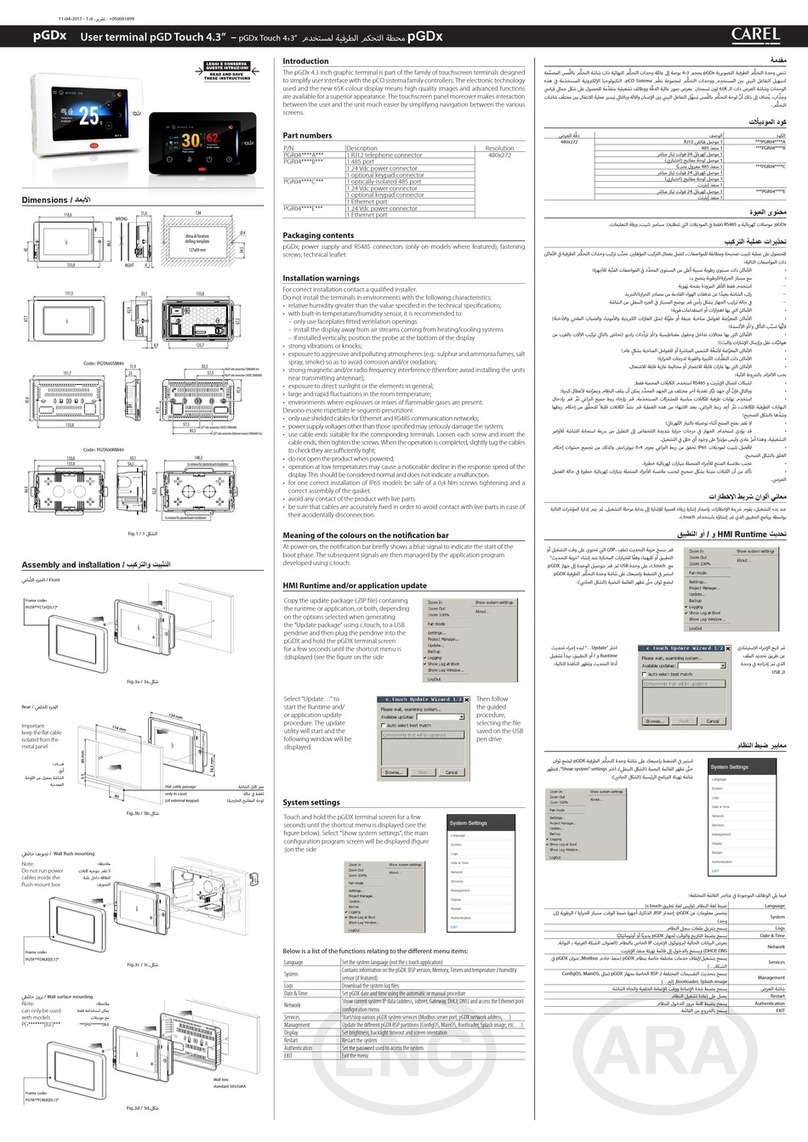
Technical specications
Display
Type LCD TFT
Resolution 480x272 Wide
Active display area 4.3”diagonal
Colours 65 K
Backlighting LCD - Lifetime 20 khrs @ 25 °C
Brightness control Yes - auto-off by default after 15 min
Visual angle (CR ≥10) Up/Down (40/50 deg.) - Left/Right (50/50 deg.)
Contrast (typical) 350 (Φ=0°)
Brightness (typical) 200 cd/m2
User interface
Touchscreen Resistive
System signal LEDs 8-colour notification bar
Interfaces
Ethernet port Auto-MDIX 10/100 Mbit - RJ45 female
STP CAT 5 cable Lmax = 100 m
Wi Fi IEEE 802.11 b/g/n - STATION/ACCESS POINT mode
Built-in/external antenna based on model
Max Transmit Power = 17dBm
External antenna remote mounting Lmax = 2 m
External antenna connector RP-SMA female
(for models PG*04***D[H,R,W]***)
USB port () Host interface 2.0 - micro USB -B - 150 mA max
(do not use to charge devices) - Lmax = 1m
Serial port with RJ12 connector RS485 max 115.2 Kb/s
6-wire telephone cable Lmax = 2m
Serial port with screw terminal () RS485 max 115,2 Kb/s
Removable screw connector 3,81mm pitch
Shielded twisted pair cable AWG 20-22 for ±
Lmax = 500m - tightening torque 0.25Nm (2.2lbf x in)
Temperature / humidity probe 0 to 50 °C / 20 to 80% rH
0 to 50 °C ±1 °C (static air)
20 to 80% ±5% (static air)
() only for service. The USB port can be damaged by ESD (Electro-Static Discharges).
It’s recommended to adopt appropriate precautions in order to avoid failures.
() opto-isolated for model PGR04****[C,R]***
Functions
Vector graphics Yes, includes SVG 1.0 support
Dynamic objects Yes Visibility, position, rotation
TrueType fonts Yes
Multi-protocol Yes
Logs and trends Yes. Limited to Flash memory capacity
Multilanguage Yes, run-time language setting and limited only by
available memory
Recipes Yes. Limited to Flash memory capacity
Alarms Yes
Event list Yes
Passwords Yes
Real Time Clock () Yes, with backup battery
Screen saver Yes
Buzzer () “Beep”when pressing the touchscreen (settable)
() only on models where featured
Electrical
PGR04****A*** power supply Power supply from pCO via RJ12 telephone connector
(check that the power supplied by the controller is
compatible with PGDx power consumption)
PG*04****[B,C,E,H,R,W]***power
supply
24Vdc supplied by PGTA00TRX0 accessory
Lmax = 50 m(--)- cable cross section AWG 12-20
tightening torque 0.8 Nm (7 lbf x in)
Max Power Absorption 7W, exception PGR04****A*** = 3W
Fuse Automatic
Weight Approx. 250 g
Battery Non-rechargeable lithium model BR1225
Software class and structure A
Purpose of control operation control
Controller construction independently mounted control (PG*04***[F,T]****)
incorporated control (PG*04***[R,D,W]****)
Type of automatic action type 1 action
Heat and fire resistance Cat. D
Overvoltage category Cat. III
Insulation class Class III
() For models PGR04***[F,T]****. To connect -Vdc to earth follow the instructions on the
connection diagrams
() For models– for flush mounting the PGTA00TRX0 accessory must be installed in a
dedicated box
() Power supply range: 24 Vdc ± 10%
Environmental conditions
Operating temperature PG*04***[T,D]****: -20T60 °C
PG*04***[F,R,W]****: 0T50 °C
Storage temperature PG*04*******: -30T70 °C
Maximum operating and storage
relative humidity
85% @ 40 °C non-condensing
Ingress protection PG*04***T****: IP65, NEMA Type 1 (front)
if coupled with PGTA**F [B,W][0,1]* (frame)
PG*04***[D,F,R,W]****: IP20, NEMA Type 1 (front)
Pollution degree 3
Указания по утилизации / Disposal regulations
• Запрещается выбрасывать в обычные мусорные бачки; направляйте в
специальные центры по утилизации.
• В состав изделия входит батарейка. Перед утилизацией необходимо выключить
питание, снять заднюю крышку и вытащить батарейку.
• Неправильная эксплуатация или утилизация изделия может нанести вред
здоровью людей и окружающей среде.
• Следует обращаться в государственные и коммерческие организации по сбору
и переработке отходов, утвержденные государственными законами.
• Наказание за незаконную утилизацию электрических и электронных изделий
устанавливается государственными органами надзора за ликвидацией отходов.
•
Do not dispose of the product as solid municipal waste; take it to the proper
collection centres.
•
The product contains a battery, power down the device, remove the rear cover and
must be removed, before proceeding with disposal.
•
Improper use or disposal could have a negative effect on human health and the
environment.
•
Public or private waste collection systems defined by local legislation must be used
for its disposal.
•
in the event of illegal disposal of waste electrical and electronic equipment,
penalties have been established by the current local laws regarding disposal.
+ –
PGDx
to pCO/c.pCO
Ethernet Wi Fi
L N
+ –
PGTA00TRX0
230 Vac
24 Vdc
to c.pCO
Модели с портом Ethernet и клеммной колодкой с винтовыми
зажимами RS485/Wi Fi
Models with Ethernet connector and RS485/Wi Fi screw terminal
G G0
230 Vac
C1
NO1
NO2
NO3
C1
C4
NO4
NO5
NO6
C4
C7
NO7
C7
NO8
C8
NC8
G
G0
U1
U2
U3
GND
+VDC
U4
GND
U5
GND
VG
VG0
Y1
Y2
Y3
Y4
ID1
ID2
ID3
ID4
ID5
ID6
ID7
ID8
IDC1
J1 J2 J3 J4 J5
J14
J10
J13
J12 J15
dracSMBdracsuBdleiF
4 3 2 1
Tx/Rx
J11 pLAN
GND
J25 BMS2
Tx/Rx
GND Tx/Rx
GND
J26 FBus2
+Vterm
GND
+5VREF
J24
+
XXXXXXXXXXXX
c.pCO
+ –
Ethernet
Wi Fi
L N
+ –
PGTA00TRX0
230 Vac
24 Vdc
Модели с портом Ethernet/Wi Fi / Models with Ethernet/Wi Fi connector
Fig. 9 Fig. 10
Подключение к сети /
Network connection:
4 10 6 3 92 1
75
GND
RX/TX +
+
–
+
–
RX/TX –
GND
RX/TX +
RX/TX –
8
Fig.4
Монтаж / Mounting Передача данных / Connectivity
Наименование
Description
PG*04***[F/T]****
Front Panel Mount.
Монтаж спереди
PG*04***D****
Rear Panel Mount.
Монтаж сзади
PG*04***W****
Wall Mounting
Настенный монтаж
PGR04****A***
PGR04****[B/W]***
PGR04****[C/R]***
PG04****[E/H]***
1Задний порт MicroUSB /
MicroUSB rear (*)
2Передний порт MicroUSB /
MicroUSB front
3
Разъем внешней
клавиатуры /
external keypad connector
4
Разъем для подключения
датчика температуры и
влажности (6) /temperature
and humidity probe (6)
(option)
5
Разъем SMA антенны Wi-Fi
(RP-SMA) / Wi-Fi antenna SMA
connector (RP-SMA)
6Порт Ethernet / Ethernet port
7Порт RS485 / RS485 port
8Разъем питания /
power supply port
9Порт RJ12 (питание/RS485) /
RJ12 connector (power/RS485)
10 Шкала состояния /
notication bar
Tab. 2
Если порт RS485 работает как порт pLAN (Modbus over pLAN) или порт дисплея: НЕ ВКЛЮЧАЙТЕ
согласующие резисторы 120 Ом в первом и последнем терминале на линии Rs485, потому что
порт Rs485 типа HW Slave. Всего в сеть можно объединить до 32 терминалов, а максимальная
протяженность сети не может быть более 500метров.
(6) Необходимо периодически проверять, что вентиляционные отверстия датчика чистые.
(*) Кроме модели PGR04***FA***.
If the RS485 port is used as pLAN (Modbus over pLAN) or display port: DO NOT connect the 120
Ohms terminal resistors into the first and the last devices of the RS485 network, this is because the
RS485 port is HW Slave type. The maximum number of devices which can be connected in the
network is 32, and the maximum lenght of it is 500meters.
(6) Periodically check that the probe ventilation holes are clean.
(*) Excepted PGR04***FA*** model.
Подключение к контроллеру pCO/c.pCO
Connection to
pCO/c.pCO
Modelli con connettore RJ12 / Models with RJ12 connector
PGDx
C1
NO1
NO2
NO3
C1
C4
NO4
NO5
NO6
C4
C7
NO7
C7
NO8
C8
NC8
G
G0
U1
U2
U3
GND
+VDC
U4
GND
U5
GND
VG
VG0
Y1
Y2
Y3
Y4
ID1
ID2
ID3
ID4
ID5
ID6
ID7
ID8
IDC1
J1 J2 J3 J4 J5
J14
J10
J13
J12 J15
dracSMBdracsuBdleiF
4 3 2 1
Tx/Rx
J11 pLAN
GND
J25 BMS2
Tx/Rx
GND Tx/Rx
GND
J26 FBus2
+Vterm
GND
+5VREF
J24
+
XXXXXXXXXXXX
Fix: cavo telefonico RJ12
Fix: RJ12 telephone cable pCO/c.pCO
S90CON*
Fig. 5
Modelli con morsetto a vite RS485/Wi Fi / Models with RS485/Wi Fi screw terminal
+ –
PGDx
C1
NO1
NO2
NO3
C1
C4
NO4
NO5
NO6
C4
C7
NO7
C7
NO8
C8
NC8
G
G0
U1
U2
U3
GND
+VDC
U4
GND
U5
GND
VG
VG0
Y1
Y2
Y3
Y4
ID1
ID2
ID3
ID4
ID5
ID6
ID7
ID8
IDC1
J1 J2 J3 J4 J5
J14
J10
J13
J12 J15
dracSMBdracsuBdleiF
4 3 2 1
Tx/Rx
J11 pLAN
GND
J25 BMS2
Tx/Rx
GND Tx/Rx
GND
J26 FBus2
+Vterm
GND
+5VREF
J24
+
XXXXXXXXXXXX
pCO
c.pCO
Wi Fi
L N
+ –
PGTA00TRX0
230 Vac
24 Vdc
Fig. 6
ВАЖНО!: Продукция компании CAREL разрабатывается по современным технологиям и все подробности работы и технические
описания приведены в эксплуатационной документации, прилагающейся к каждому изделию. Кроме этого, технические описания
продукции опубликованы на сайте www.carel.com. Вся ответственность и риски за изменение конфигурации оборудования и адаптацию
под индивидуальные требования Заказчика полностью возлагается на него самого (разработчика, наладчика или интегратора
всей системы). Несоблюдение данного требования и указаний, приведенных в технических руководствах, может привести к порче
оборудования и компания CAREL не несет ответственности за подобные поломки. Эксплуатация оборудования осуществляется только
по назначению и в соответствии с правилами, изложенными в технической документации. Степень ответственности компании CAREL в
отношении собственных изделий регулируется общими положениями договора CAREL, представленного на сайте www.carel.com и/или
дополнительными соглашениями, заключенными с заказчиками.
Утилизация изделия: Изделие утилизируется отдельно в соответствии с местными нормативами по утилизации отходов.
Стандарты
Безопасность
UL UL60730-1
sch. CB IEC60730-1
EMC CE EN61000-6-1 / EN61000-6-2
EN61000-6-3 / EN61000-6-4
EN55014-1 / EN55014-2
Радиопомехи Red EN301489-1/EN301489-17
EN300328
FCC Part.15 Subpart.B
Другие сертификаты в настоящее время утверждаются, пожалуйста, свяжитесь со
штаб-квартирой Carel для получения более подробной информации
NO POWER
& SIGNAL
CABLES
TOGETHER
READ CAREFULLY IN THE TEXT!
Сигнальные кабели и
кабели питания всегда
прокладываются в отдельных
кабель-каналах.
IMPORTANT WARNINGS: The CAREL product is a state-of-the-art product, whose operation is specified in the technical documentation supplied
with the product or can be downloaded, even prior to purchase, from the website www.carel.com. - The client (builder, developer or installer of
the final equipment) assumes every responsibility and risk relating to the phase of configuration the product in order to reach the expected results
in relation to the specific final installation and/or equipment. The lack of such phase of study, which is requested/indicated in the user manual,
can cause the final product to malfunction of which CAREL can not be held responsible. The final client must use the product only in the manner
described in the documentation related to the product itself. The liability of CAREL in relation to its own product is regulated by CAREL’s general
contract conditions edited on the website www.carel.com and/or by specific agreements with clients.
Disposal of the product: The appliance (or the product) must be disposed of separately in compliance with the local standards
in force on waste disposal.
Standards
Safety UL UL60730-1
sch. CB IEC60730-1
EMC CE EN61000-6-1 / EN61000-6-2
EN61000-6-3 / EN61000-6-4
EN55014-1 / EN55014-2
Radio Red EN301489-1/EN301489-17
EN300328
FCC Part.15 Subpart.B
Other certification under approvals, please contact Carel
Representatives for other details
NO POWER
& SIGNAL
CABLES
TOGETHER
READ CAREFULLY IN THE TEXT!
Always keep the signal cables
and power cable in separate
conduits.
