manuals.online logo
Brands
  1. Home
  2. •
  3. Brands
  4. •
  5. Carel
  6. •
  7. Touch Terminal
  8. •
  9. Carel pGD Touch User manual

Carel pGD Touch User manual

+050001485 - rel. 1.3 date 27.01.2016
Descrizione
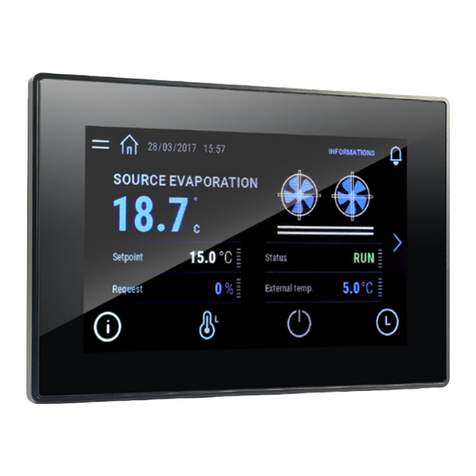
I terminali grafici pGD Touch da 10 e 13 pollici appartengono alla
famiglia di terminali touch screen pensata per rendere semplice e
intuitivo interfacciamento dell’utente con i controlli della famiglia pCO
Sistema.
La tecnologia elettronica utilizzata e il nuovo display a 65’000 colori
permettono di gestire immagini ad alta risoluzione e funzionalità
avanzate per ottenere un elevato standard estetico. Il pannello touch
screen, inoltre, facilita l’interazione uomo-macchina rendendo, di fatto,
più facile la navigazione tra le varie schermate.
Codici modelli
Codice Dimensione display Risoluzione
PGDT10000FR10 10.4 pollici 800x600 (SVGA)
PGDT13000FR10 13.3 pollici 1280x800 (WXGA)
Codici accessori
Codice Descrizione
PGTA00TRF0 Alimentatore 230 VAC – 24 VDC per guida DIN
PGTA00CNV0 Cavo adattatore DB9 per RS485 lunghezza 2 m
Avvertenze per l’installazione
Evitare il montaggio delle schede in ambienti che presentino le
seguenti caratteristiche:
• umidità relativa maggiore di quanto indicato nelle specifiche
tecniche;
• forti vibrazioni o urti;
• esposizione ad atmosfere aggressive ed inquinanti (es.: gas solforici
e ammoniacali, nebbie saline, fumi) con conseguente corrosione e/o
ossidazione;
• elevate interferenze magnetiche e/o radiofrequenze (evitare quindi
l’installazione delle macchine vicino ad antenne trasmittenti);
• esposizione all’irraggiamento solare diretto e agli agenti atmosferici
in genere;
• ampie e rapide fluttuazioni della temperatura ambiente;
• ambienti ove sono presenti esplosivi o miscele di gas infiammabili;
• evitare di avvicinarsi con le dita ai componenti elettronici montati
sulle schede per evitare scariche elettrostatiche (estremamente
dannose) dall’operatore verso i componenti stessi.
Avvertenze generali
1. I terminale pGDTouch 10’’ e 13’’ possono essere alimentati solo in
corrente continua.
2. Una tensione di alimentazione elettrica diversa da quella prescritta
può danneggiare seriamente il sistema;
3. Utilizzare capicorda adatti per i morsetti in uso. Allentare ogni vite
ed inserirvi i capicorda, quindi serrare le viti. Ad operazione ultimata
tirare leggermente i cavi per verificarne il corretto serraggio;
4. L’uso a temperature particolarmente basse può causare una visibile
diminuzione della velocità di risposta del display. Questo è da
ritenersi normale e non è indice di malfunzionamento.
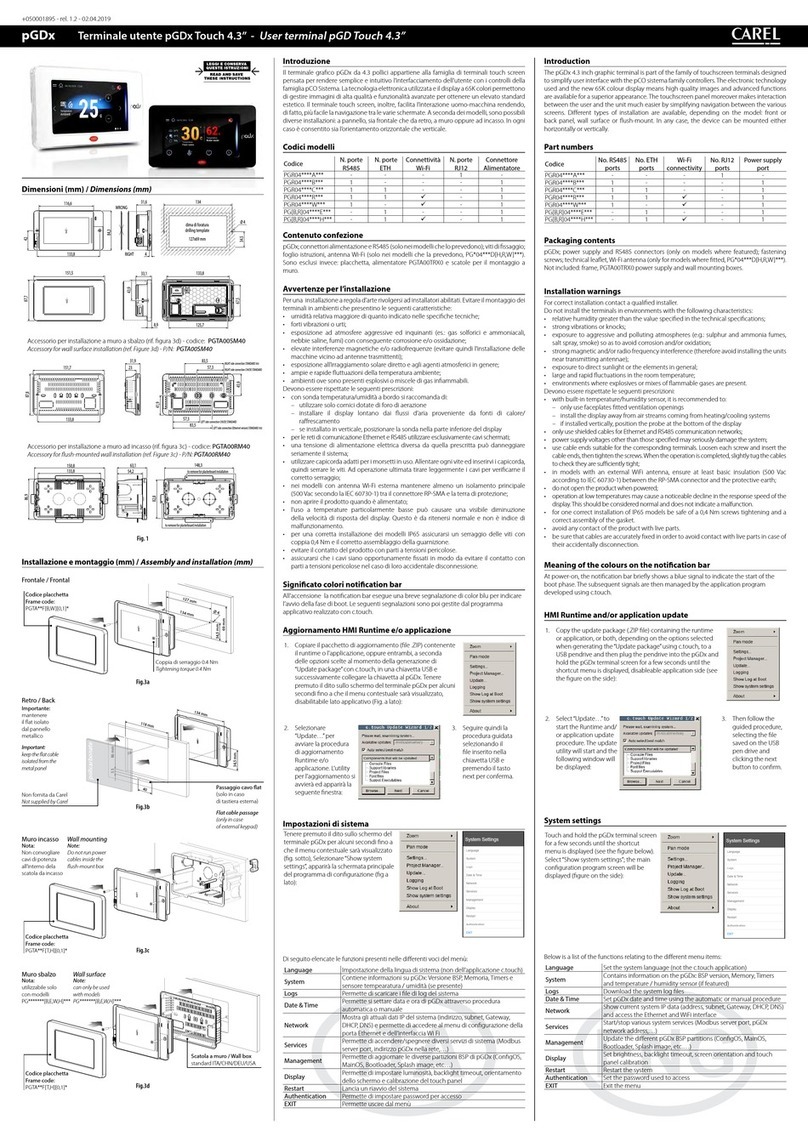
Aggiornamento Runtime
Copiare il pacchetto di aggiornamento contenente il Runtime in una
chiave USB e successivamente collegare la chiave USB al pGDTouch.
Tenere premuto il dito sullo schermo del terminale pGD Touch per
alcuni secondi fino a che il menu di scelta rapida sarà visualizzato.
Selezionare “Update…” per avviare la procedura di aggiornamento
Runtime. L’utility per l’aggiornamento del Runtime si avvierà ed apparirà
la seguente finestra.
Selezionare “Auto select best match” e premere next, in questo modo
verrà avviata la procedura di aggiornamento.
Attendere che la procedura sia terminata e premere “Close”.
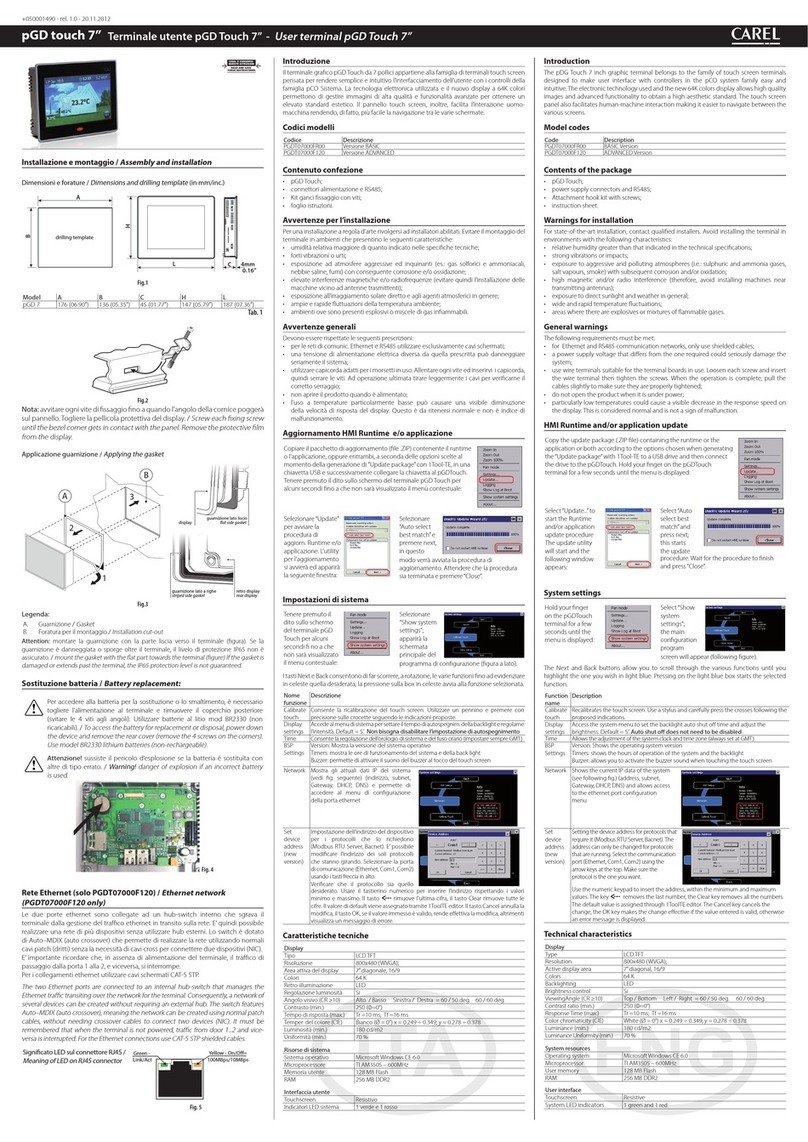
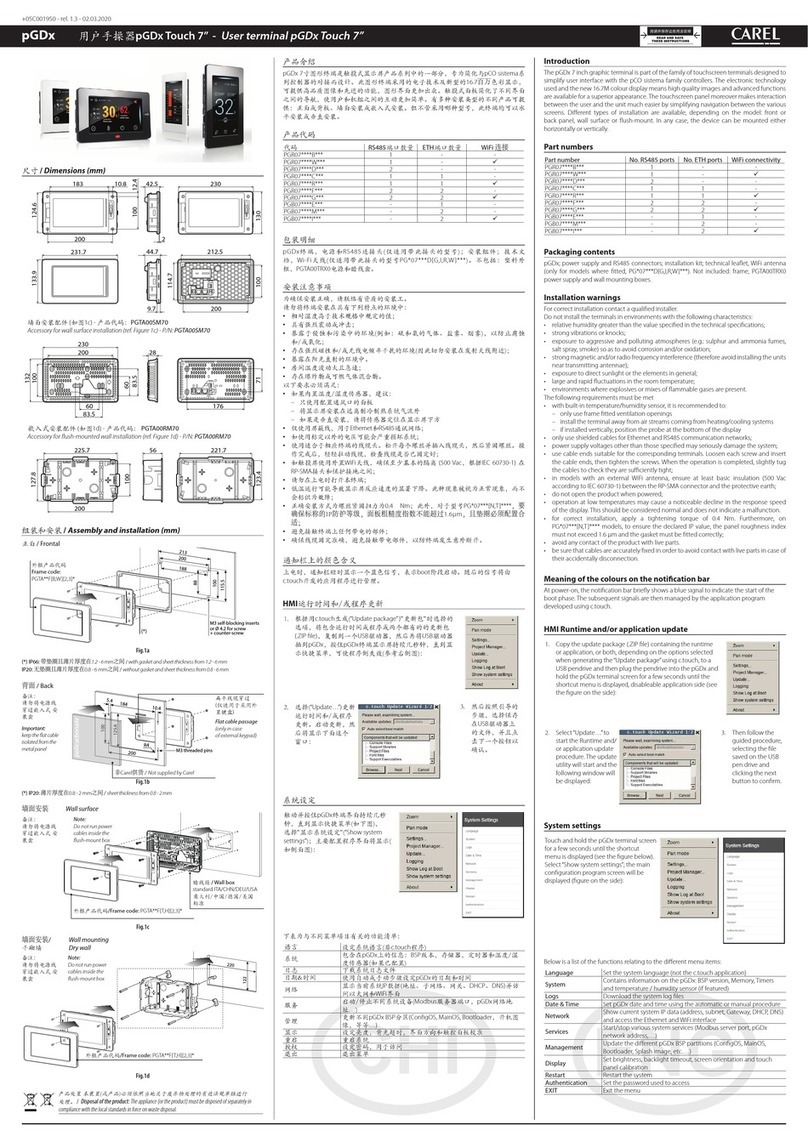
Installazione e montaggio /
Assembly and installation
Dimensioni e forature /
Dimensions and drilling template
(in mm/inc.)
drilling template
Fig.1
Model A B C H L
pGD 10 276 (10.86”) 221 (8.7”) 56 (2.2’’) 232 (9.13”) 287 (11.30”)
pGD 13 326 (12.83”) 256 (10.07”) 56 (2.2’’) 267 (10.51”) 337 (13.22”)
Tab. 1
Fissaggio supporti /
Fixing bracket
Fig.2
Nota: avvitare ogni vite di fissaggio fino a quando l’angolo della cornice poggerà
sul pannello. /
Screw each fixing screw until the bezel corner gets in contact
with the panel.
Applicazione guarnizione /
Applying the gasket
A
2
1
3
B
Fig.3
Legenda:
A. Guarnizione /
Gasket
B. Foratura per il montaggio /
Installation cut-out
Tab. 3
Collegamento elettrico /
Power supply connection
3 2 15 4
Fig.4
Legenda:
1. Porta seriale / Serial Port
2. 2x porta Ethernet / 2x Ethernet Port
3. porta USB (versione 2.0 - 1.1) / USB port (version 2.0 - 1.1)
4. porta USB (versione 2.0 solo alta velocità)
USB port (version 2.0 High speed only)
5. Alimentazione / Power Supply
Tab. 2
PGDT10000FR10-PGDT13000FR10: Terminale utente pGD Touch 10” / 13” -
User terminal pGD Touch 10” / 13”
pGD touch
Description
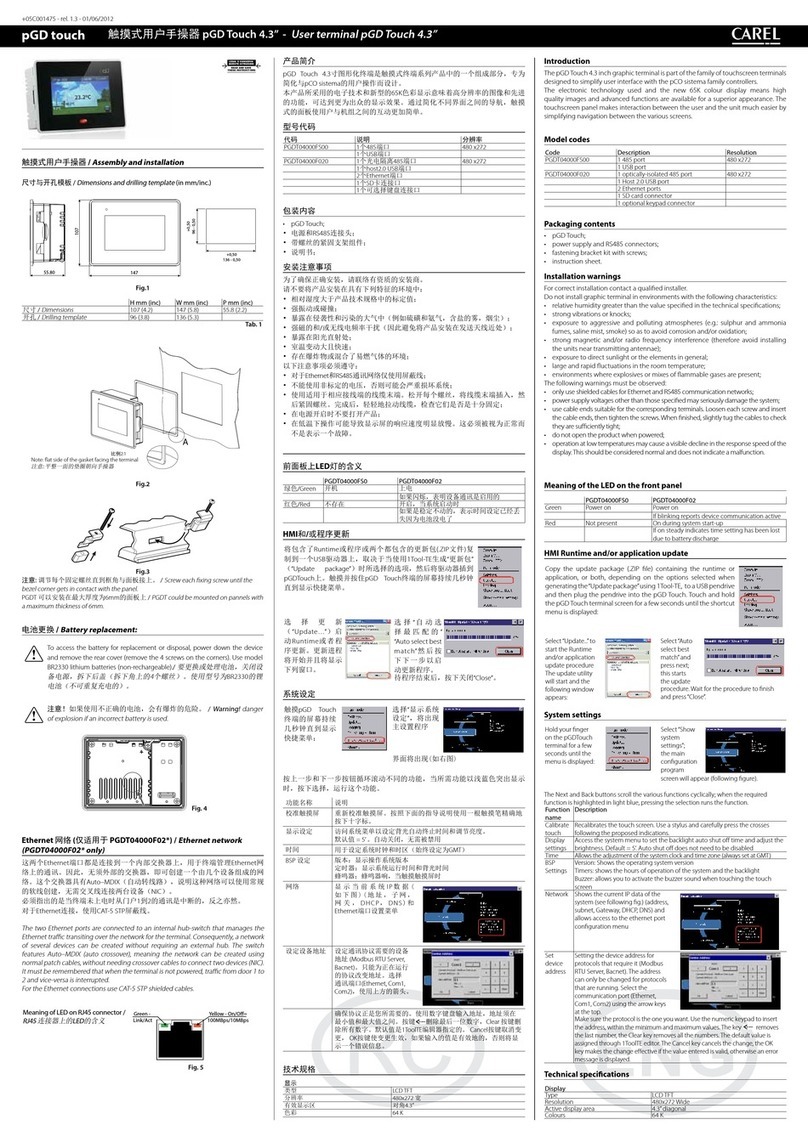
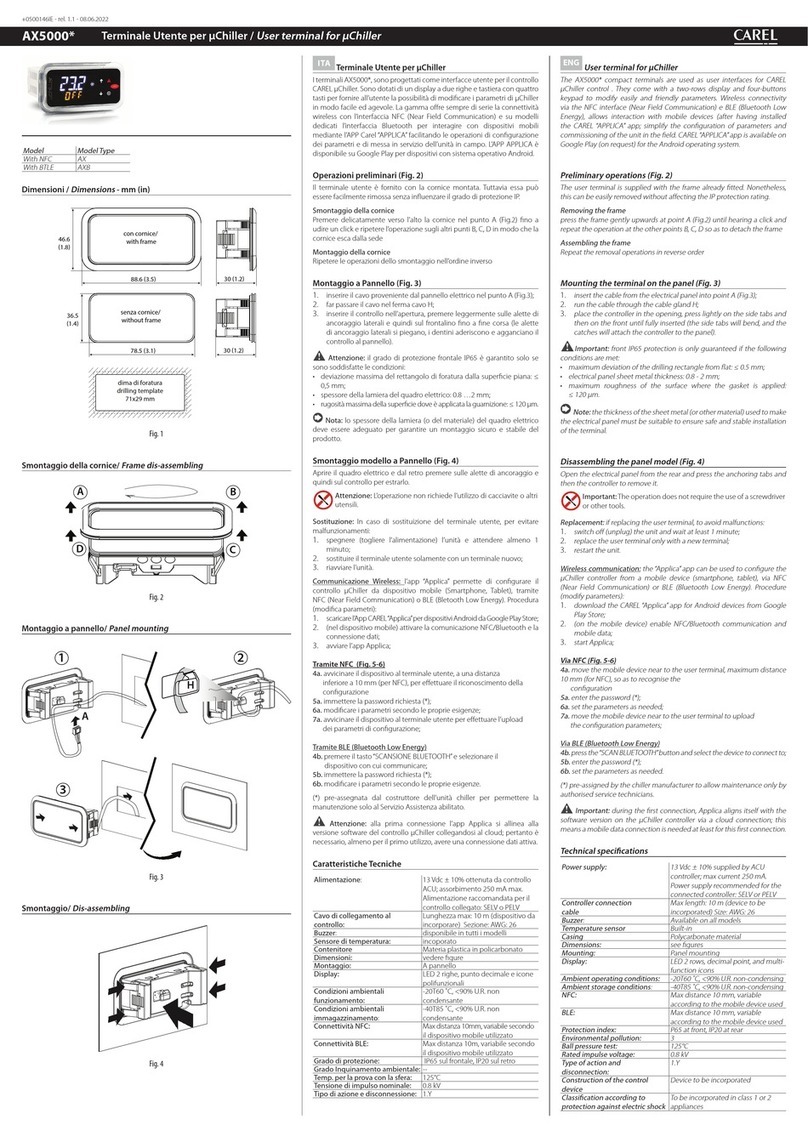
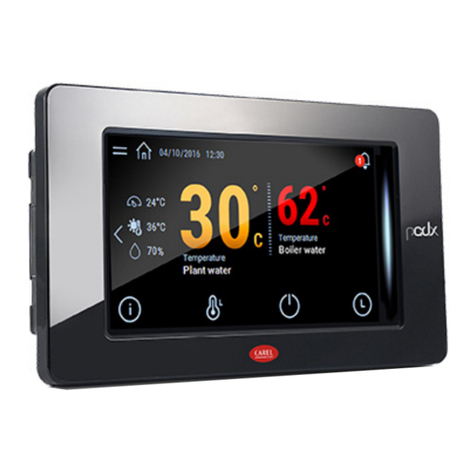
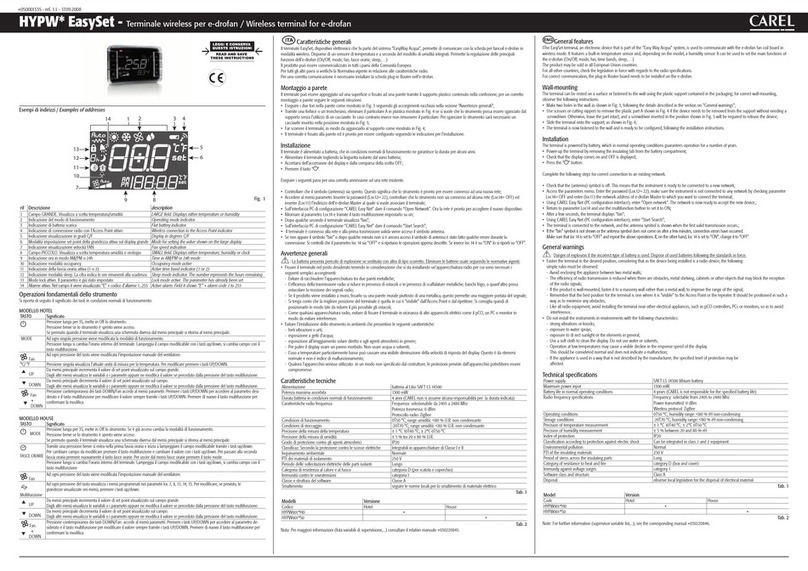
The pGD Touch 10 and 13 inch graphic terminals are part of the family
of touchscreen terminals designed to simplify user interface with the
pCO sistema. family controllers
The electronic technology used and the new 65,000 colour display
means high resolution images and advanced functions are available
for a superior appearance. The touchscreen panel makes interaction
between the user and the unit much easier by simplifying navigation
between the various screens.
Model codes
Code Display size Resolution
PGDT10000FR10 10.4 inches 800x600 (SVGA)
PGDT13000FR10 13.3 inches 1280x800 (WXGA)
Accessory codes
Code Description
PGTA00TRF0 230 VAC – 24 VDC power supply for DIN rail
PGTA00CNV0 DB9 adapter cable for RS485, 2 m long
Installation warnings
Do not install the boards in environments with the following
characteristics:
• relative humidity greater than the value specified in the technical
specifications;
• strong vibrations or knocks;
• exposure to aggressive and polluting atmospheres (e.g.: sulphur and
ammonia fumes, saline mist, smoke) so as to avoid corrosion and/or
oxidation;
• strong magnetic and/or radio frequency interference (therefore
avoid installing the units near transmitting antennae);
• exposure to direct sunlight or the elements in general;
• large and rapid fluctuations in the room temperature;
• environments where explosives or mixes of flammable gases are
present;
• avoid touching or nearly touching the electronic components fitted
on the boards to avoid electrostatic discharges (extremely damaging)
from the operator to the components.
General warnings
1. The pGD Touch 10’’ and 13’’’ terminals are for DC power supply
only.
2. Power supplies other than those specified may seriously damage the
system;
3. Use cable ends suitable for the corresponding terminals. Loosen
each screw and insert the cable ends, then tighten the screws. When
finished, slightly tug the cables to check they are sufficiently tight;
4. Operation at low temperatures may cause a visible decline in the
response speed of the display. This should be considered normal and
does not indicate a malfunction.
Runtime update
Copy the update package containing the Runtime to a USB pendrive
and then plug the pendrive into the pGDTouch.
Touch and hold the pGD Touch terminal screen for a few seconds until
the shortcut menu is displayed.
Select “Update…” to start the Runtime update procedure. The Runtime
update utility will start and the following window will be displayed.
Select “Auto select best match” and then press next to start the update
procedure.
Wait for the procedure to end and press “Close”.
IMPORTANT WARNINGS
The CAREL product is a state-of-the-art product, whose operation is specified in the
technical documentation supplied with the product or can be downloaded, even prior
to purchase, from the website www.carel.com. - The client (builder, developer or installer
of the final equipment) assumes every responsibility and risk relating to the phase of
configuration the product in order to reach the expected results in relation to the specific
final installation and/or equipment. The lack of such phase of study, which is requested/
indicated in the user manual, can cause the final product to malfunction of which CAREL
can not be held responsible. The final client must use the product only in the manner
described in the documentation related to the product itself. The liability of CAREL in
relation to its own product is regulated by CAREL’s general contract conditions edited on
the website www.carel.com and/or by specific agreements with clients.
NO POWER
& SIGNAL
CABLES
TOGETHER
READ CAREFULLY INTHETEXT! WARNING: separate as much as possible the probe and digital input signal
cables from the cables carrying inductive loads and power cables to avoid possible
electromagnetic disturbance. Never run power cables (including the electrical panel
wiring) and signal cables in the same conduits.
CAREL Industries HQs
Via dell’Industria, 11 - 35020 Brugine - Padova (Italy)
Tel. (+39) 0499716611 – Fax (+39) 0499716600 – www.carel.com – e-mail: [email protected]
Alimentazione /
Power supply
Alimentatore a bassissima tensione di sicurezza/sorgente di potenza
limitata /
Extra low voltage power supply / Limited power source.
+24V
0V
+24V
0V
Fig.5
Non aprire l’involucro dei pannelli quando sono alimentati /
Don’t open the
panel rear cover when the power supply is applied.
+24 V
0V
connettere aterra conunfaston
L
N
NL+V -V
100-240Vac
PGTA00TRF0
PGD10/PGD13
Rear panel
Fig.6
Verificare che l’alimentatore sia in grado di erogare la potenza necessaria per il
corretto funzionamento dell’apparecchiatura. E’possibile ordinare l’alimentatore
230Vac/24Vdc - codice PGTA00TRF0. /
Ensure that the power supply has enough
power capacity for the operation of the devices
.
The 230 Vac/24Vdc power
supply - code PGTA00TRF0 can be ordered.
Collegamenti seriali /
Serial conncetions
PLC PORT: Com 1 - PC/PRINTER PORT: Com2
Fig. 7
Pin Description
1 GND
2-
3 TX/CHA-
4 RX/CHB-
5-
6 +5 V output
7 CTS/CHB+
8 RTS/CHA+
9-
Per effettuare il collegamento con gli strumenti Carel in RS485 utilizzare l’apposito
cavo adattatore PGTA00CNV0. /
To make the RS485 connection to Carel
instruments use the special adapter cable code PGTA00CNV0.
Caratteristiche PGTA00CNV0
PGTA00CNV0
Technical specifications
lunghezza: 2 m
lenght
: 2 m
Il cavo è dotato di connettore
DB9 maschio e resistenze interne
di polarizzazione linea
The cable is fitted with a DB9 male
connector and internal resistance
for line polarisation
terminazioni: Db9 maschio e
fili sguainati con occhiello per
collegamento a terra della calza
terminations: DB9 male and stripped
wires with eyelet for earthing
the shield
Per il collegamento al pCO seguire i colori indicati in figura:
To connect the pCO follow the colours indicated in the figure:
GND
+
giallo / verde / marrone /
yellow / green / brown
grigio /
grey
nero /
black
collegare a terra /
connect to earth
Fig. 8
Regole per lo smaltimento /
Guidelines for disposal
• Non smaltire il prodotto come rifiuto solido urbano ma smaltirlo negli
appositi centri di raccolta.
• Il prodotto contiene una batteria ed è quindi necessario rimuoverla
separandola dal resto del prodotto seguendo le istruzioni riportate di seguito
prima di procedere al suo smaltimento.
• Un uso improprio o uno smaltimento non corretto potrebbe avere effetti
negativi sulla salute umana e sull’ambiente.
• Per lo smaltimento vanno utilizzati i sistemi di raccolta pubblici o privati
previsti dalle leggi locali.
• In caso di smaltimento abusivo dei rifiuti elettrici ed elettronici sono previste
sanzioni stabilite dalle vigenti normative locali in materia di smaltimento.
•
Do not dispose of the product as municipal waste; it must be disposed of
through specialist waste disposal centres.
•
The product contains a battery that must be removed and separated from the
rest of the product according to the instructions provided, before disposing
of the product.
•
Improper use or incorrect disposal of the product may negative effects on
human health and on the environment.
•
The public or private waste collection systems defined by local legislation
must be used for disposal.
•
In the event of illegal disposal of electrical and electronic waste, the penalties
are specified by local waste disposal legislation.
Battery
Fig. 9
Caratteristiche tecniche
pGD10” pGD13”
Display
Tipo TFT
Resoluzione 800x600, SVGA 1280x800, WXGA
Area display attiva 10.4” diagonal 13”3 diagonal
Colori 64 K
Retro-illuminazione LED
Luminosità 300 Cd/m2typ.
Regolazione luminosità Si
Requisiti di sistema
Sistema operativo Microsoft Windows CE 6.0
Memoria utente 256 MB Flash
RAM CPU 512 MB DDR
Interfaccia operativa
Touchscreen Analog resistive
Indicatori LED utente 1 (dual core)
Interfacce
Porta Ethernet 2 10/100 Mbit with intergrated switch
Porta USB Host interface, (1 vers. 2.0, 1 vers. 2.0 e 1.1)
Porta Seriale 1: Com1 RS232, RS485, RS422, configurabile via software
Memory card SD Card Slot
Funzionalità
Grafica vettoriale Si, incluso supporto SVG 1.0
Oggetti dinamici Si. Visibilità, opacità, posizione, dimensione,
rotazione per molti tipi di oggetti
Font-TrueType Si
Multi-Protocollo Sì, massimo 2 driver
Storico e trend Si. Limitato alla memoria della Flash memory
Multi-lingue Si, con impostazione della lingua run-timee
limitato solo dalla memoria disponibile
Recipes (ricette) Si. Limitato alla memoria della Flash memory
Allarmi Si
Lista eventi Si
Passwords Si
Hardware Real Time Clock Si, con batteria di back-up
Screen saver Sì
Buzzer “Beep” alla pressione del touch (configurabile)
Ratings
Alimentazione 24 Vdc (18...30 Vdc)
Corrente assorbita 0,95 A a 24 Vdc (max.) 1,15 A a 24 Vdc (max.)
Fusibile Automatico
Peso appross. 2,1 kg appross. 2,8 kg
Batteria Ricaricabile a litio, non sostituibile dall’utente
Condizioni ambientali
Temperatura di lavoro 0...50 °C (installazione verticale)
Temperatura di
immagazzinamento
-20...70 °C
Umidità i lavoro e
immagazzinamento
5 – 85 % umidità relativa, non-condensante
Grado di protezione IP65 (front panel) - IP20 (rear)
Dimensioni
Pannello frontale LxH 287x232 mm 337x267 mm
(13.22x10.51“)
Foratura AxB 276x221 mm 326x256 mm
(12.83x10.07“)
Profondità D+T 56mm + 4mm 56+4 mm (2.20+0.16”)
L’utilizzo di queste apparecchiature in ambienti residenziali, commerciali
e dell’industria leggera è permesso solo nel caso in cui vengano prese
le misure speciali per ottenere la conformità alla IEC61000-6-3.
CAREL si riserva la possibilità di apportare modifiche o cambiamenti ai propri
prodotti senza alcun preavviso.
Smaltimento del prodotto: l’apparecchiatura (o il prodotto) deve essere oggetto di
raccolta separata in conformità alle vigenti normative locali in materia di smaltimento. /
Disposal of the product: the appliance (or the product) must be disposed of separately in
accordance with the local waste disposal legislation in force.
+050001485 - rel. 1.3 date 27.01.2016
Technical Specification
pGD10” pGD13”
Display
Type TFT
Resolution 800x600, SVGA 1280x800, WXGA
Active display area 10.4” diagonal 13”3 diagonal
Colours 64 K
Backlight LED
Brightness 300 Cd/m2typ.
Dimming Yes
System resources
Operating System Microsoft Windows CE 6.0
User memory 256 MB Flash
RAM CPU 512 MB DDR
Operator Interface
Touchscreen Analogue resistive
User LED indicators 1 (dual core)
Interfaces
Ethernet port 2 10/100 Mbit with intergrated switch
USB port Host interface, (1 vers. 2.0, 1 vers. 2.0 e 1.1)
Serial Port 1: Com1 RS232, RS485, RS422, software configurable
Memory card SD Card Slot
Functions and features
Vector graphics Yes, includes SVG 1.0 support
Object dynamics Yes. Visibility, opacity, position size,
rotation for object types.
TrueType fonts Yes
Multiple driver commun. Yes, max 2 drivers
Data acquisition
and trend presentation
Yes. Flash memory storage limited only
by available memory
Multilanguage Yes, number of run-time languages limited
by available memory
Recipes Yes. Flash memory storage limited by available mem.
Alarms Yes
Event list Yes
Passwords Yes
Hardware Real Time Clock Yes, with battery back-up
Screen saver Yes
Buzzer Yes, audible feedback for touchscreen
Ratings
Power supply voltage 24 Vdc (18 to 30 Vdc)
Current consumption 0,95 A a 24 Vdc (max.) 1.15 A a 24 Vdc (max.)
Fuse Automatic
Weight Approx 2.1 kg Approx 2.8 kg
Battery Rechargeable Lithium battery, not user-replaceable
Environmental conditions
Operating temperature 0...50 °C (vertical installation)
Storage temperature -20...70 °C
Operating and storage
humidity
5 – 85 % relative humidity, non-condensing
Protection class IP65 (front panel) - IP20 (rear)
Dimensions
Faceplate LxH 287x232 mm 337x267 mm
(13.22x10.51“)
Cutout AxB 276x221 mm 326x256 mm
(12.83x10.07“)
Depth D+T 56mm + 4mm 56+4 mm (2.20+0.16”)
These devices may only be used in residential, commercial and
light industrial environments if special measures are taken to ensure
conformity to IEC61000-6-3.
CAREL reserves the right to modify the features of its products without prior notice.
Schema per collegamento a pCO5/
Connection to pCO5
R = 120 ohm
230 Vac
24 Vac
LN
230 Vac
24 Vac
LN
230 Vac
24 Vac
LN
J26FBus2
J25 BMS2
J11 pLAN
pCO5
G
G0
J26FBus2
J25 BMS2
J11 pLAN
pCO5
G
G0
J26FBus2
J25 BMS2
J11 pLAN
pCO5
G
G0
R=120 ohm
collegare a terra /
connect to earth
Fig. 10
R = 120 ohm
R = 120 ohm
J26FBus2
J25 BMS2
J11 pLAN
pCO5
G
G0
J26FBus2
J25 BMS2
J11 pLAN
pCO5
G
G0
J26FBus2
J25 BMS2
J11 pLAN
pCO5
G
G0
Power
supply
collegare a terra /
connect to earth
Fig. 11

This manual suits for next models

2

Other Carel Touch Terminal manuals

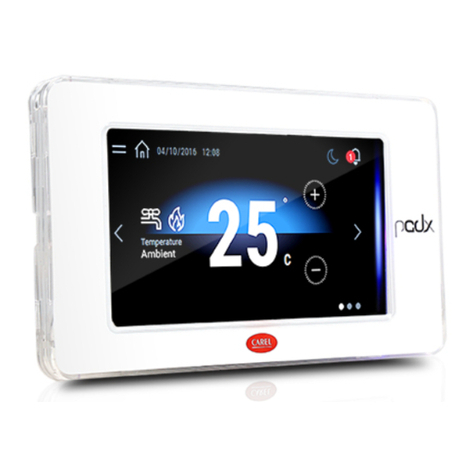
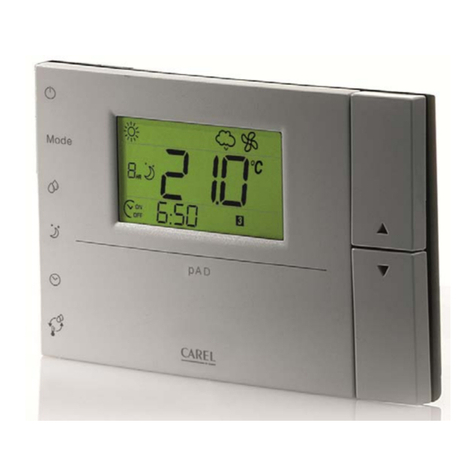
Carel PAD User manual

Carel

Carel PAD User manual

Carel IR U Series User manual

Carel

Carel IR U Series User manual

Carel pGD Series User manual

Carel

Carel pGD Series User manual

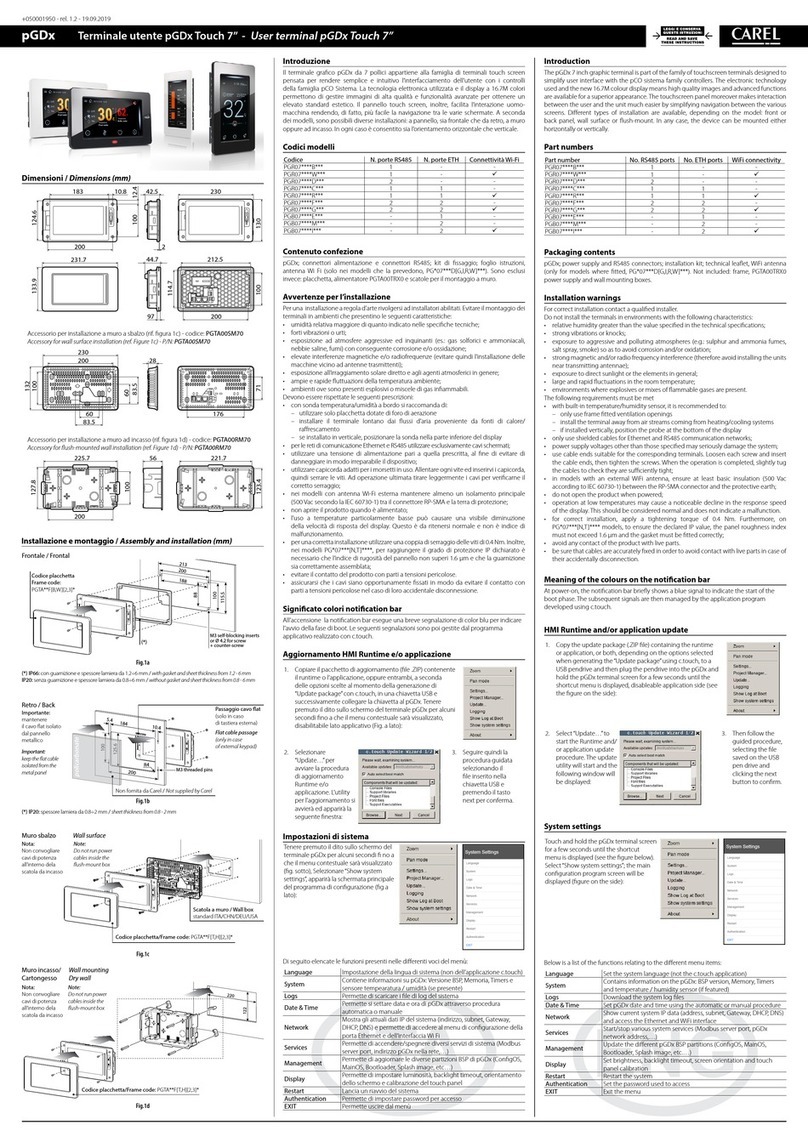
Carel pGDx User manual

Carel

Carel pGDx User manual

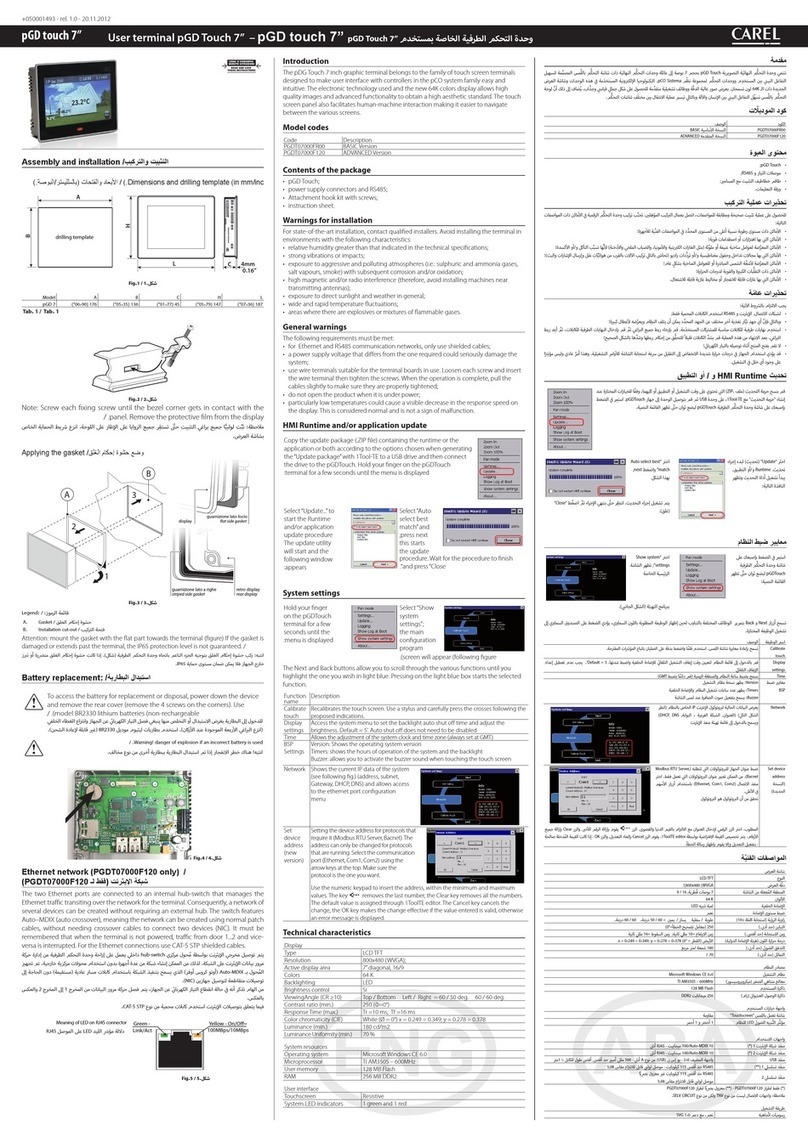
Carel pGD touch 7 User manual

Carel

Carel pGD touch 7 User manual

Carel pGDx Touch 4.3 User manual

Carel

Carel pGDx Touch 4.3 User manual

Carel AX5000 User manual

Carel

Carel AX5000 User manual

Carel EasySet HYPW User manual

Carel

Carel EasySet HYPW User manual

Carel PLD Series User manual

Carel

Carel PLD Series User manual

Carel pGDx Series Instruction Manual

Carel

Carel pGDx Series Instruction Manual

Carel TH Tune User manual

Carel

Carel TH Tune User manual

Carel PAD User manual

Carel

Carel PAD User manual

Carel AX3000 Series User manual

Carel

Carel AX3000 Series User manual

Carel pGD Touch Instruction Manual

Carel

Carel pGD Touch Instruction Manual

Carel pGD 7 Series User manual

Carel

Carel pGD 7 Series User manual

Carel pGD touch PGDT04000FS00 Instruction Manual

Carel

Carel pGD touch PGDT04000FS00 Instruction Manual

Carel pGDx Touch 4.3” User manual

Carel

Carel pGDx Touch 4.3” User manual

Carel pGD touch Instruction Manual

Carel

Carel pGD touch Instruction Manual

Carel pGDx User manual

Carel

Carel pGDx User manual

Carel pGD Series User manual

Carel

Carel pGD Series User manual

Carel pGDx User manual

Carel

Carel pGDx User manual

Carel MTST User manual

Carel

Carel MTST User manual

Carel pGD Series User manual

Carel

Carel pGD Series User manual

Carel pGD Series User manual

Carel

Carel pGD Series User manual

Popular Touch Terminal manuals by other brands

Festo VIFB13-02 Series manual

Festo

Festo VIFB13-02 Series manual

Olivetti Explor@ 100 Service manual

Olivetti

Olivetti Explor@ 100 Service manual

Kollmorgen AKI-CDB-MOD-07T installation manual

Kollmorgen

Kollmorgen AKI-CDB-MOD-07T installation manual

worldpay P400 Integration guide

worldpay

worldpay P400 Integration guide

Greenheck XG-RT-500 Installation, operation and maintenance manual

Greenheck

Greenheck XG-RT-500 Installation, operation and maintenance manual

Bosch Rexroth IndraControl VCP 08.2 Project planning manual

Bosch

Bosch Rexroth IndraControl VCP 08.2 Project planning manual

SkyBitz 2009-MTX user manual

SkyBitz

SkyBitz 2009-MTX user manual

Appostar Grand POS GP-3464 user manual

Appostar

Appostar Grand POS GP-3464 user manual

SwissPhone DE10A Service manual

SwissPhone

SwissPhone DE10A Service manual

Carrier 35L Series Installation and start-up instructions

Carrier

Carrier 35L Series Installation and start-up instructions

Suncorp VX820 Quick reference guide

Suncorp

Suncorp VX820 Quick reference guide

Parker PAC SERIES user manual

Parker

Parker PAC SERIES user manual

POSIFLEX Jiva KS-6615 Series user manual

POSIFLEX

POSIFLEX Jiva KS-6615 Series user manual

Mitsubishi Electric GT2512-STBA manual

Mitsubishi Electric

Mitsubishi Electric GT2512-STBA manual

Allen-Bradley PanelView C200 installation instructions

Allen-Bradley

Allen-Bradley PanelView C200 installation instructions

Allen-Bradley 1790-T16BV0X installation instructions

Allen-Bradley

Allen-Bradley 1790-T16BV0X installation instructions

Guangzhou Liwei OBM-A12 quick start guide

Guangzhou Liwei

Guangzhou Liwei OBM-A12 quick start guide

Rockwell Automation Allen-Bradley PanelView 5500 user manual

Rockwell Automation

Rockwell Automation Allen-Bradley PanelView 5500 user manual

manuals.online logo
manuals.online logoBrands
  • About & Mission
  • Contact us
  • Privacy Policy
  • Terms and Conditions

Copyright 2025 Manuals.Online. All Rights Reserved.