manuals.online logo
Brands
  1. Home
  2. •
  3. Brands
  4. •
  5. Cree
  6. •
  7. Lighting Equipment
  8. •
  9. Cree LR24 Series User manual

Cree LR24 Series User manual

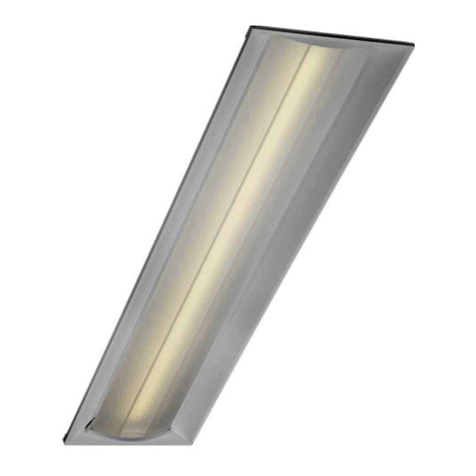
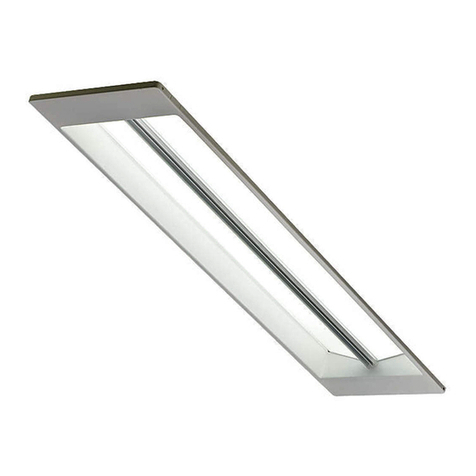
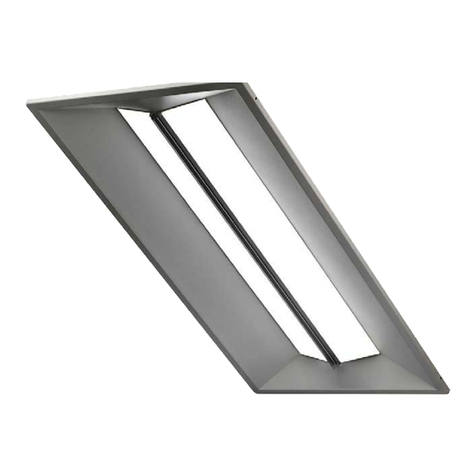
The LR24TM architectural LED troer is for non-insulated
ceiling applications using 2’ x 2’ t-bar ceiling grid only.
Designed for use in 120V~277V, 50-60 Hertz protected circuit
(fuse box, circuit breakers) and supply wire (18AWG, stranded,
600V, 90°C rated). SELV equivalent control gear.
CAUTION: Risk of Electric Shock
Dry location use only. Access above ceiling required. Do
not install insulation within 76 mm (3 in) of any part of the
luminaire. Suitable for suspended ceilings.
IMPORTANT SAFETY INFORMATION
Maximum case temperature is 51c at 25c ambient.
Read all instructions before installation.
Before installing this fixture or doing any maintenance, make sure
to turn o the power supply at the circuit breaker or fuse box.
Check to make sure that all fixture connections have been
properly made and the fixture is grounded to avoid potential
electrical shocks.
Do not handle energized fixture when hands are wet, when
standing on wet or damp surfaces, or in water.
INSTALLATION INSTRUCTIONS
LR24TM


STEP 1:
Carefully unpack the LR24 from its’ shipping containers. In-
spect product for defects due to shipping.
STEP 2:
Place the LR24 into the 2’ x 2’ T bar ceiling panel
(see figure 1). Assembly should fit tight and not need fasteners.
STEP 3:
Make sure that the orientation of the sheet metal assembly
junction box (see “B” on Figure 1) faces an accessible panel to
install the input power.
STEP 4:
Remove junction box door (see “A” on Figure 2).
STEP 5:
Using a screwdriver blade, remove appropriate knockout from
junction box door to route input conduit.
TO INSTALL:
STEP 6:
Connect wires as shown in wiring diagram (Figure 3). Push all
wires back into the junction box.
STEP 7:
Replace junction box door and tighten screw to secure.
CONNECTING/DISCONNECTING POWER TO LR24
STEP 8:
To connect power to the light engine, align the GU24 connector
whip “E”(see Fig 4) with the GU24 pins “F” on the light engine.
STEP 9:
Push the connector completely over the pins and rotate the
whip clockwise until locked (see Fig 5).
FIGURE 2FIGURE 1
!
CREE® TRUEWHITE® TECHNOLOGY FIXTURE LIMITED CONSUMER WARRANTY
The limited warranty set forth below is given by the Cree company listed below (“Seller”) with respect to the lighting product packaged with this limited warranty (the “Product”). Your Product, when delivered
to you in new condition in its original packaging, is warranted against defects in materials or workmanship as follows: for a period of FIVE (5) YEARS from the date of original purchase, defective parts or a
defective Product returned with the sales receipt as proof of purchase to Seller, or its authorized service providers, as applicable, and proven to be defective upon inspection, will be repaired, or exchanged
for a new Product, as determined by Seller, or the authorized service provider. This limited warranty covers all defects encountered in normal use of the Product, and does not apply in the following cases:
Loss of or damage to the Product due to acts of God; re; vandalism; civil disturbances; power surges; improper power supply; electrical current uctuations; corrosive environment installations; induced
vibration; harmonic oscillation or resonance associated with movement of air currents around the product; abuse; alteration; accident; mishandling; failure to follow operating, maintenance or environmental
instructions prescribed by Seller in writing or services performed by someone other than Seller or its authorized service provider. WARRANTY IS VOID IF PRODUCT IS NOT USED FOR THE PURPOSE
FOR WHICH THIS PRODUCT IS MANUFACTURED. Any complaints you may have regarding the Product should be addressed to Ruud Lighting, Inc., 9201 Washington Avenue, Racine, WI 53406. Seller
shall have no liability under this warranty unless Seller is notied in writing within sixty (60) days after your discovery of the defect and the defective items are promptly returned to Seller, freight prepaid,
and received by Seller. This warranty excludes eld labor and service charges related to the repair or replacement of the product. NO IMPLIED WARRANTY, INCLUDING ANY IMPLIED WARRANTY OF
MERCHANTABILITY OR FITNESS FOR A PARTICULAR PURPOSE, APPLIES TO THE PRODUCT AFTER THE APPLICABLE PERIOD OF THE EXPRESS LIMITED WARRANTY STATED ABOVE, AND
NO OTHER EXPRESS WARRANTY OR GUARANTY GIVEN BY ANY PERSON OR ENTITY WITH RESPECT TO THE PRODUCT SHALL BIND SELLER. (SOME STATES AND PROVINCES DO NOT
ALLOW LIMITATIONS ON HOW LONG AN IMPLIED WARRANTY LASTS, SO THE ABOVE LIMITATION MAY NOT APPLY TO YOU.)






LPN000013_J
U.S Patent no. 7,213,940
U.S and Foreign Patents Pending
Designed and Produced in USA
CreeLEDLighting.com
GREEN - GND
BLACK
BLACK
WHITE
WHITE
BLACK
WHITE
POWER
SUPPLY
120 VAC
TO LAMP
LR24 JUNCTION BOX
LR24 WIRING DIAGRAM
STEP 10:
To disconnect power for servicing, rotate the connector counter-
clockwise and pull away from the LR24.
UNIT DIMMING
Note: This fixture is capable of dimming using IEC 60929 0 ~10V
control compliant dimmers only.
STEP 11:
To connect dimmer wires, remove side panel “G” by removing
the (4) screws that hold it in place.
STEP 12:
Remove side panel knock-out “H” by inserting screw driver
blade into knock-out notch and prying apart. Connect flexible
conduit connector to the side panel as shown in Fig 6.
STEP 13:
Insert positive and neutral wires into the PCB connector (shown
in detail view of Fig 6) in the correct polarity location as shown
in Figure 6. The polarity of the connection is important to prop-
er dimmer function. Using a small flat blade screwdriver, insert
the blade into the top slots on the PCB connector and twist to
lock the wires into place.
STEP 14:
When wires are locked, replace side panel and secure using the
(4) screws provided.
STEP 15:
Reconnect power to the fixture to test.
FIGURE 3
FIGURE 4
FIGURE 5 FIGURE 6
This manual suits for next models

1

Other Cree Lighting Equipment manuals

Cree EB14SMK User manual

Cree

Cree EB14SMK User manual

Cree TRDL6 Series User manual

Cree

Cree TRDL6 Series User manual

Cree LXB Series User manual

Cree

Cree LXB Series User manual

Cree OSQ Series User manual

Cree

Cree OSQ Series User manual

Cree FLEX Series User manual

Cree

Cree FLEX Series User manual

Cree OSQ Series User manual

Cree

Cree OSQ Series User manual

Cree Essentia S-DL4-EB User manual

Cree

Cree Essentia S-DL4-EB User manual

Cree CXB Series User manual

Cree

Cree CXB Series User manual

Cree C-AR Series User manual

Cree

Cree C-AR Series User manual

Cree CR150-650L User manual

Cree

Cree CR150-650L User manual

Cree ESSENTIA S-CT-FB-25L User manual

Cree

Cree ESSENTIA S-CT-FB-25L User manual

Cree ESSENTIA ESA-ADR-414 User manual

Cree

Cree ESSENTIA ESA-ADR-414 User manual

Cree XLamp MH Series User manual

Cree

Cree XLamp MH Series User manual

Cree XA-NEMA User manual

Cree

Cree XA-NEMA User manual

Cree XLamp XR Series User manual

Cree

Cree XLamp XR Series User manual

Cree OSQ Series User manual

Cree

Cree OSQ Series User manual

Cree LQ6 Series User manual

Cree

Cree LQ6 Series User manual

Cree CR Series User manual

Cree

Cree CR Series User manual

Cree OSQ Series User manual

Cree

Cree OSQ Series User manual

Cree XLamp ML Family LEDs User manual

Cree

Cree XLamp ML Family LEDs User manual

Cree C-LITE C-WP-A-FCT3 Series User manual

Cree

Cree C-LITE C-WP-A-FCT3 Series User manual

Cree Link With SmartCast Technology User manual

Cree

Cree Link With SmartCast Technology User manual

Cree OSQ Series User manual

Cree

Cree OSQ Series User manual

Cree CPY Series User manual

Cree

Cree CPY Series User manual

Popular Lighting Equipment manuals by other brands

Epstein-Design Snowball Sun Shine manual

Epstein-Design

Epstein-Design Snowball Sun Shine manual

GAME epool 4817 owner's manual

GAME

GAME epool 4817 owner's manual

ETC Source Four LED 3 Series user manual

ETC

ETC Source Four LED 3 Series user manual

Coemar Panorama Cyc 1800 Architectural instruction manual

Coemar

Coemar Panorama Cyc 1800 Architectural instruction manual

EuroLite LED ML-56 QCL user manual

EuroLite

EuroLite LED ML-56 QCL user manual

Ledj Libretto Mini Bi-CCT Profile user manual

Ledj

Ledj Libretto Mini Bi-CCT Profile user manual

Autopilot ChlorSync CS30 Owners & installation manual

Autopilot

Autopilot ChlorSync CS30 Owners & installation manual

Aurora AU-ST324RGB quick start guide

Aurora

Aurora AU-ST324RGB quick start guide

Inspire Zuzo instruction manual

Inspire

Inspire Zuzo instruction manual

Beamz LCB-48IP quick start guide

Beamz

Beamz LCB-48IP quick start guide

MAXSPID LEDER ESR/M/W510RM installation manual

MAXSPID

MAXSPID LEDER ESR/M/W510RM installation manual

Berker 1687 Series installation instructions

Berker

Berker 1687 Series installation instructions

leahua LH-N006 user manual

leahua

leahua LH-N006 user manual

Lights Alive FireFly FF-301 Instructions and specifications

Lights Alive

Lights Alive FireFly FF-301 Instructions and specifications

HALTO SPLITTER 1 IN 4 OUT IP66 quick start

HALTO

HALTO SPLITTER 1 IN 4 OUT IP66 quick start

Tractel Dynasafe HF 31/1/A2 Assembly instructions

Tractel

Tractel Dynasafe HF 31/1/A2 Assembly instructions

ETC Lustr+ user manual

ETC

ETC Lustr+ user manual

Algam Lighting MW-430Z manual

Algam Lighting

Algam Lighting MW-430Z manual

manuals.online logo
manuals.online logoBrands
  • About & Mission
  • Contact us
  • Privacy Policy
  • Terms and Conditions

Copyright 2025 Manuals.Online. All Rights Reserved.