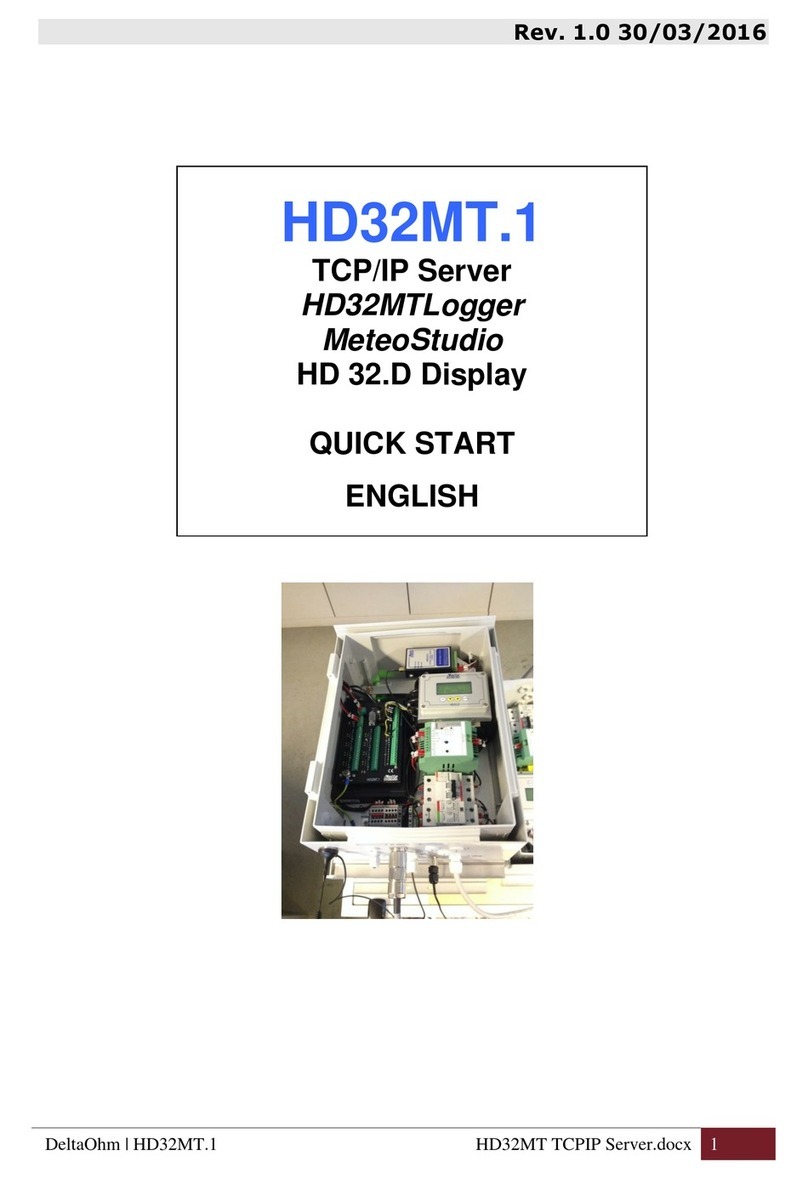
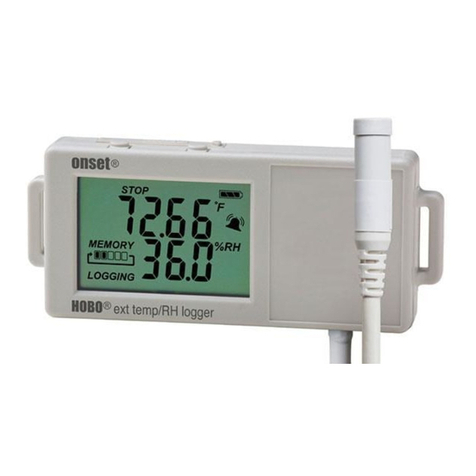
Delta OHM HD35 Series User manual

The quality level of our instruments is the result of the constant development of the
product. This may produce some differences between the information written in this
manual and the instrument you have purchased. We cannot completely exclude the
possibility of errors in the manual, for which we apologize.
The data, images and descriptions included in this manual cannot be legally asserted.
We reserve the right to make changes and corrections with no prior notice.
REV. 1.3
11/04/2014
HD35… series
Wireless
Data Logging System
ENGLISH

- 2 -
TABLE OF CONTENTS
1INTRODUCTION.................................................................................................... 4
2SYSTEM COMPONENTS.......................................................................................... 5
3INSTALLING THE SYSTEM..................................................................................... 6
4NETWORK MODIFICATION.................................................................................. 12
5INSTALLING THE HOUSING FOR INDOOR USE.................................................... 13
6BASE UNIT HD35AP… ......................................................................................... 14
6.1 AVAILABLE VERSIONS.......................................................................................... 14
6.2 DESCRIPTION ................................................................................................... 14
6.3 RF LEDS SIGNALS............................................................................................. 15
6.4 USB CONNECTION ............................................................................................. 15
6.5 ETHERNET OR WI-FI CONNECTION ........................................................................ 15
6.6 RS485 CONNECTION .......................................................................................... 17
6.7 GSM CONNECTION ............................................................................................ 18
6.7.1 SENDING COMMANDS TO THE BASE UNIT FROM A MOBILE PHONE ............................ 18
6.7.2 GPRS TCP/IP CONNECTION ..................................................................... 20
6.8 TECHNICAL FEATURES OF THE BASE UNIT ................................................................... 21
7HD35RE REPEATER ............................................................................................. 22
7.1 DESCRIPTION ................................................................................................... 22
7.2 CONNECTION TO THE WIRELESS NETWORK ................................................................. 22
7.3 TECHNICAL FEATURES OF THE REPEATER .................................................................... 23
8HD35ED… DATA LOGGERS FOR INDOOR USE...................................................... 24
8.1 DESCRIPTION ................................................................................................... 24
8.2 CONNECTION TO WIRELESS NETWORK....................................................................... 28
8.3 DATA LOGGERS WITH LCD OPTION .......................................................................... 28
8.3.1 MAXIMUM,MINIMUM AND AVERAGE OF THE MEASUREMENTS ................................. 30
8.4 THE MENU IN LCD DATA LOGGERS .......................................................................... 30
8.4.1 THE MENU IN DATA LOGGERS WITH GRAPHIC LCD............................................. 30
8.4.2 THE MENU IN DATA LOGGERS WITH CUSTOM LCD ............................................. 34
8.5 CONNECTING THE MODEL WITH TERMINAL HEADER INPUTS ............................................... 37
8.5.1 INPUTS CONFIGURATION .......................................................................... 37
8.6 CALIBRATION ................................................................................................... 39
8.6.1 CO SENSOR CALIBRATION ........................................................................ 39
8.6.2 REPLACING THE CO SENSOR...................................................................... 40
8.6.3 CO2SENSOR CALIBRATION........................................................................ 41
8.6.4 CO2SENSOR AUTOCALIBRATION ................................................................. 42
8.6.5 CALIBRATING THE RELATIVE HUMIDITY SENSOR ................................................ 43
8.6.6 DIFFERENTIAL PRESSURE CALIBRATION ......................................................... 44

- 3 -
8.6.7 SENSITIVITY OF THE ILLUMINANCE AND/OR UVA IRRADIANCE PROBE....................... 44
8.7 TECHNICAL CHARACTERISTICS OF DATA LOGGERS IN INDOOR USE HOUSING .......................... 45
9HD35EDW… WATERPROOF DATA LOGGERS........................................................ 50
9.1 DESCRIPTION ................................................................................................... 50
9.2 INSTALLATION OF WATERPROOF HOUSING .................................................................. 52
9.3 CONNECTION TO THE WIRELESS NETWORK ................................................................. 53
9.4 DATA LOGGER WITH LCD OPTION ........................................................................... 53
9.5 TECHNICAL CHARACTERISTICS OF DATA LOGGERS IN WATERPROOF HOUSING .......................... 54
10 HD35ED-ALM REMOTE ALARM DEVICE................................................................ 57
10.1 DESCRIPTION ................................................................................................... 57
10.2 CONNECTION ................................................................................................... 57
10.3 CONNECTION TO THE WIRELESS NETWORK ................................................................. 58
10.4 TECHNICAL CHARACTERISTICS OF THE ALARM DEVICE ..................................................... 58
11 MODBUS ............................................................................................................. 59
12 DIMENSIONS...................................................................................................... 71
13 RELATIVE HUMIDITY AND TEMPERATURE PROBES............................................. 73
14 STORAGE OF INSTRUMENTS ............................................................................... 77
15 SAFETY INSTRUCTIONS...................................................................................... 77
16 ORDERING CODES .............................................................................................. 78

- 4 -
1INTRODUCTION
The Delta OHM wireless data logging system allows several physical quantities to be monitored
in a large variety of application fields. Data loggers are available for the monitoring of:
•Temperature
•Relative humidity
•Atmospheric pressure or differential pressure
•Luminance (lux) and UV irradiance
•Carbon monoxide (CO)
•Carbon dioxide (CO2)
•Solar radiation and rainfall quantity
•Acceleration
The models that measure relative humidity and temperature calculate humidity derived quanti-
ties. Calculated quantities depend on the model and can be: dew point temperature, wet bulb
temperature, absolute humidity, mixing ratio, partial vapor pressure.
Data loggers provided with built-in sensors and data loggers with external probes are avail-
able. They can be connected through M12 connectors or terminals according to the model. The
data logger with terminal header input can be connected to:
•Transmitters with 0÷20 or 4÷20 mA current output and 0÷1 V or 0÷50 mV voltage output
•Pt100 / Pt1000 temperature sensors and K, J, T, N, E thermocouples
•Voltage-free contact output (commutations counting) or potentiometric sensors
This allows the monitoring capability of the system to be extended to many other quantities in
addition to the ones mentioned above.
For each detected quantity, the user can set two alarm thresholds (high threshold and low thresh-
old). The overrun of the thresholds can be indicated by an audible signal of the data logger
through an internal buzzer; the alarm signal is immediately transmitted to the base unit and dis-
played on the PC. A wireless remote alarm module with relay output is available allowing other
signaling devices (sirens, flashing lights…) or actuators to be activated. If the system is equipped
with a GMS module, the alarm is signaled also by e-mails or SMS messages.
Systems with the following transmission frequencies are available: 868 MHz (in compliance
with EN 300 220 European Directive), 902-928 MHz (in compliance with U.S. FCC part 15
section 247 and I.C. RSS-210 Directives) and 915,9-929,7 MHz (in compliance with ARIB
STD-T108 standard).
Thanks to wireless transmission, the installation of the system is a very simple and quick op-
eration. In addition, the user will not have to remove the data logger from its position or reach
the place where the data logger is installed to download the data measured with the PC.
The correctness of the transmitted data is ensured by the bidirectional communication be-
tween the base unit and the remote data loggers.
HD35AP-S basic PC software supplied with the product allows configuration of all system de-
vices, display of connection status, level of the RF signal and battery charge level, data auto-
matic download at regular intervals or manual download on request of the user. The data
transferred to the PC are entered into a database. If the PC is connected to a local network, in-
stalling the advanced version of HD35AP-PLUS software (optional) allows also other com-
puters connected to the same local network to access the data stored into the database.
Data loggers comply with EN 12830 standard. The PC application software HD35AP-S is de-
signed in compliance with FDA 21 CFR part 11 recommendations: the operations are pro-
tected by access codes and, in the advanced version, a record of the performed operations is
kept.

- 5 -
2SYSTEM COMPONENTS
The system consists of the following components:
•HD35AP… base unit
•HD35RE repeater
•HD35ED… series of data loggers
•HD35ED-ALM remote alarm device
HD35AP… BASE UNIT
This device acts as an interface between the network data loggers that are positioned in the
measurement sites, and the PC. It communicates wireless with the remote data loggers.
Fig. 2.1: base unit placed between data loggers and PC
HD35RE REPEATER
This device is able to act as a bridge between the base unit HD35AP… and the remote data
loggers HD35ED…, allowing the communication distance between data loggers and base unit to
be increased. Several repeaters in cascade can be used.
Fig. 2.2: repeater placed between data loggers and base unit
The typical transmitting range between two devices in direct communication is 300 m in open
field. The range can be reduced in the presence of obstacles or adverse atmospheric conditions.
HD35ED… DATA LOGGERS
Remote devices with measurement probes. They are installed in the locations to be monitored.
They acquire measurements, store them in the internal memory and send them automatically
to the base unit at regular intervals or on request of the user. Versions with or without LCD
display are available.
HD35ED-ALM REMOTE ALARM DEVICE
Device equipped with relay outputs that allows to activate, in case of an alarm, signaling de-
vices (sirens, flashing lights…) or actuators.
Base
unit
Datalogger
PC
Base unit
Datalogger
PC
Repeater

- 6 -
3INSTALLING THE SYSTEM
Before placing the devices in the final working environment, it is recommended to perform the
system function test on the bench. The bench test allows also the wireless network to be con-
figured more easily, in case the supplied system is not factory-configured.
To check and make the system operational, proceed as follows:
Fig. 3.1: system installation procedure
1. Install HD35AP-S and
MySQ
L
softwares
2. Connect the battery to the base
unit
3. Connect the base unit to the PC
4. Connect the software to the base
unit
8. Add devices to the networ
k
9. Check RF communication quality
Network factor
y
-configu
r
ed
Network
not configured
10.
Install the devices
7. Activate the RF stage of the devices
11. Check if the devices can be reached
A
ll devices can be reached
Some devices cannot be reached
12. Add
r
epeaters to the networ
k
Installation Completed
13. Configure network parameters
5.
Check the clock setting
6. Connect the battery of the other network devices

- 7 -
1. INSTALLING HD35AP-S SOFTWARE
The base unit is supplied with a CD-ROM containing the HD35AP-S software and MySQL Data
Base Management System. Install both HD35AP-S and MySQL in your PC. Concerning the in-
stallation of MySQL, thoroughly follow the installation guide contained in the CD-ROM.
2. CONNECTING THE BASE UNIT BATTERY
For shipments by aircraft, the battery of the devices must be disconnected.
1. Unscrew the 4 front screws of the housing and remove the back cover.
2. Attach the battery connector to the electronic board, paying attention to the correct po-
larity. The connector is equipped with a polarization key that prevents the possibility of a
wrong insertion of the connector.
Fig. 3.2: battery in the devices in housing for internal use
3. Close the housing by fixing the 4 front screws.
•Factory-configured system: first connect the battery of the base unit and check the
clock setting. Only after this operation, connect the battery of the data loggers, so that the
clock can be synchronized with the updated clock of the base unit at startup.
•Not configured system: at startup, data loggers don’t synchronize the clock with that of the
base unit, consequently it is not important to power the base unit as first.
3. CONNECTING HD35AP… BASE UNIT TO YOUR PC
All the versions of the HD35AP... base unit can be connected to the USB port of a PC through
the CP23 cable. The mini-USB connector of the base unit is located in the bottom part of the
housing. In this connection mode, the base unit is powered through the USB port of the PC.
Fig. 3.3: connecting the base unit to your PC
The connection through the CP23 cable doesn’t require the installation of USB drivers: when the
base unit is connected to the PC, Windows® operating system automatically recognizes the unit
as an HID (Human Interface Device) device and uses the drivers already included in the operat-
ing system.
Battery
Battery
connector

- 8 -
Note: even the base unit HD35APW, with Wi-Fi and Ethernet interface, must first be connected
to the PC via USB through the CP23 cable for setting the parameters of the local network (e.g.,
for setting the IP address, for choosing the Wi-Fi or Ethernet mode, etc.).
4. CONNECT THE SOFTWARE TO THE BASE UNIT
Start the HD35AP-S software in your PC and perform the connection procedure illustrated in
the chapter " Connection to base unit " of the software online help (software instructions are
also available in PDF format in the CD-ROM).
5. CHECK THE CLOCK SETTING
Select the item " Setting of date and time " of HD35AP-S software and make sure that the
clock of the base unit is updated. If the clock is not updated, set it as explained in the chapter
" Clock setting " of the software online help.
6. CONNECT THE BATTERY OF THE OTHER NETWORK DEVICES
Connect the battery of the other devices following the procedure indicated at step 2 of the pre-
vious page. In the devices with waterproof housing, the position of the battery and the connec-
tor is shown in the following figure.
Fig. 3.4: battery in devices with waterproof housing
•Factory-configured system: at startup, data loggers synchronize the clock with that of the
base unit. If the base unit is not yet connected to the power supply, the synchronization fails
and data loggers with LCD option display the clock setting window. Clock synchronization will
anyway take place automatically after connecting the base unit to the power supply. Mean-
while, data loggers start storing measurements with their date and time, not synchronized
with respect to the system measurements. If you wish to set the clock manually, see para-
graph The menu in LCD data loggers on page 30.
•Not configured system: at startup, data loggers don’t synchronize the clock with that of
the base unit. In the data loggers with LCD, the window for the clock setting is displayed.
Clock synchronization will take place automatically after network configuration (step 8), in
the meantime data loggers start storing measurements with their date and time. If you wish
to set the clock manually, see paragraph The menu in LCD data loggers on page 30.
7. ACTIVATING THE RF STAGE IN THE DEVICES (DATA LOGGERS,REPEATERS AND ALARM MODULES)
In the devices belonging to a factory-configured system, the RF stage is activated automati-
cally. In this case, proceed to step 9.
If the system is not factory-configured, the RF stage of the devices will have to be activated
manually by pressing the connection button for 5 seconds.
In the models in indoor-use housing, the connection button is on the front panel.
Battery
Battery
connector

- 9 -
Fig. 3.5: connection button in models in indoor-use housing
In models with waterproof housing, the connection button is inside the instrument (see fig.
9.3.1 on page 53).
The activation of the RF stage is signaled by the lightning-up of the green RF LED for one sec-
ond and by a beep of the buzzer. Successively, the red RF LED will start blinking until the de-
vice is added to a wireless network following the procedure indicated at step 8.
In data loggers with LCD display, the activation of the RF stage is signaled also by the connec-
tion icon. The icon will go on blinking until the device is added to a wireless network.
Fig. 3.6: connection icon in the display
In case of doubt of the RF stage status in the devices without LCD (for example, because LEDs
seldom blink due to a long logging interval), press the connection button for 5 seconds. If the
green RF LED lights up, the RF stage was not active and will be activated. If the red RF LED
lights up, the RF stage was already active and will be deactivated; in that case, press again the
connection button for 5 seconds to reactivate it.
8. ADDING THE DEVICES TO THE NETWORK
If the network structure is not configured, it is necessary to add data loggers and any repeat-
ers and alarm modules to the base unit. The adding procedure, described in detail in the chap-
ter " Adding devices to the network " in the software online help, is briefly outlined hereunder:
1. Select the command " Network " of HD35AP-S software.
2. In the section " Add Devices " of the window " Network ", select the button " Execute
search ".
3. At the end of the search, the software will list the devices available to be added to the
network; select the devices, identified by the RF address, and enter the serial number of
each device (RF address and serial number are written on the label on the rear of the in-
strument).
4. Select the button " Add to network ".
Note: the procedure for adding the devices to the network allows a limited number of devices to
be added at a time. If the software doesn’t list all the devices to be added, complete in any case
the procedure with the listed devices and repeat the procedure to add the missing devices. By
repeating the procedure, the software will list only the devices that have not been added yet.
Connection
icon
Custom
LCD
Graphic
LCD
Models without
LCD
Models with LCD

- 10 -
The maximum number of devices that can be added to a base unit depends on the data
transmission interval, as indicated in the following table.
TAB. 3.1: Number of devices manageable by the base unit
Data
transmission
interval
Number of devices
manageable by
the base unit
Data
transmission
interval
Number of devices
manageable by
the base unit
1 s 12 10 s 120
2 s 24 15 s 180
5 s 60 > 30 s 254
The table refers to the condition of direct transmission between base unit and data loggers (1
"Hop"). In the presence of repeaters, the data transmission requires more time, and the num-
ber of devices manageable by the base unit could be lower than the one indicated.
9. CHECKING THE QUALITY OF RF COMMUNICATION
The correct RF communication between base unit and the other devices connected to the net-
work can be checked in the following ways:
•In the main window of the HD35AP-S software, by checking that the RF signal level re-
mains high, that the strength of the received signal RSSI (Received Signal Strength Indi-
cation) exceeds -85 dBm and that the percentage of transmission errors PER (Packet Er-
ror Rate) is close to zero.
Fig. 3.7: verification of RF communication with HD35AP-S software
•In data loggers with display, by checking that the strength of the received signal RSSI
exceeds -85 dBm and that the percentage of transmission errors PER is close to zero.
Use the button to display RF RSSI and PER quantities.
•In the devices without display, by briefly pressing the connection button (PING function)
and by making sure that the green RF LED blinks for a few seconds;
10.INSTALLING THE DEVICES
After a bench test of the system, proceed with the individual installation of the devices in the
final work location.
If data loggers using external probes with cable are installed, place the probes in the environ-
ment to be monitored and connect them to the data loggers (for the connectors layout, see
paragraphs Data logger models in indoor-use housing on page 26 and Data logger models in
waterproof housing on page 51).
11.CHECKING WHETHER THE DEVICES ARE REACHABLE
After installing the devices, you need to verify again the correct RF communication between
the base unit and the other devices of the network, in order to make sure you didn’t place the
devices too far from the base unit or in places that make RF transmission difficult (shielded
environments or with several obstacles). To check RF communication, proceed as indicated at
step 9.

- 11 -
12.ADDING REPEATERS TO THE NETWORK
If a device is not reachable after installation (it fails communication with the base unit), it
could be necessary to install one or more repeaters in intermediate points between the device
and the base unit.
To add a repeater to the network, connect the internal battery to the repeater and repeat the
installation procedure from step only for the repeater.
13.CONFIGURING NETWORK PARAMETERS
Through the HD35AP-S software, set all the system operation parameters: logging intervals,
alarm thresholds, user codes, etc.
For data loggers, specify whether they are installed in a stationary location or mobile location
(for ex. in an articulated vehicle).
See software instructions for the setting of the various parameters.
CHANGING THE RF BAND IN THE …U MODELS
The …U models can operate in the 902-928 (U.S.A. and Canada), 915-928 (Australia) or
921-928 (New Zealand) MHz frequency band. To change the band in the devices with LCD, se-
lect the RF Frequency item of the RF Parameters menu (models with graphic LCD) or the
RF_FREQ_MHZ item of the RF_MENU menu (models with custom LCD). To change the band in
the devices without LCD, proceed as follows:
1) If the device is equipped with mini-USB connector on the housing side, connect it to the PC
by means of the CP23 cable.
2) Start the HD35AP-S software and select the Tools >> HID terminal command.
3) Select Setup >> Uart configuration.
4) Set the Baud Rate to 9600 for the …ED devices. Set the Baud Rate to 115200 for the …RE
and …AP devices. Press Apply.
5) Select Connect.
6) Transmit the command <000>PW;nnnn with nnnn=administrator password.
7) Transmit the command <000>MC;nwith n=1 for the 902-928 MHz band, n=2 for the 915-
928 MHz band and n=3 for the 921-928 MHz band.
8) Select Disconnect.
Note: after the transmission of a command, check that in the reply of the device appears the
confirmation symbol &.

- 12 -
4NETWORK MODIFICATION
One or more devices can be added or removed to/from the network at any time.
ADDING A DEVICE TO AN ALREADY OPERATING NETWORK
To add a device to the network, connect the internal battery to the device and repeat the in-
stallation procedure from step concerning only the device to be added.
REMOVING A DEVICE FROM AN ALREADY OPERATING NETWORK
To remove a device from the network, follow the procedure indicated in detail in the chapter
" Removing devices from the network " of the software online help, and briefly described here-
under:
1. Select the command " Network " of the HD35AP-S software.
2. In the section " Delete Devices " of the window " Network ", select the device that you
wish to remove from the network.
3. Select the button " Delete Devices ".
The removal procedure of a device from the network allows to select whether to turn-off the
device RF circuit after disconnection or to keep it turned-on so as to allow any connection to
another network. If the RF circuit is kept turned-on, it turns-off after 30 minutes if in the
meantime the device is not connected to another network.

- 13 -
5INSTALLING THE HOUSING FOR INDOOR USE
The installation of models in indoor-use housing can be fixed, by means of anodized-aluminum
flanges to be attached to the back of the housing, or removable, by means of a practical plas-
tic support to be fixed to the wall. The use of flanges allows preventing the instrument to be
taken away, thanks to the possibility of applying a padlock, inserted in a fastening pin to be
fixed to the wall.
Removable installation
1. Fix the plastic support to a wall.
2. Insert the device into the support pushing it downwards.
Fig. 5.1: removable installation of the indoor-use housing
Fixed installation
1. Fasten the two flanges to the back of the device housing.
2. Fix the padlock pin and the device with the flanges to the wall.
3. Attach the padlock.
Fig. 5.2: fixed installation of indoor-use housing
Plastic support
Screws for flange
fixing to housing
Screws for wall fixing
Pin hole

- 14 -
6BASE UNIT HD35AP…
6.1 AVAILABLE VERSIONS
•HD35AP: with USB output only;
•HD35APS: with USB output and RS485 output with MODBUS-RTU protocol; the base
unit operates as a multiplexer for the transmission of MODBUS commands from
PC/PLC to network devices;
•HD35APW: with USB output, Wi-Fi interface for connection to the local wireless network
and ETHERNET connection for cable connection to the local network; it al-
lows the use of MODBUS TCP/IP protocol; integrated Web server;
•HD35APG: with USB output and integrated GSM module for e-mail or SMS alarm
transmission and stored data transmission via e-mail or to an FTP address;
it allows communication with a PC through the GPRS TCP/IP protocol.
6.2 DESCRIPTION
1. RF antenna for transmission in ISM band. In the HD35APG model the antenna is on the
left. In the other models the antenna is in the center.
2. POWER LED: in red color, it indicates the presence of an external power supply; it blinks if
the battery is recharging.
3. BATTERY LED: in green color, it indicates the internal battery charge level. When the indi-
cator light is steady on, the battery is fully charged; as the battery is running low, the LED
blinks with a lower and lower frequency (the blink period increases of 1 second for each
10% decrease of the battery charge).
4. Connector for external 6 Vdc power supply (SWD06).
5. Mini-USB connector for PC connection. The PC USB port powers the instrument in the ab-
sence of an external power supply.
6. Connector present only in HD35APW and HD35APS models. In HD35APW models, the
connector is a RJ45 type for connection to the ETHERNET network. In HD35APS models,
the connector is a 8-pole M12 type for connection to the RS485 network.
7. Green RF LED: it blinks when the unit is in normal operation mode.
8. Red RF LED: it blinks to signal problems in RF transmission.
9. GSM antenna cable (only HD35APG). Place the GSM antenna at least 30 cm away from
the RF antenna.

- 15 -
6.3 RF LEDS SIGNALS
GREEN LED RED LED DESCRIPTION
ON ON Initialization phase after a reset or battery connection.
Short blink
every 3 s
OFF Normal operation mode.
Short blink
every 3 s
Short blink
every 3 s
RF alarm: at least one device exceeded the set PER
threshold (Packet Error Rate).
Blinking
1 s ON / 1 s OFF
The unit is changing RF channel.
Blinking
1 s ON / 1 s OFF
Blinking
1 s ON / 1 s OFF
The unit is changing RF channel and signaling an RF alarm
(alarm signaling is normal during an RF channel change).
OFF Blinking
1 s ON / 4 s OFF
Date/time not set. It is necessary to set the clock.
OFF Blinking
1 s ON / 2 s OFF
There is an error in the user configuration parameters.
OFF Blinking
1 s ON / 1 s OFF
There is an error in the factory configuration parameters or
a hardware component is not working properly.
OFF OFF Firmware upload or network file transfer. The RF activity is
suspended until upload completion.
6.4 USB CONNECTION
All base unit versions can be connected to a PC through the mini-USB connector and CP23 ca-
ble. In this connection mode, the base unit is powered through the PC USB port.
Fig. 6.4.1: USB connection
Connection through CP23 cable doesn’t require the installation of USB drivers: when the base
unit is connected to a PC, Windows® operating system automatically recognizes the unit as an
HID device (Human Interface Device) and uses the drivers already included in the operating sys-
tem.
Note: if the external power supply is not used but only the USB connection, it is recommended
to connect the unit to a minimum 500 mA USB port to allow a sufficient recharging of the in-
ternal battery.
6.5 ETHERNET OR WI-FI CONNECTION
The HD35APW base unit version can be connected to a PC through an Ethernet or Wi-Fi local
network. The choice of the connection mode, Ethernet or Wi-Fi, and of the relevant settings
must be performed with the HD35AP-S software.
In the connection mode through local network, the base unit must be powered by means of an
external power supply, because the internal battery has a few hours life.

- 16 -
For the Ethernet mode, connect the RJ45 connector of the base unit to a local network socket
by means of a standard Ethernet cable.
Fig. 6.5.1: ETHERNET connection
In Wi-Fi mode, connect the base unit to an available Wi-Fi network using the HD35AP-S soft-
ware (see software instructions).
The base unit connects to the router of the local network (Wi-Fi Access Point, in Wi-Fi mode)
and works as a client-type device. It is possible to set a fixed (static) IP address or configure
the DHCP mode (Dynamic Host Configuration Protocol) so as the unit requests a dynamic IP
address to the network server/router.
Fig. 6.5.2: base unit in Wi-Fi mode operating as a client
It is possible to access the base unit from any PC of the local network where the basic
HD35AP-S software was installed (see the connection procedure presented in chapter " Con-
nection to base unit " of the software online help). To access the data downloaded in the data-
base from a PC other than that where the database was installed you need instead the ad-
vanced version of the software HD35AP-PLUS.
The connection to the base unit is multi-client: the unit has two TCP/IP virtual ports and ten
sockets in total to be divided between the two ports. Each port can operate with TCP/IP or
MODBUS TCP/IP protocol. The ports setting (port number, number of socket assigned and type
of protocol) must be performed with the HD35AP-S software (see software instructions). In
MODBUS TCP/IP mode, the base unit works as "Modbus TCP/IP gateway".

- 17 -
6.6 RS485 CONNECTION
The HD35APS base unit version has a RS485 communication port with MODBUS-RTU proto-
col. For connection to the port, use the CPM12-8P… series cables with 8-pole M12 connector.
The figure and the table below show the numbering and the function of the connector con-
tacts:
Fig. 6.6.1: RS485 connection
TAB. 6.6.1: CPM12-8P… cable
Connector Function Color B
1 GND Black
2 Not connected
3 Not connected
4 RS485 A/- Brown
5 RS485 B/+ White
6 Not connected
7 Not connected
8 Not connected
Thanks to RS485 connection, several instruments can be connected in a multi-point network.
The instruments are connected in sequence by means of a shielded cable with twisted pair
wires for signals and a third wire for the ground.
Line terminations must be placed at the ends of the network. In order for the line to be polarized
during non-transmission periods, resistors are used to connect signal lines and power supply.
Polarization resistors are in one point only in the line, in the proximity of the PC or PLC. The ca-
ble shield must be connected to both ends of the line.
The maximum number of devices that can be connected to the line (Bus) RS485 depends on the
load characteristics of the devices to be connected. The RS485 standard requires that the total
load doesn’t exceed 32 (Unit Loads). The load of a base unit HD35APS is equal to 1 unit load. If
the total load is higher than 32 unit loads, divide the network in segments and add a signal re-
peater between a segment and the following. A line termination must be placed at both ends of
each segment.
The cable maximum length depends on the transmission speed and on the cable characteris-
tics. Typically, the maximum length is 1200 m. The data line must be kept separated from any
power lines to avoid interferences to the transmitted signal.
White
Brown
Black
CPM12-8P…cable
M12 male
connector
of base unit
PLC o
r
RS485/USB or RS485/RS232
converte
r
for PC
Other senso
r
s with
RS485 output
Termination
T
ermination

- 18 -
Each instrument in the RS485 network is univocally identified by an address ranging within 1
and 247. No more than one transmitter with the same address can be present in the
same network.
Before connecting the base unit to the RS485 network, configure address and Baud Rate (see
chapter " HD35AP… base unit configuration ” of the software online help). The communication
parameters in the PC/PLC must be the same as those set in the base unit.
6.7 GSM CONNECTION
In order to use the GSM functionalities of the base unit HD35APG, a SIM card enabled for
data transmission must be inserted into the unit. The card should be requested to a carrier
that has an adequate coverage of the GSM network in the place where the base unit will be in-
stalled. To insert the card, proceed as follows.
1. Unscrew the 4 front screws on the housing and remove the back cover.
2. Disconnect the battery.
3. Press the release button of the SIM housing and, keeping the button depressed, extract the
card by making it slide upward.
Fig. 6.7.1: inserting the SIM card
4. Insert the SIM card into its housing so as the SIM card contacts face the outside of the
housing. The housing is provided with an insertion key that prevents the possibility of in-
serting the SIM card improperly.
5. Put the SIM housing back in place, making sure that the SIM card contacts face the instru-
ment board.
6. Reconnect the battery.
7. Close again the housing by fixing the 4 front screws.
Through the HD35AP-S software, set the necessary information for GSM operation: SIM PIN,
name of the APN access point, e-mail account and addresses, FTP address, telephone num-
bers, data transmission mode, etc. (see chapter " GSM Options" of the software online help).
6.7.1 SENDING COMMANDS TO THE BASE UNIT FROM A MOBILE PHONE
SMS messages containing commands can be sent by a mobile phone to the HD35APG base
unit, to change some GSM settings of the unit. This feature is useful in case a connection to a
PC with the base unit is not available.
The SMS must be sent to the number of the SIM card inserted into the base unit.
The following table lists the available commands:
SIM release
button
Card
housing
SIM card
Set down

- 19 -
TAB. 6.7.1: SMS commands
Command Description
RESET Reset of the base unit
EMAIL-ON Activates periodic download of measurement data via e-mail
EMAIL-OFF Deactivates periodic download of measurement data via e-mail
EMAIL-PERIOD= period index Set the transmission interval via e-mail, where period index: 0->15 min, 1->30
min, 2->1 hour, 3->2 hours, 4->4 hours, 5->8 hours, 6->12 hours, 7->24 hours,
8->2 days, 9->4 days, 10->1 week
EMAIL-FORMAT= format index Set the format of the data sent via e-mail, where format index:
1->log (format for database), 2->csv (format for Excel®), 3->log+csv
EMAIL-DL-START Activates immediate data download by e-mail starting from the last
measurement transmitted
EMAIL-DL-FROM=YYYY/MM/DD
HH:MM:SS
Downloads data by e-mail starting from the specified date, where YYYY: year,
MM: month, DD: day, HH: hour, MM: minutes, SS: seconds
EMAIL-DL-INTERVAL=YYYY/MM/DD
HH:MM:SS - YYYY/MM/DD HH:MM:SS
Downloads by e-mail all data between the specified dates, where YYYY: year,
MM: month, DD: day, HH: hour, MM: minutes, SS: seconds
EMAIL-ALARM-REPORT Transmits by e-mail a report containing the current measurements of the
selected devices for SMS/e-mail alarms
EMAIL-REPORT Transmits by e-mail a report containing the current measurements of all the
network devices
EMAIL-HELP Transmits an e-mail containing a list of all SMS commands
FTP-ON Activates the periodic download of measurement data via FTP
FTP-OFF Deactivates the periodic download of measurement data via FTP
FTP-PERIOD= period index Set the transmission interval via FTP, where period index: 0->15 min, 1->30 min,
2->1 hour, 3->2 hours, 4->4 hours, 5->8 hours, 6->12 hours, 7->24 hours,
8->2 days, 9->4 days, 10->1 week
FTP-FORMAT= format index Set the format of the data sent via FTP, where format index:
1->log (format for database), 2->csv (format for Excel®), 3->log+csv
FTP-DL-START Activates immediate data download by FTP starting from the last
measurement transmitted
FTP-DL-FROM=YYYY/MM/DD
HH:MM:SS
Downloads data via FTP starting from the specified date, where YYYY: year,
MM: month, DD: day, HH: hour, MM: minutes, SS: seconds
FTP-DL-INTERVAL=YYYY/MM/DD
HH:MM:SS - YYYY/MM/DD HH:MM:SS
Downloads by FTP all data between the specified dates, where YYYY: year,
MM: month, DD: day, HH: hour, MM: minutes, SS: seconds
FTP-ALARM-REPORT Transmits by FTP a report containing the current measurements of the
selected devices for SMS/e-mail alarms
FTP-REPORT Transmits by FTP a report containing the current measurements of all the
network devices
FTP-HELP Transmits by FTP a file containing a list of all SMS commands
SMS-ALARM-ON Activates the transmission of alarm SMS for the overrun of the measurement
thresholds for the selected devices
SMS-ALARM-OFF Deactivates the transmission of alarm SMS for the overrun of the measurement
thresholds for the selected devices
SMS-RF-ALARM-ON Activates the transmission of alarm SMS for RF problems in the selected
devices
SMS-RF-ALARM-OFF Deactivates the transmission of alarm SMS for RF problems
EMAIL-ALARM-ON Activates the transmission of e-mail alarms when the selected devices have
measurements in alarm
EMAIL-ALARM-OFF Deactivates the transmission of e-mail alarms for measurement alarms
EMAIL-RF-ALARM-ON Activates the transmission of e-mail alarms when the selected devices have
RF problems
EMAIL-RF-ALARM-OFF Deactivates the transmission of e-mail alarms for RF problems

- 20 -
Command Description
SMS-ALARM-REPORT Transmits by SMS the list of the devices in alarm condition. Only the selected
devices are taken into consideration for SMS alarms
SMS-DEVICE-ALARM-REPORT=RF
address
Transmits via SMS a report of the measurements selected for SMS alarms,
of the device with specified RF address
SMS-DEVICE-REPORT= RF address Transmits via SMS a report of the measurements of the device with specified
RF address
SMS-HELP Transmits an SMS containing the list of all SMS commands
TCP-SERVER-ON Activates a TCP connection with AP acting as a TCP server
TCP-SERVER-OFF Deactivates the TCP connection with AP acting as a TCP server
TCP-CLIENT-ON Activates a TCP connection with AP acting as a TCP client
TCP-CLIENT-OFF Deactivate the TCP connection with AP acting as a TCP client
TCP-SERVER=server address Specifies the server address for TCP connection when AP acts as TCP client.
The server-address string can be a domain or a IP address
TCP-SERVER-PORT=port number Specifies the number of the TCP port used by the remote server to accept
connections with AP when AP acts as TCP client
TCP-LISTEN-PORT=port number Specifies the number of the TCP listening port used by AP when AP acts as
TCP server
ADD-PHONE=phone number Adds a phone number to the list of numbers considered for SMS alarms
CANC-PHONE Delete my phone number and don’t consider it any more for SMS alarms.
The primary phone number cannot be deleted
ERASE-PHONE=phone number index Deletes the phone number with specified index. This command is accepted
only by the primary phone number
Up to 16 commands can be written in the same text message, separated by spaces or commas.
For safety, commands are executed only if they are coming from the cell numbers set in the
HD35AP-S software and if the SMS text starts with a user-defined key word. The key word is
set through the HD35AP-S software, going to the menu " GSM options " at the item " SMS re-
cipients " and setting the field " SMS keyword " (see chapter " GSM settings " of the software
online help).
Example: supposing you entered the string W72A in the SMS keyword field and you wish to
activate periodic download via e-mail of the measured data with an interval of 1 hour, you will
have to send the following text message:
W72A EMAIL-ON EMAIL-PERIOD=2
With the commands EMAIL-HELP, FTP-HELP and SMS-HELP you can ask the base unit to send
respectively by e-mail, to an FTP address and through SMS the complete list of the available
SMS commands. This function is useful especially if you don’t have the manual at hand, or to
obtain the updated command list following the base unit firmware updates.
6.7.2 GPRS TCP/IP CONNECTION
Through GPRS TCP/IP protocol, it is possible to interact with the HD35APG base unit from a
remote PC with an Internet connection.
To activate this type of connection you have to send the SMS commands TCP-CLIENT-ON or
TCP-SERVER-ON to the base unit.
This manual suits for next models
4
Table of contents
Other Delta OHM Data Logger manuals
Delta OHM
Delta OHM HD 2013 Series User manual
Delta OHM
Delta OHM HD2013-DB User manual
Delta OHM
Delta OHM HD32.7 User manual

Delta OHM
Delta OHM HD30.1 User manual

Delta OHM
Delta OHM HD37B17D User manual
Delta OHM
Delta OHM HD32MT.3 User manual
Delta OHM
Delta OHM DO2003 User manual

Delta OHM
Delta OHM HD33M-MB.2 User manual
Delta OHM
Delta OHM HD32.8.8 User manual
Delta OHM
Delta OHM DO 9847K User manual


