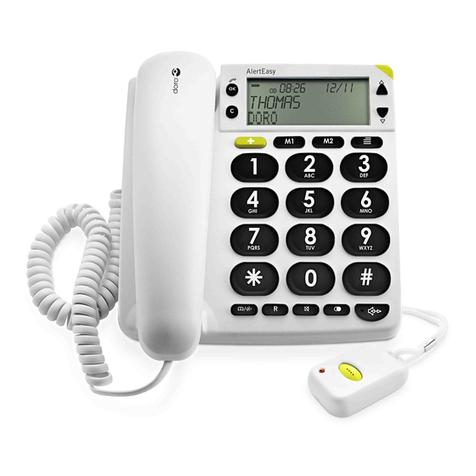
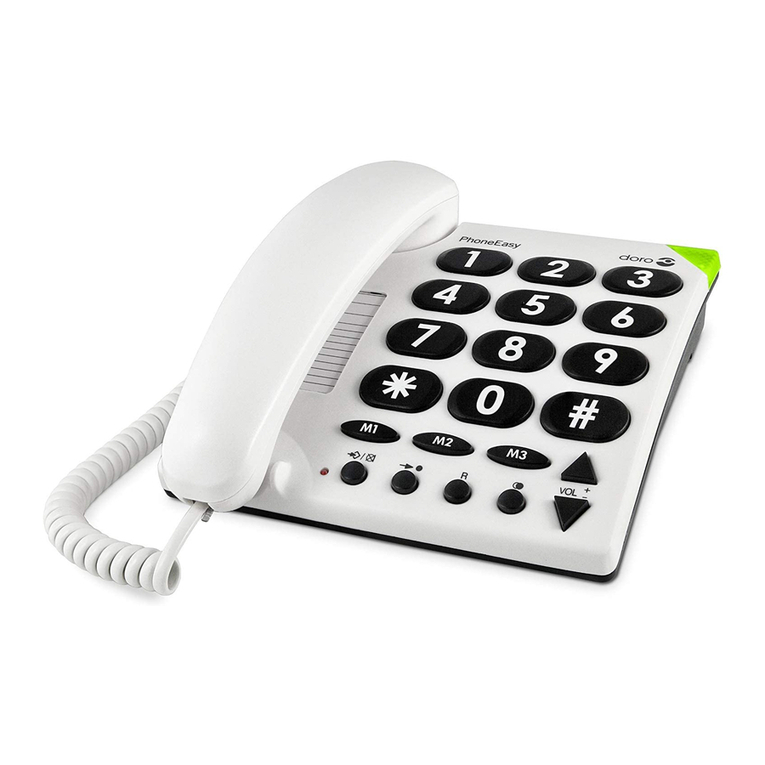
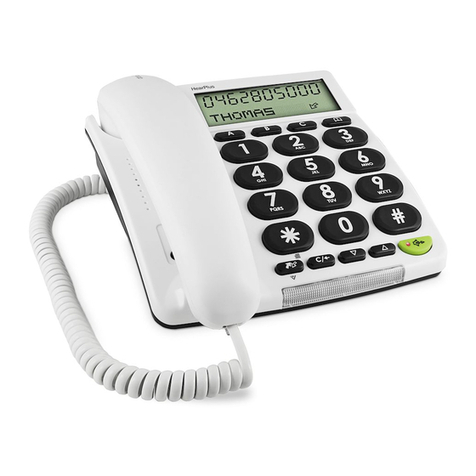
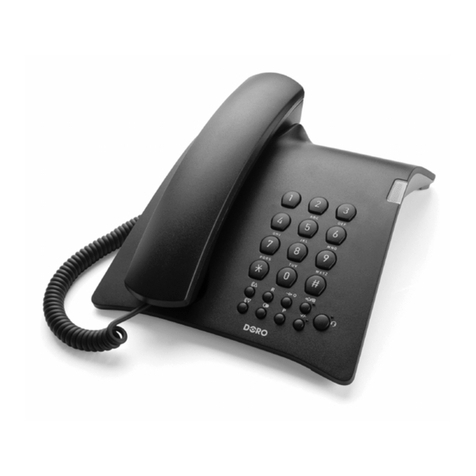
Doro 1015CS User manual

doro 1015CS
Manual Notice d'utilisation
Instrukcja obsługi

2 www.doro.com
www.doro.com 3
12
34
5
v
v
Rz*
#
8 9
0
7
4 5 7
3
2
1
v
v

2 www.doro.com
www.doro.com 3
1 Touche R et de navigation vers la
gauche
2 Touche d’accès au menu
3 Touches de navigation vers le
haut et vers le bas
4 Touche d’accès au menu
5 Touche Secret et de navigation
vers la droite
Français (voir page 26-45)
English (see pages 4-25)
Polski (patrz strony 46-67)
1 Recall (R)/Left scroll button
2 Menu Button
3 Up/Down scroll buttons
4 Call list
5 Mute/Right scroll button
1 Przycisk Recall (R)/Strzałka w
lewo
2 Przycisk Menu
3 Przyciski przewijania/Góra/Dół
4 Przycisk Menu
5 Wyłącznik mikrofonu/Strzałka w
prawo

English
4 www.doro.com
English
www.doro.com 5
Installation
Adapt your telephone the way you want it!
This modular product offers several interesting installation possibilities.
It can be easily converted into a wall telephone, you can move or reposition
the cradle, the cable can be tted in either direction, and the front fascia of the
handset can be changed.
Various accessory modules are also available, please contact DORO or your
retailer for more information.
Please refer to the illustrations on page 19 on how to t and remove the modules.
Always disconnect the telephone line before the contact plug.
The illustrations show 1015CS.
Always disconnect the telephone line before the contact plug.
Positioning cradle and cable
Select the cradle position (right or left-hand side) and cable routing (back or
front) to suit your installation.
1. Locate the metal retaining plate holding the modules in place, press down
on the tab in the middle of the plate and push sideways to remove.
2. Unplug the cradle from the module.
3. Decide on the position of the cradle and cable routing for your installation.
4. If necessary remove any protective socket cover from the cradle or telephone
module
5. Connect the cradle and telephone modules using the cable contact plug.
6. Slide the metal retaining plate into the locating grooves by pushing sideways.
7. Fit any remaining protective covers to exposed contact sockets.
Connection
1. Ensure the cable contact plug has been correctly tted to the cradle and
dialler module, and the metal retaining plate covers both units equally.
2. Connect the handset curly cord to the socket on the cradle module.
3. Connect the mains adaptor to an electrical wall socket, and the line cord to
a telephone network socket
4. Lift the handset and listen for the dial tone.

English
4 www.doro.com
English
www.doro.com 5
Installation
Wall mounting
Prior to assembly the metal retaining plate can be used to mark the screw
positions on any at vertical surface. See page 22.
1. Ensure the wall cradle has been tted to the dialler module, see above.
2. Check there are no hidden cables or pipes prior to drilling and xing the 2
mounting screws. Leave the screw heads protruding slightly.
3. Position the metal retaining plate/telephone over the screws and slide the
unit downward into place.
Important!
Please note when programming all references to press = to press once and then immediately
release the button.
Language selection
The display messages can be shown in several different languages (English,
French, German, Finnish, Polish, Norwegian Swedish, Danish, Turkish and
Italian).
1. Do NOT lift the handset. Press Menu.
2. Scroll to Settings using v/V. Press Select.
3. Scroll to Language using v/V. Press Select.
4. Scroll using v/V to the required language. Press Select to
save your settings.
Country selection
Your country of operation can be selected from one of the following - UK,
Finland, Poland, Norway, Sweden, Denmark, Australia, New Zealand, France,
Turkey and Switzerland.
1. Do NOT lift the handset. Press Menu.
2. Scroll to Settings using v/V. Press Select.
3. Scroll to Country using v/V. Press Select.
4. Scroll to the required country using v/V. Press Select to
save your settings.

English
6 www.doro.com
English
www.doro.com 7
Installation
Setting the Time and Date
1. Do NOT lift the handset. Press Menu.
2. Scroll to Settings using v/V. Press Select.
3. Scroll to Date & Time using v/V. Press Select.
4. Scroll to required setting using v/V. Press Select and follow any on
screen prompts..
Set time: Enter the current time using the number keys.
Time format: Select 12 or 24 hour display
Set date: Enter the current date using the number keys.
Date format: Select the date display as day/month or month/day.
5. Press OK to save your settings.

English
6 www.doro.com
English
www.doro.com 7
Operation
Mute button
The handset microphone can be muted during a call by pressing z, z will
be displayed while this function is active. Press z again to reactivate the
microphone.
Volume control
The handsets earpiece volume can be adjusted during a call.
1. Press Volume.
2. Select the desired earpiece volume using v/V.
3. Press OK to store your selected setting.
Timer
Upon connection of a call a call timer will be shown on the display. The timer is
a simple way to help you keep track of how long the call lasts.
Making a call
Lift the handset and wait for dial tone, then dial the required telephone number.
Alternatively to pre-dial.
1. Enter the required telephone number. Mistakes can be erased using Erase.
2. Lift the handset or press OK and then lift the handset.
Temporary ringer mute/off
The ringer can be temporarily muted on incoming calls. While the unit
is ringing Ignore will be displayed, press the button next to this and the
telephone will return to standby mode.
The ringer will remain muted until the next time the handset is lifted.
Hearing aid compatible
This telephone is hearing aid compatible. Select the T mode on your hearing aid
to enable this feature.

English
8 www.doro.com
English
www.doro.com 9
Network
Network
The most common additional network services are pre-programmed in the
unit, the functions available depend on the country selected. Refer to Country
selection on page 5.
In standby mode
1. Do NOT lift the handset. Press Menu.
2. Scroll to Network using v/V. Press Select.
3. Scroll to the required service using v/V. Press Select.
4. Follow any on screen prompts.
In call mode
1. Press Network.
2. Scroll using v/V to the required service. Press OK.
Please note!
The services programmed are those of the main network operator for each country. Ensure the
correct country selection has been made (see page 5).
Some additional network services may require subscription or be turned off; for further
information on network services contact your local network operator.

English
8 www.doro.com
English
www.doro.com 9
Memory
Using the Phonebook
The phone book can store 100 sets of names and telephone numbers. If you
subscribe to a Caller ID service, the name (for those numbers stored in the
Phonebook) and number of the caller will be shown when you receive an
incoming call.
Entries in the Phonebook are arranged alphabetically and can be up to 20 digits
or 20 characters in length.
If you subscribe to a caller ID service you can select different ringer melodies
for the numbers saved in the Phonebook.
Please note!
If SMS protocol 2 is used, fax number and e-mail addresses can be stored in the phone book,
but can in that case only be sent with the SMS functionality with operators using protocol 2.
Letters
Each number button has been allocated specic letters/characters.
Press the corresponding number button one or more times for the required
letter/character, press and hold button key for three seconds to switch between
upper and lower case.
The cursor can be manually moved using either </>.
Button Letters/symbols
1.......................................... 1 . ? ! : , ” ’ ( ) < = >
2.......................................... A B C 2 Ä Å à Æ @ ß Ç
3.......................................... D E F 3 É è
4.......................................... G H I 4 ì
5.......................................... J K L 5
6.......................................... M N O 6 Ñ ò ø
7.......................................... P Q R S 7 ß
8.......................................... T U V 8 Ü ù
9.......................................... W X Y Z 9
0.......................................... [Space]0 + - @ _ & / % $ £ ¤ € ¥ < =
* .......................................... *
#.......................................... #

English
10 www.doro.com
English
www.doro.com 11
Memory
Storing a new telephone number
1. Do NOT lift the handset. Press Menu.
2. Scroll to Phonebook using v/V. Press Select.
3. Scroll to Add new using v/V. Press Select.
4. Enter name. Press the corresponding number button one or more times for
the rst letter (refer to the table on the previous page). Press V
.
5. Enter the telephone number, including area code. Press V
.
6. Select the required ringer melody using </>. Press Save
Please note!
If the next letter is not on the same button, you can immediately press the button containing
that letter without waiting.
Access/modifying a phonebook entry
1. Do NOT lift the handset. Press Menu.
2. Scroll to Phonebook using v/V. Press Select.
3. Scroll to Search name using v/V. Press Select.
4. Scroll to required telephone number using v/V. Press Select.
It is also possible to quick-search by pressing the corresponding number
button one or more times for the rst letter, see the table on the previous
page.
5. Scroll to the required option using v/V. Press Select and follow any on
screen prompts..
Call: The selected name/number will be dialled.
View: Displays information on the selected name/number.
Edit: Change information in the same way as storing a new entry:
Erase: Deletes a selected name/number.
Quick dialling from the phonebook
1. Do NOT lift the handset. Press v.
2. Scroll to required name/telephone number using v/V.
3. Lift the handset.

English
10 www.doro.com
English
www.doro.com 11
Memory
Speed dial
In addition to the phonebook there are ten speed dial (one touch) memories.
Using speed dial a call can be made by simply pressing only one button.
Stored speed dial numbers will also be visible in the phonebook, and can be
erased and changed in the same way as in the phonebook.
Storing speed dial numbers
1. Do NOT lift the handset. Press Menu.
2. Scroll to Speed dialling using v/V. Press Select.
3. Select the required location using v/V. Press Select.
4. Scroll to Add entry using v/V. Press Select.
5. Enter name. Press the corresponding number button one or more times for
the rst letter (refer to the table on page 9.) Press V
.
6. Enter the telephone number including the area code. Press V
.
7. Select either Save or Exit using v/V. Press Select.
8. Scroll to the required ringer melody using </>. Press Save
Transfer from the phonebook
1. Do NOT lift the handset. Press Menu.
2. Scroll to Speed dialling using v/V. Press Select.
3. Scroll to required name/number using v/V. Press Select.
4. Scroll to Copy from phonebook using v/V. Press Select.
5. Select the required location using v/V. Press Select to save.
Please note!
The speed dial function must be activated to operate. See page 14.
Dialling speed dial memories
1. Press and hold (approximately 3 seconds) the button where the telephone
number is stored.
2. Lift the handset when the displayed telephone number is dialled.

English
12 www.doro.com
English
www.doro.com 13
Call list
Call list, Phone book and Caller ID
The call list is divided into calls received and calls dialled, the call list will store
100 sets of names and phone numbers.
If you subscribe to a Caller ID service the name of the caller will be displayed
when you receive an incoming call (names will only display when associated
with a numbers stored in the Phonebook). When the log is full, the oldest
numbers will be erased automatically as the new call is logged.
New calls are indicated in standby mode by .
Symbols in the call list
New calls
Answered/read calls
Dialled calls
Received call list
1. Press either v/Vor Call list.
2. Scroll through the displayed names/numbers using v/V.
3. Follow any on screen prompts.
Dialled call list
1. Press either V.
2. Scroll through the displayed names/numbers using v/V. Press Option.
3. Scroll to the required function using v/V. Press Select.
4. Follow any on screen prompts.
Quick-dialling from the call list
1. Press either v/V or Call list.
2. Scroll through the displayed names/numbers using v/V.
3. Lift the handset, the displayed number will now be dialled.
Displaying details
1. Press either v/Vor Call list.
2. Scroll to the required function using v/V. Press Option.
3. Scroll to View using v/V. Press Select.
4. Follow any on screen prompts.

English
12 www.doro.com
English
www.doro.com 13
Call list
Dialling
1. Press either v/V or Call list.
2. Scroll to the required name/number using v/V. Press Option.
3. Scroll to Calls using v/V. Press Select.
4. Lift the handset.
Saving to the phonebook
1. Press either v/V or Call list.
2. Scroll to the required name/number using v/V. Press Option.
3. Scroll to Save number using v/V. Press Select.
4. Follow any on screen prompts.
Delete a single entry
1. Press either v/V or Call list.
2. Scroll to the required name/number using v/V. Press Option.
3. Scroll to Erase using v/V. Press Select.
4. Press OK to conrm.
5. Follow any on screen prompts.
Delete all entries
1. Press either v/V or Call list.
2. Scroll to the required name/number using v/V. Press Option.
3. Scroll to Erase all using v/V. Press Select.
4. Press OK to conrm.
5. Follow any on screen prompts.

English
14 www.doro.com
English
www.doro.com 15
Settings
Ringer
The ringer volume and melody can be personalised.
1. Do NOT lift the handset. Press Menu.
2. Scroll to Settings using v/V. Press Select.
3. Scroll to Ring signal using v/V. Press Select.
4. Scroll to required melody using v/V. Press Select.
5. Scroll to Ring volume using v/V. Press Select.
6. Scroll to the desired volume using v/V. Press Save.
7. Follow any on screen prompts.
This product will usually not ring on the rst signal in order to make a correct match against the
phone book.
Speed dial
The speed dial function can be set on or off. In the off mode, it is not possible to
use the speed dial function.
1. Do NOT lift the handset. Press Menu.
2. Scroll to Settings using v/V. Press Select.
3. Scroll to Speed dialling using v/V. Press Select.
4. Select either on or off using v/V. Press Select.
5. Follow any on screen prompts.
Display contrast
1. Do NOT lift the handset. Press Menu.
2. Scroll to Settings using v/V. Press Select.
3. Scroll to Contrast using v/V. Press Select.
4. Adjust the display contrast using v/V. Press Save.
5. Follow any on screen prompts.
Reset
Most functions and settings can be restored back to the factory supplied defaults.
Please note when resetting the Country selection will change to UK and the
language to English.
1. Do NOT lift the handset. Press Menu.
2. Scroll to Settings using v/V. Press Select.
3. Scroll to Reset using v/V. Press Select.
4. Press OK to conrm.

English
14 www.doro.com
English
www.doro.com 15
Messages
SMS messages
This feature requires a current Caller Id subscription to be in place and only
applies to text message users (SMS). The memory will store up to 100 messages,
the maximum number of characters per message is 160. In standby mode new
messages will be indicated by 5.
Please remember individual SMS features are country dependent and will vary
or be unavailable. The following points are based on the UK service and may be
of assistance, if difculty is experienced please contact your network provider
for assistance.
To register for the SMS text messaging service you can either send a text
message to another telephone number, or text REGISTER to 00000.
Should you wish to reset your SMS settings text RESET to 00000.
You can also request a delivery report by entering * 0 # prior to any SMS
message.
An SMS message can also be sent to a telephone number that does not
support this feature, and will be received as a voice message.
Not all networks (ie mobile, cable) are compatible.
Further details regarding the SMS text message service are available from you
local network provider.
Please note!
Check that the right number for your network has been programmed (see next page).
In order for message receiving to work, you must normally subscribe to the caller ID service
supplied by your operator.
Information on which functions you can use varies according to network. Not all networks can
necessarily send/receive SMS messages on all types of equipment.
On certain networks it may sometimes be possible to send an SMS message to someone without
SMS equipment. In such cases the message will be read out by an automatic voice.

English
16 www.doro.com
English
www.doro.com 17
Messages
Read and manage messages in the Inbox
1. Do NOT lift the handset. Press Menu.
2. Scroll to Message using v /V Press Select.
3. Inbox is displayed. Press Select.
4. Scroll to the required message using v /V
. Press View.
5. Read your message using v /V
.
6. Press Select.
7. Scroll to the required option using v /V to the required option. Press
Select.
Reply: Reply to a message. Follow item 4, Writing a new SMS on the
next page.
Forward: Follow item 7, Writing a new SMS below.
Call: Dials the number currently displayed.
Save number. Saves to the phonebook. Follow item 4, Storing speed
dial numbers on page 11.
Erase: Deletes individual messages. Conrm with OK.
Erase all: Deletes all messages. Conrm with OK.
Writing a new SMS
1. Do NOT lift the handset. Press Menu.
2. Scroll to Message using v/V. Press Select.
3. Scroll to Write Message using v/V. Press Select.
4. Write your message. Press the corresponding number button one or more
times for the rst letter (refer to the table on page 9).
</> move the cursor within the text
0-9 hold pressed for 3 seconds to switch between upper/lower case
letters.
0 insert a space
5. Press Select.
6. Scroll using v/V to send or store the text message. Press Select.
7. Enter the telephone number including area code, alternatively press b to
retrieve a number from the Phonebook. Press Select.
8. Scroll using v/V to send or store the message. Press Select.
9. The display will show if the SMS has been sent or failed. If you do not
receive an error message, the message has been sent correctly.
Stored SMS messages are saved in Unsent.

English
16 www.doro.com
English
www.doro.com 17
Messages
Changing, forwarding or erasing messages in “Unsent”.
1. Do NOT lift the handset. Press Menu.
2. Scroll to Message using v /V
. Press Select.
3. Scroll to Unsent using v /V
. Press Select.
4. Scroll to the required message using v /V
. Press View.
5. Press Select.
6. Scroll to the required option using v /V
. Press Select.
Edit: Edits the text. Follow item 4, Writing a new SMS on the top of this
page.
Forward: Follow item 7, Writing a new SMS on the top of this page.
Erase: Deletes individual messages. Conrm with OK.
Erase all: Deletes all messages. Conrm with OK.
SMS message settings
Check that the right protocol and SMS centre number for your network has
been programmed. If you require further details please contact your network
provider.
Protocol
Select protocol 1 or 2. Protocol 1 is standard in most countries.
1. Do NOT lift the handset. Press Menu.
2. Scroll to Settings using v/V. Press Select.
3. Scroll to SMS using v/V. Press Select.
4. Scroll to Protocol using v/V. Press Select.
5. Select the required protocol using v/V. Press Select.
Entering telephone numbers for SMS Service Centre/network
Check that the correct SMS centre number/s for your network have been
programmed.
1. Do NOT lift the handset. Press Menu.
2. Scroll to Settings using v/V. Press Select.
3. Scroll to SMS using v/V. Press Select.
4. Scroll using v/V to the required centre (Servicecenter 1: Number,
OUT-centre - for outgoing messages, servicecenter 2: Number, IN-centre - for
incoming messages). Press Select.
5. Enter number, mistakes can be erased by pressing Clear. Press OK.

English
18 www.doro.com
English
www.doro.com 19
Messages
Message alert
You can activate a tone that is heard when new messages have been received.
1. Press Menu.
2. Scroll to Settings using v/V. Press Select.
3. Scroll to SMS using v/V. Press Select.
4. Scroll to SMS message tone using v/V. Press Select.
5. Select the required setting using v/V. Press Select.
Enter terminal number
Terminal number will only work if your network provider supports this feature.
SMS messages that do not match the stored terminal number are not received.
This function is sometimes referred to as Sub-addressing, the default setting is
for non-subaddressed conditions (usually 9 or 0).
The terminal number is used if there are several different SMS telephones are
connected to the same telephone line, allowing personal SMS messages to a
received only on a specic telephone. To send and SMS to specic terminal,
enter the destination telephone number plus the additional digit representing the
terminal number required.
1. Press Menu.
2. Scroll to Settings using v/V. Press Select.
3. Scroll to SMS using v/V. Press Select.
4. Scroll to Terminal number using v/V. Press Select.
5. Enter a terminal number. Press OK.
Please note!
In certain countries, the number for the service centre is saved using 1-2 extra gures following
the number itself. The rst gure added is the terminal number and the second (i.e. the last)
is the message type (0-9). Contact your network operator to nd out if the message type and
terminal number must be used or if these can be set to 00 or left out entirely.

English
18 www.doro.com
English
www.doro.com 19
Removing
Removing the metal plate
Removing the module contact
Removing the protective cover

English
20 www.doro.com
English
www.doro.com 21
Entry
Selecting the position of the modules
Selecting the direction of the cable
Table of contents
Languages:
Other Doro Telephone manuals

Doro
Doro 915c Syntiro User manual

Doro
Doro 914c User manual

Doro
Doro MemoryPlus 319ph User manual

Doro
Doro PhoneEasy 337ip User manual

Doro
Doro PhoneEasy 331ph User manual

Doro
Doro X20 User manual

Doro
Doro PhoneEasy 311C User manual

Doro
Doro AUB 3 User manual

Doro
Doro CARE User manual

Doro
Doro PhoneEasy Display 312C User manual
Popular Telephone manuals by other brands

Telrad
Telrad Executive set with expanded display user guide

Cortelco
Cortelco Colleague 2210 Owner's instruction manual

Foxtel
Foxtel nbn Quick install guide

Brother
Brother TX-325 Operation manual

LG-Nortel
LG-Nortel ARIA SOHO IP Hardware description and installation manual

Angekis
Angekis Cleartalk ASP04D-2 user manual