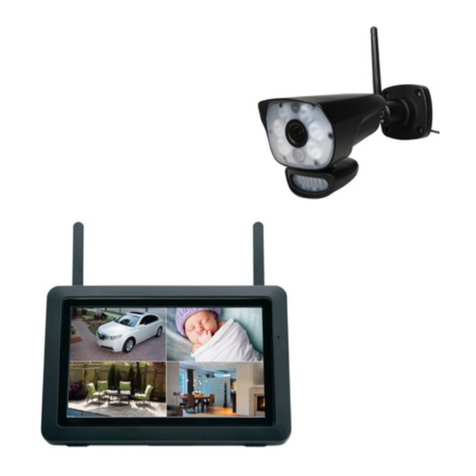
ELRO CZ60RIP11S Service manual

ELRO Camera surveillance
Set CZ60RIP11S
Extended manual

1
Feature list:
9" rechargeable, wireless LCD monitor
Record up to 1080p FHD video with audio
Weatherproof HD cameras featuring Infra Red LEDs with range up to 45 feet for nightview
500 lumens white LED to light your way or for added security
6W white LEDs with equivalent light output to 60W halogen
White LED light comes with manual, motion and timer activation
Remote access with free apps for smart phone/tablet
Programmable notification alert
Manual, motion and scheduled recording
2-way audio intercom
Expandable up to 4 cameras
Ideal for backyard, front yard, entry door, side of house, walkway, shed, driveway, detached garage
Lcd : 5v DC 2A Power adaptor (+/-5%)
Camera: 9v DC 2A (+/-5%)
RF range: 200 meter (Line of sight)
Quad view
PIR trigger and Video motion detect alert
The system includes the following components:

2
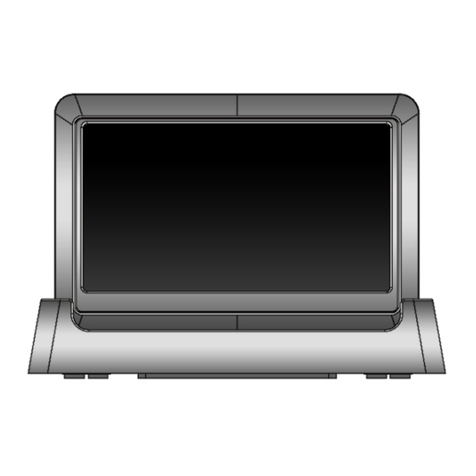
Monitor Overview
1. Wireless Antennas: Position the antennas as needed for best reception.
2. Power Button: Press and hold to turn the receiver on / off. Press power button shortly while the unit
is powered on to enter Scan mode.
3. Receiver Stand
4. Speaker
5. Stratus UID Number / QR Code: Unique ID number for connection to the system on a smartphone /
tablet.
6. Ethernet Port (RJ45): Connect the receiver to your router using the included Ethernet cable to
enable smartphone / tablet connectivity.
7. Power Port: Connect to a local power outlet using the included power adapter.
8. Volume Controls: Turn the receiver volume up and down.
9. microSD Card Slot: Insert up to a 128GB microSD card.
10. USB Port: Used for service purposes only.
11. Reset: Using a paper clip or other thin object, push the reset button to restore the system to its
default settings.
12. Power Indicator LED: Glows when receiver is connected to power.

3
The Icons display on Monitor
Icon
What it Means
SIGNAL INDICATOR
Shows how strong the camera's signal is. Signal ranges from 4
bars down to 0 bars (out of range).
SD CARD This graphic displays if an SD card is inserted into the monitor.
If blue, recording space is available.
If red, the SD card is full.
Tap this icon to view recorded files.
NEW RECORD
INDICATOR New recordings are saved on the SD card.
RECORDING
INDICATOR When this icon flashes red, it indicates that recording is in
progress.
NETWORK STATUS
INDICATOR Green- System is connected to the internet and the monitor is
connected with internet mode.
Yellow- System is connected to internet and the monitor is
connected with intranet mode.
Red- Connection failed or system is not connected to a network.

4
LED LINGHT
CONTROL DICATOR
Touch this icon to control the LED light on/off
SD CARD
OVERWRITE Displays if the SD card is allowed to overwrite files when it is full.
CHANNEL
INDICATOR
Displays the current channel number you are currently viewing. If
viewing multiple cameras at once, the camera indicator will
appear above each video display.
BATTERY
INDICATOR
Indicates the LCD monitor's battery life:
Flashing Red- Low battery
Green- Full battery
Flashing Green- Charging
ZOOM INDICATOR
When you tap this icon on the screen, the monitor breaks the
screen image into 5 areas. Tap the area you want to see in
Zoom. That area displays in 2X size. Tap the icon again to exit
Zoom mode.
VOLUME
INDICATOR
Indicates current audio volume. You must be in single channel
viewing mode to change volume. Tap + or - to raise or lower the
volume. displays when the volume is off (mute).
TALK BACK
INDICATOR Displays when TALK is pressed. Press and hold TALK on the side
of the monitor to talk back through the camera. Release TALK to
wait for a reply.
NEW DOWNLOAD
Displays if new firmware is available.
SEQUENCE
INDICATOR Displays when the monitor is in auto switch mode; it will change
channels automatically.
CHANGE CHANNEL
Tap this icon to manually change channels.

5
MOTION RECORDING
INDICATOR Indicates motion detection status.
Blue- Automatic recording OFF.
Red-Automatic recording ON.
POP-UP MENU TAB
Tap to access the pop up menu system.
Wireless Camera
1. Microphone –Captures the sound on camera side and transmits the sound from camera to receiver.
2. 6W white LEDs –White LED light comes with manual, motion and timer activation
3. Camera Lens –Catches the video in front of the lens and transmits video from camera to receiver.
4. IR LED – Infrared LED provide viewing in no/low light conditions
5. PIR Sensor – Detects motion in front of the lens and emits detection signal to transmitter.
6. Speaker – Produces the sound transmitted from the receiver.
7. Camera Antenna – Sends & receives signals to or from the receiver.
8. Wall Mounting Bracket – Use the bracket to mount the camera on a wall or other flat surfaces.
9. AC Adaptor Jack – Plug theAC adaptor to the jack for camera’s power supply.

6
10. Pair Button – The pair button is located on the back of the camera, it is used to pair the camera
with receiver.
Note:This camera includes an Auto Mechanical IR Cut Filter. When the camera changes between day
mode and night vision mode, an audible clicking noise may be heard coming from the camera. This
clicking is normal, and indicates that the camera filter is working.
Camera Installation
Before you install the camera, carefully plan where and how it will be positioned, and where you will
route the cable that connects the camera to the power adaptor.
Before starting permanent installation, verify its performance by observing the image on the receiver
when camera is positioned in the same location/position where it will be permanently installed and the
receiver is placed in the location where it will be used most of the time.
Installation Warnings
Aim the camera(s) to best optimize the viewing area: Select a location for the camera that provides a
clear view of the area you want to monitor, which is free from dust, and is not in line-of-sight to a strong
light source or direct sunlight.
Avoid installing the cameras where there are thick walls, or obstructions between the Cameras and the
Receiver.
Night Vision
This camera has built-in IR LEDs, which provides the camera with the ability to view images in no/low
light conditions.
Installing the Camera
1. Carefully unpack the camera.
NOTE: If you are installing cameras that did not come with the system, please see the pairing camera
section of this manual for details on installation.
2. Mount the camera to the wall.
Mark the position of the screw holes on the wall, and drill holes and insert 3 screws, then firmly attach
the camera to the wall. Make sure to strongly secure the screw the mounting bracket into the wall
NOTE: The camera can also be placed on a flat surface, such as a Table or Shelf, and no mounting
hardware is required.
3.Adjust the viewing angle of the camera. You can adjust camera angle to desired viewing area.
NOTE:You can install additional cameras (maximum of 4 cameras).When adding cameras that were not
included in the original box, you will need to pair up the cameras with the receiver. Refer to the camera
pairing section of this manual.
Connecting Camera Power
The camera can be powered by using the provided power adaptor
7
Power Adaptor
Connect the power adaptor to the camera.
Make sure is the DC 9V for camera, and DC 5V for Receiver
Make sure the power adaptor is placed into a grounded outlet or surge bar to
protect the camera from power fluctuations.
SCREEN DESCRIPTIONS
OVERVIEW
This section describes the monitor pop-up menu screens in detail. These pop-up menus enable you to:
•Control light settings
•• Set alarms
•• Set the brightness level for each camera connected (single channel display only)
•• Set up cameras for recording, motion detection, and other system and network requirements.
Tap and the pop-up menus display.
Light settings
Manage recorded files with this screen.You can see what recorded files you have, play them, and delete
them.

8
Tap The following screen displays.
1. Duration: This part controls how long you want the light to turn on after motion triggered. You can
turn off the light or set it to 1 min/ 3min/ 10min.
2. Timer: Set up a schedule that you want the light to turn on.

9
3. Dimmer: When the file finishes, the monitor displays the Recording File List screen again.
ALARM
When motion triggers the camera to begin recording, the monitor sounds an alarm tone.This screen lets
you determine how loud that tone will be.
1. Tap . The following screen displays.
Tap + or – to increase or decrease the alarm volume. Tap when you are finished.
BRIGHTNESS
This feature allows you to set each camera’s brightness level.
1. Tap . . . The following screen displays.

10
2. Tap + or – to increase or decrease the monitor screen brightness. Tap when you are finished.
GENERAL SETTINGS
The General Settings screen contains 6 subsections, each of which may contain sub-screens. These
sub-screenslet you setfeatures about your system. You can turn cameras on and off, establish a specific
schedule for specific cameras to record, set the date and time, and motion detection sensitivity, among
other features. The rest of this section provides details using these screens.
Main Screen
Sub-Screen
What it Does
Camera Setup Paring
This system comes with cameras already paired.
Use Pairing to assign these cameras to different
channels or to pair additional new cameras to the
monitor.
ON/OFF
Makes the cameras visible to the monitor.
Resolution
Adjusts the video quality of each camera.
Main Screen
Sub-Screen
What it Does
Recording
Setup
Duration
Set the length of time the camera records once
motion sensitivity triggers the camera to record.
Choices are 15 seconds, 30 seconds, or 1 minute
(Default - 15 seconds)
Schedule
Recording Set up a schedule for pre-determined recording
times and lengths.
File Overwrite Overwrites the oldest recorded data on the SD
card once the card is full.
System
Settings
Date & Time •Time Setting. Set the current time (including
Daylight Savings Time).
•Time Zone. Set the time zone for your system.
Time Zone •Set the time zone for your system.
•Enable/Disable Daylight Savings Time.

11
Language Changes languages setting for the montior
(English, French or Spanish)
Default Settings Restores the system to default settings.
Format SD
Card
Reformats the SD card and deletes all existing
data.
Information Displays firmware information for the monitor and
each camera.
Motion
Detection
Settings
A single screen lets you set motion detection sensitivity for each
camera.
It also lets you determine which viewing areas for each camera
should be masked from motion detection.
Network Setup
Advanced
Setup Set up Dynamic or Static IP address.
Reset
Password
Reset app password to the default (000000).
Information Displays and allows you to change information
about your network and the monitor's unique UID
number.
Firmware
Upgrade
Lets you select how you want to upgrade your firmware (from SD
card or from server).
CAMERA SETUP SCREEN
The Camera Setup screen lets you:
Pair cameras
Turn cameras on and off
Adjust the resolution
Pairing
Your cameras are paired to the monitor at the factory to channels 1 and 2. When you add a new camera
to your system, you have to “introduce” the camera and monitor to each other so they can communicate.
You can also use this procedure to move a camera from one channel to a different channel.
Some things to know about pairing cameras:
If a camerais already assigned to the selected channel, the pairing operation overwrites that camera
link with the new one.
Onlypaironecamera ata time!The monitorlinkstothe firstcamera itdetects.Iftwo ormorecameras
are in pairing mode, you can’t control which camera the monitor will detect first.

12
1. Tap Paring on the Camera Setup screen.
2. Tap the channel number you want to pair the camera to.
3. Amessage displays with instructions to press the PAIR button on the camera. Press and release the
PAIR button on the front of the camera. A 30-second countdown begins.
You must press the PAIR button during the 30-second countdown; otherwise, the camera will
not be paired.
4. The system displays live video 3 seconds after the camera is successfully paired.
On/Off
When you add a camera to your system, pair up the camera with the monitor and the system will
automatically turn it on.
1. Tap the switch bar under the camera you want to turn on or off.
2. The switch bar indicator turns green when the camera is on. It is greyed out when the camera is off.
Although the camera is turned off, it is still powered. The monitor will not receive video
signals from that camera.
3. Tap to return to the previous screen.
Resolution

13
1. Tap High or Low to set the frame rate for each camera.
2. Tap to return to the previous screen.
RECORDING SETUP SCREEN
Use the Recording Setup screen to:
Set the lengthof time the system will automatically record when something triggers motion sensitivity.
Schedule a set time and duration to automatically record from a specific camera.
Set up file retention requirements
Duration
You can set how long the camera keeps recording after motion detection triggers it. The options are 15
seconds, 30 seconds, or 1 minute. (Default = 15 secondes)
1. Tap the duattion you wish to set.
2. Tap to return to the previous screen.
Schedule Recording
This feature lets you set up a block of time for a camera to record on a weekly schedule. You can set up
multiple cameras to record at the same time and the recording times can overlap between cameras.
Total recording time is limited to the space available on the SD card. If you set the SD card to
delete the oldest files when it is full, the system continues recording; otherwise, recording
stops until space is available.
1. Tap ; the Schedule Recording Overview screen displays;

14
2. Tap MODIFY in the lower right corner. The Schedule Recording Setup screen displays.
3. Select a camera.If you want more than one camera to record at the same time, selectboth cameras.
4. Set the recording start time.
Tap the AM/PM block to toggle between them.
Tap the hour and number boxes separately and tap the up and down arrows to set the time in
HH:MM format.
5. Tap SAVE.The system returnsto the Schedule Recording Overview screen with the recording period
indicated.
6. Tap MODIFY again to set up another recording session to schedule.
Scheduled recordings are broken up into 10 minute file sizes. For example, if you record a 25
minute event, you will have two 10-minute recordings plus one 5-minute recording.
File Overwrite
This feature lets you set the system to automatically overwrite the oldest files once the SD card is full.
This will allow you to continue recording. If you do not allow overwrite, recording stops when the SD card
is full.
1. Tap to access the File Overwrite function. The following screen gives you the option of allowing
File Overwrite (tap YES) or, if File Overwrite is on, cancelling it (tap NO).
2. Tap to return to the previous screen.
SYSTEM SETTING
Use these setting options to configure your system:

15
Date and Time
Time Zone
Language
Default Settings
Format Memory Card
Information
Date and Time
1. Tap to access the Date & Time screen.
2. Tap the up or down arrow to set the month, day, and date.
3. Tap the up or down arrow to set the time.
Tap the AM/PM block to toggle between them.
Tap the up or down arrows to set the correct hour and minute.
4. Tap Synchronize with an internet time server if you want the internet clock to set your time
automatically.
You must keep your system connected to you wireless network using the Ethernet cable in
order to synchronize with the internet time server.
5. Tap to return to the previous screen.
Time Zone
Time Zone allows you to set the time zone your monitor is in. This is especially useful if you are using the
app in another time zone and you want to remotely access your recorded files. Your system will know
that your request refers to the time zone the monitor is in. [Default = (GMT-5:00) Eastern Time (USA &
Canada)].

16
1. Tap . The Time Zone screen displays,
2. Scroll up and down to your camera’s time zone and then tap it.
3. Tap the next option to turn Daylight Savings Time on or off.
4. Tap to return to the previous screen.
Language
Tap to set the language used on your system. Options are English, Japanese, and French (Français).
1. Tap the language you want your system to use.
2. Tap . The system returns to the previous screen and automatically changes over to the requested
languatge; no reboot is necessary.
Default Settings
1. Tap to return your system to the original default settings.

17
2. Tap YES on the Restore Default Settings screen.
3. Tap OK to confirm the reset.
Format SD Card
Formatting the SD card erases all data stored on the card. (Default = NO)
1. Tap to reformat your SD card.
2. Tap YES on the All stored files will be deleted! Screen (Default= NO).Aconfirmation screen displays.
Tap YES to it.
3. Aprogress bar displays on the screen.After formatting is complete, a Format OK message displays.
Information
This screen lists the firmware information of the monitor and all cameras paired to it.
1. Tap to display the screen.
2. Tap to return to previous screen.
MOTION DETECTION SETTING SCREEN

18
Motion detection settings control how strong the motion needs to be to trigger recording. This settings
screen also lets you mask off any areas in the image for the camera to ignore. For example, you may
have trees in the image area that would set off motion detection if there is a breeze.
Sensitivity
This selection allows you to set the camera’s motion detection sensitivity levels to High, Low, or Off.
1. Tap . The following screen displays.
2. Tap High, Low, or Off to set sensitivity.
3. Tap to return to the previous screen.
Mask Area
Use this selection to mask off any parts of the viewing area you do NOT want to be included for motion
detection.
1. Tap . The Mask Area screen displays, superimposed over the image from that camera.
2. Tap the squares that cover the areas of the image you do not want affected by motion detection.
3. When you are finished, tap to return to the Motion Detection Setting screen.
NETWORK SETUP SCREEN

19
This selection lets you determine your network connection type, reset the APP password, and review
your network details.
Tap to see the Nework Setup screen and option.
Advanced Setup
1. Tap to display the Advanced Setup screen.
2. Tap on your selection and fill in the fields requested. Tap SAVE.
3. Tap on your selection and fill in the fields requested.
DCHP is the most common connection. Your router will automatically assign an IP address
to your CM812732 system. Static IP is for those that have the ability to specify an IP address
for their system.
4. Reboot the monitor when prompted.
Reset Password
The Reset Password feature resets the MyCam View app’s password to the default (000000).
Tap YES, then tap to return to the Reset Password screen.
Other manuals for CZ60RIP11S
3
Table of contents
Other ELRO Security System manuals

ELRO
ELRO PK4910 User manual

ELRO
ELRO AG40SR11B Reference manual

ELRO
ELRO DVR154S User manual

ELRO
ELRO AG400011 User manual

ELRO
ELRO DVR158S User manual

ELRO
ELRO ARD51 User manual

ELRO
ELRO Pro Alarm System AP5500 User manual

ELRO
ELRO FR350111R User manual

ELRO
ELRO AS90S User manual

ELRO
ELRO HIS20S Installation instructions

ELRO
ELRO AS800011 User manual

ELRO
ELRO DWH SERIES Service manual

ELRO
ELRO DWH SERIES Instruction Manual

ELRO
ELRO HIS20USB User manual

ELRO
ELRO AS80SR11A User manual

ELRO
ELRO PRO AP55SR11B User manual

ELRO
ELRO CBFS58R-01 User manual

ELRO
ELRO AG400011 User manual

ELRO
ELRO AG40SR11A User manual

ELRO
ELRO AS90SRB User manual