manuals.online logo
Brands
  1. Home
  2. •
  3. Brands
  4. •
  5. Enabling Devices
  6. •
  7. Educational Equipment
  8. •
  9. Enabling Devices Talkable II User manual

Enabling Devices Talkable II User manual

This manual suits for next models

1

Other Enabling Devices Educational Equipment manuals

Enabling Devices 5310 User manual

Enabling Devices

Enabling Devices 5310 User manual

Enabling Devices Rocking Two Message Say It Play It User manual

Enabling Devices

Enabling Devices Rocking Two Message Say It Play It User manual

Enabling Devices Spinz-a-Round 7799 User manual

Enabling Devices

Enabling Devices Spinz-a-Round 7799 User manual

Enabling Devices Cheap Talk 4 Square Direct User manual

Enabling Devices

Enabling Devices Cheap Talk 4 Square Direct User manual

Enabling Devices 2251 User manual

Enabling Devices

Enabling Devices 2251 User manual

Enabling Devices 718-V User manual

Enabling Devices

Enabling Devices 718-V User manual

Enabling Devices Pull Ball User manual

Enabling Devices

Enabling Devices Pull Ball User manual

Enabling Devices Spinning Light Show User manual

Enabling Devices

Enabling Devices Spinning Light Show User manual

Enabling Devices Alphabet Jodey 9351 User manual

Enabling Devices

Enabling Devices Alphabet Jodey 9351 User manual

Enabling Devices 8087 User manual

Enabling Devices

Enabling Devices 8087 User manual

Enabling Devices 5310 User manual

Enabling Devices

Enabling Devices 5310 User manual

Enabling Devices 2249 User manual

Enabling Devices

Enabling Devices 2249 User manual

Enabling Devices T-Rex 3072 User manual

Enabling Devices

Enabling Devices T-Rex 3072 User manual

Enabling Devices 5060 User manual

Enabling Devices

Enabling Devices 5060 User manual

Enabling Devices Cuckoo Clock 2101 User manual

Enabling Devices

Enabling Devices Cuckoo Clock 2101 User manual

Enabling Devices Switch & Glow User manual

Enabling Devices

Enabling Devices Switch & Glow User manual

Enabling Devices Turtle Switch 729T User manual

Enabling Devices

Enabling Devices Turtle Switch 729T User manual

Enabling Devices Laugh & Learn Puppy User manual

Enabling Devices

Enabling Devices Laugh & Learn Puppy User manual

Enabling Devices Drummin' Billy 9350 User manual

Enabling Devices

Enabling Devices Drummin' Billy 9350 User manual

Enabling Devices Bump & Go 747 User manual

Enabling Devices

Enabling Devices Bump & Go 747 User manual

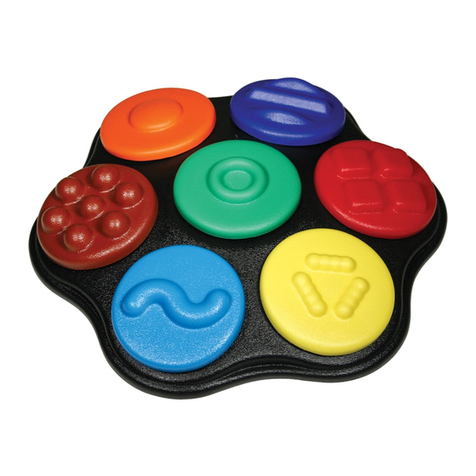
Enabling Devices Totally Tactile Communicator User manual

Enabling Devices

Enabling Devices Totally Tactile Communicator User manual

Popular Educational Equipment manuals by other brands

DISCOVER talking pen user guide

DISCOVER

DISCOVER talking pen user guide

pitsco Smart Buddies 45895 quick start guide

pitsco

pitsco Smart Buddies 45895 quick start guide

RS 3.5 quick start guide

RS

RS 3.5 quick start guide

Quanser QNET 2.0 quick start guide

Quanser

Quanser QNET 2.0 quick start guide

CAE Healthcare METIman user guide

CAE Healthcare

CAE Healthcare METIman user guide

Turning Technologies Pulse quick start guide

Turning Technologies

Turning Technologies Pulse quick start guide

TruCorp AirSim user manual

TruCorp

TruCorp AirSim user manual

LION R.A.C.E. STATION user manual

LION

LION R.A.C.E. STATION user manual

jp.ik LEAPW505 user guide

jp.ik

jp.ik LEAPW505 user guide

laerdal ASL 5000 Lung Solution for SimMan Quick setup guide

laerdal

laerdal ASL 5000 Lung Solution for SimMan Quick setup guide

Rompa GYMTOP 20143 manual

Rompa

Rompa GYMTOP 20143 manual

ScienTECH 2261 Product tutorial

ScienTECH

ScienTECH 2261 Product tutorial

Quanser 6 DOF Hexapod Laboratory guide

Quanser

Quanser 6 DOF Hexapod Laboratory guide

Surefire Flying Model Rocket Kit How to use

Surefire

Surefire Flying Model Rocket Kit How to use

ACROME myCONTROL STEWART PRO user manual

ACROME

ACROME myCONTROL STEWART PRO user manual

SmartMan Baby Manikin manual

SmartMan

SmartMan Baby Manikin manual

Nasco Life/form LF03840U instruction manual

Nasco

Nasco Life/form LF03840U instruction manual

Pitsco Education BUILDERSPACES SPACEPORT Assembly instructions

Pitsco Education

Pitsco Education BUILDERSPACES SPACEPORT Assembly instructions

manuals.online logo
manuals.online logoBrands
  • About & Mission
  • Contact us
  • Privacy Policy
  • Terms and Conditions

Copyright 2025 Manuals.Online. All Rights Reserved.

Talkable II for the VI #2600
User’s Guide
Great contrast!
Our Talkable II for the VI is terrific for the visually impaired user. Two different
colored switches are outlined in black to draw attention to the switch and make
it easier to locate the target area.
• 20 seconds total recording time
• Records two messages
• Easy single message recording
• Built-in icon holders
• Two output jacks
Size: 7 /2"L x 2 3/4"H x 4 /2"W. Requires 4 AAA Batteries. Weight: 3/4lbs.
peration:
. Carefully turn unit over and remove the small screw from the battery
compartment. Slide the battery compartment cover off. Observing polarity,
install four AAA size batteries (Not included) into the holder. Replace cover
and screw. Alkaline batteries must be used only (e.g. Duracell or Energizer
brand). Do not use rechargeable batteries or any other type of batteries
because they supply lower voltage and the unit will not perform properly.
2. Never mix brands, types or old and new batteries together. Replace the
battery compartment cover and replace the screw.
3. Turn the unit on by turning the ON/OFF/VOLUME knob located on the
bottom panel of the unit. To record, first press and hold the red “RECORD”
button press down one of the colored plates. While continuing to hold the
plate down, speak your message. Release both when you finish recording.
Record on the remaining plates in the same manner.
4. To play back your message, press lightly on the plate of your choice. It is
not necessary to continue holding the plate down when listening to the
message. The unit will continue to playback the entire message, even if
pressure on the plate is released.
5. The unit will retain recorded information indefinitely, even if the batteries
are disconnected. Previously stored information will be erased only when a
new recording is performed.
6. Playback volume can be adjusted using the “ON/OFF/VOLUME” control
knob located on the bottom panel of the unit.
To use as a switch:
7. This unit can also be used to activate switch adapted toys or devices.
Simply attach the toy or device to the corresponding /8 inch female jack
using the cords provided. There is an output jack for each or the switch
plates. When the plate is pressed, the message will play and the toy or
device will be activated. Make sure all connections are tight with no gaps
between plug and device.
8. The Talkable has holders for placing Icons or Pictures. On the back of the
unit there is a holding strip where Icons or Photos can be placed. When
inserting icon in the back holding strip, insert your icon by starting at one
side of the strip. Put the icon in at a slight angle for easy installation.
Please Note: When using the holding strip if you’re Icons, Photos or words are
printed on regular printer paper, we recommend laminating them. If not they
will not stand upright or be secure in the holding strip.
Troubleshooting:
Problem: The unit fails to operate, or operates incorrectly.
Action #1: Make sure there is no dirt or obstacles between the plates and the
housing of the unit.
Action #2: Disconnect the power by removing one of the batteries for 20
seconds in order to reset the unit. Re-install the batteries. If the unit does not
work correctly, replace all the batteries.
Problem: My device connected to the Talkable does not work.
Action #1: Make sure there are no gaps between your cord connections.
Action#2: Try your device with another switch you know works to rule it out as
the source of the problem.
Care of the Unit:
The Talkable can be wiped clean with any mild household multi-purpose, non-
abrasive cleaner and disinfectant. We recommend Simple Green, which is a non
toxic biodegradable all-purpose cleaner.
Do not use abrasive cleaners, as they will scratch the surface of the unit.
Do not submerge the unit, as it will damage the electrical components.
Rev 6/20/12