manuals.online logo
Brands
  1. Home
  2. •
  3. Brands
  4. •
  5. ETI
  6. •
  7. Thermometer
  8. •
  9. ETI 810-930 User manual

ETI 810-930 User manual

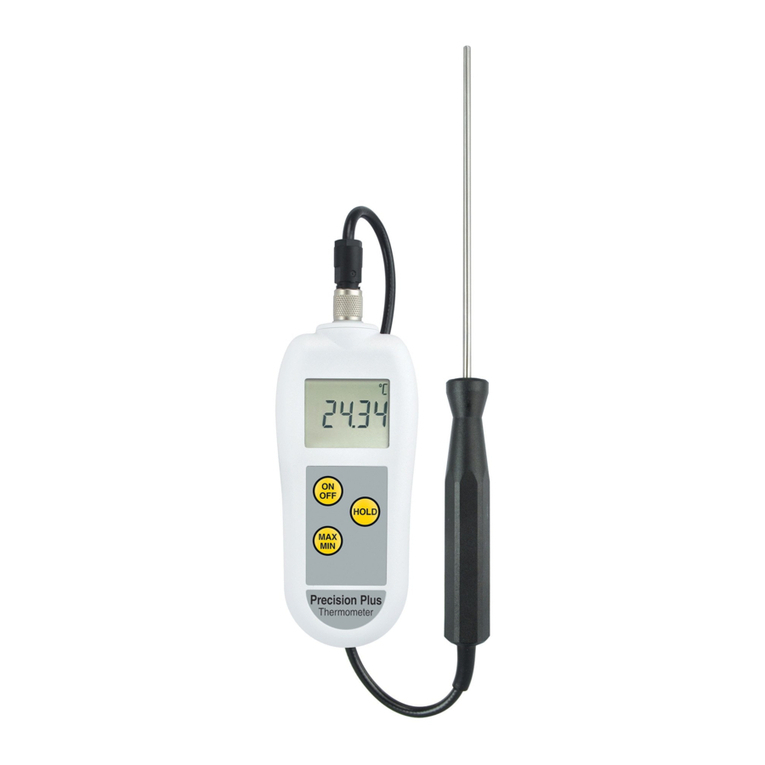
INSTRUMENT OPERATION - Open the
battery compartment and remove the
plastic tag from the battery. The instrument
is switched on by pressing the 
button, within one second the thermometer
is ready to work. Apply the tip of the
probe to the substance or medium to be
measured. The instrument reading may
take a few seconds to stabilise, depending
on the nature of the measurement.
HOLD - Press the HOLD button to capture


again to resume taking the temperature.
MAX/MIN - Press the MAX/MIN button
to display the maximum reading and a

the MAX/MIN button again to display the
minimum reading and a MIN symbol will

button again to return to normal readings.
To clear the MAX/MIN temperature memory,
turn the unit off.
°C/°F 
desired temperature scale.
BATTERY REPLACEMENT - Replace the
battery when the Bat symbol illuminates or if the
display dims, using a AAA or 1.5 volt equivalent.
EMC/RFI - Instrument performance may be
affected if operated within a high frequency

subjected to an electrostatic shock.
GUARANTEE - This instrument carries a
one-year guarantee against defects in either
components or workmanship. During this
period, products that prove to be defective
will, at the discretion of ETI, be either
repaired or replaced without charge. This
guarantee does not apply to sensors/probes,
where a six-month period is offered. The
product guarantee does not cover damage
caused by fair wear and tear, abnormal
storage conditions, incorrect use, accidental
misuse, abuse, neglect, misapplication

available within ETI’s Terms & Conditions of
Sale at etiltd.com/terms. In line with our policy
of continuous development, we reserve the

without prior notice.
OPTIONAL EXTRA - Replacement probe -
order code 810-935.
FR - FONCTIONNEMENT DU
THERMOMÈTRE Ouvrez le compartiment
des piles et enlevez la languette en plastique
des piles. Le thermomètre est mis sous


seconde. Placez l’extrémité de la sonde sur
la substance ou la surface de votre choix. Le
relevé de température a besoin de quelques
secondes pour se stabiliser, en fonction du
type de mesure.
HOLD - Maintenez le bouton HOLD enfoncé
pour procéder à un relevé de température.

nouvelle fois sur le bouton HOLD pour procéder
à un nouveau relevé de la température.
MAX/MIN - Enfoncez le bouton MAX/MIN

MAX clignotera à l’écran. Appuyez à nouveau


Enfoncez une nouvelle fois le bouton MAX/

réinitialiser la mémoire de températures
MAX/MIN, éteignez l’appareil.
°C/°F 
choisir l’échelle de température souhaitée.
REMPLACEMENT DE LA PILE - Lorsque le

en intensité, remplacez la pile par une pile
AAA ou équivalente de 1,5 volt.
EN OPTION - Sonde de remplacement – code
de commande 810-935.
810-930/23.10.18
MAX/MIN
THERMOMETER
Operating Instructions
Product code:
810-930
Supplied by
Electronic Temperature Instruments Ltd
Worthing · West Sussex · BN14 8HQ
01903 202151 · sales@etiltd.com · etiltd.com
DE - BEDIENUNG DES INSTRUMENTS
Öffnen Sie das Batteriefach und ziehen Sie
den Plastikstreifen aus der Batterie heraus.
Das Instrument wird durch Drücken der

Sekunde ist das Thermometer einsatzbereit.
Bringen Sie die Sondenspitze mit der
Substanz bzw. dem Medium in Kontakt,
für die bzw. das die Messung erfolgen soll.
Je nach Art der Messung kann es einige
Sekunden dauern, bis sich der Messwert des
Instruments stabilisiert hat.
HOLD (HALTEN) - Drücken Sie die
HOLD-Taste, um den aktuellen
Temperaturmesswert festzuhalten. Das

Drücken Sie erneut die HOLD-Taste, um die
Temperaturmessung wieder aufzunehmen.
MAX/MIN - Drücken Sie die MAX/MIN-Taste,
um den Maximalwert anzuzeigen. Dabei
blinkt ein MAX-Symbol in der Anzeige.
Drücken Sie die MAX/MIN-Taste erneut, um
den Minimalwert anzuzeigen. Dabei blinkt
ein MIN-Symbol in der Anzeige. Drücken
Sie die MAX/MIN-Taste erneut, um zu den
normalen Messwerten zurückzukehren. Zum
Löschen des MAX/MIN-Temperaturspeichers
schalten Sie das Instrument aus.
°C/°F 
gewünschte Temperatureinheit auszuwählen.
BATTERIEWECHSEL - Wechseln Sie die
Batterie, wenn das Batteriesymbol angezeigt
wird oder wenn die Anzeige schwach wird.
Setzen Sie eine Batterie des Typs AAA oder
eine entsprechende 1,5-Volt-Batterie ein.
OPTIONALES ZUBEHÖR - Ersatzsonde -
Bestellnummer 810-935.
IT - FUNZIONAMENTO DELLO STRUMENTO
Aprire lo scomparto delle batterie e
rimuovere l’etichetta di plastica dalla batteria.
Lo strumento si accende premendo il tasto

pronto a funzionare. Appoggiare la sonda
sulla sostanza da misurare. La lettura da
parte dello strumento può impiegare qualche
secondo a stabilizzarsi, a seconda della natura
della misurazione.
HOLD - Premere il tasto Hold per bloccare
la lettura della temperatura. Sul visore

il tasto HOLD per riprendere a misurare la
temperatura.
MAX/MIN - Premere il tasto Max-Min per
far apparire la lettura massima e sul visore
apparirà il simbolo MAX. Tornare a premere
il tasto MAX/MIN per far apparire la lettura
minima e sul visore apparirà il simbolo MIN.
Tornare a premere il tasto MAX/MIN per
ritornare alle letture normali. Per cancellare
le letture delle temperature massime e
minime tenere premuto il tasto MAX/MIN.
Per cancellare la memoria delle temperature
Max-Min, spegnere lo strumento.
°C/°F 
selezionare la scala di temperatura
desiderata.
SOSTITUZIONE DELLE BATTERIE - Sostituire
le batterie quando si illumina il simbolo
con il pipistrello o se la luminosità del visore
si indebolisce, usando un’AAA o batteria
equivalente a 1,5 volt.
ALTRO OPTIONAL - Sonda di sostituzione -
codice per l’ordine 810-935.
PT - FUNCIONAMENTO DO INSTRUMENTO
Abrir o compartimento e remover a etiqueta
de plástico da pilha. O instrumento é ligado


trabalhar dentro de um segundo. Aplicar a
ponta da sonda à substância ou meio a serem
medidos. A leitura do instrumento pode
demorar alguns segundos para estabilizar,
dependendo da natureza de medição.
HOLD (PREMIR) - Premir o botão HOLD
para capturar a leitura apresentada. O

botão HOLD novamente para recomeçar a
medição da temperatura.
MAX/MIN - Premir o botão de MAX/MIN
para exibir a leitura máxima e o símbolo
MAX piscará no visor. Premir o botão de
MAX/MIN novamente para indicar a leitura
mínima e o símbolo MIN piscará no visor.
Premir o botão de MAX/MIN novamente
para retornar às leituras normais. Deve

de temperatura MAX/MIN.
FUNÇÃO °C/°F 
a seleccionar a escala de temperatura desejada.
SUBSTITUIÇÃO DA PILHA - Substituir as

ou se o visor escurecer, usando duas pilhas
AAA ou equivalente a 1.5 volt.
EXTRA OPCIONAL - Substituição da sonda -

ES - FUNCIONAMIENTO DEL INSTRUMENTO
Abrir el compartimiento de las pilas y
quitar la película de plástico de las pilas.
El instrumento se enciende presionando


de la sonda a la sustancia o material cuya
temperatura se quiere determinar. El valor
registrado por el instrumento tardará unos
segundos en estabilizarse, según la clase de

HOLD

intermitentemente en el visualizador. Pulsar


MAX/MIN
visualizar la temperatura máxima registrada
y MAX se iluminará intermitentemente en el

más y MIN se iluminará intermitentemente


la temperatura. Para borrar los valores MAX y
MIN registrados, apagar el instrumento.
°C/°F 
seleccionar la escala de temperaturas deseada.
CAMBIO DE PILA - Cambiar la pila cuando
se ilumine BAT o cuando el visualizador
pierda luminosidad. Se utiliza una pila AAA o
equivalente de 1,5 voltios.
EXTRA OPTATIVO - Sonda de recambio:
número de referencia para pedirla, 810-935.

Other ETI Thermometer manuals

ETI FLOW CUP User manual

ETI

ETI FLOW CUP User manual

ETI 810-140 User manual

ETI

ETI 810-140 User manual

ETI 810-031 User manual

ETI

ETI 810-031 User manual

ETI 810-287 User manual

ETI

ETI 810-287 User manual

ETI TempTest 1 User manual

ETI

ETI TempTest 1 User manual

ETI ThermaStick Series User manual

ETI

ETI ThermaStick Series User manual

ETI DTR User manual

ETI

ETI DTR User manual

ETI TEMPTEST 2 User manual

ETI

ETI TEMPTEST 2 User manual

ETI Thermapen Blue with Bluetooth IE Wireless... User manual

ETI

ETI Thermapen Blue with Bluetooth IE Wireless... User manual

ETI 800-805 User manual

ETI

ETI 800-805 User manual

ETI THERMADATA User manual

ETI

ETI THERMADATA User manual

ETI THERMAMITE User manual

ETI

ETI THERMAMITE User manual

ETI Raytemp 38 User manual

ETI

ETI Raytemp 38 User manual

ETI RayTemp 3 User manual

ETI

ETI RayTemp 3 User manual

ETI ThermaData Logger User manual

ETI

ETI ThermaData Logger User manual

ETI 800-850 User manual

ETI

ETI 800-850 User manual

ETI THERMAQ 2 User manual

ETI

ETI THERMAQ 2 User manual

ETI Precision User manual

ETI

ETI Precision User manual

ETI 801-590 User manual

ETI

ETI 801-590 User manual

ETI DISHTEMP User manual

ETI

ETI DISHTEMP User manual

ETI Mini RayTemp User manual

ETI

ETI Mini RayTemp User manual

ETI 810-270 User manual

ETI

ETI 810-270 User manual

ETI 814-060 User manual

ETI

ETI 814-060 User manual

ETI THERMAQ BLUE User manual

ETI

ETI THERMAQ BLUE User manual

Popular Thermometer manuals by other brands

Traceable 4351 instructions

Traceable

Traceable 4351 instructions

inventum TMC609 instruction manual

inventum

inventum TMC609 instruction manual

Veridian Healthcare JXB-311 instruction manual

Veridian Healthcare

Veridian Healthcare JXB-311 instruction manual

Digoo DG-TH1180 operating instructions

Digoo

Digoo DG-TH1180 operating instructions

Beurer Janosch JFT 60 operating instructions

Beurer

Beurer Janosch JFT 60 operating instructions

Microlife MyColor MT 16B1 quick start guide

Microlife

Microlife MyColor MT 16B1 quick start guide

Oricom HFS1000 user guide

Oricom

Oricom HFS1000 user guide

ThermoWorks Therma 20 Plus operating instructions

ThermoWorks

ThermoWorks Therma 20 Plus operating instructions

BabyOno 118 Instructions for use

BabyOno

BabyOno 118 Instructions for use

DeWalt DCT414 instruction manual

DeWalt

DeWalt DCT414 instruction manual

Omega HH504 user manual

Omega

Omega HH504 user manual

Taylor 519 instruction manual

Taylor

Taylor 519 instruction manual

Zico ZI-9615 user manual

Zico

Zico ZI-9615 user manual

La Crosse Technology 308-147 manual

La Crosse Technology

La Crosse Technology 308-147 manual

Optex PT-5LD instruction manual

Optex

Optex PT-5LD instruction manual

HoMedics TO-R100-0GB manual

HoMedics

HoMedics TO-R100-0GB manual

Eco4us EK-MT2 operating instructions

Eco4us

Eco4us EK-MT2 operating instructions

Omega Engineering OS520 Handbuch

Omega Engineering

Omega Engineering OS520 Handbuch

manuals.online logo
manuals.online logoBrands
  • About & Mission
  • Contact us
  • Privacy Policy
  • Terms and Conditions

Copyright 2025 Manuals.Online. All Rights Reserved.