gehalten. Über den Bildschirm scrollt 'auto off disabled'. Die
automatische Abschaltfunktion wird wieder aktiviert, sobald
die Einheit ausgeschaltet wird.
BEWEGLICHES DISPLAY - Das Display der Einheit kann
sich mit jeder Umdrehung um 90° drehen, dadurch kann
es aus jedem Winkel bzw. mit beiden Händen verwendet
werden. Diese Funktion kann deaktiviert werden. Drücken
Sie den LOCK-Knopf und halten Sie ihn für 3 Sekunden
gedrückt, um die Ausrichtung des Displays zu sichern.
'Loc on' wird angezeigt. Zur Aktivierung dieser Funktion
wiederholen Sie diesen Vorgang und 'Loc off' wird angezeigt.
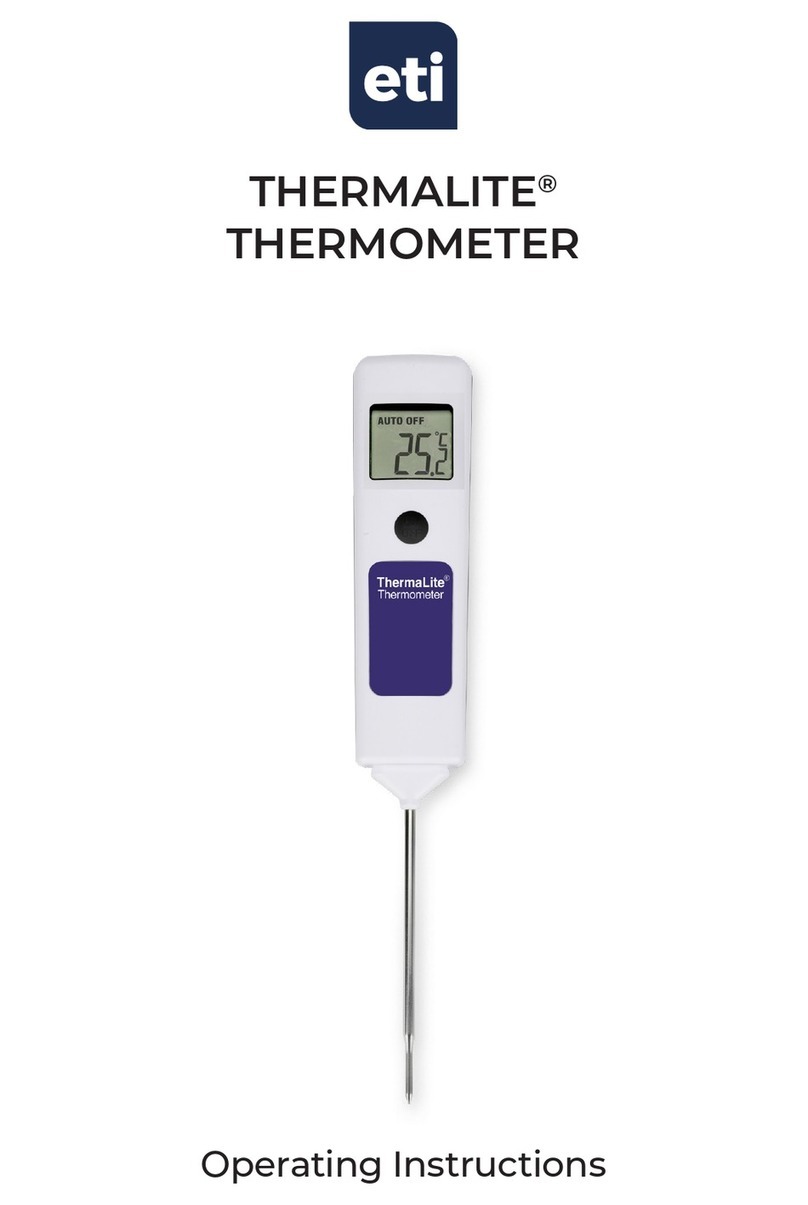
SMARTE HINTERGRUNDBELEUCHTUNG - Die Einheit
ist mit einer smarten Hintergrundbeleuchtung
ausgestattet, die sich automatisch einschaltet, wenn
die Einheit bei schwachem Licht verwendet wird. Die
Hintergrundbeleuchtung geht für 10 Sekunden an. Bitte
beachten Sie, dass sich der Lichtsensor im 'o' auf dem
Smart Thermometer Label bendet.
MAX/MIN - Drücken Sie die MAX/MIN-Knöpfe, um die
Werte anzuzeigen. Das Instrument speichert Max/Min-
Werte, wenn es ausgeschaltet wird. Um sie zu löschen,
drücken Sie den MAX/MIN-Knopf für drei Sekunden
und 'rst' wird angezeigt. Bitte beachten Sie, dass das
Instrument, solange es sich im MAX/MIN-Modus bendet,
weiter messen wird.
HOLD - Drücken Sie den HOLD-Knopf, um die letzte
gemessene Temperatur zu speichern. HOLD wird
angezeigt. Um die Messung fortzusetzen, drücken Sie
den HOLD-Knopf erneut.
°C/°F - Drücken Sie bei ausgeschalteter Einheit 5
Sekunden lang auf den ON/OFF-Knopf, um zwischen °C
und °F zu wechseln. Nach dem Wechsel wird die Einheit
die ausgewählte Maßeinheit beibehalten.
BATTERY REPLACEMENT - Das Symbol für schwache
Batterien zeigt an, wenn die Batterien ausgetauscht
werden müssen. Das Instrument wird weiterhin
korrekt messen, aber wir empfehlen, dass die Batterien
so bald wie möglich ausgetauscht werden. Um die
Batterien auszutauschen, entfernen Sie den Deckel des
Batteriefachs an der Unterseite. Verwenden Sie dafür
einen Pozidriv-Schraubendreher. Ersetzen Sie die AAA-
Batterien und überprüfen Sie, dass die Polung korrekt
ist. Setzen Sie den Deckel wieder ein und ziehen Sie die
Schrauben fest, damit die Einheit wasserdicht bleibt. Der
Deckel kann nur auf eine Art eingesetzt werden.
Bitte beachten: Wenn die Batterien entfernt werden,
werden auch die eingestellten Modi wie Lock und
Max/Min auf die Werkseinstellungen zurückgesetzt.
REINIGUNG DES INSTRUMENTS - Reinigen Sie das
Instrument regelmäßig mit einem antibakteriellen
Sonden-Reinigungstuch, um mögliches
lebensmittelbedingtes Bakterienwachstum zu verhindern.
WARNUNG: IPA und andere Lösungsmittel können das
Gehäuse und das Display dieses Geräts beschädigen.
FEHLERMELDUNGEN - 'Lo' wird angezeigt, wenn Ihr
Messwert unterhalb der Messskala des Instruments
liegt. 'Hi' wird angezeigt, wenn Ihr Messwert oberhalb
der Messskala des Instruments liegt. 'Err' wird angezeigt,
wenn der Sensor nicht richtig funktioniert. Wenn die
Fehlermeldung dauerhaft angezeigt wird, kontaktieren
Sie bitte unsere Serviceabteilung. Dort wird man Ihnen
gerne weiterhelfen.
IT - INSTRUMENT OPERATION - Accendere lo strumento
e applicare la punta della sonda sulla sostanza, supercie
o area che deve essere misurata. Alla sonda deve essere
consentito un tempo adeguato per stabilizzare la
temperatura del prodotto da misurare.
AUTO-OFF - L’unità si spegne automaticamente dopo
10 minuti per massimizzare la durata della batteria.
Si può disabilitare tale funzione. Per disabilitare la
funzione di spegnimento automatico, spegnere l’unità
e trattenere allo stesso tempo i pulsanti HOLD/LOCK
(TRATTENIMENTO/BLOCCO) e ON/OFF - sullo schermo
compare 'auto off disabled' ('spegnimento automatico
disabilitato'). Allo spegnimento dell’unità, la funzione di
spegnimento automatico viene abilitata di nuovo.
DISPLAY ROTAZIONE - La visualizzazione dell’unità ruota
di 90º ad ogni giro e la si può quindi usare con qualsiasi
angolazione o mano. Si può disabilitare tale funzione.
Premere e trattenere il bottone LOCK per
3 secondi per bloccare l’orientamento del display,
comparirà 'Loc on' ('Blocco attivato'). Per abilitare la
funzione ripetere l’operazione e compare 'Loc oFF'
('Blocco disattivato').
RETROILLUMINAZIONE INTELLIGENTE - Incorporata
nell’unità si trova la retroilluminazione intelligente che
si accende automaticamente quando si usa l’unità in
condizioni di scarsa visibilità. La retroilluminazione si attiva
per 10 secondi. Si prega di notare che il sensore luce è
incorporato nell’ 'o' dell’etichetta termometro intelligente.
MAX/MIN - Premere il pulsante MAX/MIN per visualizzare
i valori. Quando spento, lo strumento conserva i valori
minimi e massimi. Per resettarlo, premere il pulsante
MAX/MIN per tre secondi e compare la scritta 'rst'.
Preghiamo di notare che lo strumento continua la
rilevazione quando in modalità MAX/MIN.
HOLD - Premere il bottone HOLD ('Trattenimento') per
conservare l’ultima temperatura rilevata, si visualizza
HOLD. Per continuare il rilevamento, premere
nuovamente il bottone HOLD.
°C/°F - Con l’unità accesa, premere e trattenere il bottone
ON/OFF per 5 secondi per passare da °C a °F. Una volta
effettuata la variazione, l’unità rimane nel valore selezionato.
BATTERY REPLACEMENT - Il simbolo di batteria
scarica indica che è necessario cambiare le pile. Lo
strumento continua ad effettuare rilevamenti accurati
ma consigliamo di cambiare le pile il più presto possibile.
Per sostituire le pile, togliere il coperchio sul fondo con un
cacciavite Pozidriv. Sostituire le pile AAA controllandone
la polarità. Sostituire il coperchio e serrare per garantire
che l’unità rimanga impermeabile. Si può montare il
coperchio in un solo verso. Si prega di notare: Quando
si tolgono le batterie, modalità quali Lock e Max/Min
torneranno all’impostazione di default.
PULIZIA STRUMENTO - Onde evitare la potenziale
crescita di batteri di origine alimentare, pulire lo
strumento regolarmente con una salvietta antibatterica
per sonde.
AVVERTENZA: IPA e altri solventi potrebbero danneggiare
la custodia e lo schermo di questo strumento.
MESSAGGI DI ERRORE - Se il rilevamento è inferiore
alla gamma dello strumento, compare la scritta 'Lo'. Se
il rilevamento è superiore alla gamma dello strumento,
compare la scritta 'Hi'. In caso di avaria, compare il
messaggio 'Err'. Se il messaggio di errore persiste,
contattare il nostro reparto di assistenza.
PT - INSTRUMENT OPERATION - Ligue o aparelho e
coloque a ponta da sonda na substância, superfície ou
área a ser medida. Deverá permitir o tempo necessário á
sonda estabilizar à temperatura do item a ser medido.
AUTO-OFF - A unidade desligar-se-á automaticamente
após 10 minutos, para maximizar a duração das pilhas.
Esta função pode ser desactivada. Para desactivar a
função de desligamento automático, desligue a unidade
e, depois, prima e mantenha premidos os botões HOLD/
LOCK (Reter/Bloquear) e ON/OFF (Ligar/Desligar)
ao mesmo tempo - a mensagem 'auto off disabled'
('desligamento automático desactivado') percorrerá o
ecrã. Depois de a unidade ser desligada, reverterá para a
activação da função de desligamento automático.
VISOR ROTATIVO - O visor da unidade rodará 90° com
cada volta, para que possa ser utilizado em qualquer
ângulo e com qualquer mão. Esta função pode ser
desactivada. Prima e mantenha premido o botão
LOCK (Bloquear) durante 3 segundos para bloquear a
orientação do visor; será apresentada a mensagem
'Loc on' ('Bloqueio activado'). Para activar esta função,
repita o passo anterior; será apresentada a mensagem
'Loc oFF' ('Bloqueio desactivado').
RETROILUMINAÇÃO INTELIGENTE - A unidade incorpora
retroiluminação inteligente que se liga automaticamente
quando a unidade está a ser utilizada em condições
de fraca luminosidade. A retroiluminação irá activar-
se durante 10 segundos. Note que o sensor de luz está
incorporado no 'o' no rótulo do termómetro inteligente.
MAX/MIN - Prima o botão MAX/MIN para que os valores
sejam apresentados. O instrumento retém os valores
do máximo e mínimo quando é desligado. Para repor,
prima o botão MAX/MIN durante três segundos; será
apresentada a mensagem 'rst' ('repor'). Note que,
enquanto estiver no modo MAX/MIN, o instrumento
continuará a realizar a medição.
HOLD - Prima o botão HOLD (Reter) para reter a última
temperatura medida; será apresentada a mensagem
'HOLD' ('Reter'). Para continuar a medição, prima
novamente o botão HOLD.
°C/°F - Com a unidade desligada, prima e mantenha
premido o botão ON/OFF durante 5 segundos para
alternar entre °C e °F. Depois da alteração, a unidade
permanecerá na escala de valores seleccionada.
BATTERY REPLACEMENT - O símbolo de pilha fraca
indicará quando é que as pilhas precisam de ser
substituídas. O instrumento continuará a realizar
medições com precisão, mas recomendamos que as
pilhas sejam mudadas assim que possível. Para substituir
as pilhas, remova a tampa das pilhas no fundo da
unidade, utilizando uma chave de fendas Pozi. Substitua
as pilhas AAA, assegurando-se de que a polaridade
está correcta. Volte a colocar a tampa e aparafuse para
garantir que a unidade mantém a estanquicidade. A
tampa só pode ser encaixada de uma forma.
Nota: Se as pilhas forem removidas, as denições de
modos como Lock (Bloqueio) e Max/Min
(Máximo/Mínimo) serão repostas para as predenições.
LIMPEZA DO INSTRUMENTO - Limpe o instrumento
regularmente com um toalhete antibacteriano para
sondas, para impedir a potencial proliferação de bactérias
de origem alimentar.
ADVERTÊNCIA: O IPA e outros solventes podem causar
danos ao revestimento e ao visor deste instrumento.
MENSAGENS DE ERRO - Se estiver a medir abaixo do
intervalo de alcance do instrumento, será apresentada
a mensagem 'Lo' ('Baixa'). Se estiver a medir acima do
intervalo de alcance do instrumento, será apresentada
a mensagem 'Hi' ('Alta'). Se houver uma avaria da
sonda, será apresentada a mensagem 'Err' ('Erro'). Se a
mensagem de erro continuar a aparecer, contacte nosso
departamento de assistência para obter mais ajuda.
ES - INSTRUMENT OPERATION - Encender el
instrumento y aplicar la punta de la sonda a la sustancia,
supercie o área que se desee medir. Permitir que pase
un tiempo suciente para que la punta se estabilice a la
temperatura del objeto que se desea medir.
AUTO-OFF - La unidad se apagará después de
transcurridos 10 minutos a n de potenciar al máximo la
vida útil de la batería. Se puede desactivar esta función.
Para desactivar la función de apagado automático, apague
la unidad, y luego mantenga presionados los botones
HOLD/LOCK (guardar/bloquear) y ON/OFF (encendido/
apagado) a la vez. Aparecerá el mensaje 'auto off disabled'
(apagado automático desactivado) a lo largo de la pantalla.
Una vez apagada la unidad, se reestablecerá la función de
apagado automático como activada.
PANTALLA ROTATORIA - La pantalla de la unidad rotará
90 grados con cada pulsación de forma tal que pueda
utilizarse a cualquier ángulo y con cualquier mano.
Esta función puede ser desactivada. Mantenga pulsado
el botón LOCK (bloquear) durante 3 segundos para
bloquear la orientación de la pantalla y aparecerá el
mensaje 'Loc on' (bloqueo encendido). Para habilitar esta
función, repita el procedimiento como se ha detallado
anteriormente y luego aparecerá el mensaje 'Loc oFF'
(bloqueo apagado).
RETROILUMINACIÓN INTELIGENTE - La unidad
incorpora una función de retroiluminación inteligente
que se enciende automáticamente cuando se usa la
unidad en condiciones de poca luz. La retroiluminación
se activará durante 10 segundos. Tenga en cuenta que el
sensor de la luz está integrado en el 'o' en la etiqueta del
termómetro inteligente.
MAX/MIN - Pulse el botón MAX/MIN para visualizar los
valores. Cuando se apaga, el instrumento retiene los
valores máx./mín. Para reestablecer los valores, pulse el
botón MAX/MIN durante tres segundos. Aparecerá el
mensaje 'rst' (reestablecer). Tome en cuenta que mientras
el instrumento esté en el modo MAX/MIN, éste continuará
tomando la mediación.
HOLD - Pulse el botón HOLD (guardar) para guardar la
última lectura de medición. El mensaje HOLD (guardar)
aparecerá. Para continuar midiendo, presione el botón
HOLD (guardar) nuevamente.
°C/°F - Una vez apagada la unidad, mantenga pulsado el
botón ON/OFF (encendido/apagado) durante
5 segundos para cambiar el valor entre °C y °F. Una vez
cambiado el valor, la unidad permanecerá en el valor
seleccionado.
BATTERY REPLACEMENT - El símbolo de pila baja
indicará si las pilas necesitan ser sustituidas. El
instrumento continúa midiendo de forma precisa, sin
embargo sugerimos cambiar las pilas por unas nuevas
tan pronto como sea posible. Para cambiar las pilas, retire
la cubierta del compartimento de la pila, situada en la
parte inferior, con un destornillador pozi. Reemplace
las baterías AAA asegurándose de que la polaridad sea
correcta. Reemplace la cubierta y ajuste a n de asegurar
de que la unidad permanezca impermeable. La cubierta
solo puede ser colocada de una sola forma. Tome en
cuenta que al retirar las pilas, se reestablecerán los ajustes
de los modos como Lock (bloquear) y Max/Min (máx./
mín.) conforme al ajuste pre-determinado.
LIMPIEZA DEL INSTRUMENTO - Limpie el instrumento
con regularidad utilizando un paño anti-bacteriológico
para sensor a n de evitar el posible crecimiento de
bacterias transmitidas por los alimentos.
ADVERTENCIA: El alcohol isopropílico y otros
disolventes pueden causar daños en la carcasa y la
pantalla de este instrumento.
MENSAJES DE ERROR - Aparecerá el mensaje 'Lo' (bajo)
si está midiendo por debajo del rango de medición
del instrumento y el mensaje 'Hi' (alto) si está midiendo
por encima del rango de medición del instrumento. El
mensaje 'Err' (error) aparecerá si el sensor sufre una falla.
Si el mensaje de error persiste, póngase en contacto con
nuestro departamento de atención al cliente para que les
proporcione más asistencia al respecto.


