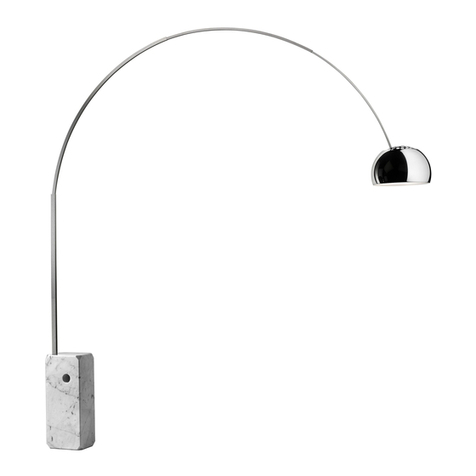
FLOS CAPTAIN FLINT User manual

CAPTAIN FLINT
DESIGN BY MICHAEL ANASTASSIADES
24586 ISTR.MONT.CAPTAIN FLINT EUR-USA.indd 1 23/02/16 14:34

2 3
<IT> ISTRUZIONI DI INSTALLAZIONE ED IMPIEGO
ATTENZIONE!
La sicurezza dell’apparecchio é garantita solo rispettando
queste istruzioni sia in fase di installazione che di impiego;
é pertanto necessario conservarle.
AVVERTENZE:
- All’atto dell’installazione ed ogni volta che si interviene
sull’apparecchio, assicurarsi che sia stata tolta la tensione
di alimentazione.
- L’apparecchio non può essere in alcun modo modificato
o manomesso, ogni modifica ne può compromettere la
sicurezza rendendo lo stesso pericoloso. FLOS declina
ogni responsabilità per i prodotti modificati.
- Se il cavo flessibile si danneggia, deve essere sostituito da
FLOS o da personale qualificato al fine di evitare pericoli.
- Il simbolo riportato sull’apparecchio indica che il
prodotto deve essere smaltito in modo differenziato dai
rifiuti urbani.
- La sorgente luminosa non può essere sostituita
dal cliente. Per informazioni contattare FLOS.
DATI TECNICI
1 LED 20W
ISTRUZIONI PER LA PULIZIA DELL’APPARECCHIO
- Per la pulizia dell’apparecchio utilizzare esclusivamente
un panno morbido eventualmente inumidito con acqua e
sapone.
- Attenzione: non utilizzare alcool o solventi.
<EN> INSTRUCTION FOR CORRECT INSTALLATION AND USE
WARNING!
The safety of this fitting can only be guaranteed if these
instructions are observed, during both installation and
use. Please retain these instructions safety.
REMARKS:
- When installing and whenever acting on the appliance,
ensure that the power supply has been switched off.
- The appliance may in no way be modified or tampered
with, any modification may compromise safety causing
the appliance to become dangerous. FLOS declines all
responsibility for products that are modified.
- Should the external trailing cable get damaged,it must
be replaced by FLOS or by qualified personnel in order to
avoid any danger.
- The symbol shown on the device indicates that the
product must be thrown out in a different manner than
with the urban trashes.
- The light source cannot be replaced by the
customer. Contact FLOS for information.
TECHNICAL DATA
1 LED 20W
CLEANING INSTRUCTIONS
- Use only a soft cloth to clean the appliance, dampened
with water and soap or mild cleanser if needed for
resistant dirt
- Warning: do not use alcohol or other solvents.
24586 ISTR.MONT.CAPTAIN FLINT EUR-USA.indd 2 23/02/16 14:34

2 3
<DE> INSTALLATION - UND GEBRAUCHSANWEISUNGEN
ACHTUNG!
Wir garantieren nur dann für die Sicherheit der Leuchte,
wenn diese Anweisungen sowohl bei der Installation als
auch beim Gebrauch genau beachtet werden. Es ist daher
ratsam, sie aufzubewahren.
BEMERKUNGEN:
- Bei der Installation und bei Eingriffen an der Leuchte ist
sicherzustellen, daß die Anlage vom Netz abgeschaltet ist.
- Der Apparat darf auf keinen Fall veraendert oder unerlaubt
geoeffnet werden, jede Veraenderung desselben kann die
Sicherheit in Frage stellen und somit gefaehrlich werden.
FLOS lehnt jede Verantwortung fuer unsachgemaess
behandelte Produkte ab.
- Falls das flexible äußere Kabel beschädigt wird, muß es
von FLOS oder von qualifiziertem Personal ersetzt werden,
um Gefahren zu vermeiden.
- Das auf dem Gerät wiedergegebene Symbol zeigt an, dass
das Produkt getrennt vom Stadtmüll entsorgt werden muss.
-
Die Leuchtquelle kann nicht vom Kunden
ausgewechselt werden. Für Informationen bitte FLOS
kontaktieren.
TECHNISCHE DATEN
1 LED 20W
REINIGUNGSVORSCHRIFTEN
- Bei der Reinigung der Leuchte darf man ausschließlich
weiche Tücher verwenden. Eventuell kann man diese mit
Wasser und Seife oder mit einem neutralen Reinigungsmittel
anfeuchten.
<FR> INSTRUCTIONS D’INSTALLATION ET D’EMPLOI
ATTENTION!
La sûreté de cet appareil est garantie uniquement si l’on
respecte ces instructions soit en phase d’installation soit
pendant l’utilisation; il faut donc les conserver.
NOTICES:
- Au moment de l’installation et chaque fois que l’on
intervient sur l’appareil, s’assurer que la tension
d’alimentation ait été coupée.
- L’appareil ne peut être modifié ou altéré de
quelque manière que ce soit, toute modification peut
compromettre la sécurité de celui-ci en le rendant
dangereux. FLOS décline toute responsabilité pour les
produits modifiés.
- Si le cordon flexible externe est endommagé, il doit
être remplacé par FLOS ou par le personnel qualifié afin
d’éviter des dangers.
- Le symbole reporté sur l’appareil indique que le
produit doit être éliminé d’une autre façon que celle avec
les déchets urbains.
- La source lumineuse ne peut pas être substituée
par le client. Pour obtenir des informations,
contacter la société FLOS.
DONNEES TECHNIQUES
1 LED 20W
INSTRUCTIONS POUR LE NETTOYAGE
- Pour le nettoyage de l’appareil utiliser exclusivement un
chiffon doux, humecté si nécessaire, avec de l’eau et du
savon ou avec un détergent neutre pour les salissures
les plus tenaces.
- Attention: ne pas utiliser d’alcool ou solvents.
24586 ISTR.MONT.CAPTAIN FLINT EUR-USA.indd 3 23/02/16 14:34

4 5
<ES> INSTRUCCIONES DE INSTALACIÓN Y DE USO
¡ATENCIÓN!
La seguridad del aparato sólo puede garantizarse con la
condición de que se respeten las siguientes instrucciones,
tanto en la fase de instalación como de uso, por lo cual se
recomienda conservarlas.
ADVERTENCIA:
- Para efectuar la instalación, y toda vez que se efectúe
alguna operación en el aparato, asegurarse de haber
cortado la corriente eléctrica.
- El aparato no puede ser en ningùn caso modificado o
forzado, cualquier modificaciòn puede comprometer la
seguridad haciéndolo peligroso. FLOS declina cualquier
responsabilidad por los productos modificados.
- Si el cable externo se estropea, debe ser sustituido
por FLOS o por personal cualificado con el fin de evitar
situaciones peligrosas.
- El símbolo marcado en el aparato indica que el
producto debe ser eliminado en modo diferenciado del
resto de los desechos urbanos.
- La fuente luminosa no puede ser sustituida por el
cliente.Paramásinformaciones,ponerseencontacto
con FLOS.
DATOS TECNICOS
1 LED 20W
INSTRUCCIONES PARA LIMPIAR EL APARATO
- Para la limpieza del aparato, utilizar exclusivamente un
paño suave. En caso de suciedad más resistente, humedecer
el paño con agua y jabón o un detergente neutro.
- Advertencia: no emplear alcohol ni disolventes.
<PT> ISTRUÇÕES INSTALAÇÃO E USO
ATENÇÃO!
A segurança do aparelho é garantida somente se
respeitarmos as instruções tanto na fase de instalação
como na de uso; portanto é necessário conservar tais
instruções.
ADVERTÊNCIA:
- Quando se instala e cada vez que se mexe no aparelho,
ter a certeza que foi desligado da tensão de alimentação.
- De forma alguma o aparelho deve ser modificado ou
alterado, toda e qualquer modificação pode comprometer
a segurança tornando o aparelho perigoso. FLOS declina
toda e qualquer responsabilidade pelos produtos
modificados.
- Se o cabo flexível está danificado, deve ser substituído
pela FLOS ou por pessoal qualificado para evitar qualquer
perigo.
- O símbolo indicado no aparelho indica que o produto
deve ser eliminado de forma diferenciada em relação ao
lixo urbano.
- A fonte luminosa não pode ser substituída pelo
cliente. Para maiores informações contactar FLOS.
DADOS TÉCNICOS
1 LED 20W
INSTRUÇÕES PARA A LIMPEZA DO APARELHO
- Para limpeza do aparelho utilizar exclusivamente um
tecido macio eventualmente úmido com água e sabão ou
detergente neutro para a sujeira mais difícil.
- Atenção: não utilizar álcool ou solventes.
24586 ISTR.MONT.CAPTAIN FLINT EUR-USA.indd 4 23/02/16 14:34

4 5
<RUS>
ИНСТРУКЦИИ ПО МОНТАЖУ И ПРИМЕНЕНИЮ
ВНИМАНИЕ!
Надёжность устройства гарантируется только при
соблюдении данных инструкций, как в фазе монтажа,
так и при применении, поэтому необходимо обеспечить их
сохранность.
ПРЕДУПРЕЖДЕНИЯ:
- В момент установки и каждый раз при проведении работ
с устройством, убедиться в снятии напряжения питания.
- Устройство не может изменяться или разбираться, любые
изменения могут нарушить надёжность, делая его опасным.
FLOS не несёт ответственность за измененную продукцию.
- При повреждении гибкого кабеля он должен заменяться
FLOS или квалифицированным персоналом в целях
предотвращения опасности.
- Символ приведённый на устройстве, указывает на
то, что данная продукция должна быть переработана
отдельно от городских отходов.
-
Источник света не может быть заменен
заказчиком. Для получения информации
связаться с компанией FLOS.
ТЕХНИЧЕСКИЕ ДАННЫЕ EUR
1LED 20Вт.
ИНСТРУКЦИИ ПО ОЧИСТКЕ УСТРОЙСТВА
Для очистки устройства использовать только мягкую
тряпку, смоченную водой с мылом или нейтральным
моющим средством для наиболее стойких загрязнений.
- Внимание: Не использовать спирт или другие растворители.
< J > 取り付けおよびご使用方法
危険ですので、器具を改造したり、部品を追加・
変更して使用しないでください。改造した製品
に対しては、FLOSは一切責任を負いません。
警告
安全な器具の取り付けおよびご使用のために、取
扱説明書に従って作業を行ってください。また、
取扱説明書は必ず保管してください。
注意
‐取り付け作業および取り外しや再取り付け時
には、必ず電源を切ってください。
‐危険ですので、器具を改造したり、部品を追
加・変更して使用しないでください。改造した製
品に対しては、FLOSは一切責任を負いません。
- 器具上の表示 は、一般ごみと区別し 本製品
を廃棄しなければならないことを表しますアメリ
カ対応のみ高温発光です。
-
光源はお客様の手でお取り替えいただけませ
ん。 詳しくはFLOSまでお尋ね下さい。
技術的な仕様
1発光ダイオード 20W.
器具の清掃について
器具の清掃には、柔らかい布を使用してくださ
い。落ちにくい汚れは、柔らかい布を石鹸水また
は薄めた中性洗剤に浸し、十分に絞ってから拭
き取ってください。
- 注 意: アルコールや溶剤などは使用しないで
くだ さい 。
24586 ISTR.MONT.CAPTAIN FLINT EUR-USA.indd 5 23/02/16 14:34

6 7
<CN> 正确安装指南和使用说明
警告!
只有在安装阶段和使用期间遵守这份说明书的
要求,才能保证设备的安全。因此请妥善保管
此说明书。
注意事项:
- 在每次灯具安装及操作时,必须确保电源已
被断开。
- 不得以任何方式更改或擅自拆卸灯具,任
何更改都可能危害到安全,并引发危险。如因
修改导致产品出现问题,FLOS拒绝承担任何责
任。
- 如果外部拖线电缆损坏,必须要由FLOS人员
或专业人员对其进行更换以避免危险的发生。
-灯具上标有 符号,表明产品废品的处理
方式和普通城市垃圾的处理方式不同。
技术参数
1个20WLED灯
灯具清洗说明
- 只能使用软布对灯具进行清洗,软布可用水
或肥皂泡打湿,以清除顽固污渍
- 警告:不得使用酒精或溶剂。
<SA>
24586 ISTR.MONT.CAPTAIN FLINT EUR-USA.indd 6 23/02/16 14:34

6 7
<IT> Fig.1 Svitare le viti (A) utilizzando la chiave
(B) fornita in dotazione e separare la flangia
inferiore (C) dalla flangia superiore (D).
<EN> Fig.1 Loose the screws (A) using the wrench (B)
supplied as standard and separate the lower
flange (C) from the upper one (D).
<DE> Abb.1 Lösen Sie die Schrauben (A), indem Sie
den bereitgestellten Schlüssel (B) verwenden,
um den unteren Flansch (C) vom oberen
Flansch (D) zu trennen.
<FR> Fig.1 Dévisser les vis (A) à l’aide de la clé (B)
fournie et séparer la platine inférieure (C) de la
platine supérieure (D).
<ES> Imag.1 Desatornillar los tornillos (A) con la
llave (B) incluida y separar la pestaña inferior
(C) de la superior (D).
<PT> Fig.1 Desapertar os parafusos (A) utilizando a
chave (B) fornecida e separar a flange inferior
(C) da flange superior (D).
<RUS>
Рис.1 Вывернуть винты (A) при
помощи ключа (B), поставляемого
в комплекте, и отделить нижний
фланец (C) от верхнего фланца (D).
< J > 図1. 付属の棒スパナ(B)を用いてネジ
(A)を抜き、下側のフランジ(C)を上側の
フランジ(D)から離します。
<CN> 图1. 按钮可导致光强度逐步下降10%
。在达到所需的光强度之后,松开
按钮。该装置也可通过远程开关操
作,这样您可以采用上次光强度选
项打开/关闭装置;调光器功能仅可
通过按钮(I)启用。
<SA> (B) (A) 1
.(D) (C)
B
D
C
Fig. 1
24586 ISTR.MONT.CAPTAIN FLINT EUR-USA.indd 7 23/02/16 14:34

8 9
Fig. 2
G
A
E
E
I
F
D
H
C
24586 ISTR.MONT.CAPTAIN FLINT EUR-USA.indd 8 23/02/16 14:34

8 9
<IT> Fig.2 Inserire il cavo (E) nel foro della base (F) ed appoggiare la flangia superiore (D) inserendo la spina (G)
nell’asola (H). Fissare la flangia inferiore (C) tramite le viti (A) facendo attenzione a far passare il cavo (E) nello
spacco (I) che deve essere rivolto dalla parte opposta della spina (G).
<EN> Fig.2 Insert the cable (E) into the hole of the base (F) and place the upper flange (D) inserting the plug into the
slot (H). Fix the lower flange (C) through the screws (A) paying attention to insert the cable (E) into the split (I)
which must be placed oppose the plug (G).
<DE> Abb.2 Inserieren Sie das Kabel (E) in das Loch der Basis (F) und setzen Sie die obere Flansche (D) darauf, indem
Sie den Stift (G) in die Nut (H) stecken. Befestigen Sie die untere Flansche (C) mit den Schrauben (A). Achten
Sie dabei darauf, dass das Kabel (E) in die Öffnung (I), die sich auf der gegenüberliegenden Seite des Stifts (G)
befinden muss, inseriert wird.
<FR> Fig.2 Insérer le câble (E) dans le trou de la base (F) puis placer la platine supérieure (D) en insérant la prise (G)
dans la fente (H). Fixer la platine inférieure (C) avec les vis (A) en prenant soin de faire passer le câble (E) dans
la fente (I) qui doit être orientée du côté opposé de la prise (G).
<ES> Imag.2 Introducir el cable (E) en el orificio de la base (F) y apoyar la pestaña superior (D) introduciendo la
clavija (G) en la hendidura(H). Fijar la pestaña inferior (C) con los tornillos (A) teniendo cuidado de introducir el
cable (E) en la hendidura (I) que debe estar orientada desde la parte opuesta de la clavija (G).
<PT> Fig.2 Introduzir o cabo (E) no orifício da base (F) e apoiar a flange superior (D), introduzindo a ficha (G) no
entalhe (H). Fixar a flange inferior (C) com os parafusos (A), prestando atenção para introduzir o cabo (E) na
fissura (I) que deve encontrar-se no lado oposto à ficha (G).
<RUS>
Рис.2 Пропустить кабель (E) через отверстие основания (F) и зафиксировать его на верхнем
фланце (D), вставив фиксатор (G) в отверстие (H). Закрепить нижний фланец (C) винтами
(A), при этом пустить кабель (E) через паз (I), который должен быть на противоположной
стороне от фиксатора (G).
< J > 図2. ベース (F)の穴にケーブル(E)を挿入し、ピン(G)を穴 (H)に差し込みながら上側のフラ
ンジ(D)を乗せます。ピン(G)の反対側にくる様に位置付けられた溝(I)にケーブル(E)が通る様
に配慮しながら、下側のフランジ(C)をネジ(A)を用いて固定します。
<CN> 图2. 把电缆(E)插入底座(F)的孔并放置上侧法兰(D),把插头插入槽(H)。通
过螺钉(A)固定下侧法兰(C),注意把电缆(E)插入开口(I)中,开口必须置于
插头(G)的另一侧。
<SA> (D) (F) (E) 2
(E) (A) (C) .(H)
.(G) (I)
24586 ISTR.MONT.CAPTAIN FLINT EUR-USA.indd 9 23/02/16 14:34

10 11
Fig. 3
L
M
N
O
Fig. 4
P
24586 ISTR.MONT.CAPTAIN FLINT EUR-USA.indd 10 23/02/16 14:34

10 11
<IT> Fig.3 Connettere lo spinotto (L) all’interruttore a pulsante (M) bloccandolo con una rotazione di 90° in senso
orario. Fig.4 Inserire la spina (N) nell’alimentatore (O) utilizzando le apposite guide fino ad avvertire lo scatto
di aggancio (utilizzare la tipologia di spina corretta per la regione in cui si installa l’apparecchio); collegare lo
spinotto (P) all’alimentatore bloccandolo con una rotazione di 90° in senso orario.
<EN> Fig.3 Connect the pin (L) to the push button switch (M) locking it by turning it 90º clockwise. Fig.4 Insert the plug
(N) into the feeder unit (O). By using the guides snap it inside its apposite slot (use the correct type of plug for
the area in which the device must be installed), connect the plug (P) to the feeder unit locking it in by rotating
it 90° clockwise.
<DE> Abb.3 Den Steckerstift (L) mit dem Druckschalter (M) verbinden und mit einer 90° Drehung im Uhrzeigersinn
arretieren. Abb.4 Stecker (N) über die vorgesehenen Führungen bis zum Einrasten in das Netzgerät (O) einführen
(es ist der in dem entsprechenden Benutzerland des Geräts richtige Steckertyp zu verwenden); Steckerstift (P)
mit dem Netzgerät verbinden und mit einer 90°-Drehung im Uhrzeigersinn blockieren.
<FR> Fig.3 Raccorder la fiche (L) à l’interrupteur (M) en la bloquant par une rotation de 90° dans le sens horaire.
Fig.4 Insérer la fiche (N) dans le boîtier d’alimentation (O) en utilisant les guides prévus jusqu’au verrouillage
des crochets (utiliser le type de prise correcte en fonction du pays où est installé l’appareil); connecter la petite
fiche (P) au boîtier d’alimentation et la bloquer par une rotation de 90° dans le sens des aiguilles d’une montre.
<ES> Imag.3 Conectar la clavija (L) al interruptor (M) bloqueándola con un giro de 90° hacia la derecha. Imag.4
Introducir el enchufe (N) en el alimentador (O) utilizando las adecuadas guías hasta que se advierta el golpe de
enganche (utilizar la tipologia de enchufe correcto para la región donde se instala el aparato); unir el enchufe
(P) en el alimentador bloqueandolo con una rotación de 90° en sentido horario.
<PT> Fig.3 Ligar a ficha (L) ao interruptor (M) fixando-a com uma rotação de 90° para a direita. Fig.4 Colocar o pino
(N) no alimentador (O) utilizando as guias apropriadas até sentir o engate de acoplamento (utilizar o tipo de
pino correcto para a região na qual se instala o aparelho); conectar o pino (P) no alimentador bloqueando com
uma rotação de 90° no sentido horário.
<RUS>
Рис.3 Вставить штекер (L) в кнопочный выключатель (M), зафиксировать поворотом на 90° по
часовой стрелке. Рис.4 Вставить вилку (N) в блок питания (O) при использовании специальных
направляющих до щелчка сцепления (использовать вилку соответствующего типа для целей,
для которых предназначено устройство); подсоединить штырь (P) к блоку питания, блокируя
его посредством вращения на 90° по часовой стрелке.
24586 ISTR.MONT.CAPTAIN FLINT EUR-USA.indd 11 23/02/16 14:34

12 13
Fig. 3
L
M
N
O
Fig. 4
P
24586 ISTR.MONT.CAPTAIN FLINT EUR-USA.indd 12 23/02/16 14:34

12 13
< J > 図3. 端子(L)を時計回りに90°回して固定しながら押しボタンスイッチ(M)に接続し。 図4. プ
ラグ(N)を電源アダプター(O)にカチっと音が聞こえるまで、しっかりと挿入します(プラグタイ
プはご利用になる地域に適した物をご利用下さい)。また電源アダプターを固定した状態で丸
プラグ(P)を90度時計回りに回しながら接続します。
<CN> 图3. 把销(L)连接到按钮开关(M)上,顺时针转动90º将其锁定。图4.把插头(N)
插入馈电装置(O)。使用引导装置将其卡在另外一侧的槽内(根据装置安装的区域选
择正确类型的插头),把插头(P)连接在馈电装置上,顺时针旋转90°将其锁定。
<SA> 4 . 90 (M) (L) 3
) .(O) (N)
(P) (
. 90
24586 ISTR.MONT.CAPTAIN FLINT EUR-USA.indd 13 23/02/16 14:34

14 15
Fig. 5
Q
<IT> Fig.5 Per l’accensione/spegnimento dell’apparecchio premere il pulsante (Q); sequenza luminosa: MASSIMO /
MINIMO (50%) / SPENTO. Ad apparecchio acceso, un contatto prolungato del pulsante provoca il decremento
progressivo dell’intensità luminosa fino al 10% e viceversa. Al raggiungimento dell’intensità desiderata,
interrompere il contatto con il pulsante. L’apparecchio può essere comandato anche con interruttore remoto
che permette di accendere/spegnere l’apparecchio con l’ultima intensità luminosa scelta; la funzione dimmer è
attivabile solo tramite il pulsante (Q).
<EN> Fig.5 To switch the device on/off push the button (Q); light sequence: MAXIMUM / MINIMUM (50%) / OFF. When the
appliance is switched on, prolonged contact of the button causes a progressive decrease of light intensity up
to 10% and viceversa. Upon reaching the desired intensity, stop contact with the button. The device can also be
operated with a remote switch that allows you to turn on/turn off the device with the last light intensity choice;
the dimmer function can only be activated with the button (Q).
<DE> Abb.5 Zum Ein-/Ausschalten der Leuchte die Taste (Q) drücken; Lichtsequenz: MAXIMUM / MINIMUM (50%) /
AUSGESCHALTET. Wenn die Leuchte eingeschaltet ist, bewirkt ein längerer Tastendruck die fortlaufende Verringerung
der Lichtstärke bis zu 10% und umgekehrt. Sobald die gewünschte Lichtstärke erreicht ist, den Kontakt mit der Taste
unterbrechen. Die Leuchte kann auch mit einem Fernschalter gesteuert werden, der das Ein-/Ausschalten der Leuchte
mit der zuletzt gewählten Lichtstärke ermöglicht; die Dimmer-Funktion ist nur mit der Taste (Q) aktivierbar.
100% 10% 10%
50%
OFF 100% 100%
24586 ISTR.MONT.CAPTAIN FLINT EUR-USA.indd 14 23/02/16 14:34

14 15
<FR> Fig.5 Pour allumer et éteindre l’appareil, appuyer sur le bouton (Q); séquence lumineuse: MAXIMUM / MINIMUM
(50%)/ETEINT. Lorsque l’appareil est allumé, la baisse progressive de l’intensité lumineuse jusqu’à 10% et vice
versa peut être obtenue en maintenant la pression sur le bouton. Une fois atteint le niveau d’intensité désiré,
relâcher la pression du bouton. L’appareil peut aussi être commandé par un interrupteur à distance qui permet
d’allumer et d’éteindre l’appareil en gardant en mémoire la dernière intensité choisie; la fonction variation est
uniquement obtenue avec le bouton (Q).
<ES> Imag.5 Para encender/apagar el dispositivo, pulse el botón (Q); secuencia luminosa: MÁXIMO / MÍNIMO (50%) /
APAGADO. Con el dispositivo encendido, si mantiene el botón pulsado durante un tiempo prolongado, hará que
la intensidad luminosa se reduzca progresivamente hasta el 10% y viceversa. Cuando alcance la intensidad
que desee, detenga el contacto con el botón. El dispositivo se puede regular también a través del interruptor
remoto, que permite encender/apagar el dispositivo con la última intensidad luminosa que haya configurado;
la función del atenuador (dimmer) sólo se puede activar con el botón (Q).
<PT> Fig.5 Para ligar/desligar o aparelho premir o botão (Q). Sequência da iluminação: MÁXIMO / MÍNIMO (50%) /
DESLIGADO. Com o aparelho aceso, um contacto prolongado do botão provoca o decremento progressivo da
intensidade de iluminação até 10% e vice-versa. Ao atingir a intensidade desejada, libertar o botão. O aparelho
pode ser comandado também através do interruptor remoto que permite ligar/desligar o aparelho com a
última intensidade de iluminação escolhida. A função dimmer só pode ser activada com o botão (Q).
24586 ISTR.MONT.CAPTAIN FLINT EUR-USA.indd 15 23/02/16 14:34

16 17
Fig. 5
Q
<RUS>
Рис.5 Для включения /выключения устройства нажмите кнопку (Q); последовательность:
МАКС./ МИН. (50%) / ВЫКЛ. При включенном устройстве длительное нажатие кнопки
вызывает постепенное уменьшение интенсивности до 10%, и наоборот. При достижении
желаемой интенсивности света отпустить кнопку. Устройством можно управлять также с
помощью удаленного выключателя, который позволяет включать/выключать устройство с
последней заданной интенсивностью света; функция регулировки света доступна только с
помощью кнопки (Q).
< J > 図5. 器具を点灯/消灯するにはボタン(Q)を押します。明るさの順番:最大/最低 (50%)/消
灯。 器具が点灯している時にボタンに触れ続けると10%.まで明るさの度合いが漸減します。
好み の明るさに達したらボタンから指を離します。器具は最後に選択した明るさの度合いに
器具 を点灯/消灯することができるリモートスイッチでコントロールすることも可能です。ディ
マー 機能(Q)はボタンによってのみアクティブにできます。
<CN> 图5. 为开启/关闭该装置,按下按钮(Q);灯光顺序:最强/最弱(50%)/关闭。当
开启该装置时,长按该按钮可导致光强度逐步下降10%,反之亦然。在达到所需的光
强度之后,松开按钮。该装置也可通过远程开关操作,这样您可以采用上次光强度选
项打开/关闭装置;调光器功能仅可通过按钮(Q)启用。
100% 10% 10%
50%
OFF 100% 100%
24586 ISTR.MONT.CAPTAIN FLINT EUR-USA.indd 16 23/02/16 14:34

16 17
<SA> (50) / : (Q) / 5
. /
. . 10
. /
.(Q)
24586 ISTR.MONT.CAPTAIN FLINT EUR-USA.indd 17 23/02/16 14:34

18 19
270°
45°
Fig. 6
24586 ISTR.MONT.CAPTAIN FLINT EUR-USA.indd 18 23/02/16 14:34

18 19
24586 - 17/02/2016
<IT> Fig.6 La testa dell’apparecchio non può ruotare completamente di 360° ma solo 45° in senso antiorario e
270° in senso orario. Non forzare il movimento oltre questi limiti, altrimenti si danneggia e compromette il
funzionamento dell’apparecchio.
<EN> Fig.6 The device’s head cannot rotate the full 360° but only 45° anticlockwise and 270° clockwise. Do not force
its movement beyond these limits or you will damage it and cause the device to stop working.
<DE> Abb.6 Der Leuchtenkopf kann nicht komplett um 360°, sondern nur um 45° entgegen dem Uhrzeigersinn
und 270° im Uhrzeigersinn gedreht werden. Die Bewegung nicht darüber hinaus erzwingen, sonst wird die
Leuchte beschädigt und ihr Betrieb beeinträchtigt.
<FR> Figg.6 Il n’est pas possible de tourner la tête de l’appareil à 360° mais seulement à 45° dans le sens contraire
des aiguilles d’une montre, et à 270° dans le sens des aiguilles d’une montre. Ne pas forcer au-delà de ces
limites afin de ne pas endommager l’appareil et compromettre son bon fonctionnement.
<ES> Imag.6 l cabezal del aparato no puede girar 360°completamente. El movimiento que permite el sistema es de
45° en el sentido contrario de las agujas del reloj, y de 270°en el sentido de las agujas del reloj. No forzar más
allá de los limites indicados para no dañar el aparato y comprometer su buen funcionamiento.
<PT> Figg.6 A cabeça do aparelho não consegue rodar completamente a 360°, só a 45° para a esquerda e 270°
para a direita. Não forçar o movimento para além destes limites para não danificar e comprometer o
funcionamento do aparelho.
<RUS>
Рис.6 Передняя часть устройства не может вращаться полностью на 360°, а только на 45°
против часовой стрелки и на 270° по часовой стрелке. Нельзя двигать эту часть устройства сверх указанного
ограничения, в противном случае устройство может быть повреждено и может выйти из строя.
< J > 図6. 器具のヘッドは完全に360°回ることはできず、左回りに45°、右回りに270°のみで
す 。 壊れたり、器具の性能を損ねてしまう可能性があるので、力づくでこの限界以上の動きを
させないでください。
<CN> 图6. 装置头部不能完全转动360°,仅能逆时针转动45°,顺时针转动270°。在达
到这一限值后,不得使用蛮力使其继续转动,否则可导致灯具损坏,无法使用。
<SA> 45 360 6
. 270
.
24586 ISTR.MONT.CAPTAIN FLINT EUR-USA.indd 19 23/02/16 14:34

www.flos.com
24586 ISTR.MONT.CAPTAIN FLINT EUR-USA.indd 20 23/02/16 14:34
Other manuals for CAPTAIN FLINT
1
This manual suits for next models
3
Other FLOS Outdoor Light manuals

FLOS
FLOS IN VITRO 1 BOLLARD User manual

FLOS
FLOS Melrie User manual

FLOS
FLOS TOIO User manual

FLOS
FLOS Last Order User manual

FLOS
FLOS Landlord User manual

FLOS
FLOS KELVIN LED F3301030 User manual

FLOS
FLOS 45 ADJ User manual

FLOS
FLOS 45 ADJ User manual

FLOS
FLOS TILEE User manual

FLOS
FLOS OK F4640009 User manual

FLOS
FLOS BELLHOP User manual

FLOS
FLOS SERENA F6582054 User manual

FLOS
FLOS Clessidra User manual

FLOS
FLOS JASPER MORRISON GLO-BALL F Series User manual

FLOS
FLOS SERENA F6582030 User manual

FLOS
FLOS F1584018 User manual

FLOS
FLOS BELLHOP User manual

FLOS
FLOS CAPTAIN FLINT User manual

FLOS
FLOS SUPERLOON User manual
FLOS
FLOS GLO-BALL BASIC User manual