manuals.online logo
Brands
  1. Home
  2. •
  3. Brands
  4. •
  5. FLOS
  6. •
  7. Outdoor Light
  8. •
  9. FLOS Clessidra User manual

FLOS Clessidra User manual

CLESSIDRA
DESIGN BY ANTONIO CITTERIO
<IT> ISTRUZIONI DI INSTALLAZIONE ED IMPIEGO
ATTENZIONE!
La sicurezza dell’apparecchio é garantita solo rispettando
queste istruzioni sia in fase di installazione che di
impiego; é pertanto necessario conservarle.
AVVERTENZE:
- All’atto dell’installazione ed ogni volta che si interviene
sull’apparecchio, assicurarsi che sia stata tolta la
tensione di alimentazione;
- L’apparecchio non può essere in alcun modo modificato
o manomesso, ogni modifica ne può compromettere la
sicurezza rendendo lo stesso pericoloso. FLOS declina
ogni responsabilità per i prodotti modificati.
- Per un funzionamento sicuro e corretto è necessario
che questo apparercchio sia collegato ad un efficiente
impianto di messa a terra.
- L’apparecchio è esente dal rischio di emissione
fotobiologica.
- La sorgente luminosa non può essere sostituita dal
cliente. Per informazioni contattare FLOS.
- Il simbolo riportato sull’apparecchio indica che il
prodotto deve essere smaltito in modo differenziato dai
rifiuti urbani.
DATI TECNICI
- 2 x 1 Led; 2 x 5W.
- La cromatura utilizzata è eco-compatibile e rispetta
quindi la normativa RoHS.
ISTRUZIONI PER LA PULIZIA DELL’APPARECCHIO
- Per la pulizia dell’apparecchio utilizzare esclusivamente
un panno morbido eventualmente inumidito con acqua
e sapone.
- Attenzione: non utilizzare alcool o solventi.
<GB> INSTRUCTION FOR CORRECT INSTALLATION AND USE
WARNING!
The safety of this fitting can only be guaranteed if these
instructions are observed, during both installation and
use. Please retain these instructions safety.
REMARKS:
- When installing and whenever acting on the appliance,
ensure that the power supply has been switched off.
- The appliance may in no way be modified or tampered
with, any modification may compromise safety causing
the appliance to become dangerous. FLOS declines all
responsibility for products that are modified.
- This appliance must be connected to an efficient
grounding system in order to work safely and correctly.
- The device carries no risk of photobiological emissions;
- The light source cannot be replaced by the customer.
Contact FLOS for information.
- If not familiar with electrical connections, contact a
qualified electrician.
- The symbol shown on the device indicates that the
product must be thrown out in a different manner than
with the urban trashes.
TECHNICAL DATA
- 2 x 1 Led; 2 x 5W.
- The chrome plating used is environmentally friendly
and thus adheres to RoHS regulations.
CLEANING INSTRUCTIONS
- Use only a soft cloth to clean the appliance, dampened
with water and soap.
- Warning: do not use alcohol or other solvents.
<DE> INSTALLATION - UND GEBRAUCHSANWEISUNGEN
ACHTUNG!
Wir garantieren nur dann für die Sicherheit der Leuchte,
wenn diese Anweisungen sowohl bei der Installation als
auch beim Gebrauch genau beachtet werden. Es ist daher
ratsam, sie aufzubewahren.
BEMERKUNGEN:
- Bei der Installation und bei Eingriffen an der Leuchte ist
sicherzustellen, daß die Anlage vom Netz abgeschaltet ist.
- Der Apparat darf auf keinen Fall veraendert oder
unerlaubt geoeffnet werden, jede Veraenderung
desselben kann die Sicherheit in Frage stellen und somit
gefaehrlich werden. FLOS lehnt jede Verantwortung fuer
unsachgemaess behandelte Produkte ab.
- Für eine sichere und ordnungsgemäße Funktionsweise
ist diese Leuchte an eine effiziente Erdungsanlage
anzuschließen.
- Das Gerät ist frei von photobiologischen Emissionsgefahren;
- Die Leuchtquelle kann nicht vom Kunden ausgewechselt
werden. Für Informationen bitte FLOS kontaktieren.
- Das auf dem Gerät wiedergegebene Symbol zeigt
an, dass das Produkt getrennt vom Stadtmüll entsorgt
werden muss.
TECHNISCHE DATEN
- 2 x 1 Led; 2 x 5W.
- Die verwendete Verchromung ist umweltfreundlich und
entspricht daher den RoHS Vorschriften.
REINIGUNGSVORSCHRIFTEN
- Bei der Reinigung der Leuchte darf man ausschließlich
weiche Tücher verwenden. Eventuell kann man diese
mit Wasser und Seife oder mit einem neutralen
Reinigungsmittel anfeuchten.
- Achtung: Weder Alkohol noch Lösungsmittel verwenden.
<FR> INSTRUCTIONS D’INSTALLATION ET D’EMPLOI
ATTENTION!
La sûreté de cet appareil est garantie uniquement si l’on
respecte ces instructions soit en phase d’installation soit
pendant l’utilisation; il faut donc les conserver.
NOTICES:
- Au moment de l’installation et chaque fois que l’on
intervient sur l’appareil, s’assurer que la tension
d’alimentation ait été coupée.
-L’appareil ne peut être modifié ou altéré de quelque
manière que ce soit, toute modification peut compromettre
la sécurité de celui-ci en le rendant dangereux. FLOS
décline toute responsabilité pour les produits modifiés.
- Pour un fonctionnement sûr et correct, il est nécessaire
que l’appareil soit relié à une installation efficace de mise
à la terre.
- L’ appareil ne présente aucun risque photobiologique;
- La source lumineuse ne peut pas être remplacée par
le client. Pour obtenir des informations, contacter la
société FLOS.
- Si vous n’êtes pas pratiques pour les branchements
électriques, contactez un électricien qualifié.
-Le symbole reporté sur l’appareil indique que le
produit doit être éliminé dans le respect des règles de tri
sélectif des déchets.
DONNEES TECHNIQUES
- 2 x 1 Led; 2 x 5W.
- La chromature utilisée est eco-compatibile et
respecte la la norme RoHS.
INSTRUCTIONS POUR LE NETTOYAGE
- Pour le nettoyage de l’appareil utiliser exclusivement un
chiffon doux, humecté si nécessaire, avec de l’eau et du savon
ou avec un détergent neutre pour les salissures les plus tenaces.
- Attention: ne pas utiliser d’alcool ou solvents.
<ES> INSTRUCCIONES DE INSTALACIÓN Y DE USO
¡ATENCIÓN!
La seguridad del aparato sólo puede garantizarse
con la condición de que se respeten las siguientes
instrucciones, tanto en la fase de instalación como de
uso, por lo cual se recomienda conservarlas.
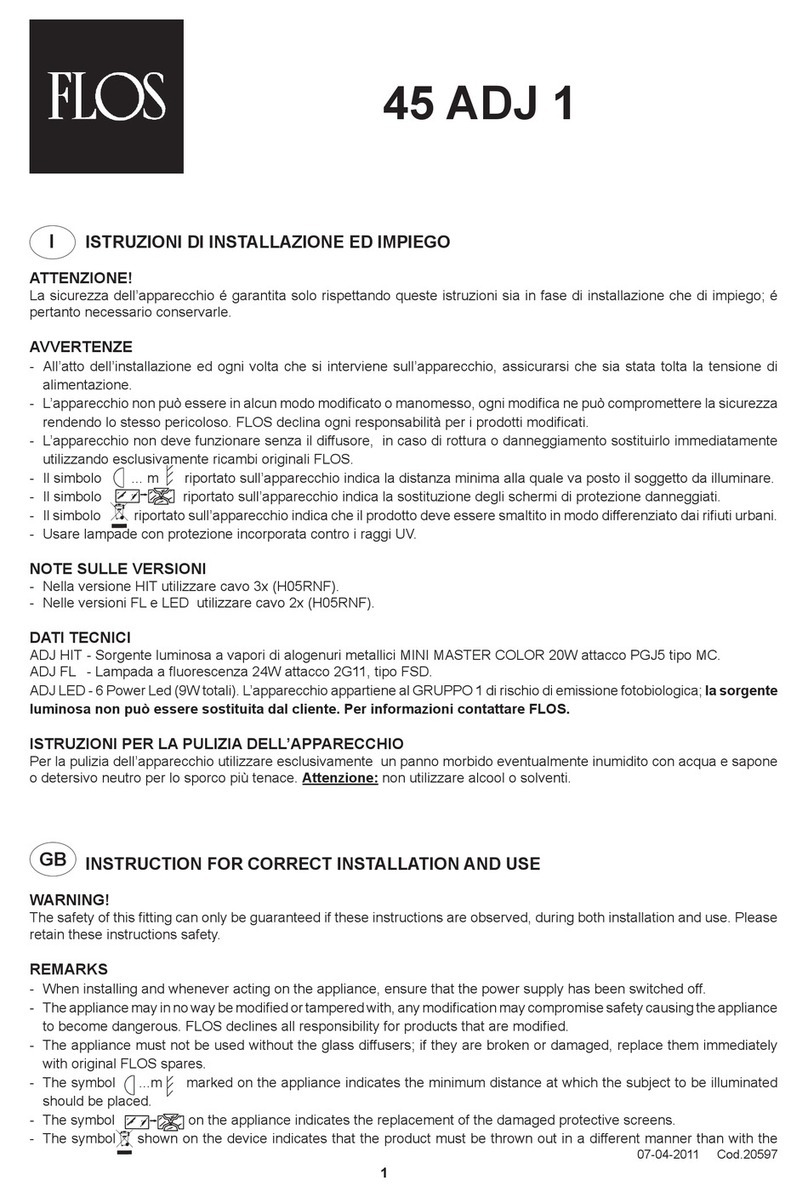
ADVERTENCIA:
- Para efectuar la instalación, y toda vez que se efectúe
alguna operación en el aparato, asegurarse de haber
cortado la corriente eléctrica.
- El aparato no puede ser en ningún caso modificado o
forzado, cualquier modificación puede comprometer la
seguridad haciéndolo peligroso. FLOS declina cualquier
responsabilidad por en productos modificados.
- Para obtener un funcionamiento seguro y correcto
es necesario que este aparato esté conectado a una
eficiente toma de tierra.
- El aparato no presenta ningún riesgo fotobiológico.
- La fuente luminosa no puede ser sustituida por el cliente.
Para más información, ponerse en contacto con FLOS.
- Si Usted no está familiarizado con conexiones eléctricas,
contacte con un técnico electricista cualificado.
- El símbolo que aparece en el aparato indica que el
producto debe ser eliminado en modo diferenciado del
resto de los desechos urbanos.
DATOS TECNICOS
- 2 x 1 Led; 2 x 5W.
- La cromatura utilizada es ecocompatible y respeta la
normativa RoHS.
INSTRUCCIONES PARA LIMPIAR EL APARATO
- Para la limpieza del aparato, utilizar exclusivamente un
paño suave. En caso de suciedad más resistente, humedecer
el paño con agua y jabón o un detergente neutro.
- Advertencia: no emplear alcohol ni disolventes.
<PT> INSTRUÇÕES INSTALAÇÃO E USO
ATENÇÃO!
A segurança do aparelho é garantida somente se
respeitarmos as instruções tanto na fase de instalação como
na de uso; portanto é necessário conservar tais instruções.
ADVERTÊNCIA:
- Para efectuar la instalación, y toda vez que se efectúe
alguna operación en el aparato, asegurarse de haber
cortado la corriente eléctrica.
- De forma alguma o aparelho deve ser modificado
ou alterado, toda e qualquer modificação pode
comprometer a segurança tornando o aparelho perigoso.
FLOS declina toda e qualquer responsabilidade pelos
produtos modificados.
- Para um funcionamento seguro e correcto é necessário
que este aparelho esteja ligado a uma eficiente
instalação de ligação a terra.
- El aparato no presenta ningún riesgo fotobiológico.
- A fonte luminosa não pode ser substituída pelo
cliente. Para maiores informações contactar FLOS.
- O símbolo indicado no aparelho indica que o produto
deve ser eliminado de forma diferenciada em relação ao
lixo urbano.
DADOS TÉCNICOS
- 2 x 1 Led; 2 x 5W.
- A cromagem utilizada é eco-compatível e respeita as
normas RoHS.
INSTRUÇÕES PARA A LIMPEZA DO APARELHO
- Para limpeza do aparelho utilizar exclusivamente um
tecido macio eventualmente úmido com água e sabão.
- Atenção: não utilizar álcool ou solventes.
<RUS>
ИНСТРУКЦИИ ПО МОНТАЖУ И ПРИМЕНЕНИЮ
ВНИМАНИЕ!
Надёжность устройства гарантируется только
при соблюдении данных инструкций, как в фазе
монтажа, так и при применении, поэтому необходимо
обеспечить их сохранность.
ПРЕДУПРЕЖДЕНИЯ:
- В момент установки и каждый раз при проведении
работ с устройством, убедиться в снятии напряжения
питания.
- Устройство не может изменяться или разбираться,
любые изменения могут нарушить надёжность, делая
его опасным. FLOS не несёт ответственность за
измененную продукцию.
- Для надежного и правильного функционирования
данного устройства необходимо обеспечить его
подсоединение к эффективной системе заземления.
- Устройство не обладает риском фотобиологической
эмиссии;
- Источник света не может быть заменен
заказчиком. Для получения информации
связаться с компанией FLOS.
- Символ приведённый на устройстве, указывает
на то, что данная продукция должна быть
переработана отдельно от городских отходов.
ТЕХНИЧЕСКИЕ ДАННЫЕ
- 2 x 1 Led; 2 x 5
Вт
.
-
Применяемое хромирование является
экосовместимым и соответствует нормативам RoHS.
ИНСТРУКЦИИ ПО ОЧИСТКЕ УСТРОЙСТВА
Для очистки устройства использовать только
мягкую тряпку, смоченную водой с мылом или
нейтральным моющим средством для наиболее
стойких загрязнений.
-Внимание: Не использовать спирт или другие
растворители.
< J > 取り付けおよびご使用方法
警告
安全な器具の取り付けおよびご使用のために、取
扱説明書に従って作業を行ってください。また、取
扱説明書は必ず保管してください。
注意
- 取り付け作業および取り外しや再取り付け時に
は、必ず電源を切ってください。
- 危険ですので、器具を改造したり、部品を追
加・変更して使用しないでください。改造した製
品に対しては、FLOSは一切責任を負いません。
-安全に正しくご使用いただくため、必ず適切な接
地システムに器具を接続してください。
- 発光ダイオードの場合:器具は光生物学上の光
害リスクはありません。
-
光源はお客様の手でお取り替えいただけませ
ん。 詳しくはFLOSまでお尋ね下さい。
USA : 安全に正しくご使用いただくため、必ず適
切な接地システムに器具を接続してください。
- 器具上の表示 は、一般ごみと区別して本製
品を廃棄しなければならないことを表します。
- 電気接続に精通していない場合は、有資格の
電気技術者に連絡してください。
- 電気接続に精通していない場合は、有資格の電
気技術者に連絡してください。
技術的な仕様
- 2 X 1 LED; 2 X 5W
- 環境にやさしいRoHS指令に準拠したクロム
めっき使用 。
器具のお手入れの仕方
- 器具のお手入れの際には、水と中性石鹸で湿らせた柔
らかい布をご利用下さい。
- 注 意: お手入れの際にはアルコールや溶液はご利用い
ただけません。
<IT>
<GB>
<DE>
<FR>
<ES>
<PT>
<RUS>
Fig.1 Smontare la copertura (A) svitando le viti (B) con la chiavetta fornita in dotazione.
Fig.1 Dismantle the cover (A) unscrewing the screws (B) with the allen key included.
Abb.1 Lösen Sie die Schrauben (B) mit dem beigepackten Schraubenschlüssel und nehmen Sie die Verkleidung
(A) ab.
Fig.1 Démonter le couvercle (A) en dévissant les vis (B) à l’aide de la clé Allen fournie dans l’emballage.
Fig.1 Desmontar la tapa (A) desatornillando los tornillos (B) con la llave suministrada en dotación.
Fig.1 Desmontar a tampa (A) desapertando os parafusos (B) com a chave fornecida.
Рис.1 Снять кожух (A), вывернув винты (B) ключом, поставляемым в комплекте.
Fig. 1
A
B
EUR
<IT>
<GB>
<DE>
<FR>
<ES>
<PT>
<RUS>
Fig.2 Separare l’attacco a parete (C) dal corpo (D) svitando le viti (E).
Fig.2 Separate the wall attachment from the (C) body (D) unscrewing the screws (E).
Abb.2 Lösen Sie die Schrauben (E), um den Wandanschluss (C) vom Korpus (D) zu trennen.
Fig.2 Séparer l’attache murale (C) du corps (D) en dévissant les vis (E).
Fig.2 Separar el soporte de pared (C) del cuerpo (D) desatornillando los tornillos (E).
Fig.2 Separar o suporte de parede (C) do corpo (D) desapertando os parafusos (E).
Рис.2 Отделить несущую панель (C) от основной части (D), вывернув винты (E).
Fig. 2
D
E
C
EUR
<IT>
<GB>
<DE>
<FR>
<ES>
<PT>
<RUS>
Fig.3 Fissare l’attacco a parete (C) con viti e tasselli ad espansione avendo cura di rispettare il corretto
orientamento indicato dalla freccia (F) e facendo passare i cavi di alimentazione attraverso l’apposito foro.
NOTA BENE: Scegliere tasselli ad espansione idonei allla superficie di montaggio.
Fig.3 Fix the wall attachment (C) with screws and rawl plugs taking care to put it the correct way up as indicated
by the arrow (F) and passing the power cables through the correct hole. NOTE: Choose screw anchors that are
suitable for the surface which shall be assembled upon.
Abb.3 Befestigen Sie den Wandanschluss (C) mit Schrauben und Spreizdübeln, achten Sie dabei auf die richtige
Ausrichtung laut Pfeil (F) und ziehen Sie die Stromkabeln durch die entsprechende Öffnung. HINWEIS: für die für
die Montage vorgesehene Fläche passende Spreizdübel auswählen.
Fig.3 Fixer l’attache murale (C) avec les vis et les chevilles à expansion en respectant le sens de la flèche (F) et en
faisant passer les câbles d’alimentation à travers le trou prévu à cet effet. NOTE: choisir les chevilles à expansion
appropriées à la surface destinée au montage.
Fig.3 Fijar el soporte (C) a la pared con los tornillos y los tacos de expansión respetando la orientación
correcta de la flecha (F) y prestando especial atención al pasar los cables de alimentación a través del agujero
correspondiente. NOTA: Elegir los tacos de expansión idóneos para la superficie destinada al montaje.
Fig.3 Fixar o suporte à parede (C) com os parafusos e as buchas de expansão, tendo o cuidado de respeitar
a orientação correcta indicada pela seta (F) e passar os cabos de alimentação através do respectivo orifício.
OBSERVAR BEM: Escolher as buchas de expansão correctas de acordo com a superfície destinada à montagem.
Рис.3 Закрепить несущую панель (C) с помощью шурупов и дюбель-пробок, соблюдая
правильное направление, указанное стрелкой (F) и пропуская провода питания
через специальное отверстие. ПРИМЕЧАНИЕ: Выбирать расширительные вставки,
соответствующие поверхности, предназначенной для монтажа.
Fig. 3 F
C
EUR
Fig. 4
<IT>
<GB>
<DE>
<FR>
<ES>
<PT>
<RUS>
Fig.4 Rimontare il corpo (D) all’attacco a parete avendo cura di far passare i cavi di alimentazione attraverso il
passacavo (G), quindi effettuare i collegamenti elettrici nella morsettiera (H) e al morsetto di terra (I).
Fig.4 Remount the body (D) onto the wall attachment taking care to pass the supply cables through the fairlead
(G), then make the electrical connections in the terminal box(H) and to the earth terminal (I).
Abb.4 Montieren Sie den Korpus (D) wieder am Wandanschluss, achten Sie dabei darauf, dass die Stromkabeln
in die Kabelführung (G) eingezogen werden. Führen Sie den Stromanschluss an der Klemmleiste (H) und an der
Erdungsklemme (I) durch.
Fig.4 Remonter le corps (D) sur l’attache murale en prenant soin de faire passer les câbles d’alimentation à
travers le passe câble (G), puis effectuer les raccordements électriques dans le bornier (H) et raccorder la terre (I).
Fig.4 Volver a montar el cuerpo (D) en el soporte de pared pasando los cables de alimentación a través del
pasacalbes (G), entonces efectuar las conexiones eléctricas en la regleta (H) y al borne de la toma de tierra (I).
Fig.4 Voltar a montar o corpo (D) ao suporte de parede tendo o cuidado de passar os cabos de alimentação
através do passa-cabo (G) e, posteriormente, realizar a ligação eléctrica na régua de terminais (H) e ao borne
de terra (I).
Рис.4 Снова установить основную часть (D) на несущую панель, пропустив провода
питания через кабельный вход (G), затем подсоединить их к клеммной панели (H) к клемме
заземления (I).
G
I
D
H
EUR
Fig. 1b
<GB>
<FR>
<ES>
<J>
Fig.1b Separate the wall attachment (C) from the body (D) by unscrewing the screws(E); pass the power cables
from the device through the central hole of the covering plate (Y) , then make the electrical connections in the
Junction Box (White to white, black to black, green to earth); fix the covering plate (Y) to the Junction Box with
the screws provided taking care to follow the direction of the arrow, then fix the attachment to the wall (C) with
screws and rawl plugs; N.B.use rawl plugs appropriate to the mounting medium. Remount the body (D) to the wall
attachment (C) with the screws (E), then tighten down the four screws (X) with the tool provided.
Fig.1b Séparer la pièce de fixation murale (C) du corps du luminaire (D) en retirant les vis (E); faire passer les
câbles d’alimentation de l’appareil à travers le trou central de la pièce ronde (Y), puis effectuer les raccordements
électriques à l’intérieur du boîtier (Blanc à blanc, noir à noir, vert à la terre); fixer la pièce ronde (Y) au boîtier à
l’aide des vis fournies en veillant à respecter le sens indiqué par la flèche, puis fixer l’attache au mur (C) avec des
vis et des chevilles à expansion; Nota bene : utiliser des vis et des chevilles adaptées à la surface d’installation.
Installer le corps (D) sur la pièce de fixation murale (C) avec les vis (E) puis serrer à fond les quatre vis (X) à
l’aide de la clé fournie.
Fig.1b Separe la pieza de fijación a la pared (C) de la unidad (D) aflojando los tornillos (E); Pase los cables de
alimentación procedentes del aparato por el orificio central de la cubierta (Y); a continuación, realice las
conexiones eléctricas en la Caja de Conexiones (blanco con blanco, negro con negro y verde con tierra); fije
la cubierta (Y) a la Caja de Conexiones con los tornillos que se suministran, prestando atención a que tengan
la orientación correcta, según indica la flecha; a continuación, asegure la pieza de fijación a la pared (C) con
tornillos y tacos de expansión; Nota: utilice tornillos y tacos adecuados para la superficie destinada al montaje.
Vuelva a montar la unidad (D) en la pieza de fijación a la pared (C) con los tornillos (E), a continuación, apriete a
fondo los cuatro tornillos (X) con la llave que se suministra.
図1B ネジ (E)を抜いてウォールアッタチメント (C) を本体 (D) から分離する; 器具の電気ケーブルをカ
バーのプレート(Y)の中央の穴に通し、ジャンクションボックス(黒色は黒色に、白色は白色に、緑色はア
ースに)の電気接続を行う;矢印で印されている通りに正しく方向づけられているか注意しながら付属の
ネジでカバーのプレート(Y )をジャンクションボックスに固定し、ネジとスクリューアンカーでウォールアッ
タチメント (C) を固定する; 注意 組み立てが行われる表面に適したスクリューアンカーを選択する。
ネジ(E)で本体 (D) をウォールアッタチメント (C)に再び組み立てる、四本のネジ (X) をしっかり付属のス
パナで締める。
E
E
Y
D
C
X
X
USA
<IT>
<GB>
<DE>
<FR>
<ES>
<PT>
<RUS>
<J>
Fig. 5
L A
D
M
O
N
Fig.5 Rimontare la copertura (A); montare il corpo esterno (L) sul corpo interno (D) con le viti (M) in dotazione
avendo cura di posizionare correttamente le rondelle (N) nelle apposite sedi (O).
Fig.5 Remount the cover (A); mount the external body (L) onto the internal body (D) with the screws (M) included
taking care to put the washers (N) in the correct positions (O).
Abb.5 Montieren Sie wieder die Verkleidung (A); montieren Sie den Außenkorpus (L) am Innenkorpus (D) mit den
beigepackten Schrauben (M). Achten Sie dabei darauf, dass die Scheiben (N) richtig in die entsprechenden Sitze
(O) eingesetzt werden.
Fig.5 Replacer le couvercle (A); fixer le corps externe (L) sur le corps interne (D) avec les vis fournies (M) en
prenant soin de placer correctement los tacos (N) dans leur emplacement (O).
Fig.5 Volver a montar la tapa (A); montar el cuerpo externo (L) sobre el cuerpo interno (D) con los tornillos (M)
suministrados en dotación, prestando especial atención para colocar correctamente les rondelles (N) en la sede
correspondiente (O).
Fig.5 Voltar a montar a tampa (A). Voltar a montar o corpo externo (L) no corpo interno (D) com os parafusos (M)
fornecidos, tendo o cuidado de colocar correctamente os arruelas (N) nos respectivos lugares (O).
Рис.5 Снова установить кожух (A); установить внешний корпус (L) на основной части (D),
закрепив его винтом (M) из комплекта, предварительно разместив шайб (N) в специальных
местах (O).
図5 Rimontare la copertura (A); montare il corpo esterno (L) sul corpo interno (D) con le viti (M) in dotazione
avendo cura di posizionare correttamente le rondelle (N) nelle apposite sedi (O).
EUR <IT>
<GB>
<DE>
<FR>
<ES>
<PT>
<RUS>
Fig. 5
L A
D
M
O
N
Fig.5 Rimontare la copertura (A); montare il corpo esterno (L) sul corpo interno (D) con le viti (M) in dotazione
avendo cura di posizionare correttamente le rondelle (N) nelle apposite sedi (O).
Fig.5 Remount the cover (A); mount the external body (L) onto the internal body (D) with the screws (M) included
taking care to put the washers (N) in the correct positions (O).
Abb.5 Montieren Sie wieder die Verkleidung (A); montieren Sie den Außenkorpus (L) am Innenkorpus (D) mit den
beigepackten Schrauben (M). Achten Sie dabei darauf, dass die Scheiben (N) richtig in die entsprechenden Sitze
(O) eingesetzt werden.
Fig.5 Replacer le couvercle (A); fixer le corps externe (L) sur le corps interne (D) avec les vis fournies (M) en
prenant soin de placer correctement los tacos (N) dans leur emplacement (O).
Fig.5 Volver a montar la tapa (A); montar el cuerpo externo (L) sobre el cuerpo interno (D) con los tornillos (M)
suministrados en dotación, prestando especial atención para colocar correctamente les rondelles (N) en la sede
correspondiente (O).
Fig.5 Voltar a montar a tampa (A). Voltar a montar o corpo externo (L) no corpo interno (D) com os parafusos (M)
fornecidos, tendo o cuidado de colocar correctamente os arruelas (N) nos respectivos lugares (O).
Рис.5 Снова установить кожух (A); установить внешний корпус (L) на основной части (D),
закрепив его винтом (M) из комплекта, предварительно разместив шайб (N) в специальных
местах (O).
EUR
21404 - 14/05/2012
<GB>
<FR>
<ES>
<J>
Fig. 5
L
D
M
O
N
N
Fig.5 Mount the external body (L) onto the internal body (D) with the screws (M) included taking care to put the
washers (N) in the correct positions (O).
Fig.5 Fixer le corps externe (L) sur le corps interne (D) avec les vis fournies (M) en prenant soin de placer
correctement los tacos (N) dans leur emplacement (O).
Fig.5 Montar el cuerpo externo (L) sobre el cuerpo interno (D) con los tornillos (M) suministrados en dotación,
prestando especial atención para colocar correctamente les rondelles (N) en la sede correspondiente (O).
図5 ワッシャー (N)が適切な場所 (O)に正確に位置付けられるよう注意しながら付属のネジ(M)で外側の
ボディ(L)を内側の本体 (D)に組み立てる
USA
www.flos.com

This manual suits for next models

4

Other FLOS Outdoor Light manuals

FLOS BELLHOP User manual

FLOS

FLOS BELLHOP User manual

FLOS F1584018 User manual

FLOS

FLOS F1584018 User manual

FLOS IPNOS User manual

FLOS

FLOS IPNOS User manual

FLOS ARIETTE 2 User manual

FLOS

FLOS ARIETTE 2 User manual

FLOS 45 ADJ User manual

FLOS

FLOS 45 ADJ User manual

FLOS PATRICIA URQUIOLA TATOU T1 User manual

FLOS

FLOS PATRICIA URQUIOLA TATOU T1 User manual

FLOS ARCO User manual

FLOS

FLOS ARCO User manual

FLOS CAPTAIN FLINT User manual

FLOS

FLOS CAPTAIN FLINT User manual

FLOS ARES Pan User manual

FLOS

FLOS ARES Pan User manual

FLOS NOCTAMBULE F User manual

FLOS

FLOS NOCTAMBULE F User manual

FLOS Last Order User manual

FLOS

FLOS Last Order User manual

FLOS MILE WALL Series User manual

FLOS

FLOS MILE WALL Series User manual

FLOS JASPER MORRISON GLO-BALL F Series User manual

FLOS

FLOS JASPER MORRISON GLO-BALL F Series User manual

FLOS SUPERLOON F6630057 User manual

FLOS

FLOS SUPERLOON F6630057 User manual

FLOS Landlord User manual

FLOS

FLOS Landlord User manual

FLOS CHRYSALIS User manual

FLOS

FLOS CHRYSALIS User manual

FLOS BELLHOP User manual

FLOS

FLOS BELLHOP User manual

FLOS GLO-BALL BASIC User manual

FLOS

FLOS GLO-BALL BASIC User manual

FLOS Michael Anastassiades COPYCAT F1952030 User manual

FLOS

FLOS Michael Anastassiades COPYCAT F1952030 User manual

FLOS SUPERLOON User manual

FLOS

FLOS SUPERLOON User manual

FLOS IN VITRO 1 BOLLARD User manual

FLOS

FLOS IN VITRO 1 BOLLARD User manual

FLOS KELVIN LED F User manual

FLOS

FLOS KELVIN LED F User manual

FLOS CAPTAIN FLINT User manual

FLOS

FLOS CAPTAIN FLINT User manual

FLOS In Vitro Unplugged User manual

FLOS

FLOS In Vitro Unplugged User manual

Popular Outdoor Light manuals by other brands

wofi Gloria installation instructions

wofi

wofi Gloria installation instructions

Paradise Datacom GL22915 instructions

Paradise Datacom

Paradise Datacom GL22915 instructions

urban ambiance UQL1103 installation instructions

urban ambiance

urban ambiance UQL1103 installation instructions

VIBIA Brisa Aassembly Instructions

VIBIA

VIBIA Brisa Aassembly Instructions

BEGA 84 289 Installation and technical information

BEGA

BEGA 84 289 Installation and technical information

Saxby Lighting 1818PIR Instruction leaflet

Saxby Lighting

Saxby Lighting 1818PIR Instruction leaflet

Philips CityTouch OLC COM SRLLC7270 installation instructions

Philips

Philips CityTouch OLC COM SRLLC7270 installation instructions

Ledsavers 64641 manual

Ledsavers

Ledsavers 64641 manual

ARANI WALL PACK 11 quick start guide

ARANI

ARANI WALL PACK 11 quick start guide

Heitronic 35864 Installation and operating instructions

Heitronic

Heitronic 35864 Installation and operating instructions

Zled Lighting Solar-LED-Motion-Curve user manual

Zled Lighting

Zled Lighting Solar-LED-Motion-Curve user manual

Waldmann ATARO DUS 240/440 Instructions for use

Waldmann

Waldmann ATARO DUS 240/440 Instructions for use

modway Nourish EEI-5609 Assembly instructions

modway

modway Nourish EEI-5609 Assembly instructions

Inspire DAROCA instruction manual

Inspire

Inspire DAROCA instruction manual

Philips Fair user manual

Philips

Philips Fair user manual

Philips RL4-H installation instructions

Philips

Philips RL4-H installation instructions

Allen + Roth LB4466 Quick reference guide

Allen + Roth

Allen + Roth LB4466 Quick reference guide

LIGMAN BA-10643 installation manual

LIGMAN

LIGMAN BA-10643 installation manual

manuals.online logo
manuals.online logoBrands
  • About & Mission
  • Contact us
  • Privacy Policy
  • Terms and Conditions

Copyright 2025 Manuals.Online. All Rights Reserved.