manuals.online logo
Brands
  1. Home
  2. •
  3. Brands
  4. •
  5. Giacomini
  6. •
  7. Control Unit
  8. •
  9. Giacomini R314DN User manual

Giacomini R314DN User manual

047U51158 Ottobre 2017 - October 2017
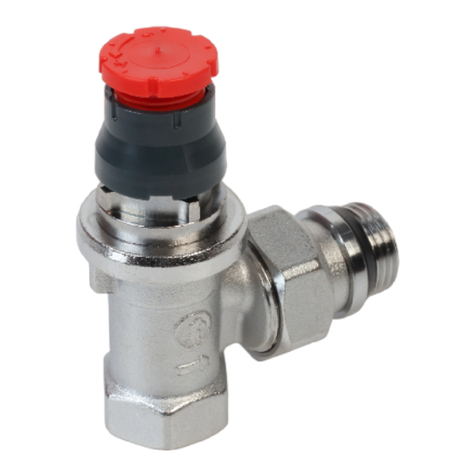
Gruppo con valvola manuale per impianti monotubo
unit with manual valve for sinGle pipe systems
r314Dn
047U51158 Ottobre 2017 - October 2017
Gruppo con valvola manuale per impianti monotubo
unit with manual valve for sinGle pipe systems
r314Dn
Il Gruppo R314DN può essere installato su circuiti monotubo in cui i radiatori devono essere alimentati secondo
lo schema classico che prevede l’entrata dell’acqua nella parte alta e l’uscita nella parte bassa.
The R314DN unit can be installed on single-pipe circuits, where radiators must be connected in the traditional
way, characterised by the water inlet on the upper part and the outlet on the lower part.
Ο διακόπτης μονοσωληνίου R314DN εγκαθίσταται σε σώματα που πρέπει να τροφοδοτιθούν με τον κλασικό τρόπο
που προβλέπει την προσαγωγή του νερού στο ψηλό σημείο του σώματος και την επιστροφή στο κάτω μέρος.
Disposizione dei collegamenti - Connection arrangement - Διάταξη συνδέσεων
La congurazione base prevede che il ritorno sia prossimo al radiatore e la mandata sia esterna. (Fig.A). Qualora
sia necessaria la congurazione opposta (mandata prossima al radiatore e ritorno esterno – Fig.B) è necessario
intervenire sul gruppo di separazione eettuando operazioni le riportate in calce (Fig. C)
The basic conguration provides that the return is close to the radiator and the delivery is on the outside (Fig. A).
If the opposite conguration is necessary (delivery close to the radiator and external return – Fig. B), you must
amend the separation group by following the instructions quoted at the bottom (Fig. C)
Οταν προμηθεύεστε τον διακόπτη, η επιστροφή του είναι κοντά στο θερμαντικό σώμα, ενώ η προσαγωγή του,
μακρυά, εξωτερικά (Σχ.Α= Fig.A). Αν πρέπει να τις αντιστρέψετε, (επιστροφή εξωτερικά και προσαγωγή κοντά στο
σώμα – Σχ.Β= Fig.B ) πρέπει να γυρίσετε το διαχωριστικό διάφραγμα, σύμφωνα με τις πιο κάτω οδηγίες(Σχ.Γ= Fig).
C).
Fig.C
180°
4 mm 4 mm
Fig.A Fig.B
5
Accoppiare il corpo valvola (comp. n°4).
Couple the valve body (component no.4).
Ενώστε το σώμα του διακόπτη (εξάρτημα n°4).
N.B. : La tacca di riferimento presente sul separatore di
usso é rivolta verso il basso per garantire il funzionamento
rappresentato in Fig.A; invece rivolta verso l’alto per
garantire il funzionamento rappresentato in Fig.B.
Note: The reference notch on the ow separator is turned
downwards in order to guarantee the functioning as
in Fig.A; when it is turned upwards, it guarantees the
functioning represented in Fig.B.
Η μικρή προεξοχή αναφοράς που υπάρχει στον
διαχωριστήρα ροής είναι στραμμένη προς τα κάτω για να
εγγυάται την λειτουργία που παρουσιάζεται στo Σχ.Α=Fig.A
και αντίθετα, στραμμένη προς τα επάνω, για να εγγυάται
την λειτουργία που παρουσιάζεται στo Σχ.Β=Fig.B.
Estrarre il separatore di usso
Ruotarlo di 180°
Re–inserire il separatore di usso
Extract the ow separator
Rotate 180°
Re-insert the ow separator
Τραβήξτε τον διαχωριστήρα ροής (μέγιστη
διαδρομή 4mm)
Περιστρέψτε τον κατά 180°
Επανεισάγετε τον διαχωριστήρα ροής
Serrare i due adattatori.
Tighten the two adaptors
Σφίξτε τα δύο ρακόρ
4
Avvertenza per la sicurezza - Safety Warning
L’installazione, la messa in servizio e la periodica manutenzione del prodotto devono essere eseguite da personale professionalmente abilitato, in accordo con i regolamenti nazionali e/o i requisiti locali.
L’installatore qualicato deve adottare tutti gli accorgimenti necessari, incluso l’utilizzo di Dispositivi di Protezione Individuale, per assicurare la propria incolumità e quella di terzi. L’errata installazione può causare
danni a persone, animali o cose nei confronti dei quali Giacomini S.p.A. non può essere considerata responsabile.
Installation, commissioning and periodical maintenance of the product must be carried out by qualied operators in compliance with national regulations and/or local standards. A qualied installer must take all required
measures, including use of Individual Protection Devices, for his and others’ safety. An improper installation may damage people, animals or objects towards which Giacomini S.p.A. may not be held liable.
Smaltimento imballo - Package Disposal
Scatole in cartone: raccolta dierenziata carta. Sacchetti in plastica e pluriball: raccolta dierenziata plastica.
Carton boxes: paper recycling. Plastic bags and bubble wrap: plastic recycling.
Smaltimento del prodotto - Product Disposal
Alla ne del suo ciclo di vita il prodotto non deve essere smaltito come riuto urbano. Può essere portato ad un centro speciale di riciclaggio gestito dall’autorità locale o ad un rivenditore che ore questo servizio.
Do not dispose of product as municipal waste at the end of its life cycle. Dispose of product at a special recycling platform managed by local authorities or at retailers providing this type of service.
Altre informazioni - Additional information
Per ulteriori informazioni consultare il sito www.giacomini.com o contattare il servizio tecnico: '+39 0322 923372 6+39 0322 923255 *[email protected]
Questa comunicazione ha valore indicativo. Giacomini S.p.A. si riserva il diritto di apportare in qualunque momento, senza preavviso, modiche per ragioni tecniche o commerciali agli articoli
contenuti nella presente comunicazione. Le informazioni contenute in questa comunicazione tecnica non esentano l’utilizzatore dal seguire scrupolosamente le normative e le norme di
buona tecnica esistenti. Giacomini S.p.A. Via per Alzo, 39 - 28017 San Maurizio d’Opaglio (NO) Italy
For more information, go to www.giacomini.com or contact our technical assistance service: '+39 0322 923372 6+39 0322 923255 *[email protected]
This document provides only general indications. Giacomini S.p.A. may change at any time, without notice and for technical or commercial reasons, the items included herewith.
The information included in this technical sheet do not exempt the user from strictly complying with the rules and good practice standards in force.
Giacomini S.p.A. Via per Alzo, 39 - 28017 San Maurizio d’Opaglio (NO) Italy
Istruzioni - Instructions - Oδηγίες
Il tubo di collegamento in rame cromato Ø =15 mm (comp. n° 3) non è fornito insieme al R314DN. La lunghezza
del tubo necessaria per una corretta installazione è riportata nella tabella sottostante (es. 350 - 33 = 317).
Il tubo dovrà poi essere sbavato prima del suo utilizzo, questo per non danneggiare gli elementi di tenuta.
The connection pipe made of chrome plated copper Ø = 15 mm (component no.3) is not supplied together
with R314DN. The pipe length required for proper installation is shown in the table below (i.e. 350 - 33 = 317).
The pipe must then be de-burred before it is used, to avoid damaging the sealing elements.
Ο χρωμιωμένος χαλκοσωλήνας Ø =15 mm (εξάρτημα αρ. 3) δεν προμηθεύεται μαζί με τον διακόπτη R314DN. Το
απαραίτητο μήκος σωλήνα για μία σωστή εγκατάσταση αναφέρεται στην πιο κάτω πινακίδα (π.χ. 350 - 33 = 317).
ο σωλήνας θα πρέπει να κοπεί και να λειανθεί πρίν την χρήση του ώστε να μην τραυματίσει τα υλικά
στεγανοποίησης.
Interasse radiatore (mm)
Distance between axis (mm)
Απόσταση κέντρων
οπών σώματος (mm)
Lunghezza tubo rame (mm)
Copper pipe length (mm)
Μήκος σωλήνα χρωμέ (mm)
350 317
400 367
500 467
600 567
1
Assemblare al radiatore (tramite le opportune riduzioni) la
curvetta (comp. n°1) e l’elemento separatore di usso (comp.
n°2)
Assemble the curve (component no.1) on the radiator (by
means of the appropriate reductions) and the ow separator
element (component no.2)
Βιδώστε στο θερμαντικό σώμα (διαμέσου των κατάλληλων
συστολών)την πάνω γωνία (εξάρτημα N°1)και το εξάρτημα
διαχωρισμού ροής (εξάρτημα n°2)
2
Ruotare di circa 30° la curvetta e, dopo aver calzato
l’adattatore (aver sempre cura di lubricare l’O-Ring), inserire
il tubo di rame nella curvetta sino ad andare in battuta.
Rotate the curve by about 30° . Put on the adaptor (do not
forget to lubricate the O-Ring) and then insert the copper
pipe into the elbow until the stop.
Περιστρέψτε κατά 30° περίπου την γωνία και αφού φορέσετε
το ρακόρ (φροντίστε για την λίπανση του ελαστομερούς
O-Ring), εισάγετε το σωληνάκι χρωμέ μέσα (εξάρτημα n°3)
στην γωνία (εξάρτημα n°1) μέχρι να τερματίσει.
3
Calzare il secondo adattatore (aver sempre cura di lubricare
l’O-ring), ruotare indietro il tutto e far scorrere il tubo di rame
sino ad accoppiarlo all’elemento separatore di usso (no a
trovare la battuta).
Put on the second adaptor (do not forget to lubricate the
O-ring), turn everything backwards and let the copper pipe
slide until meeting the ow separator element (until the
stop).
Φορέστε το δεύτερο ρακόρ (φροντίστε για την λίπανση του
ελαστομερούς O-ring), περιστρέψτε το σύνολο προς τα πίσω
και τραβήξτε προς τα κάτω το σωληνάκι ώστε να συρθεί
μέχρι να ζευγαρώσει (έως ότου τερματίσει) με το εξάρτημα
διαχωρισμού ροής.

This manual suits for next models

1

Other Giacomini Control Unit manuals

Giacomini P146M User manual

Giacomini

Giacomini P146M User manual

Giacomini HDB Series User manual

Giacomini

Giacomini HDB Series User manual

Giacomini R160 User manual

Giacomini

Giacomini R160 User manual

Giacomini R453HY011 User manual

Giacomini

Giacomini R453HY011 User manual

Giacomini R701F User manual

Giacomini

Giacomini R701F User manual

Giacomini PM100W User manual

Giacomini

Giacomini PM100W User manual

Giacomini R140D User manual

Giacomini

Giacomini R140D User manual

Giacomini R298 Series User manual

Giacomini

Giacomini R298 Series User manual

Giacomini R586RY121 User manual

Giacomini

Giacomini R586RY121 User manual

Giacomini KTD3 User manual

Giacomini

Giacomini KTD3 User manual

Giacomini DB Series User manual

Giacomini

Giacomini DB Series User manual

Giacomini R401TG User manual

Giacomini

Giacomini R401TG User manual

Giacomini KPM35 User manual

Giacomini

Giacomini KPM35 User manual

Giacomini R401TG User manual

Giacomini

Giacomini R401TG User manual

Giacomini KPM30 Series Manual

Giacomini

Giacomini KPM30 Series Manual

Giacomini GE550Y022 Operating instructions

Giacomini

Giacomini GE550Y022 Operating instructions

Giacomini KPM36Y001 User manual

Giacomini

Giacomini KPM36Y001 User manual

Giacomini INAIL N143 User manual

Giacomini

Giacomini INAIL N143 User manual

Giacomini R140 User manual

Giacomini

Giacomini R140 User manual

Popular Control Unit manuals by other brands

Egcon GCU-DG3 user guide

Egcon

Egcon GCU-DG3 user guide

Delabie TEMPOMATIC 4 quick start guide

Delabie

Delabie TEMPOMATIC 4 quick start guide

CUAV CAN PMU manual

CUAV

CUAV CAN PMU manual

Lectrosonics XO2 operating instructions

Lectrosonics

Lectrosonics XO2 operating instructions

Bosch Rexroth RE 07601-B operating instructions

Bosch

Bosch Rexroth RE 07601-B operating instructions

Siemens Q3920 Retrofit Guide

Siemens

Siemens Q3920 Retrofit Guide

Ai-Thinker ESP32-SL specification

Ai-Thinker

Ai-Thinker ESP32-SL specification

KSB DANAIS 150 operating instructions

KSB

KSB DANAIS 150 operating instructions

Sanhua RFKH series instructions

Sanhua

Sanhua RFKH series instructions

Spectrum Controls Micro800 2085-IF16C-SC user manual

Spectrum Controls

Spectrum Controls Micro800 2085-IF16C-SC user manual

National Instruments NI 9251 Getting started guide

National Instruments

National Instruments NI 9251 Getting started guide

HP HP 70909A installation guide

HP

HP HP 70909A installation guide

Genebre 2940 Installation, operation and maintenance manual

Genebre

Genebre 2940 Installation, operation and maintenance manual

ICPDAS ET-2255 quick start

ICPDAS

ICPDAS ET-2255 quick start

Siemens SIMATIC 8DO 24 V DC/0.5 A HF manual

Siemens

Siemens SIMATIC 8DO 24 V DC/0.5 A HF manual

VIPA TM-E 900-1E650 manual

VIPA

VIPA TM-E 900-1E650 manual

Helios AIR1-ULM Installation and operating instructions

Helios

Helios AIR1-ULM Installation and operating instructions

Texas Instruments BQ25750 user guide

Texas Instruments

Texas Instruments BQ25750 user guide

manuals.online logo
manuals.online logoBrands
  • About & Mission
  • Contact us
  • Privacy Policy
  • Terms and Conditions

Copyright 2025 Manuals.Online. All Rights Reserved.