Gima VISIO 2000 User manual

OFTALMOSCOPIO F.O. XENON VISIO 2000 - 3,5V
VISIO 2000 F.O.XENON OPHTHALMOSCOPE - 3.5V
OPHTALMOSCOPE F.O. XÉNON VISIO 2000 - 3,5V
OFTALMOSCOPIO F.O. XENON VISIO 2000 - 3,5V
M31536-M-Rev.2-03.20
31536
PROFESSIONAL MEDICAL PRODUCTS
Gima S.p.A.
Via Marconi, 1 - 20060 Gessate (MI) Italy
gima@gimaitaly.com - export@gimaitaly.com
www.gimaitaly.com
Made in Pakistan
È necessario segnalare qualsiasi incidente grave vericatosi in relazione al dispositivo medico da noi fornito
al fabbricante e all’autorità competente dello Stato membro in cui si ha sede.
All serious accidents concerning the medical device supplied by us must be reported to the manufacturer and
competent authority of the member state where your registered ofce is located.
Il est nécessaire de signaler tout accident grave survenu et lié au dispositif médical que nous avons livré au
fabricant et à l’autorité compétente de l’état membre où on a le siège social.
Es necesario informar al fabricante y a la autoridad competente del Estado miembro en el que se encuentra
la sede sobre cualquier incidente grave que haya ocurrido en relación con el producto sanitario que le hemos
suministrado.

2
B
C
F
E
D
A
Fig.1
G
HFig.2

3
End-cap (E)
Locking cap
Barrel
rechargeable
li-ion battery 3.5V
A
Fig.3

4
ITALIANO
OFTALMOSCOPIO
L’oftalmoscopio è un dispositivo medico utilizzato per tutti gli esami oftalmici generali.
CARATTERISTICHE DEL PRODOTTO
- Struttura in plastica rinforzata antiurto.
- Tecnologia Xenon alogena ottimizzata.
- Lampadina sostituibile con facilità.
- Custodia a prova di polvere.
- Selezione tra 6 diverse aperture: microspot, spot piccolo, spot grande, stellina di ssazione, fessura e ltro
assorbente il rosso. La varietà delle aperture risponde a tutte le necessità mediche nell’ambito di un esame
oftalmico.
- 28 lenti colorate al ne di favorirne l’identicazione per un esame perfetto (verde per +; rosso per -)
ISTRUZIONI PER L’USO
Attaccare la testa dell’oftalmoscopio al manico mediante il sistema di chiusura a baionetta. A tal ne è necessario
tenere la testa in una mano e il manico con batteria nell’altra, far combaciare le scanalature a baionetta sulla
testa e sul manico, premere la testa in basso e ruotarla in senso orario come in gura 1.
1. Vericare che la connessione tra testa e manico sia perfetta e che il reostato funzioni correttamente.
2. Premere il tasto (A) posto sul manico e ruotare la manopola nera verso sinistra. Lo strumento è ora in
modalità operativa. Ruotando la manopola nera in senso orario o antiorario si può regolare l’intensità della
luce.
3. Accostare delicatamente l’occhio all’adattatore oculare in gomma (B). Guardando attraverso il quadrante
(C) puntare il fascio luminoso al centro della lente.
4. Per selezionare la lente desiderata, girare con il dito indice la rotella (D) in senso orario o antiorario. Il potere
della lente è visualizzabile attraverso il quadrante (E).
5. L’oftalmoscopio è dotato di un set di 6 diverse aperture che possono essere selezionate girando la rotella
(F).
6. Spegnere lo strumento dopo l’uso per preservare le batterie. Ruotare la manopola nera verso destra: una
volta che il tasto (A) è in posizione di spegnimento, si udirà un click.
SOSTITUZIONE DELLA LAMPADINA
Smontare la testa dell’oftalmoscopio dal manico e tirare la lampadina (G) verso il basso come mostrato nella
Fig.2. Pulire il nuovo vetro della lampadina e inserirlo in modo che il perno di posizionamento (H) si inserisca
nella fessura.
PULIZIA
La custodia può essere stronata/pulita con un panno inumidito di alcool. Le superci in vetro possono essere
pulite con un bastoncino di cotone allo stesso modo.
ISTRUZIONI PER IL MANICO
Premere il tasto (A) Fig.3 e ruotare la manopola in senso orario per accendere lo strumento e la lampadina.
La posizione viene indicata da una spia rossa.
Per spegnere lo strumento, ruotare la manopola in senso antiorario no a udire un clic.
0 1 2 3 4 5 6 7 8 9 10 12 15 20 40
1 2 3 4 5 6 7 8 9 10 15 20 25

5ITALIANO
SOSTITUZIONE DELLE BATTERIE
Svitare il cappuccio collocato alla base (E) ed estrarre le batterie esauste.
Inserire le batterie nuove come mostrato in gura 3. Prestare attenzione alla corretta polarità.
PULIZIA
Il manico può essere pulito con un panno imbevuto di disinfettante, ma non può essere immerso in liquidi.
Attenzione:
- Non utilizzare il dispositivo se danneggiato. Rivolgersi al fornitore.
- Vericare periodicamente o stato della batteria, assicurandosi che non presenti segni di corrosione
od ossidamento. Se necessario sostituire con batterie nuove.
- Maneggiare con cura le batterie in quanto i liquidi possono irritare gli occhi e la cute.
- Prima dell’uso, ispezionare attentamente il prodotto. La stessa operazione dev’essere eseguita dopo
la pulizia.
- Vericare che la connessione tra testa e manico sia perfetta, e che il tasto di accensione funzioni
correttamente.
- Se la luce è intermittente o spenta, controllare la lampadina, le batterie e i contatti elettrici.
Smaltimento: Il prodotto non deve essere smaltito assieme agli altri riuti domestici. Gli utenti devono
provvedere allo smaltimento delle apparecchiature da rottamare portandole al luogo di raccolta indicato
per il riciclaggio delle apparecchiature elettriche ed elettroniche.
CONDIZIONI DI GARANZIA GIMA
Si applica la garanzia B2B standard Gima di 12 mesi.
Attenzione: Leggere e seguire attentamente
le istruzioni (avvertenze) per l’uso Seguire le istruzioni per l’uso
Conservare in luogo fresco ed asciutto Conservare al riparo
dalla luce solare
Fabbricante Data di fabbricazione
Codice prodotto Numero di lotto
Dispositivo medico conforme al regolamento
(UE) 2017/745 Parte applicata di tipo B
Smaltimento RAEE Dispositivo medico

6
ENGLISH
OPTHALMOSCOPE
The Opthalmoscope is designed for all general opthalmic examination.
FEATURES
- Made from Impact Resistant re-enforced plastic.
- Enhanced Xenon/Halogen super bright light.
- Easy replacement of lamp.
- Dust proof housing.
- 6 apertures to select from, micro spot, small spot, large spot, xation, slit and red-free lter. This selection
of apertures covers all the physician’s needs in an ophthalmologic examination.
- Color coded 28 lenses for perfect examination (Green for +, Red for - )
OPERATING INSTRUCTION
Attach the ophthalmoscope head to the handle by bayonet locking system, it is necessary to hold the battery
handle and head in each hand and match the bayonet grooves on both the head and handle, push the head
down and turn the head clock wise as in Fig.1.
1. Check that the connection between the head and handle is perfect and that the rheostat works properly.
2. Push the button (A) on the handle and twist the black knob towards the left hand side. The unit is now in
operating position. The intensity of the light can be adjusted by turning the knob clock wise or counter clock
wise.
3. Gently place the rubber eye brow (B) near your eye. Viewing through window (C) point the light beam at
the center of the eye lens.
4. With your index nger turn the wheel (D) clockwise or counterclockwise to select the desired lens. The
power of the selected lens is visible through window (E).
5. The ophthalmoscope is equipped with a set of 6 different aperture, which can be selected by turning the
wheel (F).
6. Switch off the unit after use to preserve batteries. Twist the black knob towards right until an audible click
sound is heard once the button (A) comes to its off position.
CHANGING THE LAMP
Unmount the ophthalmoscope head from the handle and pull the lamp (G) downwards as in Fig.2.Wipe the
new lamp glass clean and insert it so that the locating pin (H) ts into the slit.
CLEANING
The housing can be wiped/clean with a cloth moistened with alcohol. Glass Surfaces can be cleaned with a
cotton wool bud in the same way.
OPERATING THE HANDLE
Push button (A) in Fig.3 inward and rotate the knob clock wise which will turn the power on and the lamp will
light up. This position is indicated by a RED indicator comes into view.
To switch off the instrument rotate the knob counter clock wise till an audible sound is heard.
CHANGING THE BATTERIES
Unscrew the end-cap (E) and shake out the old batteries.
Insert new batteries as Shown in Fig.3. Take care that the poles point in the right direction.
0 1 2 3 4 5 6 7 8 9 10 12 15 20 40
1 2 3 4 5 6 7 8 9 10 15 20 25

7ENGLISH
CLEANING
The handle can be cleaned with a cloth soaked with disinfectant however it Cannot be dipped into liquids.
Caution:
- Do not use the equipment in case it is damaged. Apply to your Retailer.
- Periodically check the battery conditions, making sure that no sign of corrosion or oxidation is present.
In case of necessity replace them with new ones.
- Carefully handle the batteries as the liquids can irritate skin and eyes.
- Before being used, thoroughly check the product. The same Operation shall be carried out after
cleaning.
- Check that the connection between the head and the handle is perfect and that the On/Off Button
works correctly.
- If the light is intermittent or in case it does not turn on, check the bulb, the batteries and the electrical
contacts.
Disposal: The product must not be disposed of along with other domestic waste. The users
must dispose of this equipment by bringing it to a specic recycling point for electric and elec-
tronic equipment.
GIMA WARRANTY TERMS
The Gima 12-month standard B2B warranty applies.
Caution: read instructions (warnings) carefully Follow instructions for use
Keep in a cool, dry place Keep away from sunlight
Manufacturer Date of manufacture
Product code Lot number
Medical Device compliant with Regulation
(EU) 2017/745 Type B applied part
WEEE disposal Medical Device

8
FRANÇAIS
OPHTALMOSCOPE
L’Ophtalmoscope a été conçu pour tout type d’examen ophtalmologique général.
CARACTÉRISTIQUES
- Fabriqué en plastique renforcé résistant aux chocs.
- Éclairage intense amélioré au Xénon et Halogène.
- Lampe facile à remplacer.
- Boîtier étanche à la poussière.
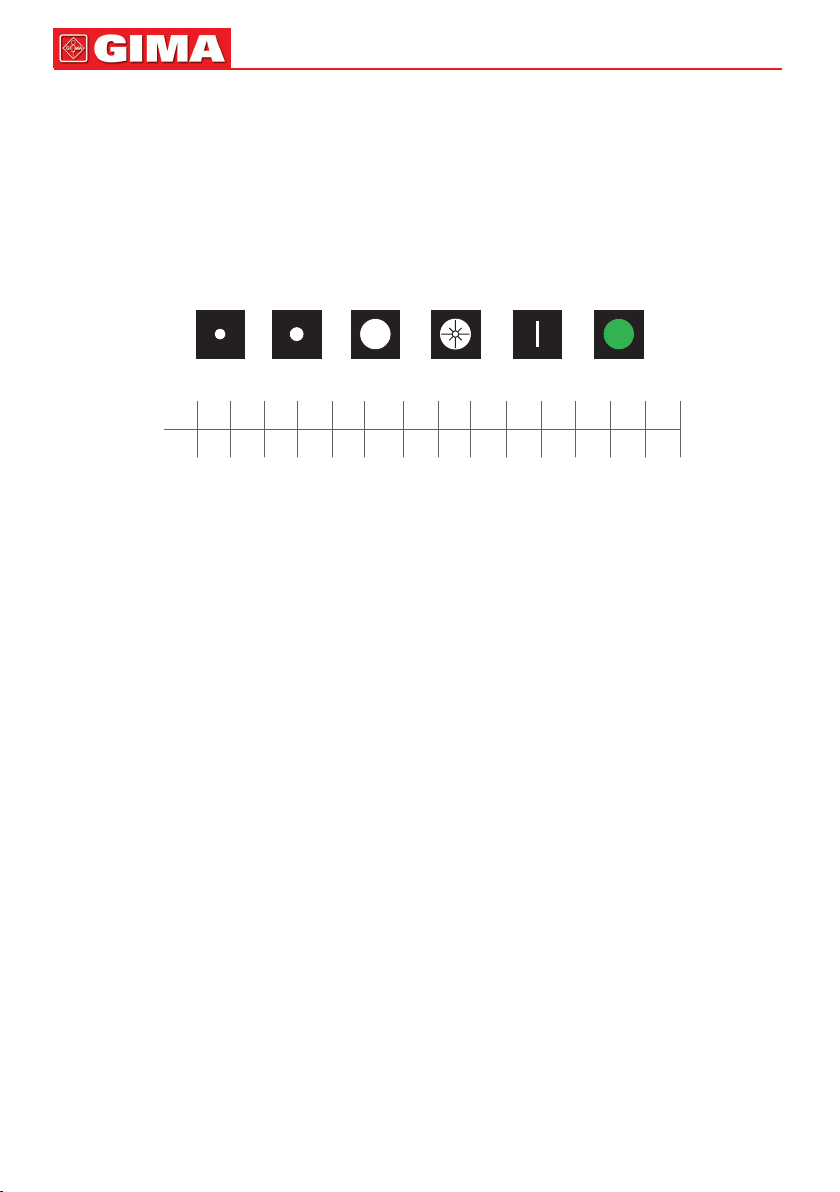
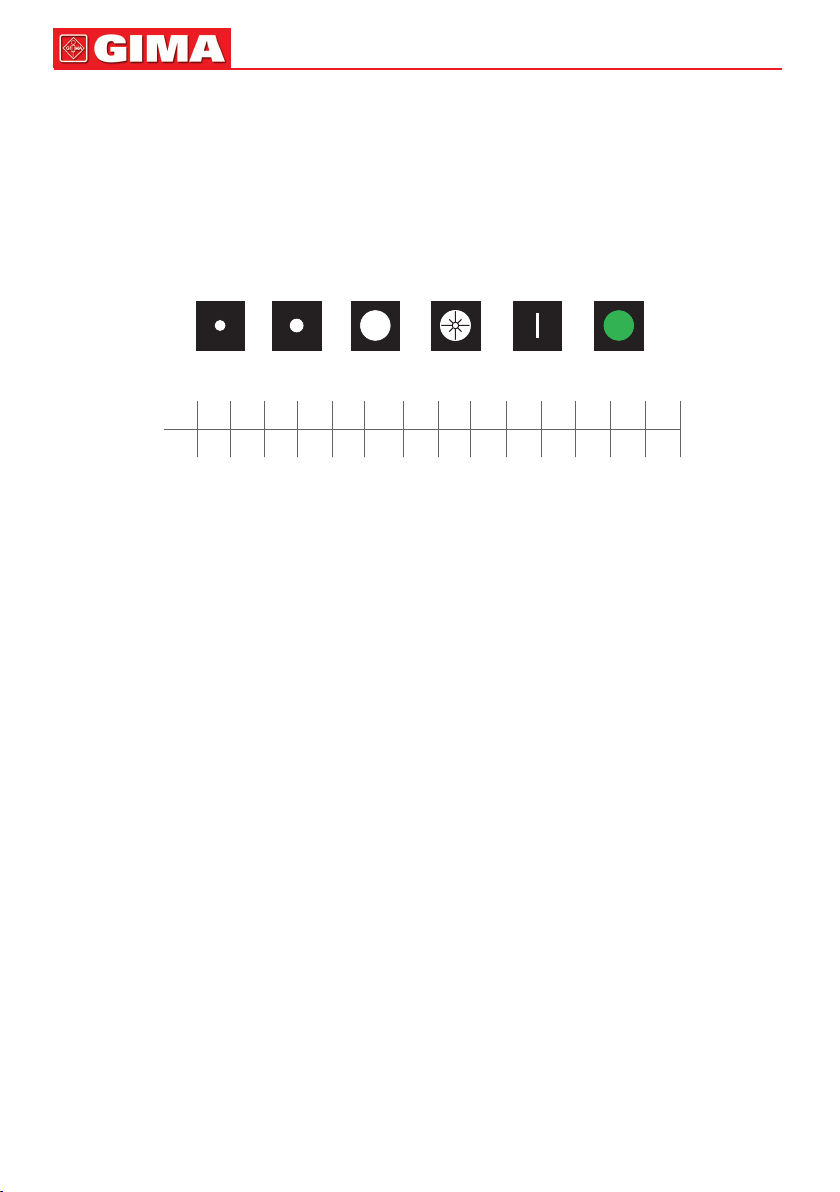
- 6 diaphragmes d’ouverture : micro cercle, petit cercle, grand cercle, étoile de xation, fente et ltre absorbant
du rouge. Cette gamme de diaphragmes permet de répondre à tous les besoins du spécialiste lors d’un
examen ophtalmologique.
- 28 lentilles à code couleur pour un examen optimal (Vert pour +, Rouge pour - )
CONSIGNES D’UTILISATION
Assembler la tête de l’ophtalmoscope au manche en utilisant le système de fermeture à baïonnette ; tenir
le manche contenant les batteries et la tête à l’aide d’une main et les faire coïncider tous les deux avec les
rainures de la baïonnette, puis pousser la tête vers le bas et la faire pivoter dans le sens des aiguilles d’une
montre, tel que montré à la Fig.1.
1. S’assurer que la tête et le manche sont bien assemblés et que le rhéostat fonctionne correctement.
2. Appuyer sur le bouton (A) situé sur le manche et faire pivoter le bouton de réglage noir vers la gauche.
L’appareil est maintenant prêt à fonctionner. Il est possible d’ajuster l’intensité de l’éclairage en faisant
pivoter le bouton de réglage dans le sens des aiguilles d’une montre ou dans le sens inverse.
3. Placer délicatement le sourcil en caoutchouc (B) à proximité de votre œil. En regardant à travers la fenêtre
(C), diriger le faisceau lumineux au centre de la pupille.
4. À l’aide de votre index, faire rouler la molette (D) dans le sens des aiguilles d’une montre ou dans le sens
inverse pour sélectionner la lentille souhaitée. La puissance de la lentille sélectionnée est visible au travers
de la fenêtre (E).
5. L’ophtalmoscope est muni d’un set de 6 diaphragmes différents qui peuvent être sélectionnés en tournant
la molette (F).
6. Éteindre l’ophtalmoscope après utilisation an d’économiser la batterie. Faire pivoter le bouton de réglage
noir vers la droite jusqu’à entendre un « clic » une fois le bouton (A) positionné sur « off ».
REMPLACER L’AMPOULE
Retirez la tête de l’ophtalmoscope de la poignée et tirez l’ampoule (G) vers le bas, comme indiqué sur la Fig.2.
Nettoyez la nouvelle ampoule en verre et insérez-la de sorte que la goupille de positionnement (H) s’insère
dans la fente.
NETTOYAGE
L’extérieur peut être nettoyé/lavé à l’aide d’un chiffon humidié avec de l’alcool. Les surfaces de verre peuvent
être nettoyées à l’aide un coton-tige de la même manière.
UTILISATION DU MANCHE
Appuyer sur le bouton (A) tel que montré à la Fig.3 et faire pivoter le bouton de réglage dans le sens des
aiguilles d’une montre de sorte à enclencher l’alimentation et à éclairer la lampe. À ce moment, un indicateur
ROUGE apparaît. Pour éteindre l’appareil, faire pivoter le bouton de réglage dans le sens inverse des aiguilles
d’une montre jusqu’à entendre un clic.
REMPLACEMENT DES BATTERIES
Dévisser le capuchon (E) et sortir les anciennes batteries.
0 1 2 3 4 5 6 7 8 9 10 12 15 20 40
1 2 3 4 5 6 7 8 9 10 15 20 25

9FRANÇAIS
Insérer les nouvelles batteries tel que montré à la Fig.3. S’assurer que les pôles soit positionnés correctement.
NETTOYAGE
Le manche peut être nettoyé à l’aide d’un chiffon trempé dans du désinfectant et ne doit en aucun cas être
plongé dans des liquides.
Attention :
- Renoncer à toute utilisation si l’appareil est endommagé. S’adresser au Revendeur.
- Contrôler régulièrement l’état des batteries, s’assurer de l’absence de corrosion ou d’oxydation. Si
nécessaire, remplacer les batteries.
- Manipuler les batteries avec prudence car les liquides qu’elles contiennent risquent d’irriter la peau
et les yeux.
- Avant toute utilisation et après tout nettoyage, contrôler rigoureusement le produit.
- Contrôler que la tête et le manche sont parfaitement assemblés et s’assurer que l’interrupteur « On/
Off » fonctionne correctement.
- Si la lumière est discontinue ou si elle ne s’allume pas, vérier la poire, les batteries ainsi que les
contacts électriques.
Élimination des déchets d’EEE: Ce produit ne doit pas être jeté avec les ordures ménagères. Les
utilisateurs doivent remettre leurs appareils usagés à un point de collecte approprié pour le traitement,
la valorisation, le recyclage des déchets d’EEE.
CONDITIONS DE GARANTIE GIMA
La garantie appliquée est la B2B standard Gima de 12 mois.
Attention: lisez attentivement
les instructions (avertissements) Suivez les instructions d’utilisation
Á conserver dans un endroit frais et sec Á conserver à l’abri de la lumière
du soleil
Fabricant Date de fabrication
Code produit Numéro de lot
Dispositif médical conforme au règlement
(UE) 2017/745 Appareil de type B
Disposition DEEE Dispositif médical

10
ESPAÑOL
OFTALMOSCOPIO
El oftalmoscopio ha sido diseñado para el examen oftálmica general.
CARACTERÍSTICAS
- Fabricado con plástico reforzado resistente a los impactos.
- Luz superbrillante Xenón/Halógena.
- Fácil sustitución de la bombilla.
- Alojamiento antipolvo.
- 6 aperturas para seleccionar microfoco, foco pequeño, foco ancho, jación, hendidura y ltro sin rojo. Esta
selección de aperturas cubre todas las necesidades médicas en el examen oftalmológico.
- 28 lentes codicadas por colores para un examen perfecto (verde para + y rojo para -).
INSTRUCCIONES DE USO
Acople el cabezal del otoscopio al mango, utilizando el sistema de bloqueo de la bayoneta. Es necesario
mantener el mango de la pila y el cabezal con las manos y acoplar las muescas de la bayoneta tanto en el
cabezal como en el mango. Empuje el cabezal hacia abajo y gírelo en el sentido de las agujas del reloj (Fig. 1).
1. Compruebe que el acople del cabezal y el mango es perfecto y que el reóstato funciona correctamente.
2. Presione el botón (A) situado en el mango y gire el pomo negro hacia la izquierda. En ese momento, el
dispositivo estará en posición de funcionamiento. Se puede ajustar la intensidad de la luz, girando el pomo
hacia la derecha o hacia la izquierda.
3. Coloque cuidadosamente la ceja de goma (B) cerca de su ojo. Mirando a través de la ventanilla (C), apunte
con el haz de luz hacia el centro de la lente del ojo.
4. Con el dedo índice, gire la ruleta (D) hacia la derecha o hacia la izquierda para seleccionar la lente deseada.
La potencia de la lente deseada puede verse en la ventanilla (E).
5. El oftalmoscopio está equipado con un set de 5 aperturas diferentes que pueden seleccionarse girando la
ruleta (F).
6. Apague el dispositivo después de utilizarlo para no gastar la pila. Gire el pomo negro hacia la derecha hasta
que oiga un clic, lo que signica que el botón (A) está en posición de apagado.
SUSTITUCIÓN DE LA BOMBILLA
Retire la cabeza del oftalmoscopio del mango y tire de la bombilla (G) hacia abajo como se muestra en la Fig.2.
Limpie la nueva bombilla de vidrio e insértela para que el pasador de posicionamiento (H) encaje en la ranura.
LIMPIEZA
El alojamiento puede limpiarse con un paño humedecido con alcohol. Las supercies de cristal pueden
limpiarse con un trozo de algodón en rama.
USO DEL MANGO
Presione el botón (A) (Fig. 3) y gire el pomo negro en el sentido de las agujas del reloj, lo que encenderá el
dispositivo y la bombilla. Esta posición viene marcada por un indicador ROJO visible.
Para apagar el dispositivo, gire el pomo en el sentido de las aguas del reloj hasta que escuche un clic.
SUSTITUCIÓN DE LAS PILAS
Aoje el tapón (E) y extraiga las pilas gastadas.
Introduzca las pilas nuevas (Fig. 3). Preste atención a colocar los polos positivo y negativo en la posición
correcta.
0 1 2 3 4 5 6 7 8 9 10 12 15 20 40
1 2 3 4 5 6 7 8 9 10 15 20 25

11 ESPAÑOL
LIMPIEZA
El mango puede limpiarse con un paño humedecido con desinfectante. Sin embargo, no puede sumergirse
en líquidos.
Precaución:
- No utilice el dispositivo si está dañado. Consulte a su vendedor.
- Compruebe periódicamente el estado de las pilas, asegurándose de que no haya ningún signo de
corrosión ni oxidación. Si fuera necesario, sustitúyalas por unas nuevas.
- Manipule cuidadosamente las pilas, puesto que los líquidos pueden irritar la piel y los ojos.
- Antes de utilizar el producto, inspecciónelo cuidadosamente. La misma operación debe realizarse
después de la limpieza.
- Compruebe que el acople entre el cabezal y el mango es perfecto y que el botón On/Off funciona
correctamente.
- Si la luz parpadea o en caso de que no se encienda, compruebe la bombilla, las pilas y los contactos
eléctricos.
Eliminación: El producto no ha de ser eliminado junto a otros residuos domésticos. Los usuarios tie-
nen que ocuparse de la eliminación de los aparatos por desguazar llevándolas al lugar de recogida
indicado por el reciclaje de los equipos eléctricos y electrónicos.
CONDICIONES DE GARANTÍA GIMA
Se aplica la garantía B2B estándar de Gima de 12 meses.
Precaución: lea las instrucciones
(advertencias) cuidadosamente Siga las instrucciones de uso
Conservar en un lugar fresco y seco Conservar al amparo de la luz solar
Fabricante Fecha de fabricación
Código producto Número de lote
Producto sanitario conforme
con el reglamento (UE) 2017/745 Aparato de tipo B
Disposición WEEE Producto sanitario

Other manuals for VISIO 2000
3
This manual suits for next models
1
Table of contents
Languages:
Other Gima Medical Equipment manuals
Popular Medical Equipment manuals by other brands

Getinge
Getinge Arjohuntleigh Nimbus 3 Professional Instructions for use

Mettler Electronics
Mettler Electronics Sonicator 730 Maintenance manual

Pressalit Care
Pressalit Care R1100 Mounting instruction

Denas MS
Denas MS DENAS-T operating manual

bort medical
bort medical ActiveColor quick guide

AccuVein
AccuVein AV400 user manual