manuals.online logo
Brands
  1. Home
  2. •
  3. Brands
  4. •
  5. Grandview
  6. •
  7. Projection Screen
  8. •
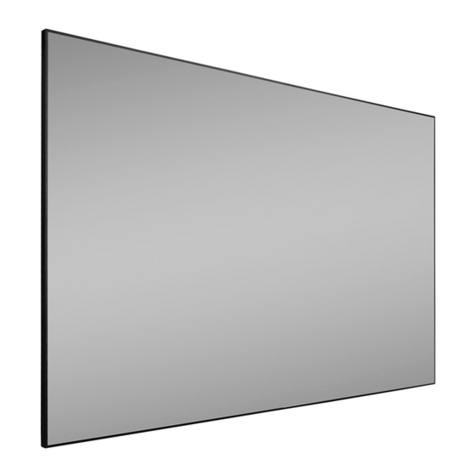
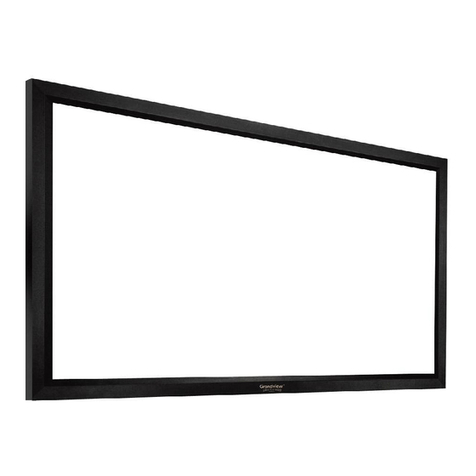
  9. Grandview PE-Y (R7)15 Series User manual

Grandview PE-Y (R7)15 Series User manual

Edge-Lite Fixed Frame Instruction Manual
Model:PE-Yxxx(R7)15
PE-Yxxx(R7)12
Ⅲ Frame assembly
a. Raise the screen, rotate F5 to the correct direction, align with the
installation slot of P2, and press down slightly with a tool. Each frame is
fixed with three P2 (all need to be pressed to the bottom to complete
the fixing).
b. Slide the frame to the center and insert P1 into the end face of F5,
then install the adjacent frame.
c. Connect the plastic corner guard P1 to the frames (F6, F5) in order to
complete the installation of the frame.
P1
Press down
P2
(F5、F6、P1、P2)
P1*4
Ⅳ Wall mount
Back
Front
(F7、S6、S7)
F7
Screen middle line
a. Flip the screen to ensure the correct orientation (for
ultra-short-throw anti-glare screens). Install S6 in the
upper frame slot (note that the hook should face the
back). The installation spacing A = 0.52 * L.
b. Attach S7 strong magnets to the sides of S4 at the
bottom and mark them.
c. Calculate the screen installation position, mark the
highest line of the screen and the vertical centerline.
The highest line of the screen is marked 109mm below
the F7 bottom reference line.
d.Align F7 with the bottom reference line, mark the
installation hole positions, drill holes, insert expansion
glue particles, and secure with ø5*50 screws.
e. Two people lift the screen simultaneously and hang
it on the groove of F7. Move it left and right to the
desired position, then mark the position of the strong
magnet. Remove the screen, drill installation holes, insert
expansion glue particles, and secure with ø5*50 screws.
f. Hang the screen back up, move it left and right to the
magnet position, gently place the screen, and complete
the wall-mount installation of the screen.
UP
Ⅲ/a Ⅲ/b
Ⅲ/c
Ⅲ/a-b
Ⅲ/c-d
Ⅲ/e-f
109
A
L
Screen top line
Screen middle line
109
Thank you for choosing Grandview products. Before installation and use, please read
the instructions carefully and keep them for future reference
Please assemble the screen in a flat and clean area, which is beneficial to protect the
screen fabric and ensure the assembly effect of the frame
The edges of the screen frame are sharp, so please protect your body during assembly
to prevent cuts.
If you have purchased an ultra-short-throw anti-glare screen, please pay attention to
the orientation of the screen during installation.
Reminder
F5 F5
F6 *4
F5 *2
S7
S6
S4
F7
P1
P2(Pre-installed)
Exploded view
Cutaway view
Front
Back
Side
P1
Screen
Diagram
Screen components
Please check whether all the components of the silver screen are complete before assembly. Some nuts and accessories have been
pre-installed, and the extra screws and accessories are for backup in case of damage during the installation process.
Frame set F
Lock set S
Fabric 1PCS
M5*8 large flat
head screws,
30 pieces
M5*6 countersunk
screws, 4 pieces
(pre-installed)
M5 long nut(pre-installed)
P2(pre-installed)P1 4PCS
Other
ⅠInner frame assembly
Back Front
Scraper and Tweezers
a. Take F1 and F2 and place them on the left and right side respectively. Merge the two vertical cuts and secure S1 and S2 using M5*8
screws. This completes the assembly of component A.
b. Take two component A and two F3, arrange them to form a rectangle. Insert S3 into the slots at the four corners, adjust until the joint
gap is minimized, then tighten the screws. Take F4 and S5 and place them in the center of the frame, align with the pre-installed nuts,
and tighten all the screws to complete the front connection of the frame.
c. Flip the assembled frame upside down, take S4 and adjust the upper nuts into the corner grooves, tighten the screws to reinforce the
back of the frame, completing the installation of the inner frame.
Ⅱ Fabric installation
Scraper
A
A
B
B
C C
Front
Installation method
C
C
A
A
A
A
A
A
B
C
C
BC C
Press down
Align
Apply force
Fabric alignment point:A*8→B*4
Edge installation direction
≈10mm
a. Flip the frame over so that the front side faces up. Place the screen fabric on the highest surface of the frame and rotate the winding pipe to completely
flatten the screen fabric.
b. Pull the screen fabric outwards and use it to completely cover the frame, aligning the screen fabric with the frame.
c. This screen fabric installation method is a card strip type, which requires a special tool to be used to press the inner edge of the card strip into the sawtooth
groove of the frame to fix the screen fabric.
d. Installation details: gently press the tool head into the sawtooth groove at the edge of the screen fabric by about 10mm (using the first or second level
sawtooth groove). The installation sequence is to first press point A in the four corners, then point B in the middle to initially position the screen fabric, and
then press the remaining edge C from the center outwards to fix the screen fabric.
e. Flatness adjustment: If it is found that the tension of the screen fabric is insufficient after it is fixed, use a tool to press the card strip down to increase
tension on the screen fabric.
(F1、F2、F3、F4、S1、S2、S3、S4、S5)
Ⅰ/a Ⅰ/b Ⅰ/c
Ⅱ/a Ⅱ/b
Ⅱ/c Ⅱ/d-e
29
12or15mm
109
67
Flatten and align
Glove (2 sets) Ø5X50mm countersunk
self-tapping screws, plastic
expansion tube
(total of 8 pieces)"
F1+F6 2PCS
F2+F6 2PCS F3+F5 2PCS F7 1PCS
S1 2PCS S2 2PCS S3 4PCS S4 4PCS
S5 2PCS(pre-installed) S6 2PCS S7 2PCS
Fabric
F1
F6 F2
F3
F4
F5
F7
F5 F4
F1 F2
F3
F4
F6
S2
S1
S3
S4
S5
S6
S7
S1S4 S6
S3S2
S7
Back
S4 *4
F3*2
S3 *4
Part A*2
Front
Adjust
F4 + S5 1~2PCS
Acoustic Mesh
(Included for AW6 fabric ONLY)
F1
F2
S2
Part A
S1 F4 + S5
Acoustic Mesh
When you choose woven acoustically transparent
screen fabric, you need to install the black acoustic
mesh. Simply use the pre-installed Velcro to attach
the acoustic mesh to cover the frame.

This manual suits for next models

1

Other Grandview Projection Screen manuals

Grandview GVFA100V User manual

Grandview

Grandview GVFA100V User manual

Grandview LF-PU Series User manual

Grandview

Grandview LF-PU Series User manual

Grandview Skyshow Series User manual

Grandview

Grandview Skyshow Series User manual

Grandview HideAway HH3 User manual

Grandview

Grandview HideAway HH3 User manual

Grandview CB-UMxx Series User manual

Grandview

Grandview CB-UMxx Series User manual

Grandview Sky-Show User manual

Grandview

Grandview Sky-Show User manual

Grandview Large-flat Series User manual

Grandview

Grandview Large-flat Series User manual

Grandview Tripod User manual

Grandview

Grandview Tripod User manual

Grandview FC-FHP-MF Series User manual

Grandview

Grandview FC-FHP-MF Series User manual

Grandview LF-HMF-xxx User manual

Grandview

Grandview LF-HMF-xxx User manual

Grandview Edge R3 PE-L Series Instruction Manual

Grandview

Grandview Edge R3 PE-L Series Instruction Manual

Grandview Elegant EL-M Series User manual

Grandview

Grandview Elegant EL-M Series User manual

Grandview Large Stage MAIII User manual

Grandview

Grandview Large Stage MAIII User manual

Grandview LF-PP series User manual

Grandview

Grandview LF-PP series User manual

Grandview Ultimate PP-G Series User manual

Grandview

Grandview Ultimate PP-G Series User manual

Grandview GRIP084V User manual

Grandview

Grandview GRIP084V User manual

Grandview Large Sky-Show User manual

Grandview

Grandview Large Sky-Show User manual

Grandview CB-UY92 User manual

Grandview

Grandview CB-UY92 User manual

Grandview EL-Pxx User manual

Grandview

Grandview EL-Pxx User manual

Grandview Motorised Rising Screen User manual

Grandview

Grandview Motorised Rising Screen User manual

Grandview Sky-Show User manual

Grandview

Grandview Sky-Show User manual

Grandview CB-Mxx User manual

Grandview

Grandview CB-Mxx User manual

Grandview Portable X-Press Series User manual

Grandview

Grandview Portable X-Press Series User manual

Grandview CB-Sxx User manual

Grandview

Grandview CB-Sxx User manual

Popular Projection Screen manuals by other brands

Elite Screens Osprey Tension Dual Series Adjustment instructions

Elite Screens

Elite Screens Osprey Tension Dual Series Adjustment instructions

Da-Lite Viewshare Advantage Electrol Instruction book

Da-Lite

Da-Lite Viewshare Advantage Electrol Instruction book

TEREN THD quick start guide

TEREN

TEREN THD quick start guide

SCREENLINE Big Lodo Evolution manual

SCREENLINE

SCREENLINE Big Lodo Evolution manual

SI Dynamic 2 XL installation manual

SI

SI Dynamic 2 XL installation manual

Da-Lite TENSIONED ADVANTAGE ELECTROL Instruction book

Da-Lite

Da-Lite TENSIONED ADVANTAGE ELECTROL Instruction book

Elite Screens DIY Screen Series user guide

Elite Screens

Elite Screens DIY Screen Series user guide

Shenzhen HONY Optical FDT05 user manual

Shenzhen HONY Optical

Shenzhen HONY Optical FDT05 user manual

Draper Paragon Installation & operating instructions

Draper

Draper Paragon Installation & operating instructions

Kimex 042-3 Series installation manual

Kimex

Kimex 042-3 Series installation manual

Elite Screens SILVERMAX106H2 brochure

Elite Screens

Elite Screens SILVERMAX106H2 brochure

Nierbo E46399F9FF instructions

Nierbo

Nierbo E46399F9FF instructions

Elite Screens FE72V user guide

Elite Screens

Elite Screens FE72V user guide

HAPRA DescenderPro Instruction book

HAPRA

HAPRA DescenderPro Instruction book

ADEO SCREEN PROFESSIONAL PSCHP0001 user manual

ADEO SCREEN

ADEO SCREEN PROFESSIONAL PSCHP0001 user manual

Elite Screens Yard Master Electric Adjustment instructions

Elite Screens

Elite Screens Yard Master Electric Adjustment instructions

Dragonfly DF-SL-84-MW/HC installation instructions

Dragonfly

Dragonfly DF-SL-84-MW/HC installation instructions

Celexon HomeCinema 1000027204 operating instructions

Celexon

Celexon HomeCinema 1000027204 operating instructions

manuals.online logo
manuals.online logoBrands
  • About & Mission
  • Contact us
  • Privacy Policy
  • Terms and Conditions

Copyright 2025 Manuals.Online. All Rights Reserved.