manuals.online logo
Brands
  1. Home
  2. •
  3. Brands
  4. •
  5. Hearth & Home
  6. •
  7. Fireplace Accessories
  8. •
  9. Hearth & Home MI25-5040CS-BK User manual

Hearth & Home MI25-5040CS-BK User manual

1
Hearth & Home Technologies • On-Site Custom Surround Installation Instructions • 2542-922 Rev. D • 9/19
On-Site Custom Surround:
MI25-5040CS-BK, MI30-5040CS-BK, MI35-5040CS-BK
Installation Instructions -
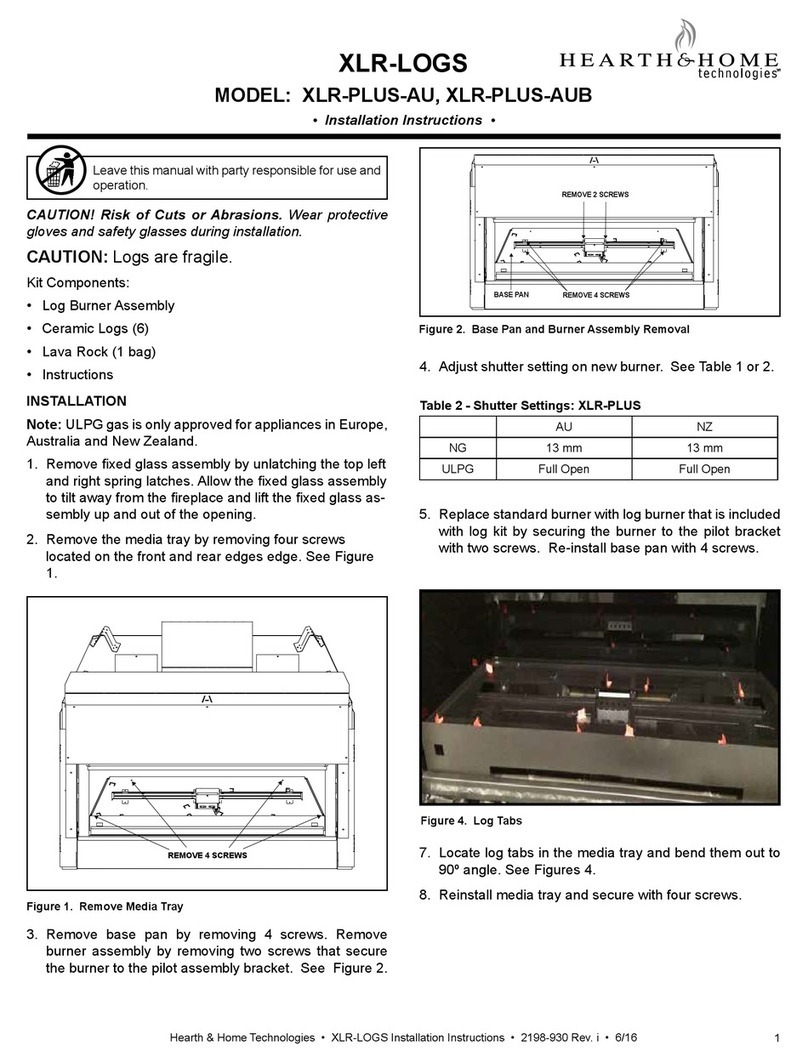
INTRODUCTION
The surround is used to ll the space between the insert
and the solid fuel rebox opening. The front is placed onto
the surround after it is attached to the insert. The surround
is required.
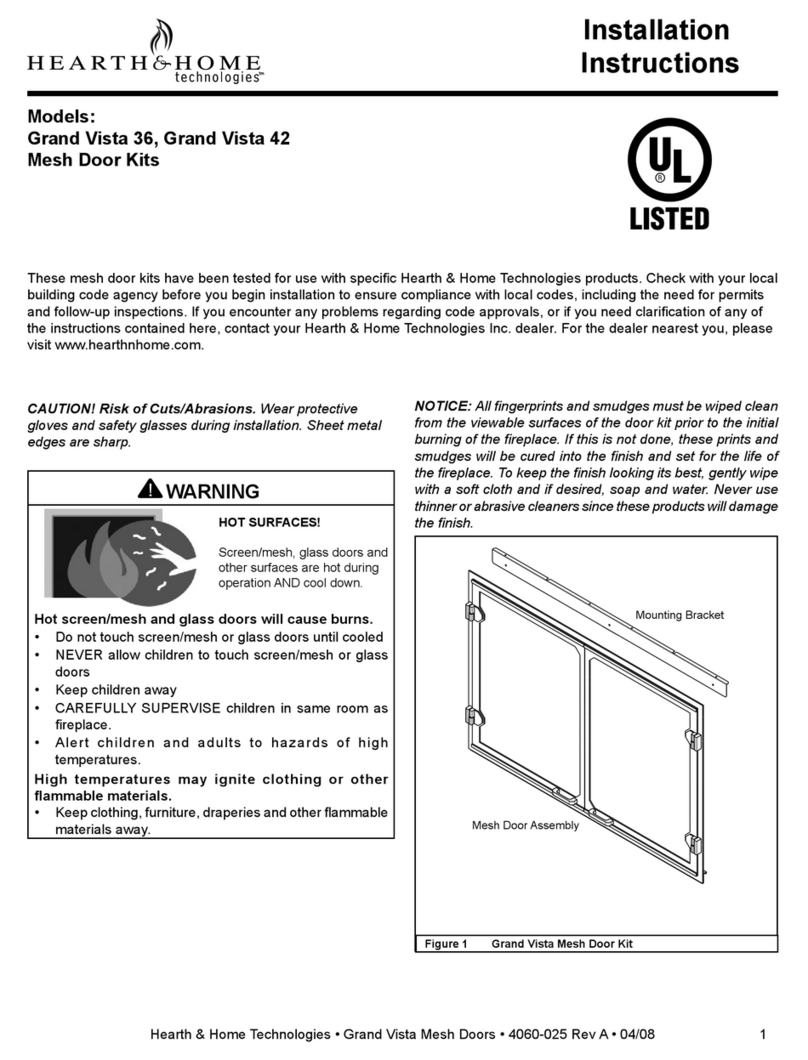
WARNING! Risk of Fire! Combustible materials MUST
NOT overlap or be placed under a surround.
Leave this manual with party responsible for use
and operation.
CAUTION! Risk of Cuts, Abrasions or Flying Debris.
Wear protective gloves and safety glasses during instal-
lation. Sheet metal edges are sharp.
DANGER
HOT GLASS WILL
CAUSE BURNS.
DO NOT TOUCH GLASS
UNTIL COOLED.
NEVER ALLOW CHILDREN
TO TOUCH GLASS.
A barrier designed to reduce the risk of
burns from the hot viewing glass is provided
with this appliance and shall be installed for
the protection of children and other at-risk
individuals.
• CAREFULLY SUPERVISE children in same room
as replace.
• Alert children and adults to hazards of high
temperatures.
High temperatures may ignite clothing or other
ammable materials.
• Keep clothing, furniture, draperies and other
ammable materials away.
• Do NOT operate with protective barriers open or
removed.
• The decorative front must remain closed if children
will be present during the operation of the replace.
• The decorative front may be made operable per these
instructions. This may be done only upon request of
a person responsible for the use and operation of
the replace.
• The decorative front can be returned to the locked
position following these instructions.
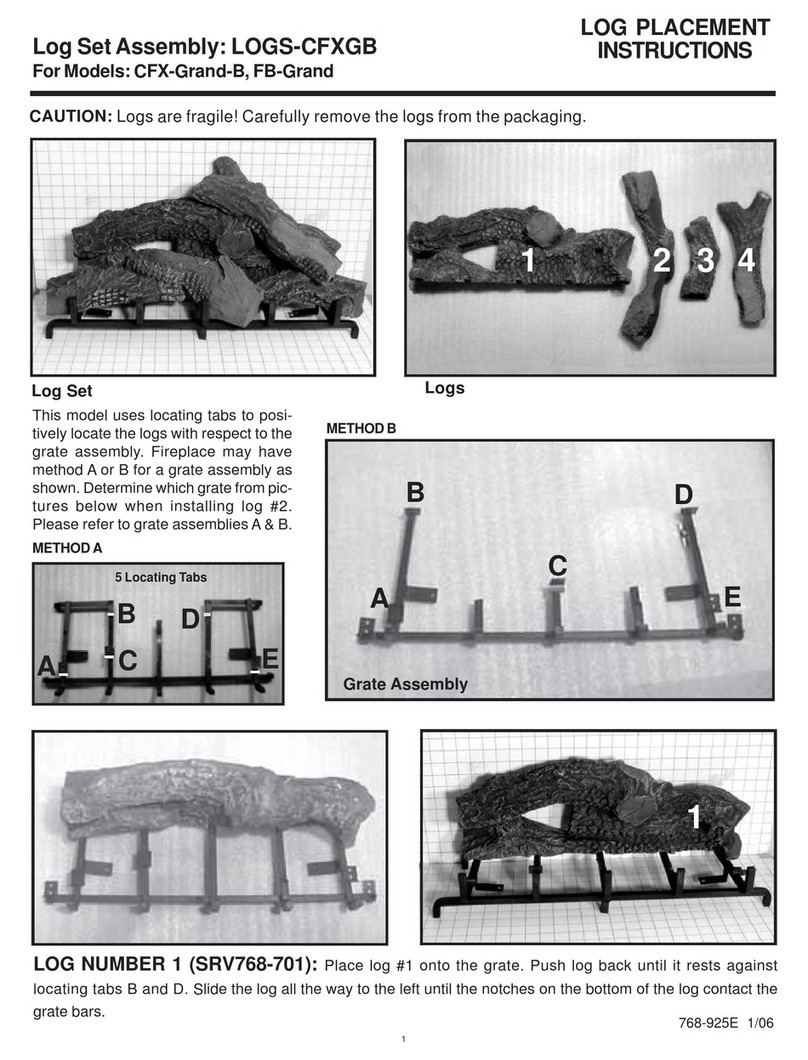
SURROUND KIT COMPONENTS
• (1) Metal Surround
• (1) Rocker Switch
• (1) Rocker Switch Mounting Bracket
• (4) 1/2 in. Sheet Metal Screw
• (2) Shoulder Screws
• (1) Vanity Panel
• (1) Self-Drilling Screw
TOOLS NEEDED
• 1/4 in. driver
• Pliers
• De-burring tool
• Sheet metal cutting tool
Combustible Materials Specication
Materials made of or surfaced with wood, compressed
paper, plant bers, plastics, or other material that can ig-
nite and burn, whether ame proofed or not, or plastered
or unplastered shall be considered combustible materials.
THE ON-SITE CUSTOM SURROUND REQUIRES
THE APPLIANCE OPENING DEPTH TO BE AN
ADDITIONAL 3/4". SEE MINIMUM APPLIANCE
OPENING SECTION IN THE APPLIANCE IN-
STALLATION MANUAL. THE ON-SITE CUSTOM
SURROUND COMES STANDARD AS A 4-SIDED
SURROUND AND SHIPS WITH A VANITY PANEL.
WHEN THIS SURROUND IS INSTALLED AS
A 4-SIDED SURROUND, THE VANITY PANEL
SHOULD BE USED. IT IS PERMISSIBLE TO CUT
THE BOTTOM 5 INCHES OFF THE SURROUND
AND INSTALL IT AS A 3-SIDED SURROUND
WHEN INSTALLED AS A 3-SIDED SURROUND
THE VANITY PANEL WILL NOT BE USED.
Hearth & Home Technologies • On-Site Custom Surround Installation Instructions • 2542-922 Rev. D • 9/192
ON-SITE CUSTOM SURROUND
1. Install the rocker switch into the rocker switch bracket.
See Figure 2.
2. For PROVIDENT/JASPER inserts: Use the self drilling
screw and attach the rocker switch bracket to the center
standoff. The bracket should sit at on the bottom of
the unit. Center the hole in the bracket on the center
of the standoff. See Figure 1. Move onto step 4. For all
other metal inserts: Slide the component tray forward to
access the rocker switch bracket slot. Install the rocker
switch into the bracket. See Figure 2.
3. Insert the tab of the rocker switch bracket into the rocker
switch bracket slot by lifting the component tray and sliding
the bracket into position. Press lightly on the component
tray to snap the bracket into position. See Figure 3.
4. The rocker switch wire, located on the outer wrap on
right side of the appliance needs to be fed back through
the grommet. Run only enough wire back through to
reach the rocker switch location and attach to the rocker
switch. Leave the excess wire outside of the unit. See
Figures 3 and 4.
Figure 2
Figure 4
5. Slide the component tray back into the unit. See Figure
5.
6. Remove surround from packaging
7. Measure the dimensions for the desired application.
8. Mark the dimensions on the surround and cut to size.
An electric shear like the one shown in Figure 6 is a
good option for a clean, burr free, cut.
Figure 5
SWITCH
BRACKET
SLOT
Figure 3
SELF-DRILLING
SCREW
CENTER
STANDOFF
RESET SWITCH
BRACKET
Figure 1 PROVIDENT/JASPER Bracket Location
3
Hearth & Home Technologies • On-Site Custom Surround Installation Instructions • 2542-922 Rev. D • 9/19
Figure
9. Remove any burrs or sharp edges/corners that were
created during cutting. Touch up the paint if needed.
NOTE: In certain applications the surround may bow
during operation. Removable mechanical fasteners can
be installed to hold the surround ush against the non-
combustible surface.
Please contact your Hearth & Home Technologies dealer with any
questions or concerns.
For the location of your nearest Hearth & Home Technologies dealer,
please visit www.hearthnhome.com.
Hearth & Home Technologies
7571 215th Street West, Lakeville, MN 55044
www.hearthnhome.com
Figure 7 Hand Bend Tab & Shoulder Screw
Figure 8 Vanity Panel Installed
SHOULDER SCREWS
HAND
BEND
TAB
SHOULDER
SCREW
10. See the front instructions for surround installation.
11. If installed as a 4-sided surround, install shoulder
screws in bottom corners of surround opening. Bend
tabs on vanity panel toward the 90° return bend and
hang on shoulder screws. See Figures 7 and 8.

This manual suits for next models

2

Other Hearth & Home Fireplace Accessories manuals
Hearth & Home FBG-4832-EDGE User manual

Hearth & Home

Hearth & Home FBG-4832-EDGE User manual

Hearth & Home SRV2384-070 User manual

Hearth & Home

Hearth & Home SRV2384-070 User manual

Hearth & Home ASD-36 User manual

Hearth & Home

Hearth & Home ASD-36 User manual

Hearth & Home Grand Vista 36 User manual

Hearth & Home

Hearth & Home Grand Vista 36 User manual

Hearth & Home PVV-SLP User manual

Hearth & Home

Hearth & Home PVV-SLP User manual

Hearth & Home Outdoor Lifestyles ODCOUG-36NR User manual

Hearth & Home

Hearth & Home Outdoor Lifestyles ODCOUG-36NR User manual

Hearth & Home LINER-BK-25 User manual

Hearth & Home

Hearth & Home LINER-BK-25 User manual

Hearth & Home BRICK-6K-TG User manual

Hearth & Home

Hearth & Home BRICK-6K-TG User manual

Hearth & Home MEDIA-AMBER-MS User manual
Hearth & Home

Hearth & Home MEDIA-AMBER-MS User manual

Hearth & Home 550-TRIM3-BK-B Manual

Hearth & Home

Hearth & Home 550-TRIM3-BK-B Manual

Hearth & Home LOGS-550TRS-E User manual

Hearth & Home

Hearth & Home LOGS-550TRS-E User manual

Hearth & Home CK-30 Operating instructions

Hearth & Home

Hearth & Home CK-30 Operating instructions

Hearth & Home 6K User manual

Hearth & Home

Hearth & Home 6K User manual

Hearth & Home BRICK-MI30 User manual

Hearth & Home

Hearth & Home BRICK-MI30 User manual

Hearth & Home FS-36 User manual

Hearth & Home

Hearth & Home FS-36 User manual

Hearth & Home QUADRA-FIRE Castile Insert Programming manual

Hearth & Home

Hearth & Home QUADRA-FIRE Castile Insert Programming manual

Hearth & Home PIER-DV36IN User manual

Hearth & Home

Hearth & Home PIER-DV36IN User manual

Hearth & Home Outdoor Lifestyles LPTK-ODPLAZA-L User manual

Hearth & Home

Hearth & Home Outdoor Lifestyles LPTK-ODPLAZA-L User manual

Hearth & Home Contour60 User manual

Hearth & Home

Hearth & Home Contour60 User manual
Hearth & Home MESH-RETRO1928 User manual

Hearth & Home

Hearth & Home MESH-RETRO1928 User manual

Hearth & Home FRAME-V12 User manual

Hearth & Home

Hearth & Home FRAME-V12 User manual

Hearth & Home LOGS-NDI30 User manual

Hearth & Home

Hearth & Home LOGS-NDI30 User manual

Hearth & Home COREP-36BK User manual

Hearth & Home

Hearth & Home COREP-36BK User manual

Hearth & Home SMART WALL B Installation instructions

Hearth & Home

Hearth & Home SMART WALL B Installation instructions

Popular Fireplace Accessories manuals by other brands

pleasant hearth FA990SA quick start guide

pleasant hearth

pleasant hearth FA990SA quick start guide

Napoleon GI-RB3 installation instructions

Napoleon

Napoleon GI-RB3 installation instructions

Dimplex SIERRA VISTA EMP-OSTN-23 install guide

Dimplex

Dimplex SIERRA VISTA EMP-OSTN-23 install guide

EcoSmart Fire Scope 700 Clearances and installation manual

EcoSmart Fire

EcoSmart Fire Scope 700 Clearances and installation manual

Whalen Wheatley MNFP60WTY23HLAA manual

Whalen

Whalen Wheatley MNFP60WTY23HLAA manual

pleasant hearth 28-03-66 manual

pleasant hearth

pleasant hearth 28-03-66 manual

HEAT GLO GL-36D installation instructions

HEAT GLO

HEAT GLO GL-36D installation instructions

Napoleon B52NL-1 Installation and operation manual

Napoleon

Napoleon B52NL-1 Installation and operation manual

Valor Portrait 549APB installation manual

Valor

Valor Portrait 549APB installation manual

SimpliFire SF-SC43-BK instructions

SimpliFire

SimpliFire SF-SC43-BK instructions

Lopi Zero Clearance Box installation manual

Lopi

Lopi Zero Clearance Box installation manual

HPC FPSPPK Installation and operation instructions

HPC

HPC FPSPPK Installation and operation instructions

Napoleon GSS42CFN Installation and operation manual

Napoleon

Napoleon GSS42CFN Installation and operation manual

Valor H3 Series installation manual

Valor

Valor H3 Series installation manual

Lennox Hearth Products ADAGIO-AG installation instructions

Lennox Hearth Products

Lennox Hearth Products ADAGIO-AG installation instructions

pleasant hearth MERLOT 24-44-34M manual

pleasant hearth

pleasant hearth MERLOT 24-44-34M manual

Firegear FPB-19RBS16TPSI-N Installation

Firegear

Firegear FPB-19RBS16TPSI-N Installation

SBI AC01263 Installation

SBI

SBI AC01263 Installation

manuals.online logo
manuals.online logoBrands
  • About & Mission
  • Contact us
  • Privacy Policy
  • Terms and Conditions

Copyright 2025 Manuals.Online. All Rights Reserved.